
Ramen Egg Ajitama is, without a doubt, the crown jewel atop any bowl of ramen. Have you ever wondered what makes that perfectly jammy, intensely flavorful egg in your favorite ramen restaurant so utterly irresistible? Today, I’m thrilled to guide you through the simple yet rewarding process of creating this culinary masterpiece right in your own kitchen. Originating in Japan, these marinated soft-boiled eggs, known as Ajitama, have become a quintessential component of a truly authentic ramen experience, celebrated globally for their depth of flavor and luscious texture.
There’s something truly magical about the contrast between the tender, creamy yolk and the savory, umami-rich marinade that transforms a simple egg into a work of art. People absolutely adore this dish not just for its incredible taste and melt-in-your-mouth texture, but also for its ability to elevate a humble instant ramen or a sophisticated homemade broth into something extraordinary.
The convenience of preparing a batch ahead of time, allowing the eggs to soak up all that incredible flavor, makes Ramen Egg Ajitama a fantastic, versatile addition to various meals.
From topping salads and rice bowls to being enjoyed on its own as a snack, its versatility extends far beyond just ramen. Get ready to impress yourself and your loved ones with this surprisingly simple yet profoundly delicious recipe!

Ingredients:
- For the Eggs:
- 6-8 large fresh eggs (preferably pastured or free-range for richer yolks)
- Plenty of water for boiling
- A large bowl of ice water (for the ice bath)
- For the Marinade (Ajitama Tare):
- 1/2 cup (120ml) quality soy sauce (Japanese light soy sauce is ideal for its balanced flavor)
- 1/4 cup (60ml) mirin (sweet rice wine, essential for the signature sweetness and glaze)
- 1/4 cup (60ml) sake (Japanese cooking sake, adds depth and umami; can be omitted or replaced with more water if necessary, but highly recommended)
- 1/4 cup (60ml) filtered water
- 1-2 tablespoons granulated sugar (adjust to your preferred level of sweetness; 1 tablespoon creates a subtle sweetness, 2 tablespoons makes it more pronounced)
- 1-2 cloves garlic, thinly sliced or lightly smashed (optional, but adds a wonderful aromatic dimension)
- 2-3 thin slices fresh ginger (optional, for a subtle hint of warmth and spice)
- A pinch of dashi powder (optional, for an extra boost of umami; about 1/4 teaspoon)
Preparing the Perfect Soft-Boiled Eggs for Your Ramen Egg Ajitama
The foundation of an exquisite Ramen Egg Ajitama lies in perfectly cooked soft-boiled eggs with a jammy, creamy yolk. This requires precision and attention to detail, but I promise, it’s entirely achievable!
- Gather Your Tools and Eggs: First, ensure your eggs are at room temperature. This isn’t strictly necessary but can help prevent cracking when the cold eggs hit hot water and promotes more even cooking. If your eggs are straight from the fridge, let them sit out for 30-60 minutes. You’ll also need a saucepan large enough to hold all your eggs in a single layer without overcrowding, tongs or a slotted spoon, and a large bowl filled generously with ice and cold water for your ice bath. The ice bath is crucial for immediately stopping the cooking process and ensuring those beautiful jammy yolks.
- Bring Water to a Rolling Boil: Fill your large saucepan with enough water to fully submerge the eggs, plus about an inch or two above them. Add a pinch of salt to the water, which some believe can help prevent egg whites from seeping out if a crack occurs. Bring the water to a vigorous, rolling boil over high heat. You want to see plenty of bubbles, indicating consistent, high temperature.
- Gently Lower the Eggs: Once the water is at a full boil, carefully and gently lower each room-temperature egg into the boiling water using tongs or a slotted spoon. This step requires a steady hand to prevent the eggs from cracking against the bottom of the pot. Do not drop them in.
- Start Timing Precisely: Immediately set your timer. For a truly jammy, creamy yolk that is still slightly runny in the very center, I recommend a cooking time of 6 minutes and 30 seconds for large eggs. If you prefer a slightly firmer, custardy yolk, you can go for 7 minutes. For a runnier yolk, try 6 minutes. Consistency is key here; even a 30-second difference can change the texture dramatically. Keep the water at a steady, vigorous boil throughout the cooking time. You might need to adjust the heat slightly to maintain this.
- Prepare the Ice Bath and Shock the Eggs: As soon as the timer goes off, remove the pot from the heat. Immediately, using your tongs or slotted spoon, transfer each cooked egg directly into the waiting ice bath. Do not skip this step! The sudden change in temperature from boiling hot to icy cold halts the cooking process instantly, preventing the yolks from overcooking and becoming chalky. It also helps the egg whites set firmly and shrink slightly, which makes peeling significantly easier. Let the eggs sit in the ice bath for at least 5-10 minutes, or until they are completely cool to the touch. This cooling period is vital.
- The Art of Peeling Your Soft-Boiled Eggs: This is often considered the trickiest part, but with cooled eggs and a little technique, it becomes much simpler. Gently tap one end of a cooled egg against a hard surface, then the other end. Then, gently roll the egg on the surface to create small cracks all over the shell. Return the egg to the water in the ice bath or under a slow stream of cold running water as you peel. The water helps to get under the membrane just beneath the shell, making it easier to separate and preventing bits of egg white from tearing off with the shell. Start peeling from the wider end, as there’s usually an air pocket there, which can make it easier to get started. Be patient and gentle. Once peeled, inspect each egg for any shell fragments and rinse them if necessary. You should now have beautifully smooth, perfectly cooked soft-boiled eggs, ready to transform into glorious Ramen Egg Ajitama.
Crafting the Flavorful Marinade for Your Ramen Egg Ajitama
The marinade, often called ‘tare’ in Japanese cuisine, is what infuses the eggs with their signature savory-sweet flavor and gives them that beautiful amber hue. This step is straightforward and incredibly rewarding.
- Combine Marinade Ingredients: In a small saucepan, combine the soy sauce, mirin, sake (if using), filtered water, and sugar. If you’re adding garlic, ginger, or dashi powder, add them to the saucepan now as well. I find that a good quality soy sauce makes a noticeable difference here, so don’t skimp on this ingredient if you can help it.
- Gently Simmer to Infuse Flavors: Place the saucepan over medium heat and bring the mixture to a gentle simmer, stirring occasionally to ensure the sugar dissolves completely. You don’t need a rolling boil here; a gentle simmer for 2-3 minutes is sufficient. This brief heating process helps to meld the flavors, dissolve the sugar, and cook off the alcohol from the sake and mirin, leaving behind only their delicious essence. The aroma will start to fill your kitchen – a truly appetizing smell!
- Cool Completely: Once simmered, remove the saucepan from the heat. Allow the marinade to cool down completely to room temperature before adding the eggs. This is a crucial step! Adding hot marinade to cold eggs can cook them further and ruin their texture. You can speed up the cooling process by placing the saucepan in an ice bath or transferring the marinade to a heat-proof container and refrigerating it for a short period.
Marinating for Maximum Flavor and That Signature Ramen Egg Ajitama Color
This is where the magic truly happens, transforming simple soft-boiled eggs into the beloved Ramen Egg Ajitama. The longer they marinate, the deeper the flavor and color will be.
- Prepare Your Marinating Container: Choose a container that will allow your peeled eggs to be fully submerged in the marinade. A resealable plastic bag (like a Ziploc bag), a small airtight container, or even a deep bowl covered with plastic wrap will work. The goal is to minimize the amount of marinade needed while ensuring full contact with the eggs.
- Submerge the Eggs: Carefully place the peeled, cooled soft-boiled eggs into your chosen container. Pour the completely cooled marinade over the eggs. Ensure that all eggs are fully submerged. If using a bag, try to press out as much air as possible before sealing to create a vacuum effect that keeps the eggs fully coated. If using a container, ensure there’s enough liquid to cover them. If the marinade doesn’t quite cover them, you can gently rotate the eggs occasionally during the marinating process, or add a touch more filtered water to the marinade if it’s very concentrated.
- Refrigerate and Marinate: Place the container with the eggs and marinade in the refrigerator. The ideal marinating time for Ramen Egg Ajitama is anywhere from 6 hours to 24 hours.
- 6 hours: You’ll get a lovely light amber color and a delicate flavor infusion, perfect for a quick turnaround.
- 12 hours: This is my sweet spot. The eggs will have a beautiful golden-brown exterior, and the savory-sweet marinade will have penetrated nicely into the whites, while the yolk remains perfectly jammy.
- 24 hours: For the deepest color and most intense flavor, marinate for a full day. The whites will be thoroughly infused, offering a truly rich experience. I generally don’t recommend going beyond 24 hours, as the eggs can become overly salty or the whites might start to firm up slightly more.
Remember to rotate your eggs every few hours if they are not completely submerged, especially if you’re aiming for an even color. This ensures every part of the egg absorbs the delicious flavors of the tare.
Serving Your Homemade Ramen Egg Ajitama and Storage Tips
Once your Ramen Egg Ajitama have marinated to perfection, they are ready to elevate any dish!
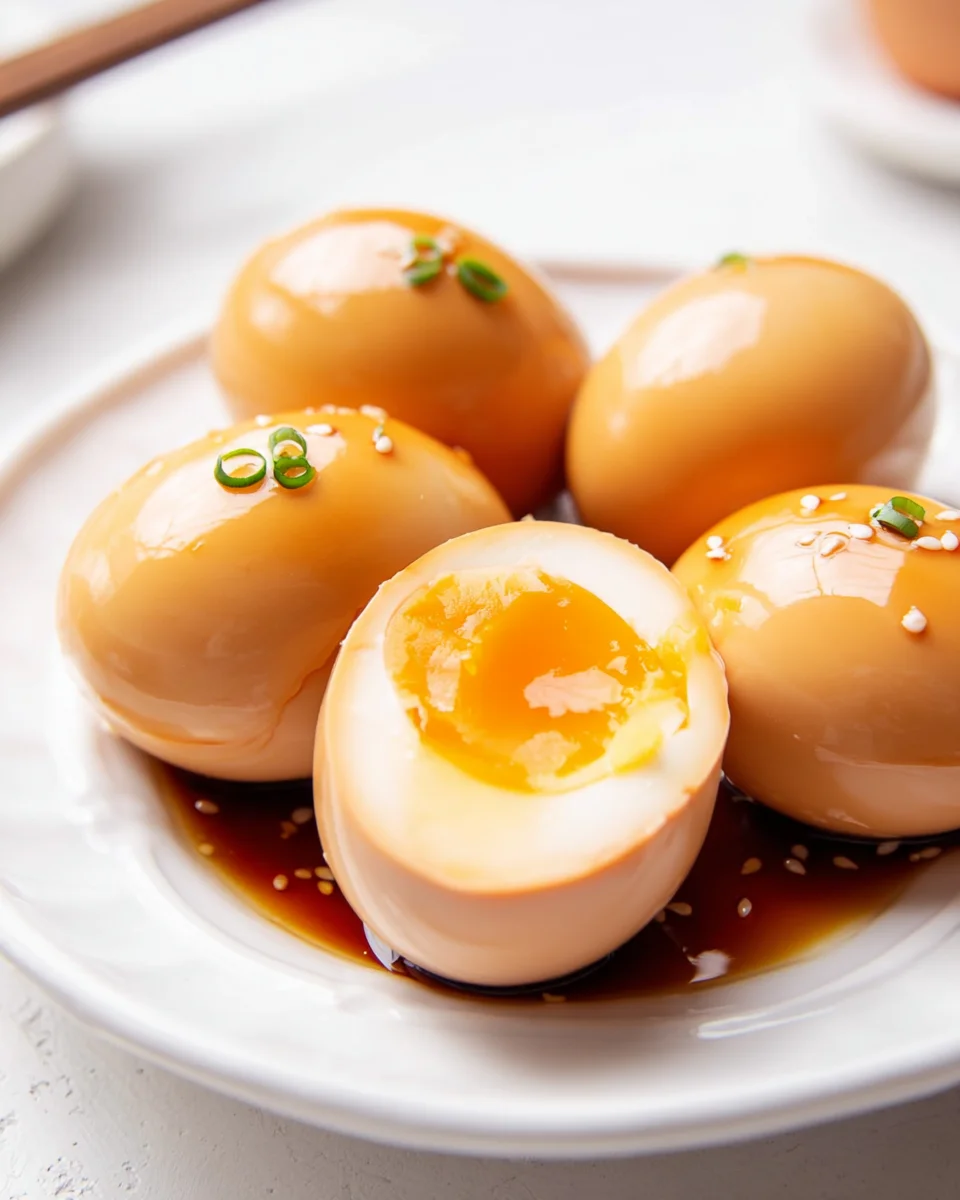
- Remove and Prepare for Serving: Gently remove the eggs from the marinade. You can serve them whole, but the traditional and most appealing way is to slice them in half lengthwise. Use a very sharp knife or even a piece of plain, unflavored dental floss for a super clean cut that preserves the integrity of that beautiful jammy yolk. The contrast between the dark marinated whites and the vibrant, creamy yolk is simply stunning.
- Enjoy with Your Favorite Dishes: These glorious Ramen Egg Ajitama are, of course, perfect as a topping for a bowl of steaming ramen. But don’t stop there! They are also fantastic with rice bowls (donburi), added to salads for an extra protein boost, served alongside grilled meats or vegetables, or even enjoyed on their own as a savory snack. Drizzle a tiny bit of the leftover marinade over your dish for an extra punch of flavor if desired, but sparingly, as the eggs are already quite flavorful.
- Storage: Leftover Ramen Egg Ajitama can be stored in an airtight container in the refrigerator, either in their marinade or separately, for up to 3-4 days. The marinade itself can also be stored in the fridge for up to a week and potentially reused for another batch of eggs or even as a dipping sauce, although its flavor will have mellowed slightly. Always trust your senses; if it smells off, it’s best to discard it. The beauty of making your own Ramen Egg Ajitama is that you can always whip up a new batch to have on hand, ensuring you’re never far from this irresistible ramen topping!
Conclusion:
If there’s one culinary secret I could implore you to unlock, it’s the magic held within the perfect `Ramen Egg Ajitama`. This isn’t just an egg; it’s a testament to how simple ingredients, combined with a little patience and a dash of foresight, can transform an ordinary meal into an extraordinary dining experience. Throughout this recipe journey, I hope you’ve come to appreciate the art and science behind achieving that coveted jammy yolk, that tender yet firm white, and that profound savory-sweet umami flavor that permeates every single bite. It’s truly a game-changer for anyone who loves Japanese cuisine, or simply appreciates adding a layer of sophisticated flavor and texture to their dishes.
I genuinely believe this recipe is a must-try for several compelling reasons. Firstly, the flavor profile is utterly captivating. The careful balance of soy sauce, mirin, and often a hint of sake or sugar in the marinade creates an unparalleled depth that regular hard-boiled eggs simply can’t achieve. It’s savory, subtly sweet, and packed with umami, making it incredibly addictive. Secondly, the texture is nothing short of sublime. That perfectly jammy yolk, rich and creamy, contrasted with the silky, marinated white, provides a delightful mouthfeel that is both comforting and luxurious. It’s a sensory delight that adds a significant ‘wow’ factor to any bowl of ramen, making it feel truly authentic and restaurant-quality right in your own kitchen. Lastly, the relative ease of preparation, especially once you’ve mastered the initial soft-boil, means you can consistently produce these culinary gems with minimal fuss. Batch cooking the eggs means you always have a fantastic, flavorful protein source ready to elevate countless meals throughout the week. This simple addition elevates a humble dish into a culinary masterpiece.
Beyond its traditional role nestled atop a steaming bowl of ramen, the versatility of the Ramen Egg Ajitama is truly astonishing, and I encourage you to experiment. Of course, it is non-negotiable for a superb bowl of tonkotsu, shoyu, or miso ramen, but its applications stretch far beyond. Imagine it halved over a warm bowl of fluffy Japanese rice, perhaps with a drizzle of the leftover marinade and a sprinkle of furikake – a simple yet profoundly satisfying meal in itself. It also makes for an incredible addition to bento boxes, adding a burst of flavor and protein that stands out. Try slicing it thinly and layering it into a sandwich or on toast for an unexpectedly gourmet breakfast or lunch. It’s fantastic in various Asian-inspired salads, lending a creamy texture and savory punch that complements fresh greens and crisp vegetables beautifully. For a quick and nutritious snack, simply enjoy it on its own, perhaps with a sprinkle of toasted sesame seeds. If you’re feeling adventurous, consider infusing your marinade with different aromatics; a sliver of ginger, a touch of garlic, or even a pinch of chili flakes can introduce exciting new dimensions to the classic flavor profile. You can also experiment with the cooking time of your eggs to achieve your absolute preferred yolk consistency, whether you prefer it slightly runnier and oozing or a bit more set and custardy.
So, now that you have the knowledge and the encouragement, my heartfelt plea to you is this: please give this Ramen Egg Ajitama recipe a try! Don’t be intimidated by the precision; the joy of perfecting that jammy yolk is incredibly rewarding. I promise you, the moment you slice open that first perfectly marinated egg and see that vibrant, luscious yolk, you’ll understand why it’s so revered. It’s an edible luxury that’s surprisingly accessible to make at home. Once you’ve mastered it, you’ll wonder how you ever enjoyed your ramen without it. I am genuinely excited for you to experience the rich, umami-packed deliciousness that awaits. After you’ve made your batch, I would absolutely love to hear about your experience! Did you stick to the classic marinade, or did you venture into new flavor territories? How did you enjoy serving your ajitama? Please don’t hesitate to share your stories, your triumphs, and even your creative variations. Your culinary adventures inspire me, and I can’t wait to see the incredible dishes you create with this wonderful addition. Happy cooking, and enjoy every savory bite!
Authentic Beef Ramen Egg Ajitama (Non-Alcohol)
Discover the non-alcohol secret to perfectly jammy, intensely flavorful Ajitama eggs, the crown jewel atop any Beef Ramen bowl. These marinated soft-boiled eggs elevate any ramen or rice dish with their savory-sweet taste and luscious texture, and are easy to prepare ahead of time.
Ingredients
Instructions
Important Information
Nutrition Facts (Per Serving)
It is important to consider this information as approximate and not to use it as definitive health advice.
Allergy Information
Please check ingredients for potential allergens and consult a health professional if in doubt.


Leave a Comment