
Red Velvet Oreo Cheesecake is not just a dessert; it’s an unforgettable culinary experience that combines three beloved classics into one show-stopping masterpiece. Imagine the lush, vibrant crimson of a classic Red Velvet cake, with its signature subtle cocoa notes and tender, velvety texture, expertly layered atop a sumptuously rich and creamy cheesecake. Now, picture that incredible creation crowned with the irresistible crunch and iconic flavor of crushed Oreo cookies. This isn’t merely a dream; it’s the decadent reality we’re about to dive into.
The individual components of this extraordinary dessert each bring their own rich heritage. The captivating Red Velvet cake, often debated for its exact origins, gained significant popularity in the American South, captivating palates with its dramatic color and unique taste profile. Cheesecake, a dessert enjoyed since ancient Greece, has evolved over millennia into a universally adored comfort food. By harmoniously blending these two titans with the globally cherished Oreo, we craft a contemporary classic that pays homage to tradition while delivering an unparalleled modern indulgence.
Why This Dessert Is Irresistible
People absolutely adore this Red Velvet Oreo Cheesecake because it offers a truly magnificent symphony of flavors and textures in every single bite. From the tangy cream cheese swirl that perfectly balances the sweetness, to the robust chocolatey Oreo crust, and the incredibly smooth, melt-in-your-mouth cheesecake filling, every element works in perfect harmony. It’s the ultimate showstopper for any gathering, promising gasps of delight and satisfied smiles from everyone fortunate enough to taste it. Preparing this magnificent dessert will undoubtedly elevate your baking prowess and leave a lasting impression on your guests.

Ingredients:
-
For the Oreo Crust:
- 24 full-sized Oreo cookies (about 270g or 9.5 oz), including their cream filling
- 6 tablespoons (85g) unsalted butter, melted
-
For the Red Velvet Cake Layers:
- 2 ½ cups (300g) all-purpose flour, spooned and leveled
- 1 ½ teaspoons baking soda
- 1 teaspoon unsweetened cocoa powder (natural, not Dutch-processed)
- ½ teaspoon salt
- ½ cup (113g) unsalted butter, softened to room temperature
- 1 ¾ cups (350g) granulated sugar
- 2 large eggs, at room temperature
- 1 teaspoon vanilla extract
- 1 cup (240ml) buttermilk, at room temperature
- 1 tablespoon distilled white vinegar
- 1 tablespoon red food coloring (gel food coloring provides a more vibrant hue)
-
For the Red Velvet Oreo Cheesecake Filling:
- 3 (8-ounce) packages full-fat cream cheese, softened to room temperature
- 1 cup (200g) granulated sugar
- 3 large eggs, at room temperature
- 1 teaspoon vanilla extract
- ½ cup (120g) sour cream, at room temperature (full-fat is best!)
- 10-12 full-sized Oreo cookies, roughly chopped into ½-inch pieces
-
For the Cream Cheese Frosting:
- 1 (8-ounce) package full-fat cream cheese, softened to room temperature
- ½ cup (113g) unsalted butter, softened to room temperature
- 3-4 cups (360-480g) powdered sugar, sifted (adjust to desired sweetness and consistency)
- 1 teaspoon vanilla extract
- 1-2 tablespoons milk or heavy cream, if needed for consistency
-
For the Garnish:
- Extra Red Velvet cake crumbs (from leveling the cake layers)
- Extra Oreo cookies, roughly crushed
- Optional: White chocolate shavings or mini chocolate chips
Instructions:
Get ready to embark on a delightful baking journey to create the most incredible Red Velvet Oreo Cheesecake you’ve ever tasted! This recipe brings together the best of two dessert worlds into one show-stopping treat. Let’s start with the foundation.
Phase 1: Preparing the Oreo Crust
- Prepare your springform pan: Begin by lightly greasing a 9-inch springform pan. For the cheesecake, we’ll be using a water bath, so wrap the outside of the springform pan securely with two layers of heavy-duty aluminum foil. Make sure the foil extends all the way up the sides to prevent any water from seeping in.
- Crush the Oreos: Place the 24 full-sized Oreo cookies, cream filling and all, into a food processor. Process until the cookies are finely ground into even crumbs. If you don’t have a food processor, no problem! You can place the cookies in a large zip-top bag, seal it, and crush them with a rolling pin or the bottom of a heavy pan until they become fine crumbs. Consistency is key here; we want it to be like fine sand.
- Combine with butter: Transfer the crushed Oreo crumbs to a medium-sized bowl. Pour the 6 tablespoons of melted unsalted butter over the crumbs. Use a fork or your hands to mix thoroughly until all the crumbs are moistened and resemble wet sand. This butter is what will hold our crust together beautifully.
- Press into the pan: Pour the buttered Oreo crumbs into the prepared 9-inch springform pan. Using the bottom of a flat-bottomed glass or your fingers, firmly and evenly press the crumbs into the bottom of the pan. I like to bring the crust up the sides of the pan slightly, about half an inch, to create a nice edge for our Red Velvet Oreo Cheesecake. Press firmly to ensure it’s compact.
- Pre-bake the crust: Place the springform pan with the crust into an oven preheated to 350°F (175°C). Bake for 8-10 minutes. This pre-baking step helps to set the crust, making it sturdy and preventing it from becoming soggy once the cheesecake filling is added.
- Cool completely: Remove the pan from the oven and set it aside to cool completely while you prepare the red velvet cake layers and cheesecake filling. A cooled crust is essential to prevent any melting of the cheesecake batter.
Phase 2: Baking the Red Velvet Cake Layers
- Preheat and prep cake pans: Preheat your oven to 350°F (175°C). Grease and flour two 9-inch round cake pans. For an extra non-stick measure, cut out two circles of parchment paper to fit the bottom of each pan, place them in, and then grease and flour over the parchment as well. This will ensure your beautiful red velvet layers release easily.
- Combine dry ingredients: In a large bowl, whisk together the 2 ½ cups of all-purpose flour, 1 ½ teaspoons of baking soda, 1 teaspoon of unsweetened cocoa powder, and ½ teaspoon of salt. The cocoa powder in a red velvet cake is less for chocolate flavor and more to enhance the deep red hue. Set this aside.
- Cream butter and sugar: In a separate large bowl, using an electric mixer (stand mixer with paddle attachment or hand mixer), cream together the ½ cup of softened unsalted butter and 1 ¾ cups of granulated sugar until light and fluffy. This should take about 2-3 minutes.
- Add eggs and vanilla: Beat in the 2 large room temperature eggs one at a time, mixing well after each addition. Scrape down the sides of the bowl as needed. Stir in the 1 teaspoon of vanilla extract until just combined.
- Prepare wet mixture: In a small bowl or liquid measuring cup, combine the 1 cup of buttermilk, 1 tablespoon of white vinegar, and 1 tablespoon of red food coloring. Stir well to ensure the color is evenly distributed. This vibrant red mixture is what gives our red velvet cake its signature color.
- Combine wet and dry: With the mixer on low speed, gradually add the dry ingredients to the wet ingredients in three alternating additions, beginning and ending with the dry ingredients. Start with about one-third of the dry ingredients, mix until just combined, then add half of the red buttermilk mixture, mix, then another third of dry, the remaining buttermilk mixture, and finally the last third of dry. Do not overmix! Overmixing can lead to a tough cake. Mix only until no streaks of flour remain. A few lumps are perfectly fine.
- Bake the layers: Divide the red velvet cake batter evenly between your two prepared 9-inch cake pans. You can use a kitchen scale for precision if you like. Place them in the preheated 350°F (175°C) oven and bake for 25-30 minutes, or until a wooden skewer or toothpick inserted into the center of the cakes comes out clean.
- Cool completely: Once baked, remove the cakes from the oven and let them cool in their pans on a wire rack for about 10-15 minutes. Then, carefully invert them onto the wire racks to cool completely. It’s absolutely crucial that these cake layers are fully cooled before we start assembling our Red Velvet Oreo Cheesecake, otherwise, the frosting will melt and slide right off.
Phase 3: Crafting the Red Velvet Oreo Cheesecake Filling
- Preheat and prepare for water bath: Reduce your oven temperature to 325°F (160°C). Remember the springform pan with the cooled Oreo crust, securely wrapped in foil? Place it inside a larger roasting pan. This roasting pan will hold the water bath.
- Beat cream cheese: In a very large mixing bowl, using an electric mixer on medium speed, beat the 3 packages of softened cream cheese until it is incredibly smooth and creamy, with no lumps. This is the foundation of a perfect cheesecake, so take your time here, scraping down the sides of the bowl frequently. Lumps are the enemy!
- Add sugar: Gradually add the 1 cup of granulated sugar to the cream cheese, continuing to beat on medium speed until well combined and smooth. Don’t rush this step; ensure the sugar is fully incorporated.
- Incorporate eggs: Add the 3 large room temperature eggs one at a time, beating on low speed just until each egg is combined. It’s important not to overmix the eggs, as incorporating too much air can cause the cheesecake to crack during baking. Gently scrape down the sides of the bowl after each egg addition.
- Add vanilla and sour cream: Stir in the 1 teaspoon of vanilla extract and ½ cup of room temperature sour cream until just combined. The sour cream adds a wonderful tang and contributes to the cheesecake’s creamy texture.
- Fold in Oreos: Gently fold in the 10-12 roughly chopped Oreo cookies. We want chunks of Oreo throughout, not fine crumbs, so be gentle to keep their integrity. These delightful cookie pieces will add an amazing textural contrast to your Red Velvet Oreo Cheesecake.
- Pour filling over crust: Pour the cheesecake batter evenly over the cooled Oreo crust in the springform pan. Gently tap the pan on the counter a few times to release any trapped air bubbles.
- Create the water bath: Carefully pour hot water into the larger roasting pan, around the springform pan, until the water comes about halfway up the sides of the springform pan. Be very careful not to get any water into the cheesecake itself. The water bath provides a moist, even heat that helps prevent cracks and ensures a smooth, creamy texture.
- Bake the cheesecake: Carefully transfer the roasting pan with the cheesecake into the preheated 325°F (160°C) oven. Bake for 60-75 minutes, or until the edges are set but the center (about a 2-3 inch circle) still jiggles slightly when the pan is gently nudged. Do not overbake!
- Cool gradually: Once baked, turn off the oven and leave the cheesecake inside with the oven door slightly ajar for 1 hour. This slow cooling process helps prevent cracking. After an hour, carefully remove the cheesecake from the water bath and the roasting pan, and place it on a wire rack to cool completely at room temperature for another 1-2 hours.
- Chill thoroughly: Once cooled to room temperature, cover the cheesecake loosely with plastic wrap and refrigerate for at least 6-8 hours, or preferably overnight. This chilling step is absolutely crucial for the cheesecake to fully set and achieve its perfect firm yet creamy texture. Resist the urge to cut into it early!
Phase 4: Preparing the Cream Cheese Frosting
- Cream butter and cream cheese: In a large mixing bowl, using an electric mixer on medium-high speed, beat the 1 package of softened cream cheese and ½ cup of softened unsalted butter together until very smooth and creamy, about 2-3 minutes. Make sure there are no lumps of butter or cream cheese remaining.
- Add powdered sugar: Gradually add the 3-4 cups of sifted powdered sugar, one cup at a time, beating on low speed until combined, then increasing to medium-high. Scrape down the sides of the bowl as needed. The amount of powdered sugar can be adjusted to your preference for sweetness and desired frosting consistency.
- Add vanilla and thin (if needed): Stir in the 1 teaspoon of vanilla extract. If the frosting is too thick, add milk or heavy cream, 1 tablespoon at a time, until you reach your desired piping or spreading consistency. Beat on medium-high speed for another 1-2 minutes until the frosting is light, fluffy, and smooth. This glorious cream cheese frosting is the perfect companion for our Red Velvet Oreo Cheesecake.
Phase 5: Assembling Your Red Velvet Oreo Cheesecake Masterpiece
Now for the exciting part – bringing all these incredible components together to form your show-stopping Red Velvet Oreo Cheesecake!
- Level the cake layers (if necessary): If your red velvet cake layers have domed tops, use a serrated knife or a cake leveler to gently trim off the domed portion, creating flat, even layers. This makes for a much neater and more stable cake. Any trimmed cake can be saved for garnish!
- Prepare the cheesecake: Carefully remove the chilled cheesecake from the springform pan. Run a thin knife around the edge of the pan before releasing the spring. Leave the cheesecake on its base for easier handling, or transfer it to a cake board if preferred.
- Layer the first cake: Place one of your cooled, leveled red velvet cake layers onto your desired serving platter or cake stand. If you want, you can spread a thin layer of cream cheese frosting on the platter first to help anchor the cake.
- Add cheesecake: Carefully center the chilled Red Velvet Oreo Cheesecake on top of the first red velvet cake layer. This is the heart of your creation!
- Add second cake: Gently place the second red velvet cake layer on top of the cheesecake. Press down very gently to ensure it’s sitting flat and stable.
- Apply crumb coat: Using an offset spatula or butter knife, apply a thin layer of cream cheese frosting all over the top and sides of the entire assembled cake. This is called a “crumb coat,” and its purpose is to trap any loose crumbs from the red velvet cake, preventing them from mixing into your final, smooth frosting layer.
- Chill the crumb-coated cake: Place the crumb-coated cake in the refrigerator for at least 20-30 minutes, or until the frosting is firm to the touch. This step is essential for a clean, professional finish.
- Apply final frosting layer: Once the crumb coat is chilled and firm, apply the remaining cream cheese frosting to the top and sides of the cake. Use your offset spatula to spread it smoothly and evenly. You can create swoops and swirls for a rustic look or aim for perfectly smooth sides – whatever makes you happy!
Phase 6: Chilling and Garnish
- Final chill: Once frosted, return your magnificent Red Velvet Oreo Cheesecake to the refrigerator for at least another 1-2 hours to allow the frosting to set completely. This will make it much easier to slice cleanly.
- Garnish beautifully: Before serving, it’s time to add the finishing touches. Crush a few extra Oreo cookies into coarse crumbs. If you saved any red velvet cake crumbs from leveling, sprinkle those around the top edge or base of the cake. You can also pipe decorative borders or rosettes with any leftover frosting using a piping bag fitted with your favorite tip. Sprinkle the crushed Oreos and red velvet crumbs generously over the top and around the base. For an extra touch of elegance, you might even add some white chocolate shavings.
- Serve and enjoy: When you’re ready to serve, use a sharp, thin knife. For the cleanest slices, dip the knife in hot water and wipe it clean between each cut. Present slices of your truly decadent and impressive Red Velvet Oreo Cheesecake to your eager guests. Prepare for rave reviews! This cake is a celebration in every single bite.
Conclusion:
And there you have it, my friends! We’ve journeyed through the creation of what I truly believe is one of the most magnificent desserts you’ll ever have the pleasure of tasting, let alone baking. This isn’t just another cheesecake; it’s an experience, a masterpiece of flavors and textures that come together in perfect harmony. From the moment you lay eyes on its striking red hue, crowned with that luscious cream cheese frosting and studded with irresistible Oreo pieces, you know you’re in for something truly special. It’s the kind of dessert that silences a room, captivating everyone with its rich, tangy, and utterly indulgent character. Every single bite delivers that unmistakable classic red velvet taste, perfectly complemented by the crunchy, chocolatey base and the creamy, dreamy cheesecake filling, all elevated by those delightful bits of Oreo throughout. It’s a guaranteed showstopper for any gathering, a luxurious treat for a quiet evening in, or simply the perfect way to celebrate absolutely anything. Trust me, once you master this recipe, it will quickly become a cherished favorite in your culinary repertoire, something you’ll be proud to present and eager to share with everyone you love.
The magic of this particular dessert lies in its irresistible combination of familiar comforts with a touch of decadent extravagance. We’re talking about a serious upgrade to your standard dessert fare, transforming simple ingredients into something truly extraordinary. It’s robust enough to satisfy the most demanding sweet tooth, yet sophisticated enough to grace the most elegant dessert table. The textural play between the smooth cheesecake, the velvety cake, and the crumbly cookie crust creates a fascinating dance on the palate, ensuring that each mouthful is as exciting as the last. It’s a testament to the fact that some of the best culinary creations are born from combining beloved classics in innovative ways. And this Red Velvet Oreo Cheesecake absolutely delivers on that promise, exceeding expectations with its layered complexity and unwavering deliciousness. It’s a dessert that isn’t afraid to be bold, to be vibrant, and to be utterly, unashamedly delightful in every single aspect.
Serving Suggestions for Maximum Enjoyment:
To truly elevate your Red Velvet Oreo Cheesecake experience, consider serving it chilled, allowing the flavors to fully meld and the textures to firm up beautifully. It pairs wonderfully with a strong cup of coffee or a delicate espresso, the slight bitterness cutting through the richness of the cheesecake. Alternatively, a cold glass of milk can be incredibly comforting, especially for a casual evening treat. For a truly decadent presentation, a light dusting of cocoa powder or a few fresh raspberries can add a pop of color and a hint of tartness. Imagine a slice of this magnificent cheesecake alongside a scoop of vanilla bean ice cream, creating a warm-cool contrast that is simply divine. It’s also fantastic as the grand finale to a dinner party, sliced meticulously and offered as the crowning jewel of your culinary efforts. Don’t be shy about letting its stunning appearance speak for itself; it hardly needs much adornment to impress.
Creative Variations to Spark Your Culinary Imagination:
While the classic version is undeniably perfect, I always encourage a little creative flair in the kitchen! If you’re feeling adventurous, why not experiment with different types of Oreos for the crust? Golden Oreos could offer a more vanilla-forward base, or perhaps a mint-flavored Oreo for a festive twist during the holidays. You could also swirl a raspberry coulis or a homemade chocolate ganache through the cheesecake batter before baking for an extra layer of flavor and visual appeal. For the topping, consider a sprinkle of white chocolate shavings, mini chocolate chips, or even some edible glitter for a truly celebratory feel. If you’re making these for a large gathering, mini cheesecakes baked in cupcake liners can be a fantastic, portion-controlled option that’s just as delicious and equally impressive. Or, for a seasonal touch, a hint of peppermint extract in the cream cheese frosting could transform this into a holiday showstopper. The possibilities are truly endless when you have such a versatile and delicious base to work with.
So, now that you’ve got all the secrets and my personal endorsements, it’s your turn to step into the kitchen and unleash your inner baker! I genuinely hope you find as much joy in making this Red Velvet Oreo Cheesecake as I do. There’s something incredibly satisfying about bringing such a delicious creation to life, knowing the smiles and delighted expressions it will inspire. Don’t just read about it; go ahead and bake it, taste it, and most importantly, share it with those who matter most to you. I absolutely cannot wait to hear about your experience! Please, do come back and leave a comment below, or share your photos on social media. Tell me what you loved most, any variations you tried, or what special occasion you made it for. Your feedback and stories are what truly inspire me and this wonderful community of food lovers. Happy baking, everyone – may your kitchens be filled with laughter and the irresistible aroma of this incredible dessert!

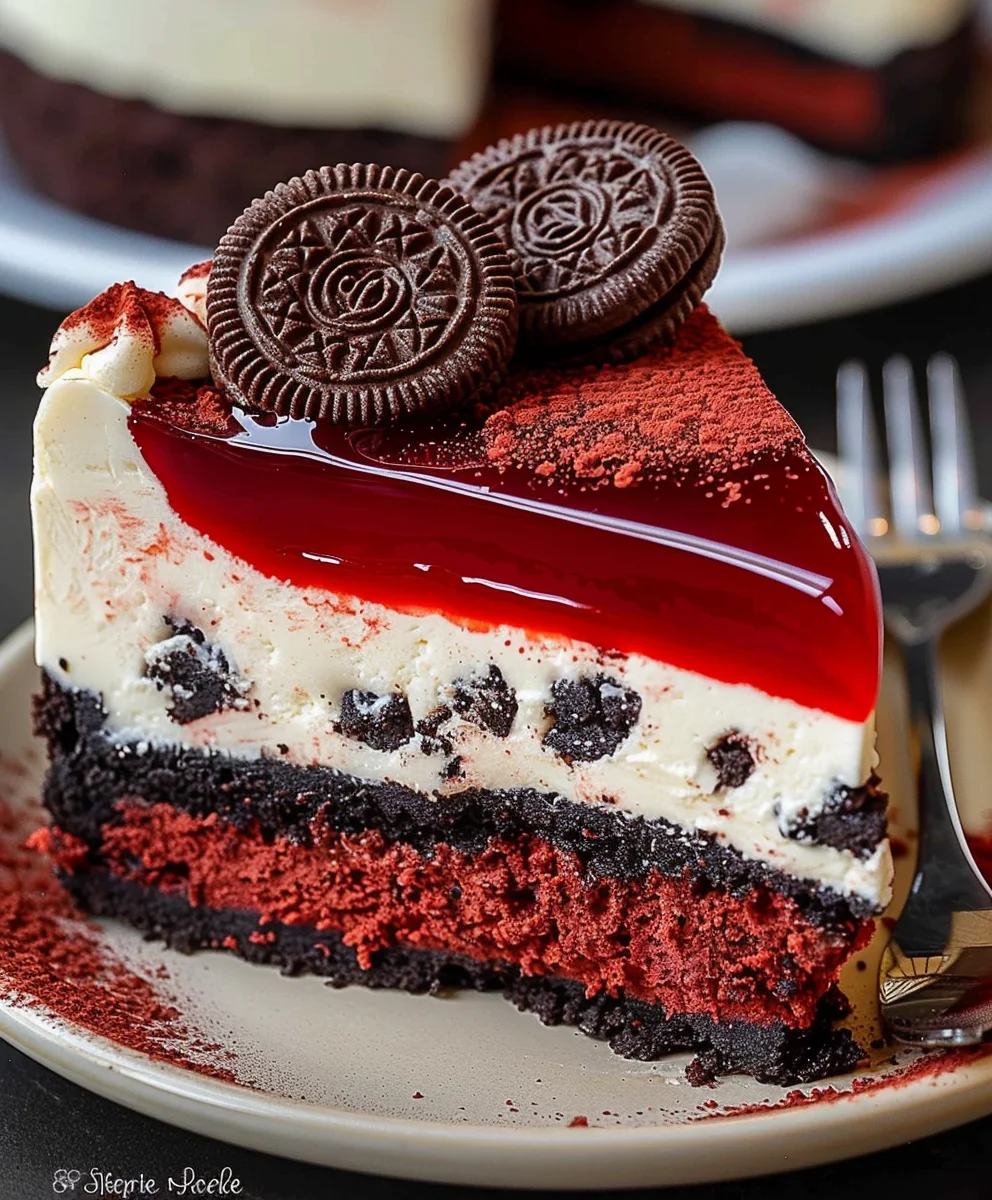
Ultimate Red Velvet Oreo Cheesecake – Decadent & Easy!
Red Velvet Oreo Cheesecake is not just a dessert; it’s an unforgettable culinary experience that combines three beloved classics into one show-stopping masterpiece. Imagine the lush, vibrant crimson of a classic Red Velvet cake, with its signature subtle cocoa notes and tender, velvety texture, expertly layered atop a sumptuously rich and creamy cheesecake. Now, picture that incredible creation crowned with the irresistible crunch and iconic flavor of crushed Oreo cookies. This isn’t merely a dream; it’s the decadent reality we’re about to dive into.
Ingredients
-
2 ½ cups Oreo cookie crumbs (about 25-30 cookies, crushed)
-
5 tbsp unsalted butter, melted
-
16 oz (2 blocks) cream cheese, softened
-
¾ cup granulated sugar
-
¼ cup sour cream
-
2 large eggs
-
1 ½ tbsp cocoa powder
-
1 ½ tsp vanilla extract
-
1 tbsp red food coloring
-
16 oz (2 blocks) cream cheese, softened
-
¾ cup granulated sugar
-
¼ cup sour cream
-
2 large eggs
-
1 ½ tsp vanilla extract
-
½ cup heavy cream
Instructions
-
Step 1
Preheat oven to 350°F (175°C). Grease a 9-inch springform pan and wrap securely with two layers of heavy-duty aluminum foil for a water bath. Process 2 ½ cups Oreo cookie crumbs and 5 tbsp melted butter until moistened. Press firmly into the bottom of the prepared pan. Bake for 8-10 minutes, then cool completely. -
Step 2
Reduce oven to 325°F (160°C). In a large bowl, beat the first 16 oz softened cream cheese until smooth. Gradually add the first ¾ cup granulated sugar, then beat in the first ¼ cup sour cream, 1 ½ tsp vanilla extract, 1 ½ tbsp cocoa powder, and 1 tbsp red food coloring until combined. Beat in the first 2 large eggs one at a time on low speed until just incorporated. Pour this red velvet batter over the cooled Oreo crust. -
Step 3
In a separate large bowl, beat the second 16 oz softened cream cheese until smooth. Gradually add the second ¾ cup granulated sugar, then beat in the second ¼ cup sour cream, 1 ½ tsp vanilla extract, and ½ cup heavy cream until combined. Beat in the second 2 large eggs one at a time on low speed until just incorporated. Carefully pour this white batter over the red velvet layer in the springform pan. -
Step 4
Place the springform pan inside a larger roasting pan. Pour hot water into the roasting pan, coming halfway up the sides of the springform pan (water bath). Carefully transfer to the preheated 325°F (160°C) oven. Bake for 60-75 minutes, or until edges are set but the center still jiggles slightly. Do not overbake. -
Step 5
Turn off the oven and leave the cheesecake inside with the door slightly ajar for 1 hour. Remove from water bath and cool completely at room temperature for 1-2 hours. Cover loosely and refrigerate for at least 6-8 hours, or preferably overnight, for best setting. -
Step 6
Once thoroughly chilled, remove from springform pan. Garnish with additional crushed Oreo cookies (not included in the ingredient list but recommended). For clean slices, dip a sharp knife in hot water and wipe clean between each cut. Serve and enjoy!
Important Information
Nutrition Facts (Per Serving)
It is important to consider this information as approximate and not to use it as definitive health advice.
Allergy Information
Please check ingredients for potential allergens and consult a health professional if in doubt.


Leave a Comment