
Hissy Fit Dip is more than just a catchy name; it’s a culinary phenomenon that has taken countless gatherings by storm, and I’m thrilled to share why it has become such a beloved staple. I remember the first time I encountered this incredible appetizer at a friend’s potluck; it was gone in a flash, leaving everyone clamoring for the recipe and perhaps, a little dramatic over its swift disappearance!
While its exact historical origins might be rooted in modern Southern hospitality and the creative kitchens of home cooks, its cultural significance lies in its undeniable ability to bring people together. It’s the ultimate communal dish, perfect for game days, casual get-togethers, or simply a cozy night in. People absolutely adore this dip for its incredibly rich and creamy texture, its savory blend of cheeses and often sausage, and its wonderfully satisfying flavor that strikes the perfect balance between indulgent and irresistible. It truly lives up to its name – people have been known to playfully ‘throw a fit’ when the bowl is empty!
Why Everyone Loves This Dip
Its ease of preparation, combined with an unforgettable taste that leaves you craving just one more scoop, makes the Hissy Fit Dip a guaranteed crowd-pleaser. It’s comforting, hearty, and effortlessly delicious, making it a go-to recipe for any occasion where you want to impress without the stress.

Ingredients:
- 1 pound ground sausage, your choice of mild, medium, or hot, depending on your preferred spice level for this incredible Hissy Fit Dip
- 2 (8-ounce) packages cream cheese, full-fat, softened to room temperature – this is crucial for a smooth and luxurious dip base
- 1 cup full-fat sour cream, contributing to the rich, tangy creaminess that defines this classic dip
- 1 (10-ounce) can Rotel (diced tomatoes with green chilies), undrained – the juices add moisture and distribute the vibrant flavors throughout the dip; however, if you prefer a thicker dip, you can opt to drain about half the liquid
- 2 cups shredded sharp cheddar cheese, freshly shredded from a block for superior melt and flavor compared to pre-shredded varieties
- 1 cup shredded Monterey Jack cheese, or a Colby Jack blend, for an extra layer of meltiness and a milder, complementary cheese flavor
- ½ cup grated Parmesan cheese, providing a salty, umami kick that rounds out the cheesy profile of our Hissy Fit Dip
- ½ teaspoon garlic powder, a pantry staple that delivers consistent garlic flavor without the sharpness of fresh garlic
- ¼ teaspoon onion powder, enhancing the savory depth of the dip
- A generous pinch of cayenne pepper, optional but highly recommended if you like an additional subtle warmth that complements the Rotel’s heat
- Salt and freshly ground black pepper to taste – always season as you go, tasting before the final bake
- ¼ cup chopped fresh green onions, both white and green parts, for a fresh, zesty garnish that adds a pop of color and flavor
- 4-6 slices crispy cooked bacon, crumbled, for garnish – an optional but absolutely delicious addition that takes your Hissy Fit Dip to the next level of indulgence
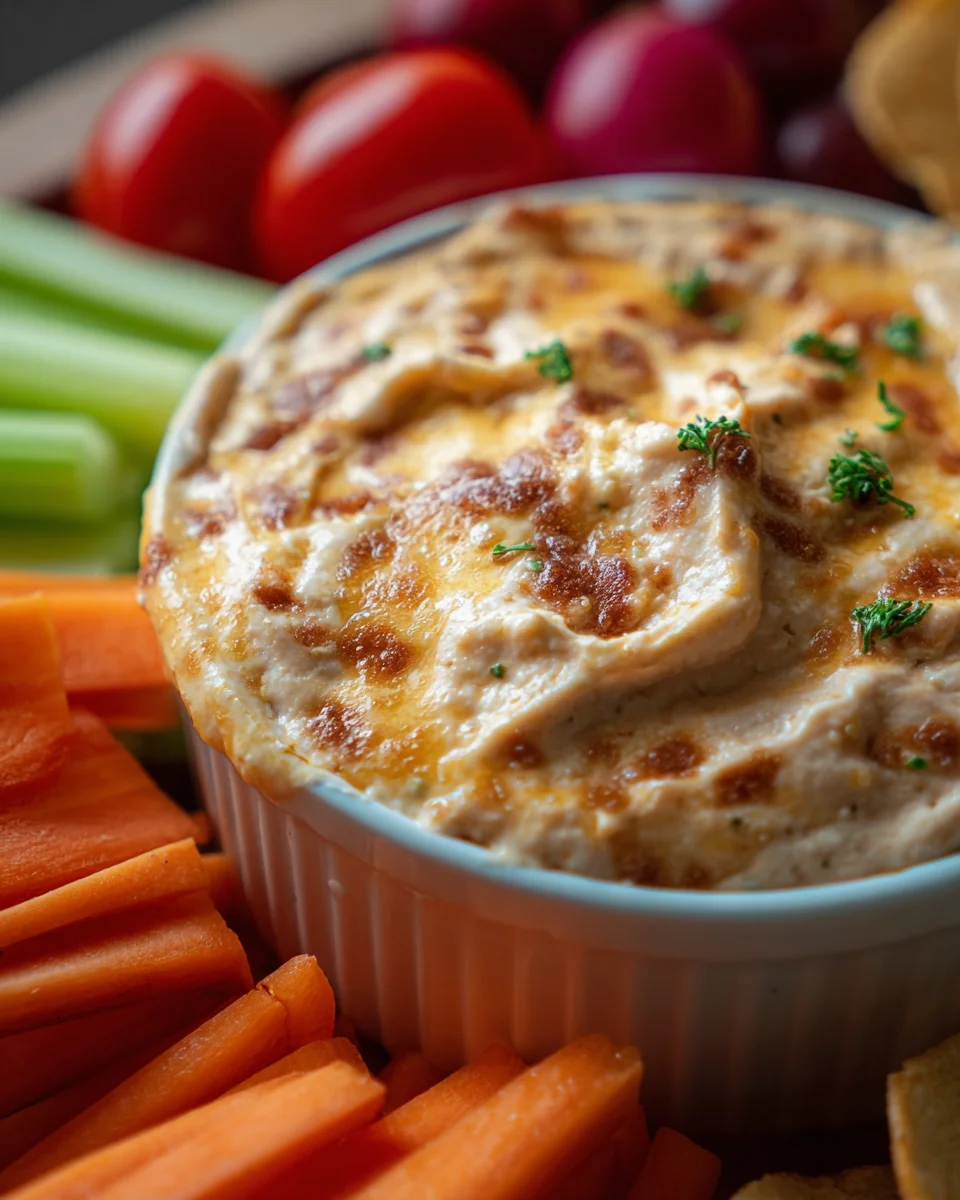
- Your favorite dippers: think sturdy tortilla chips, Fritos scoops, crisp pita bread wedges, robust crackers, or even fresh vegetable sticks like carrot and celery for a lighter option.
Preparation Phase: Gathering Your Arsenal for the Ultimate Hissy Fit Dip
Before we dive into the delicious process of creating our Hissy Fit Dip, it’s always a good idea to practice a little mise en place – that’s a fancy French term for “everything in its place.” This ensures a smooth, stress-free cooking experience, allowing you to focus on building layers of flavor rather than scrambling for ingredients. Trust me, it makes a world of difference when you’re orchestrating a dish this fantastic.
- First things first, let’s get those cheeses ready. While pre-shredded cheese might seem like a time-saver, I always, always recommend shredding your own from a block. The difference in melt factor and flavor is truly remarkable. Pre-shredded cheeses often contain anti-caking agents that can hinder a smooth, creamy melt, which is precisely what we want for our Hissy Fit Dip. So, grab your block of sharp cheddar and Monterey Jack and get shredding. You’ll need 2 cups of cheddar and 1 cup of Monterey Jack. For the Parmesan, either grate it fresh or use good quality pre-grated; it will be ½ cup. Set all your shredded cheeses aside in separate bowls for easy access.
- Next, let’s bring those two 8-ounce packages of cream cheese to room temperature. This is a non-negotiable step for achieving that silky-smooth base that makes this dip so addictive. Cold cream cheese will be lumpy and difficult to incorporate evenly, leading to a less than ideal texture. I usually take it out of the fridge at least an hour before I plan to start cooking, sometimes two, depending on how warm my kitchen is. You want it pliable and soft to the touch, easily mashed with a fork.
- Open your 10-ounce can of Rotel (diced tomatoes with green chilies). Decide whether you want it undrained or partially drained. For a truly luscious and moist Hissy Fit Dip, I prefer to keep it undrained. The liquid helps distribute the flavor and keeps the dip from becoming too stiff. If you like a thicker dip, you can drain about half the liquid by simply tilting the can over a sink for a minute or two. Don’t press the tomatoes, just let the excess liquid drain naturally.
- Measure out your 1 cup of full-fat sour cream. Again, full-fat is key here for the best flavor and texture. This is a celebratory dip, after all, so let’s embrace the richness!
- Prepare your seasonings: ½ teaspoon garlic powder, ¼ teaspoon onion powder, and a pinch of cayenne pepper if you’re adding it. Have your salt and freshly ground black pepper ready to go.
- Finally, preheat your oven to 375°F (190°C). This ensures that when your dip is assembled, it goes straight into a hot oven, ready to bake to bubbly perfection. Grab a 9×13-inch baking dish or a similar sized oven-safe casserole dish and have it standing by. A standard 2-quart casserole dish works perfectly.
The Heart of the Dip: Cooking the Sausage
The sausage provides the foundational savory flavor that elevates this Hissy Fit Dip from good to absolutely unforgettable. Choosing the right type of sausage for your preference is important here. Whether you go for mild, medium, or hot, ensure it’s ground sausage for easy browning and breaking up.
- Place a large skillet, preferably a sturdy cast-iron or a heavy-bottomed non-stick pan, over medium-high heat on your stovetop. Allow it to heat up for a minute or two until it’s nicely warm.
- Add the 1 pound of ground sausage to the hot skillet. Using a wooden spoon or a spatula, immediately begin breaking up the sausage into smaller pieces. You want to avoid large clumps, aiming for uniformly crumbled bits that will distribute evenly throughout your Hissy Fit Dip.
- Continue to cook the sausage, stirring occasionally and breaking it up further as it browns. This process usually takes about 7-10 minutes. You’re looking for the sausage to be thoroughly cooked through, with no pink remaining, and nicely browned for maximum flavor development. The browning creates those delicious caramelized bits that add depth to the dip.
- Once the sausage is fully cooked, it’s time to drain off any excess grease. This is an important step to prevent your dip from becoming oily. Carefully tilt the skillet and use a spoon or spatula to push the sausage to one side, allowing the grease to pool on the other. You can then carefully spoon or pour the grease into a heat-safe container (like an empty can or a glass jar) for disposal. Avoid pouring hot grease down your drain, as it can solidify and cause blockages. Leave just a tiny bit of residual fat in the pan for flavor, but most of it should be removed.
- Once drained, remove the cooked sausage from the skillet and transfer it to a plate lined with a paper towel. This extra step helps absorb any remaining grease, ensuring your Hissy Fit Dip stays perfectly creamy and not greasy. Set the sausage aside to cool slightly while you prepare the creamy base.
Building the Flavor Foundation: Creamy Goodness
This is where the magic truly begins to happen, as we create the luxurious, velvety base that holds all the delicious components of our Hissy Fit Dip together. The key here is working with softened cream cheese to achieve an incredibly smooth texture.
- In a large mixing bowl, place your two packages of softened cream cheese. If it’s truly at room temperature, it should be quite soft and pliable.
- Add the 1 cup of full-fat sour cream to the bowl with the cream cheese. The combination of these two dairy ingredients creates a rich, tangy, and incredibly smooth foundation for the dip.
- Using a sturdy spoon, a rubber spatula, or even a hand mixer on low speed, begin to beat or stir the cream cheese and sour cream together. Your goal here is to achieve a completely smooth, lump-free mixture. This might take a few minutes of vigorous stirring if you’re doing it by hand. Scrape down the sides of the bowl frequently to ensure everything is thoroughly combined. The smoother you get this base, the creamier your final Hissy Fit Dip will be.
- Once the cream cheese and sour cream mixture is perfectly smooth, it’s time to introduce our seasonings. Add the ½ teaspoon garlic powder, ¼ teaspoon onion powder, and the optional pinch of cayenne pepper. These dry spices will melt into the creamy base, providing a consistent savory background.
- Season the mixture with a good pinch of salt and a few grinds of fresh black pepper. Remember, you can always add more salt later, but you can’t take it out, so start conservatively. Stir everything together until the seasonings are well distributed throughout the creamy base.
- Now, carefully spoon the Rotel (diced tomatoes with green chilies), undrained or partially drained as per your preference, into the cream cheese mixture. Gently fold it in. You want to incorporate the Rotel without overmixing, ensuring those delicious bits of tomato and chili are dispersed throughout the creamy base. The vibrant red and green from the Rotel will start to give the dip its characteristic look and a delightful zesty kick.
Bringing It All Together: Assembling Your Hissy Fit Dip
With our seasoned creamy base and perfectly cooked sausage ready, it’s time to combine all the glorious elements that make this Hissy Fit Dip truly special. This phase is all about layering flavors and textures to create a cohesive and irresistible dish.
- Add the cooled, drained cooked sausage to the large mixing bowl with the cream cheese, sour cream, Rotel, and seasonings. The sausage should be just warm or at room temperature; adding very hot sausage can sometimes cause the cheese to melt prematurely or alter the texture of the cream cheese base.
- Next, it’s time for the stars of the show – the shredded cheeses! Add the 2 cups of freshly shredded sharp cheddar cheese and the 1 cup of freshly shredded Monterey Jack cheese (or Colby Jack blend) to the bowl. You can reserve just a small handful of each if you want to sprinkle a little extra on top before baking for an extra golden crust, but I usually mix it all in for maximum cheesiness throughout.
- Now, gently fold all the ingredients together. Use a large spoon or a sturdy rubber spatula and employ a folding motion, scraping from the bottom of the bowl and bringing it over the top, then turning the bowl. The goal is to evenly distribute the sausage and cheeses throughout the creamy base without overworking the mixture. You want every spoonful of Hissy Fit Dip to be packed with all the wonderful flavors and textures.
- Once everything is thoroughly combined, give it a quick taste. This is your last chance to adjust the seasoning before it goes into the oven. Does it need a little more salt? A dash more pepper? Perhaps another pinch of cayenne if you’re feeling bold? Adjust according to your palate. Remember, the flavors will meld and intensify slightly during baking.
- Carefully spoon the entire mixture into your prepared 9×13-inch baking dish or 2-quart casserole dish. Use your spatula to spread it out evenly into a uniform layer. Don’t press it down too firmly; you want it to be light and airy for that perfect bubbly texture. If you reserved a bit of cheese, sprinkle it over the top now.
The Grand Finale: Baking Your Masterpiece
The moment of truth! Baking is where all the distinct flavors meld together, the cheeses get gloriously melty and bubbly, and a beautiful golden crust forms on top. This is when your Hissy Fit Dip transforms into the ultimate comfort food experience.
- Place your filled baking dish into the preheated 375°F (190°C) oven. It’s important that the oven is fully preheated to ensure even cooking and melting.
- Bake for approximately 25-30 minutes. The exact baking time can vary slightly depending on your oven and the material of your baking dish.
- During baking, keep an eye on your Hissy Fit Dip. You’re looking for a few key indicators of perfection:
- Bubbling Bliss: The dip should be actively bubbling around the edges and throughout the center. This indicates that it’s heated through and the flavors are mingling beautifully.
- Golden-Brown Perfection: The top layer, especially if you added extra cheese, should be beautifully golden brown in spots. This adds a lovely texture and visual appeal.
- Irresistible Aroma: Your kitchen will be filled with the most incredible aroma of cheesy, savory goodness. Trust your nose!
If after 25 minutes it’s not quite as golden as you’d like, you can carefully turn on your oven’s broiler for just 1-2 minutes, watching it very, very closely to prevent burning. A minute can be the difference between perfectly golden and burnt to a crisp!
- Once your Hissy Fit Dip has reached peak bubbly, golden perfection, carefully remove it from the oven using oven mitts. The dish will be extremely hot.
Serving Suggestions and Enjoying Your Hissy Fit Dip
You’ve done it! Your incredible Hissy Fit Dip is hot, bubbly, and ready to be devoured. Now for the crucial last touches and, of course, the enjoyment!
- Before serving, let the dip rest for about 5-10 minutes. This resting period is crucial. It allows the cheese to set slightly and the molten interior to cool just enough so that it’s not scalding hot, but still incredibly warm and gooey. It also helps prevent the dip from being overly runny when you first scoop into it.
- While the dip is resting, prepare your garnishes. Finely chop your fresh green onions. The white and green parts both add a lovely mild oniony bite and a vibrant splash of color. If you’re using bacon, ensure it’s crispy and crumbled into small bits. These garnishes aren’t just for looks; they add fresh texture and flavor contrast to the rich, warm dip.
- Once rested, sprinkle the chopped fresh green onions generously over the top of the hot Hissy Fit Dip. If using, scatter the crumbled crispy bacon over the dip as well. The warmth of the dip will slightly soften the green onions, releasing their aromatic compounds, and the bacon will add an extra layer of smoky, salty crunch.
- Serve your glorious Hissy Fit Dip warm, straight from the baking dish, surrounded by an array of your favorite dippers. Tortilla chips, especially the sturdy restaurant-style ones, are classic for a reason – they hold up to the dip’s richness. Fritos scoops are another fantastic choice, offering a satisfying crunch and a bowl-like shape perfect for scooping. Don’t forget hearty crackers, pita bread wedges (toasted or soft), or even a selection of fresh vegetables like carrot sticks, celery sticks, or bell pepper strips for a refreshing contrast.
- Encourage your guests (or just yourself!) to dive in. Be ready for oohs and aahs, and perhaps even a few happy groans of satisfaction. This dip earned its name for a reason – people might just throw a “hissy fit” if they miss out!
Pro Tip for Maximum Flavor: Letting it Rest
While it’s tempting to dig into your Hissy Fit Dip the second it emerges from the oven, exercising a little patience will be greatly rewarded. A 5 to 10-minute rest allows the molten cheese to firm up ever so slightly, preventing it from being overly runny. This also lets the intense heat dissipate just enough so you can truly appreciate the nuanced flavors without burning your tongue. Think of it as allowing all the delicious ingredients a moment to fully settle and become the cohesive, irresistible dip you’ve worked hard to create.
Storage and Reheating Your Beloved Hissy Fit Dip
If, by some miracle, you have any leftover Hissy Fit Dip (it’s a rare occurrence, I know!), it stores surprisingly well. Allow the dip to cool completely to room temperature before covering it tightly with plastic wrap or transferring it to an airtight container. Store it in the refrigerator for up to 3-4 days. When you’re ready to enjoy it again, you have a couple of reheating options: For best results, spoon the desired amount into an oven-safe dish and reheat in an oven preheated to 350°F (175°C) for about 15-20 minutes, or until thoroughly heated through and bubbly again. You can also microwave individual portions in 30-second intervals, stirring in between, until warm. While reheating, the texture might not be quite as perfectly fresh from the oven, but the flavors will still be absolutely delicious, making for a fantastic snack or even a quick meal. You might want to add a fresh sprinkle of green onions after reheating to brighten it up.
Conclusion:
After diving deep into the delightful details of this incredible creation, I truly hope you’re as excited as I am about what we’ve discovered together. This isn’t just another dip; it’s a culinary experience waiting to happen, a guaranteed crowd-pleaser that will have everyone asking for the recipe. I’m talking about a dish that effortlessly combines comfort, flavor, and a touch of playful drama, making it absolutely indispensable for your next gathering or even a cozy night in. We’ve meticulously crafted a recipe that ensures simplicity without sacrificing an ounce of taste, bringing together creamy textures, savory spices, and that irresistible warmth that makes you want to keep coming back for more. It’s the kind of dish that truly elevates an occasion, turning a simple snack into a memorable event. You see, the magic lies in its perfect balance – it’s rich but not overwhelming, flavorful but approachable, and utterly satisfying from the very first bite.
Think about those moments when you’re searching for something truly special, something that stands out from the usual fare. This recipe delivers precisely that. It’s a versatile star, ready to shine at tailgates, holiday parties, impromptu get-togethers, or even just as a decadent treat for yourself. The aroma alone as it bakes is enough to draw a crowd, promising the deliciousness that awaits. But beyond its incredible taste and enticing fragrance, what makes this recipe a must-try is its ability to foster connection and joy. Food has a way of bringing people together, and this dish, with its communal appeal, is designed to do just that. It’s robust enough to satisfy even the heartiest appetites, yet refined enough to impress the most discerning palates. And let me tell you, once you taste the creamy, cheesy, savory goodness that is the Hissy Fit Dip, you’ll understand exactly why it earns its delightfully dramatic name – it’s just that good, you might just throw a “hissy fit” if it runs out too soon!
Serving Suggestions to Elevate Your Dip Experience
Now that you’re convinced of its irresistible charm, let’s talk about how to serve this magnificent creation. The possibilities are truly endless, allowing you to tailor the experience to your specific tastes and the occasion. For a classic approach, sturdy tortilla chips are always a fantastic choice, providing that perfect crunch to complement the creamy dip. Think about a variety of colors and flavors – blue corn, white corn, even a hint of lime. Beyond chips, a fresh assortment of crudités offers a lighter, healthier alternative. Crisp carrot sticks, vibrant bell pepper strips (red, yellow, orange), refreshing cucumber slices, and crunchy celery stalks are all excellent vehicles for scooping up every last bit of this savory goodness. If you’re feeling a bit more adventurous, consider slices of toasted baguette or warm pita bread, which absorb the flavors beautifully and add a delightful chewiness. You could even hollow out a sourdough bread bowl for a truly show-stopping presentation! And don’t forget the power of a good cracker selection – buttery Ritz, hearty whole wheat, or even sesame seed crackers can add another layer of texture and flavor.
Unleash Your Inner Chef: Exciting Variations!
One of the most exciting aspects of this recipe is its incredible adaptability. While the core recipe is perfect as is, I absolutely encourage you to make it your own! Don’t be afraid to experiment and discover new flavor profiles. Want to amp up the heat? A dash of your favorite hot sauce stirred in, or finely diced jalapeños (fresh or pickled) folded into the mix, will certainly add that fiery kick. For a smoky depth, cooked and crumbled bacon bits are an absolute game-changer; stir them in or sprinkle them generously on top before serving. Feeling cheesy? Experiment with different cheese blends! A mix of sharp cheddar and Monterey Jack is fantastic, but imagine the zing of pepper jack, the nuttiness of Gruyere, or the creaminess of fontina. You can also play with herbs and aromatics. Fresh chives or green onions finely chopped and mixed in, or sprinkled as a garnish, add a wonderful freshness and mild oniony bite. For a heartier version, consider browning a small amount of ground beef or sausage, draining it well, and folding it into the dip mixture – transforming it into an even more substantial meal or party offering. The beauty of this recipe lies in its forgiving nature; it’s hard to go wrong when you’re starting with such a delicious base.
Your Culinary Adventure Awaits!
So, what are you waiting for? I wholeheartedly urge you to roll up your sleeves, gather your ingredients, and embark on this delightful culinary adventure. Trust me, the minimal effort required is overwhelmingly rewarded by the incredible flavors and the sheer joy this dish brings. There’s something truly satisfying about creating something so delicious from scratch, especially when it’s met with such enthusiasm by everyone who tastes it. This isn’t just a recipe; it’s an invitation to create lasting memories, to share laughter around a table, and to simply enjoy good food. Once you’ve made it, I would be absolutely thrilled to hear about your experience! Did you stick to the original recipe, or did you put your own unique twist on it? What were your favorite serving suggestions? Please, share your stories, your photos, and any brilliant variations you came up with in the comments below. Let’s build a community around this fantastic dish. I’m confident that once you’ve experienced the delightful drama and undeniable deliciousness of this amazing Hissy Fit Dip, it will quickly become a cherished staple in your recipe collection. Happy cooking, my friends!
Hissy Fit Dip! Creamy, Zesty Beef Party Pleaser
Hissy Fit Dip is a beloved, irresistible appetizer renowned for its rich, creamy texture, savory beef, and zesty blend of cheeses and tomatoes. Perfect for game days, potlucks, or any gathering, this easy-to-make dip guarantees satisfaction and might even cause a playful ‘hissy fit’ when the bowl is empty!
Ingredients
Instructions
Important Information
Nutrition Facts (Per Serving)
It is important to consider this information as approximate and not to use it as definitive health advice.
Allergy Information
Please check ingredients for potential allergens and consult a health professional if in doubt.


Leave a Comment