
No Knead Cheese Bread is not just a recipe; it’s an invitation to experience baking magic without the usual fuss. I’ve always been fascinated by how simple ingredients can transform into something truly extraordinary, and this dish is a perfect testament to that principle. Imagine waking up to the intoxicating aroma of freshly baked bread, its crust golden and crisp, yielding to a wonderfully soft and airy interior studded with glorious pockets of melted, gooey cheese. This isn’t a dream only for experienced bakers; it’s an accessible and utterly delightful culinary creation for everyone, regardless of their skill level in the kitchen.
The inherent beauty of the “no knead” method, which has gained significant popularity in recent years, lies in its brilliant simplicity, allowing time and hydration to perform the heavy lifting that traditionally required vigorous kneading. While numerous cultures proudly boast their own cherished versions of cheese bread – from the pillowy Brazilian Pão de Queijo to the rich Georgian Khachapuri – this particular method marries the universal adoration for cheese with unparalleled baking convenience. People absolutely adore this No Knead Cheese Bread because it consistently delivers an unbeatable combination of robust flavor, a divinely chewy texture, and incredible ease of preparation. It’s truly perfect for a cozy breakfast, a heartwarming side dish alongside any meal, or an impressive appetizer that will undoubtedly disappear in mere minutes. Prepare to craft a loaf that’s effortlessly delicious and undeniably satisfying!

Ingredients:
- For the Dough:
- 3 ½ cups (420g) bread flour, plus extra for dusting. I find bread flour gives the best chewy texture and a beautiful crumb for this kind of bread, but you can use all-purpose flour in a pinch.
- 1 ½ teaspoons fine sea salt. Salt is crucial for flavor, so don’t skimp!
- ½ teaspoon active dry yeast. You might be surprised by how little yeast we use, but this is the secret to a long, slow fermentation that develops incredible flavor.
- 1 ½ cups (360ml) lukewarm water (around 105-115°F or 40-46°C). The temperature is important for activating the yeast without killing it.
- 1 tablespoon olive oil, plus a little extra for coating the bowl. This adds richness and helps with the texture.
- For the Cheese Filling:
- 1 ½ cups (about 6 ounces / 170g) shredded sharp cheddar cheese. Cheddar brings a wonderful tang and robust flavor that stands up well to the bread.
- 1 cup (about 4 ounces / 113g) shredded low-moisture mozzarella cheese. Mozzarella is fantastic for that classic gooey, stretchy cheese pull we all love in a good No Knead Cheese Bread.
- ½ cup (about 2 ounces / 56g) grated Parmesan or Asiago cheese. This adds a salty, savory depth that truly elevates the overall cheese profile.
- 1-2 tablespoons fresh chives or parsley, finely chopped (optional, but highly recommended for a touch of freshness and color).
Preparing the No Knead Cheese Bread Dough
Oh, this is where the magic begins! The beauty of a no-knead recipe, especially for something as comforting as No Knead Cheese Bread, is in its simplicity. We let time and yeast do all the hard work, developing an incredible depth of flavor and texture that traditional kneading often can’t match without a lot of effort. Trust me, your patience will be richly rewarded with every bite of this cheesy delight.
-
Gather Your Dry Ingredients: In a very large bowl, one that gives your dough plenty of room to grow and breathe, combine your 3 ½ cups of bread flour, 1 ½ teaspoons of fine sea salt, and ½ teaspoon of active dry yeast. Give these a really good whisk with a spoon or a sturdy spatula. You want to make sure the salt and yeast are evenly distributed throughout the flour. This ensures that the yeast has access to nutrients and the salt can work its flavor magic throughout the entire dough. I always take a moment here to admire the simplicity of these core ingredients, knowing what a magnificent transformation they’re about to undergo.
-
Add the Wet Components: Now, create a little well in the center of your dry ingredients. Pour in your 1 ½ cups of lukewarm water and the 1 tablespoon of olive oil. The water temperature is key here; too hot, and you’ll kill the yeast, too cold, and it won’t activate properly. Think of it like a warm bath for the yeast – just right for waking it up. The olive oil isn’t just for flavor; it also contributes to a tender crumb and helps with the overall texture, giving our No Knead Cheese Bread a lovely richness.
-
The Initial Mix (No Kneading Required!): This is the “no knead” part! Using a wooden spoon or a sturdy spatula, start mixing from the center outwards, gradually incorporating the flour into the wet ingredients. Mix until everything just comes together and there are no dry spots of flour left in the bowl. It will be a very shaggy, sticky, and wet dough – and that’s exactly what we want! Resist the urge to add more flour; this high hydration is what gives no-knead breads their signature open, airy crumb. Once it’s all combined, there’s no need to knead at all. Just scrape down the sides of the bowl to bring all the dough into a cohesive mass.
-
First Rise – The Flavor Development Phase: Drizzle a tiny bit of olive oil around the inside of a clean, similarly large bowl (or just clean out your mixing bowl if you prefer to use the same one, making sure to coat the sides with a little oil). Transfer your shaggy dough into this oiled bowl. Turn the dough once to ensure it’s lightly coated with oil on all sides, which prevents it from drying out. Now, cover the bowl tightly with plastic wrap or a damp kitchen towel. This creates a humid environment perfect for yeast activity. Place the bowl in a warm spot in your kitchen, away from drafts. I usually tuck mine into the microwave (when it’s off, of course!) or a slightly warm oven that’s just been turned off. Let it rise at room temperature for 12 to 18 hours. Yes, you read that right – 12 to 18 hours! This long, slow fermentation is the secret weapon for developing incredible depth of flavor, creating those wonderful airy pockets, and giving our No Knead Cheese Bread its characteristic sourdough-like tang without needing a starter. The dough should at least double, if not triple, in size, and you’ll see plenty of bubbles on the surface. If your kitchen is particularly warm, it might be ready closer to 12 hours; if it’s cooler, closer to 18. You’ll know it’s ready when it looks puffy, alive with bubbles, and smells wonderfully yeasty and slightly tangy. This is the stage where the magic really happens for our ultimate No Knead Cheese Bread.
Shaping and Second Proofing Our Cheesy Loaf
After the long, glorious first rise, your dough will be a beautiful, bubbly spectacle, brimming with flavor. Now comes the exciting part: incorporating all that wonderful cheese and giving our No Knead Cheese Bread its final shape. This phase requires a gentle touch, as we want to preserve as many of those precious air bubbles as possible.
-
Prepare Your Work Surface and Cheese Mixture: First, lightly flour a clean work surface. Don’t go overboard, but enough to prevent sticking. In a separate medium bowl, combine your shredded sharp cheddar, low-moisture mozzarella, and grated Parmesan/Asiago cheese. If you’re using fresh chives or parsley, now’s the time to mix them into the cheese blend. This ensures an even distribution of cheesy goodness throughout our No Knead Cheese Bread. The aroma of the mixed cheeses alone is enough to get anyone excited!
-
Gently Turn Out the Dough: With floured hands or a lightly oiled spatula, gently scrape the risen dough out of its bowl onto your floured work surface. Try to be as delicate as possible to avoid deflating it too much. Remember, we’ve worked hard to create all those bubbles! The dough will be incredibly soft and sticky, which is perfectly normal for a high-hydration no-knead dough. Avoid punching it down vigorously; instead, let it gently ease out of the bowl.
-
The Cheese Integration (The Heart of Your No Knead Cheese Bread): Now, sprinkle about two-thirds of your mixed cheese generously over the top of the dough. Using floured hands, gently pat the cheese onto the surface. Then, with a dough scraper or your hands, fold the dough over onto itself once or twice, as if you’re folding a letter. This helps to gently incorporate the cheese without overworking the dough. Repeat this process, adding the remaining cheese to the new surface and gently folding again. The goal is to distribute the cheese somewhat evenly throughout the dough. It doesn’t have to be perfect; a few cheese pockets are a delightful surprise! This step is what truly transforms it into an undeniable No Knead Cheese Bread.
-
Pre-Shape (Optional but Helpful): At this point, you can gently form the dough into a rough round or rectangle. If the dough is very sticky, you can use a lightly floured bench scraper to help coax it into shape. Don’t worry about perfection; this is just to make the final shaping easier. You’re essentially creating a loose structure for the final loaf.
-
Final Shaping: Now for the final shape. If you’re baking in a Dutch oven (which I highly recommend for that perfect crust!), you’ll want a round loaf. Gently cup the dough with your hands, rotating it on the floured surface while gently pulling the top edge towards you and tucking the bottom edge underneath. This creates surface tension, which is crucial for a good oven spring. You want to create a taut skin on the outside of your loaf. If you prefer a more elongated loaf for a bread pan, gently shape it into an oval. The key is to be gentle but firm enough to create a coherent shape. Place your shaped dough onto a large piece of parchment paper. This parchment paper will be your sling for transferring the dough into the hot Dutch oven later, making the process much safer and easier.
-
Second Rise (Proofing): Carefully lift the parchment paper with your shaped dough and transfer it into a medium-sized bowl or a proofing basket (banneton) that’s been generously floured (especially if using a banneton). This bowl or basket will help the dough hold its shape during this second, shorter rise. Cover the bowl or basket loosely with a clean kitchen towel or plastic wrap. Let it proof at room temperature for 30 to 60 minutes, or until it looks visibly puffy and slightly expanded, but not quite doubled. You can do the poke test: gently press a floured finger into the dough; if the indentation springs back slowly, it’s ready. If it springs back immediately, it needs a little more time. If it doesn’t spring back at all and feels deflated, it might be over-proofed. This second rise is much quicker than the first because the yeast is already very active, and we just need a final gentle push before baking our magnificent No Knead Cheese Bread.
Baking the Perfect No Knead Cheese Bread
The moment of truth is approaching! The baking process is critical for achieving that glorious golden crust, a chewy interior, and beautifully melted cheese pockets that define a truly exceptional No Knead Cheese Bread. Using a preheated Dutch oven is my absolute favorite method, as it mimics a professional steam oven, creating an unparalleled crust.
-
Preheat Your Oven and Dutch Oven: About 30 minutes before your dough is ready for baking (or when you start your second rise), place your empty 5 to 7-quart Dutch oven (with its lid on) into your cold oven. Preheat the oven to a scorching 450°F (232°C). Allow the Dutch oven to preheat with the oven for at least 30 minutes, or even an hour, once it reaches temperature. It’s absolutely essential for the Dutch oven to be screaming hot. This intense initial heat is what gives our No Knead Cheese Bread that fantastic oven spring and beautiful, crispy crust. Don’t rush this step!
-
Score the Loaf (Optional, but Pretty!): Once the Dutch oven is fully preheated, carefully take your dough out of its proofing bowl or basket. You can gently score the top of the loaf with a very sharp knife or a bread lame. A simple “X” or a few parallel slashes will do. Scoring allows the bread to expand predictably in the oven, preventing uncontrolled tearing and adding a professional touch to your No Knead Cheese Bread. Plus, it just looks lovely.
-
Transfer to the Hot Dutch Oven: This is the most critical and potentially dangerous step, so please be careful! Using the parchment paper as a sling, carefully lift the dough and lower it, parchment and all, into the blazing hot Dutch oven. Make sure the parchment paper isn’t bunched up too much, allowing the dough space to expand. Quickly and carefully replace the lid onto the Dutch oven. The trapped steam inside the Dutch oven during the initial bake is crucial for preventing the crust from setting too early, allowing for maximum expansion and creating a beautiful, glossy finish on our No Knead Cheese Bread.
-
First Bake (Covered): Place the covered Dutch oven back into your preheated oven. Bake for 30 minutes with the lid on. During this time, the dough will experience incredible oven spring, puffing up beautifully, and the crust will begin to set without browning too quickly thanks to the trapped steam. You’ll be able to hear it crackling slightly as it bakes – a symphony of bread in the making!
-
Second Bake (Uncovered): After 30 minutes, carefully remove the lid from the Dutch oven. Be mindful of the escaping steam! Reduce the oven temperature slightly to 425°F (220°C). Continue baking for another 15-25 minutes, or until your No Knead Cheese Bread has a deep, golden-brown crust and the internal temperature reaches around 200-210°F (93-99°C). The cheese that’s near the surface might bubble up and brown beautifully, creating irresistible crispy bits. Keep an eye on it during this phase; ovens can vary, and you want that perfect rich color without burning.
-
Checking for Doneness: If you have an instant-read thermometer, insert it into the center of the loaf; it should read between 200-210°F (93-99°C). Alternatively, you can tap the bottom of the loaf – it should sound hollow. The crust should be firm and beautifully colored. This is the moment you’ve been waiting for, the glorious culmination of your patience!
Cooling and Serving Your Delicious No Knead Cheese Bread
You’ve done it! You’ve baked a magnificent loaf of No Knead Cheese Bread. But the journey isn’t quite over. The cooling process is just as important as the baking for achieving the perfect texture and flavor. Rushing this step would be a culinary crime!
-
Cooling is Essential: Once your bread is baked to perfection, carefully remove it from the Dutch oven (using the parchment sling again, if helpful). Transfer the hot loaf directly onto a wire cooling rack. This allows air to circulate all around the bread, preventing the bottom from becoming soggy due to trapped steam. It’s incredibly tempting to slice into that warm, cheesy goodness right away, I know! The aroma filling your kitchen will be intoxicating, a true testament to the power of a good No Knead Cheese Bread. However, resisting the urge for at least 1 to 2 hours is crucial. During this cooling period, the internal structure of the bread finishes setting, and the starches stabilize. Slicing too early will result in a gummy texture. The flavors will also fully develop as it cools, making each cheesy bite even more satisfying. Think of it as the bread taking a well-deserved rest after all its hard work.
-
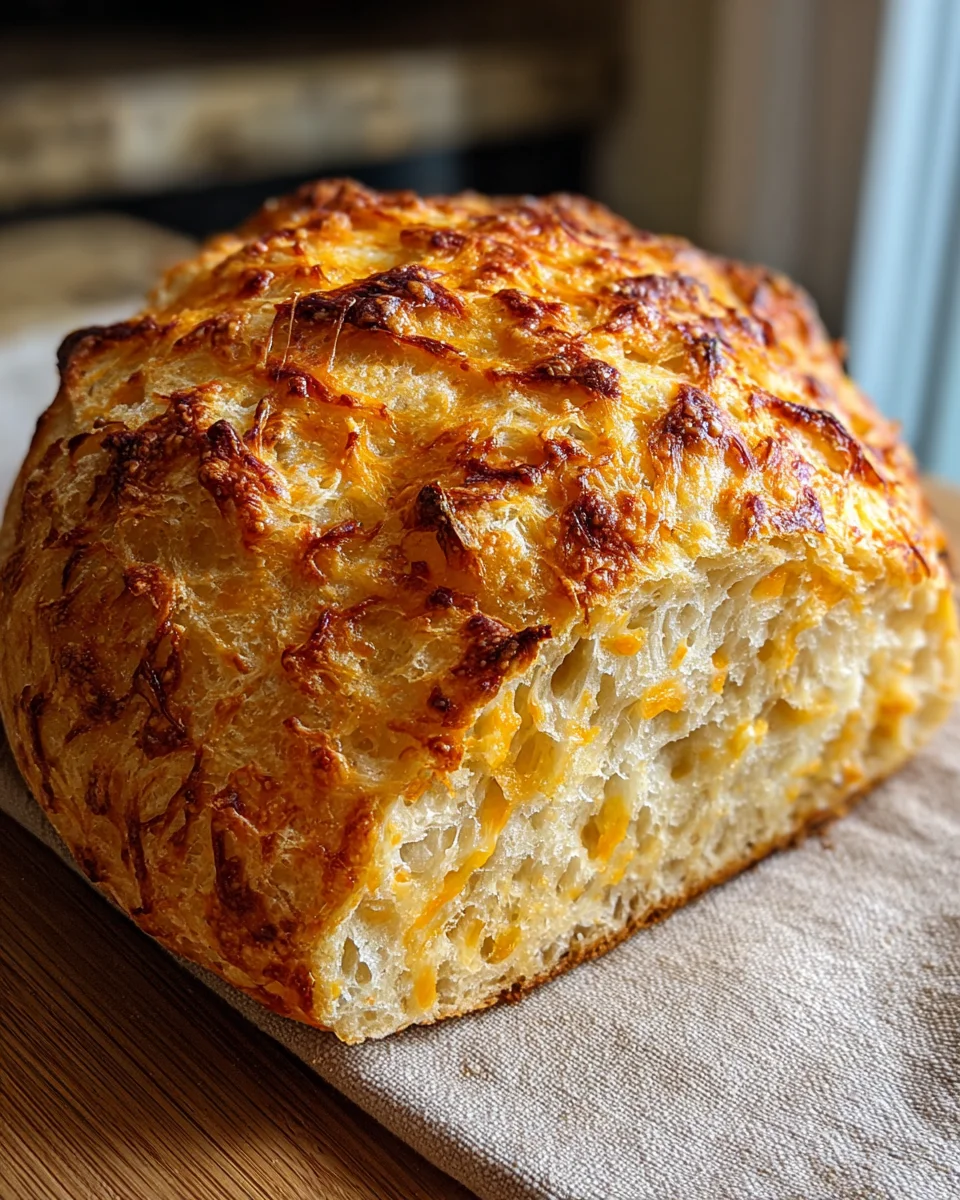
Serving Suggestions: Once fully cooled, grab your sharpest serrated knife and slice into your homemade No Knead Cheese Bread. You’ll be greeted by an open, airy crumb studded with pockets of melted, gooey cheese – a truly beautiful sight! This bread is incredibly versatile. It’s absolutely divine on its own, perhaps with a smear of good quality butter, or a drizzle of olive oil and a sprinkle of flaky sea salt. It makes an incredible accompaniment to hearty soups and stews, perfect for dipping and soaking up all those delicious juices. Try it alongside a simple salad for a light meal, or use thick slices for the most epic grilled cheese sandwiches you’ve ever had. For breakfast, a slice toasted lightly, perhaps with a fried egg, is a revelation. Leftovers (if there are any!) can be stored in an airtight container at room temperature for a couple of days, or frozen for longer enjoyment. Reheat slices gently in a toaster or oven to bring back some of that fresh-baked magic. Every bite of this No Knead Cheese Bread is a testament to simple ingredients and a little patience, delivering incredible flavor and comfort.
Conclusion:
I truly believe that if there’s one recipe you absolutely have to try this year, it’s this incredible bread. I’ve poured my heart into perfecting it, and the sheer joy it brings to any table is immeasurable. This isn’t just another bread recipe; it’s a culinary revelation, especially for those who might feel intimidated by the world of yeast and dough. The magic of the no-knead method transforms what could be a time-consuming chore into an effortless triumph. Imagine: minimal effort on your part, and yet you’re rewarded with a loaf that boasts a gorgeously golden, crisp crust, a divinely soft and airy interior, and pockets of melted, savory cheese in every single bite. The aroma alone, as it bakes and fills your home, is enough to make anyone’s mouth water, promising a taste of pure comfort and indulgence. It’s the kind of bread that makes people ask for the recipe the moment they taste it, and you’ll be able to proudly tell them just how simple it was to achieve such perfection. It truly is a testament to how simple ingredients, combined with the right technique, can yield truly extraordinary results right in your own kitchen.
Elevate Your Meals with This Versatile Loaf:
One of the best things about this fantastic creation is its incredible versatility. While it’s absolutely phenomenal enjoyed warm and plain, perhaps with a smear of butter, its potential extends far beyond that. For an easy weeknight dinner, this bread is the ultimate companion to a hearty bowl of soup—think classic tomato, a robust minestrone, or even a creamy broccoli cheddar. It’s also sensational alongside rich stews or a spicy chili, perfect for soaking up every last drop of flavorful sauce. Imagine serving thick slices with your favorite pasta dishes, allowing it to sop up delicious marinara or pesto. And don’t even get me started on its potential for sandwiches! Turn humble deli meat into a gourmet experience, or dare I say it, make a grilled cheese using slices of this bread for an utterly decadent cheesy explosion. For a breakfast treat, a toasted slice is divine with scrambled eggs, or simply enjoyed with your morning coffee. You could even cut it into cubes and serve it with a simple olive oil and balsamic vinegar dip for an elegant appetizer.
Creative Twists & Personalization for Your No Knead Cheese Bread:
But why stop there? This recipe is a fantastic canvas for your own culinary creativity. If you’re feeling adventurous, consider swapping out or mixing the cheeses. A combination of sharp cheddar and Monterey Jack creates a lovely meld, while adding some smoked gouda can introduce a wonderful depth of flavor. For a more Italian flair, try a blend of mozzarella, provolone, and a touch of Parmesan. Want a little kick? Fold in some finely chopped pickled jalapeños or a pinch of red pepper flakes with the cheese. Fresh herbs are another fantastic addition; finely chopped rosemary, thyme, or chives would infuse the bread with aromatic delight. A tablespoon of garlic powder or a sprinkle of everything bagel seasoning on top before baking would also be phenomenal. You could also experiment with adding sun-dried tomatoes, Kalamata olives, or caramelized onions for an even more savory loaf. For a different texture, brush the top with an egg wash before baking and sprinkle with sesame seeds or poppy seeds. The possibilities are truly endless, and each variation will bring its own unique character to your homemade No Knead Cheese Bread. Don’t be afraid to make it your own; that’s part of the fun of baking!
Your Turn: Bake, Savor, and Share!
So, what are you waiting for? I wholeheartedly encourage you to roll up your sleeves – or, more accurately, just mix a few ingredients in a bowl – and experience the sheer joy of baking this simple yet extraordinary bread. You’ll be amazed at how easily you can create something so impressive and utterly delicious. There’s a profound satisfaction that comes from pulling a warm, golden loaf out of your own oven, and I promise you, this recipe delivers that feeling in spades. Don’t let the idea of homemade bread intimidate you any longer. This is your chance to shine in the kitchen with minimal fuss. Once you’ve experienced the magic of this no-knead wonder, I’d absolutely love to hear about it! Please share your baking adventures, your favorite serving suggestions, or any creative variations you came up with. Your experiences inspire me and our entire community of home bakers. Happy baking, and get ready to enjoy the most delightful cheesy bread you’ve ever made!
No Knead Cheese Bread
No Knead Cheese Bread is not just a recipe; it’s an invitation to experience baking magic without the usual fuss. This accessible culinary creation consistently delivers an unbeatable combination of robust flavor, a divinely chewy texture, and incredible ease of preparation, perfect for breakfast, a side dish, or an impressive appetizer.
Ingredients
Instructions
Important Information
Nutrition Facts (Per Serving)
It is important to consider this information as approximate and not to use it as definitive health advice.
Allergy Information
Please check ingredients for potential allergens and consult a health professional if in doubt.


Leave a Comment