
Knock You Naked Bars are not just a dessert; they are an experience, a phenomenon that has captivated sweet tooths across generations. I’m incredibly excited to finally share my ultimate recipe for these legendary treats with you, inviting you into the delightful world of pure indulgence.
Unraveling the Irresistible Charm of Knock You Naked Bars
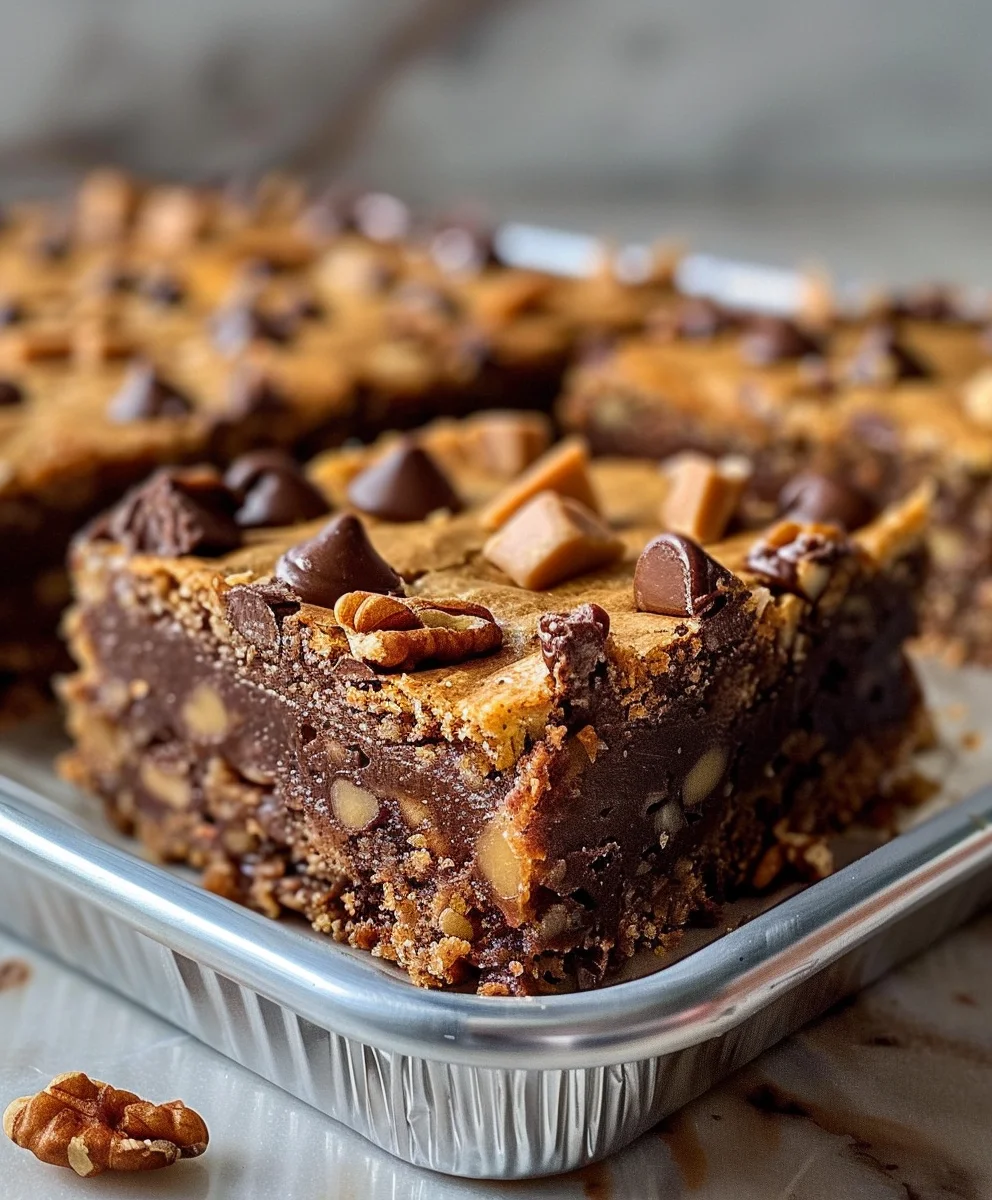
You might be wondering about the intriguing name, and trust me, it’s a perfect reflection of their utterly irresistible nature. While their exact origin is a bit shrouded in delicious mystery, these bars rose to prominence for their audacious combination of a buttery crust, a luscious layer of sweetened condensed milk, rich chocolate, and crunchy nuts. It’s a recipe that has been passed around, scribbled on recipe cards, and shared with a wink and a promise of pure decadence. Every bite delivers a symphony of textures and flavors – a chewy, gooey center, a satisfying crunch, and a melt-in-your-mouth chocolate finish that truly lives up to its bold moniker. People adore these Knock You Naked Bars because they are deceptively simple to make yet deliver an unparalleled level of decadent satisfaction, perfect for any gathering or simply for an extraordinary treat after a long day. I promise, once you try them, you’ll understand why they’re a timeless favorite!

Ingredients:
Here’s everything you’ll need to create these absolutely irresistible Knock You Naked Bars. Trust me, every single ingredient plays a crucial role in achieving that perfect balance of chewy, gooey, and utterly delicious.
-
For the Crust:
- 1 cup (2 sticks) unsalted butter, softened: I always use unsalted so I can control the salt content. Make sure it’s truly softened, not melted, for the best dough consistency. Softened butter creams beautifully with sugar, creating air pockets that lead to a tender, crumbly crust. If your butter is too cold, it won’t cream properly; if it’s melted, the dough will be greasy. This is the foundation of our Knock You Naked Bars, so let’s get it right!
- ½ cup granulated sugar: This adds just the right amount of sweetness to our buttery base. It also helps with the tender texture of the crust as it crystallizes during baking.
- 1 teaspoon vanilla extract: A good quality vanilla makes all the difference here, adding warmth, depth, and a comforting aroma. Don’t skimp on the vanilla!
- 2 cups all-purpose flour: The main structure of our crust. All-purpose flour provides the perfect balance for a shortbread-like texture.
- ¼ teaspoon salt: Balances the sweetness, enhances all the other flavors, and prevents the crust from tasting flat. It’s a small amount but mighty in impact.
-
For the Gooey Filling:
- 1 (14-ounce) can sweetened condensed milk: This is the absolute magic ingredient that creates that incredibly rich, caramel-like goo. Do not substitute this for evaporated milk! Sweetened condensed milk is thick, sweet, and essential for the signature gooey texture of these Knock You Naked Bars.
- ½ cup packed light brown sugar: Adds a deeper, molasses-rich sweetness and contributes to the fudgy texture of our filling. Packing it ensures you get the correct amount.
- ½ cup unsalted butter, melted: Combines with the condensed milk for that truly indulgent, luscious texture. Melting it ensures it fully incorporates into the liquid filling.
- 1 teaspoon vanilla extract: Again, essential for rounding out the flavors and adding that comforting warmth to the very sweet filling.
- Pinch of salt: A tiny bit of salt in the filling helps cut through the richness, brightens the flavors, and prevents it from being cloyingly sweet.
- 2 cups semi-sweet chocolate chips: You can adjust this to your preference; milk chocolate or dark chocolate chips also work wonderfully. I love a good quality semi-sweet for its balanced flavor, which complements the rich caramel notes without overwhelming them. These melt into pockets of pure joy within the gooey center.
- 1 cup chopped pecans or walnuts (optional): If you love a nutty crunch, these are a fantastic addition, providing a lovely textural contrast to the soft filling. I often include them for extra texture and a hint of earthy flavor, but feel free to omit if you prefer a nut-free treat.
-
For the Topping (Optional, but highly recommended for ultimate decadence):
- ½ cup semi-sweet chocolate chips: For a simple, elegant drizzle or a light sprinkle on top. This extra layer of chocolate takes your Knock You Naked Bars from great to absolutely phenomenal.
- 1 tablespoon unsalted butter: To melt with the chocolate for a smooth, glossy, and easily drizzle-able finish. This helps achieve a beautiful consistency that sets nicely.
Preparing the Crust – The Foundation of Your Knock You Naked Bars
This first step is crucial for creating that perfect, crumbly yet sturdy base for your Knock You Naked Bars. We want a crust that can stand up to the gooey filling without getting soggy, and that starts with proper creaming and pre-baking. Don’t rush this part; a good foundation makes all the difference!
- Preheat and Prepare Your Pan: First things first, let’s get our oven ready. Preheat your oven to 350°F (175°C). While that’s heating up, grab a standard 9×13 inch baking pan. I find it incredibly helpful to line mine with parchment paper, leaving a generous overhang on the long sides. This makes it astonishingly easy to lift the entire batch of baked and cooled Knock You Naked Bars out of the pan in one go, allowing for super neat and effortless slicing later. If you don’t have parchment paper, thoroughly greasing and flouring your pan will also work, but the parchment method is truly superior for gooey bar recipes like this one.
- Cream the Butter and Sugar: In a large mixing bowl, combine your 1 cup (2 sticks) of softened unsalted butter with the ½ cup of granulated sugar. Using an electric mixer (either a stand mixer fitted with the paddle attachment or a hand mixer), beat them together on medium speed until the mixture is visibly light in color and delightfully fluffy. This usually takes about 2-3 minutes. You’ll notice a distinct change in both color and texture; it will become paler and incorporate more air, which is exactly what we want for a tender, almost shortbread-like crust. This creaming process is vital for the texture of your crust, so please don’t skip or rush it!
- Add Vanilla: Once the butter and sugar are perfectly creamed, stir in the 1 teaspoon of vanilla extract. Beat until it’s fully incorporated, ensuring that aromatic vanilla essence is spread throughout the base. That fragrant vanilla aroma is already starting to build the anticipation for these amazing Knock You Naked Bars!
- Incorporate Dry Ingredients: In a separate small bowl, take a moment to whisk together the 2 cups of all-purpose flour and the ¼ teaspoon of salt. This simple step ensures that the salt is evenly distributed throughout the flour. Now, gradually add this dry mixture to your wet butter and sugar mixture, beating on low speed until just combined. The key here is to stop mixing as soon as you no longer see any dry streaks of flour. Overmixing develops the gluten in the flour too much, which can lead to a tough, dense crust instead of the tender, melt-in-your-mouth base we’re aiming for. The dough will be thick and somewhat crumbly, but it should hold together when gently pressed.
- Press into Pan: Now, evenly press this delightful dough into the bottom of your prepared 9×13 inch baking pan. I find it easiest to use my clean fingertips to spread it out, and then I use the bottom of a flat glass or a dry measuring cup to press the dough down firmly and uniformly across the entire bottom of the pan. The goal is an even, compact layer. This provides a solid and even base for all the deliciousness that’s about to come in these incredible Knock You Naked Bars.
- Pre-bake the Crust: Pop the pan with the pressed crust into your preheated 350°F (175°C) oven and bake for 12-15 minutes, or until the edges are just lightly golden brown. This crucial pre-baking step ensures that the crust is perfectly cooked through and provides a stable foundation before we add our luscious, gooey filling. It also prevents the bottom from becoming soggy. While the crust is baking, let’s get started on that irresistible gooey layer!
Creating the Gooey Filling – The Heart of Your Knock You Naked Bars
This is where the magic truly happens, transforming simple ingredients into that incredibly rich, caramel-like, and utterly addictive center of your Knock You Naked Bars. Pay close attention to the details here for the ultimate gooey experience that defines this recipe.
- Combine Wet Ingredients for the Filling: In a medium-sized mixing bowl, pour in your 1 (14-ounce) can of sweetened condensed milk. Just a friendly reminder: this is definitely not evaporated milk, so please double-check your can! Sweetened condensed milk is distinctly thick, wonderfully sweet, and incredibly creamy – it’s absolutely non-negotiable for achieving the signature texture of these Knock You Naked Bars. Add the ½ cup of packed light brown sugar, the ½ cup of melted unsalted butter, the 1 teaspoon of vanilla extract, and a tiny pinch of salt to the bowl.
- Whisk Until Smooth: Now, whisk all these ingredients together with enthusiasm until the mixture is completely smooth and homogeneous. You want the brown sugar to be fully dissolved, leaving no grainy bits. This might take a couple of minutes of vigorous whisking to achieve. The resulting liquid should be uniform, slightly thick, and possess a beautiful caramel color. A well-mixed filling ensures that cohesive, wonderfully gooey texture throughout your bars. This forms the luxurious base for the gooey center.
- Prepare for Layering: Once the crust has finished its initial pre-bake and is lightly golden, carefully remove it from the oven. Be mindful, as the pan will be hot! Leave your oven on, as the bars will be going right back in very soon. Set the pan aside for a moment.
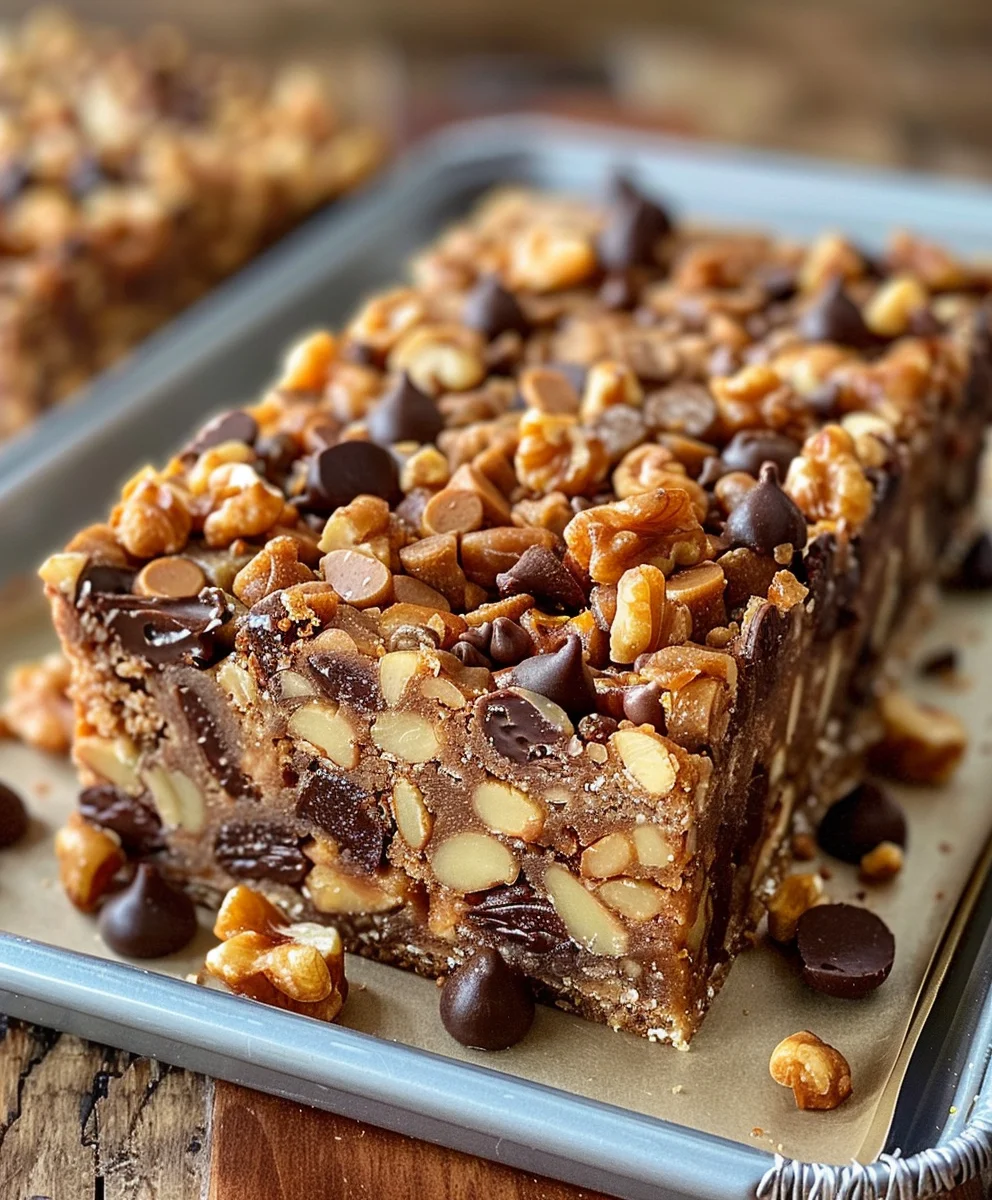
- Layer the Chocolate and Nuts (if using): Evenly sprinkle the 2 cups of semi-sweet chocolate chips over the warm, pre-baked crust. The residual warmth from the crust will just start to melt the chocolate ever so slightly, helping it adhere. If you’re adding nuts, this is the perfect time to sprinkle your 1 cup of chopped pecans or walnuts (or both!) over the chocolate chips as well. I personally adore the textural contrast and slight toastiness the nuts provide in these Knock You Naked Bars, but they are certainly optional if you prefer a nut-free treat or have allergies.
- Pour the Gooey Filling: Carefully and evenly pour the entirely luscious sweetened condensed milk mixture over the layer of chocolate chips and nuts. Use a spatula to gently spread it out if needed, ensuring that the entire surface of the crust, chocolate, and nuts is generously covered by this golden, gooey liquid. You want every single bite of these Knock You Naked Bars to be loaded with that amazing, rich goo!
Baking the Knock You Naked Bars – Bringing It All Together
Now comes the patient part: letting your oven transform these layers into the incredible Knock You Naked Bars you’ve been dreaming of. Don’t peek too often, and trust the process! The aroma filling your kitchen will be pure bliss.
- Bake to Perfection: Return the pan to your preheated 350°F (175°C) oven. Bake for approximately 25-30 minutes. You’ll know they’re ready when the filling is visibly set around the edges, appears bubbly, and the center still has a slight, gentle jiggle when the pan is lightly shaken. The top might acquire a beautiful golden-brown caramelization, which is exactly what we want for that rich flavor. Every oven is a little different, so keep a close eye on your bars during the last few minutes of baking. You want the filling to be set enough that it’s no longer liquid but still wonderfully soft and perfectly gooey. This is what gives Knock You Naked Bars their signature, irresistible texture.
- Initial Cooling: Once baked to perfection, carefully remove the pan from the oven. Be extremely cautious, as the bars and pan will be piping hot and the filling will still be quite soft and liquid-like. Allow them to cool completely in the pan on a wire rack for at least 30 minutes to an hour. This initial cooling period is crucial; it allows the filling to begin firming up and setting, making the subsequent steps much easier and preventing a total gooey mess. Resist the powerful urge to dive in just yet! Patience, my friend, is a true virtue, especially when it comes to the perfect Knock You Naked Bars.
Preparing the Decadent Topping – The Crowning Glory
While these Knock You Naked Bars are incredibly delicious on their own, I highly recommend adding a little extra chocolate drizzle. It elevates them to a truly spectacular dessert, adding another layer of chocolatey goodness and making them look even more enticing and professionally finished. It’s the final flourish!
- Melt the Topping Chocolate: In a small, microwave-safe bowl, combine your ½ cup of semi-sweet chocolate chips and 1 tablespoon of unsalted butter. Microwave on 50% power for 30-second intervals, stirring thoroughly and gently after each interval, until the chocolate is completely melted and beautifully smooth. Alternatively, for a more controlled and gentle melt, you can use a double boiler on the stovetop. Be very careful not to overheat the chocolate, as it can seize and become grainy. Slow and steady wins the race here for a perfectly smooth drizzle.
- Achieve Drizzle Consistency: Once the chocolate and butter are fully melted, stir them together until the mixture is glossy and perfectly smooth. If it seems too thick for a nice, easy drizzle, you can add a tiny bit more butter (start with ½ teaspoon) or a very small amount of a neutral oil (like vegetable oil or coconut oil) until it reaches a nice, pourable consistency. You want it to flow off your spoon effortlessly.
Assembling and Finishing Your Knock You Naked Bars
This is the final touch before your Knock You Naked Bars are ready for their grand debut! The chocolate topping adds that extra ‘wow’ factor and a delightful visual appeal.
- Drizzle the Topping: Using a spoon, or if you’re feeling a bit fancy and want more precise control, transfer the melted chocolate topping into a piping bag (or a ziplock bag with a tiny corner snipped off). Drizzle the chocolate decoratively over the partially cooled bars in the pan. You can go for an artistic zig-zag pattern, random swirls, or whatever design strikes your fancy. This extra layer of chocolate not only looks gorgeous but also adds another layer of rich flavor, truly making these Knock You Naked Bars ridiculously good and irresistible.
Cooling and Serving – The Ultimate Reward
This is perhaps the hardest step for me personally: waiting for these amazing Knock You Naked Bars to fully cool. However, it’s absolutely essential for achieving perfect, clean slices and the best possible texture. Trust me, the wait is worth every single moment!
- Cool Completely: Allow the Knock You Naked Bars to cool completely in the pan on the wire rack for at least 2-3 hours at room temperature. For the absolute best results and cleanest slices, I often recommend refrigerating them for an additional 1-2 hours after they’ve reached room temperature. Cooling completely allows the incredibly gooey filling to fully set and solidify. This step is vital for ensuring you get neat, well-defined slices that hold their shape. If you attempt to cut them while they’re still warm, the wonderfully gooey center will inevitably spread, and the bars won’t hold their beautiful shape as well. I know it’s a test of willpower to wait, but I promise, it’s worth every second for the perfect bar!
- Lift and Slice: Once your Knock You Naked Bars are thoroughly cooled and completely set, use the convenient parchment paper overhang to carefully lift the entire glorious slab out of the baking pan and onto a sturdy cutting board. This parchment paper method is a game-changer for easy removal.
- Cut into Bars: Using a very sharp knife, cut the slab into your desired bar sizes. I typically aim for about 24 bars (creating 4 rows by 6 columns) from a standard 9×13 inch pan, but you can certainly make them larger or smaller depending on your preference for portion size. For super clean and precise cuts, I’ve learned a little trick: wipe your knife clean with a warm, damp cloth between each slice. This simple step makes a surprisingly big difference, especially with gooey and sticky treats like these magnificent Knock You Naked Bars, preventing chocolate and caramel drag.
- Serve and Enjoy: Arrange your beautiful Knock You Naked Bars on a serving platter and prepare to watch them disappear faster than you can say “more, please!” These are truly fantastic on their own, offering a rich, satisfying bite. For an extra touch of indulgence, try serving them slightly warmed (a quick zap in the microwave for 10-15 seconds) with a scoop of premium vanilla bean ice cream or a dollop of fresh whipped cream. They are rich, decadent, and absolutely live up to their name – they will truly knock your socks off!
- Storage: Any leftover Knock You Naked Bars (if such a miracle occurs!) should be stored in an airtight container at room temperature for up to 3-4 days. For extended freshness, you can store them in the refrigerator for up to a week; just bring them to room temperature or warm slightly before serving for the best gooey experience. These bars also freeze wonderfully for up to 2-3 months. To enjoy them from the freezer, simply thaw them at room temperature for a few hours before serving. But honestly, I highly doubt you’ll have many leftovers once people get a taste of these incredible, unforgettable Knock You Naked Bars!
Conclusion:
If there’s one recipe I urge you to add to your baking repertoire, it’s this one. We’ve journeyed through the simple steps, uncovered the magic behind the layers, and now it’s time to truly appreciate what makes these bars an absolute game-changer. These aren’t just any ordinary dessert bars; they are an experience, a symphony of textures and flavors that will undoubtedly become a staple in your home. From the moment the rich, buttery crust emerges from the oven, providing that perfect foundation, to the glorious, gooey, caramelized center studded with chocolate and nuts, and finally, the tender, crumbly topping that ties it all together – every bite is pure bliss. I truly believe that the sheer indulgence and unforgettable taste of these creations are what earn them their fitting, albeit playful, moniker:
Knock You Naked Bars.
They are the ultimate crowd-pleaser, effortlessly scaling from a casual weeknight treat to the star of any potluck, bake sale, or holiday gathering. The beauty of this recipe lies not only in its sensational taste but also in its surprising simplicity. You don’t need to be a seasoned baker to achieve spectacular results; the instructions are straightforward, and the ingredients are readily available. Imagine the delight on your friends’ and family’s faces when they sink their teeth into these irresistible squares. They strike that perfect balance between chewy, crunchy, and melt-in-your-mouth tender, delivering a comforting sweetness that leaves everyone wanting more.
But the fun doesn’t stop there! While phenomenal as is, these bars are incredibly versatile, inviting you to experiment and personalize them to your heart’s content. Here are a few ideas to get your creative juices flowing:
Serving Suggestions:
- Warm with Ice Cream: A scoop of vanilla bean or coffee ice cream melting over a warm bar creates an incredible contrast of temperatures and textures. A drizzle of warm caramel or chocolate sauce takes it to the next level.
- Chilled and Ready: These bars are equally delightful when completely cooled and chilled, offering a firmer, yet still wonderfully chewy, grab-and-go treat perfect with your morning coffee or as an afternoon pick-me-up.
- A Pinch of Salt: Before the bars cool completely, sprinkle a tiny bit of flaky sea salt over the top. This simple addition enhances the sweetness and adds a sophisticated touch that truly elevates the flavor profile.
Exciting Variations:
- Nutty Alternatives: While pecans are classic, feel free to substitute with toasted walnuts, slivered almonds, or even a mix of your favorite nuts for a different crunch.
- Chocolate Explorations: Experiment with different types of chocolate chips – milk chocolate, dark chocolate, white chocolate, or even a blend! Peanut butter chips or butterscotch chips would also be fantastic additions, adding another layer of flavor.
- Coconut Lover’s Dream: Stir in a handful of shredded coconut with the chocolate chips for a tropical twist and added texture.
- Spice It Up: A hint of cinnamon or a tiny dash of espresso powder in the crust or filling can add a wonderful depth and warmth to the overall flavor.
- Fruity Fun: For a touch of tang, try adding dried cranberries or cherries to the mix.
I truly can’t wait for you to experience the magic of these bars for yourself. My hope is that they bring as much joy to your kitchen and your taste buds as they have to mine. So, gather your ingredients, preheat that oven, and prepare to bake something truly special. Once you’ve made them, I’d absolutely love to hear about your experience! Did you stick to the original recipe, or did you try out a fun variation? What did your friends and family think? Share your stories and photos with us; your baking adventures inspire us all. Trust me, these are more than just a dessert; they are a delightful journey that culminates in pure, unadulterated happiness. Go ahead, give them a try – you won’t regret it!
Irresistible Knock You Naked Bars
Knock You Naked Bars are an experience, a phenomenon that has captivated sweet tooths across generations. This recipe delivers an unparalleled level of decadent satisfaction, featuring a buttery cookie base, a luscious caramel-peanut butter filling, and rich chocolate, making it pure dessert bliss perfect for any gathering or an extraordinary treat.
Ingredients
-
2 1/4 cups all-purpose flour
-
1 tsp baking soda
-
1 tsp salt
-
1 cup butter, softened
-
3/4 cup sugar
-
3/4 cup packed brown sugar
-
1 tsp vanilla extract
-
2 eggs
-
2 cups semi-sweet chocolate chips
-
5 oz evaporated milk
-
14 oz caramels
-
1/2 cup peanut butter
Instructions
-
Step 1
Preheat oven to 350°F (175°C). Line a 9×13 inch baking pan with parchment paper. In a medium bowl, whisk together flour, baking soda, and salt. In a large bowl, cream softened butter with granulated sugar and packed brown sugar until light and fluffy. Beat in vanilla extract and eggs until well combined. Gradually add the dry ingredients to the wet ingredients, mixing on low speed until just combined to form a soft cookie dough. -
Step 2
Press about two-thirds of the cookie dough evenly into the bottom of the prepared pan. Bake for 10-12 minutes, or until the edges are lightly golden. Remove from oven and set aside, keeping the oven on. -
Step 3
While the crust is pre-baking, unwrap the caramels and place them in a microwave-safe bowl with the evaporated milk and peanut butter. Microwave on medium power, stirring every 30-60 seconds, until the caramels are completely melted and the mixture is smooth and well combined. Alternatively, melt in a saucepan over low heat, stirring constantly until smooth. -
Step 4
Pour the melted caramel-peanut butter filling evenly over the warm, pre-baked crust. Sprinkle 1 cup of the semi-sweet chocolate chips over the caramel layer. Crumble the remaining one-third of the cookie dough evenly over the chocolate chips. Top with the remaining 1 cup of semi-sweet chocolate chips. -
Step 5
Return the pan to the oven and bake for another 25-30 minutes, or until the topping is lightly golden brown and the filling is bubbly. The center might still have a slight jiggle. Remove from oven and cool completely in the pan on a wire rack for at least 2-3 hours. For the cleanest slices and best texture, refrigerate for an additional 1-2 hours after reaching room temperature. -
Step 6
Once fully cooled and set, use the parchment paper overhang to carefully lift the entire slab of bars from the pan onto a sturdy cutting board. Using a very sharp knife, cut into your desired bar sizes (typically 24 bars). For clean cuts, wipe your knife clean with a warm, damp cloth between each slice. Serve and enjoy. Store any leftover bars in an airtight container at room temperature for up to 3-4 days, or in the refrigerator for up to a week.
Important Information
Nutrition Facts (Per Serving)
It is important to consider this information as approximate and not to use it as definitive health advice.
Allergy Information
Please check ingredients for potential allergens and consult a health professional if in doubt.

Leave a Comment