
Chocolate Peanut Butter Cookies – the very name evokes a feeling of pure culinary bliss, doesn’t it? As an avid baker and a connoisseur of all things sweet and satisfying, I can confidently say that few treats capture hearts quite like this iconic combination. Imagine sinking your teeth into a cookie that delivers the perfect harmony of rich, decadent chocolate and the creamy, salty allure of peanut butter. It’s more than just a dessert; it’s a symphony of flavors and textures designed to bring instant joy.
The fascinating journey of peanut butter and chocolate becoming such a beloved pairing is deeply woven into the fabric of American comfort food. What began as an innovative combination in confectionery quickly evolved into a staple for home bakers, transforming simple ingredients into something extraordinary. I believe people adore these cookies not just for their delightful taste—the chewy texture, the sweet-and-salty balance—but also for the profound sense of nostalgia they often bring. They are the quintessential crowd-pleaser, perfect for a cozy evening at home or a lively gathering with friends.
You’ll discover why these Chocolate Peanut Butter Cookies stand out as a timeless classic. They offer an accessible way to create a genuinely impressive dessert that satisfies even the most discerning sweet tooth. Get ready to bake a batch that will undoubtedly become a new favorite in your repertoire!

Ingredients:
- Unsalted Butter: 1 cup (2 sticks), softened to true room temperature. This is crucial for proper creaming, usually taking about 30-60 minutes out of the refrigerator, or until it yields slightly when pressed but isn’t melted or greasy.
- Granulated Sugar: 1 cup (200g).
- Packed Light Brown Sugar: 1 cup (220g). Make sure to pack it firmly into the measuring cup for an accurate quantity.
- Creamy Peanut Butter: 1 cup (250g). I always opt for a classic, processed creamy peanut butter (like Jif or Skippy) for these cookies. Natural peanut butter, with its varying oil content, can sometimes lead to a different texture in baked goods, so for consistency in these Chocolate Peanut Butter Cookies, the conventional kind is my go-to.
- Large Eggs: 2, also at room temperature. Room temperature eggs emulsify better with the butter and sugar mixture, creating a smoother dough.
- Pure Vanilla Extract: 1 teaspoon. A good quality vanilla really enhances the flavor profile.
- All-Purpose Flour: 2 ½ cups (300g). I recommend measuring your flour by lightly spooning it into a measuring cup and then leveling it off with a straight edge, rather than scooping directly from the bag, which can compact the flour and lead to too much.
- Baking Soda: 1 teaspoon. This helps with the lift and spread of our cookies, giving them that delightful chew.
- Fine Sea Salt: ½ teaspoon. Salt is a flavor enhancer and balances the sweetness, making the chocolate and peanut butter flavors truly sing.
- Semi-Sweet Chocolate Chips or Chunks: 1 ½ cups (about 250g). Feel free to use your favorite kind of chocolate here – semi-sweet offers a lovely balance, but milk chocolate can add extra creaminess, or dark chocolate a richer contrast.
Phase 1: Preparing Your Kitchen and Gathering Ingredients for Chocolate Peanut Butter Cookies
Before we dive into mixing up these magnificent Chocolate Peanut Butter Cookies, it’s absolutely essential to get our kitchen set up for success. Baking, in many ways, is a science, and proper preparation can make all the difference in the world between a good cookie and an extraordinary one. Trust me, these small steps save you time and frustration later on!
First things first, let’s preheat our oven. Turn your oven to 375°F (190°C). Giving your oven ample time to reach and maintain the correct temperature is vital for even baking. If you pop your cookies into a cold or lukewarm oven, they won’t bake properly, often resulting in unevenly cooked or dense cookies. I usually give my oven at least 15-20 minutes after it signals it’s preheated to ensure it’s truly at the target temperature. You can even invest in an oven thermometer for ultimate precision, which can be a real game-changer.
Next, grab two large baking sheets. Line both of them with parchment paper or silicone baking mats. This isn’t just about preventing sticking; it also promotes even baking and makes for super easy cleanup. Plus, your cookies will slide right off without any fuss! If you don’t have parchment or silicone mats, you can lightly grease your baking sheets, but the former options are truly superior for consistent results with Chocolate Peanut Butter Cookies.
Now, let’s talk about those room temperature ingredients. I mentioned them in the ingredient list, but it’s worth reiterating their importance. Your butter should be soft enough that you can press a finger into it and leave an indentation without it feeling greasy or melted. If your butter is too cold, it won’t cream properly with the sugars, leading to a denser cookie. If it’s too warm, your dough might become greasy, and the cookies could spread too much. Similarly, room temperature eggs emulsify much better with the fat and sugar, creating a smoother, more homogenous dough and a more consistent texture in the final Chocolate Peanut Butter Cookies. If you forgot to take them out, a quick trick is to place the eggs in a bowl of warm (not hot!) water for 5-10 minutes.
Finally, measure out all your ingredients before you start mixing. This practice, known as “mise en place,” ensures you have everything on hand and in the correct quantities. It streamlines the entire process, reduces stress, and minimizes the chance of forgetting an ingredient or making a mistake mid-recipe. Having all your dry ingredients whisked together, your wet ingredients ready, and your chocolate chips measured means you can focus purely on the mixing technique when the time comes. This meticulous preparation is the first secret to baking truly irresistible Chocolate Peanut Butter Cookies.
Phase 2: Crafting the Perfect Peanut Butter Cookie Dough Base
This phase is where the magic truly begins for our Chocolate Peanut Butter Cookies, as we lay the foundational flavors and textures of our cookie dough. The steps here are crucial for achieving that wonderfully soft, chewy, and rich cookie we’re aiming for.
Grab a large mixing bowl, or if you have one, your stand mixer fitted with the paddle attachment. First, we’re going to combine the softened unsalted butter with both the granulated sugar and the packed light brown sugar. Add all of these into your bowl.
Now, it’s time to cream them together. Begin mixing on low speed to prevent the sugars from flying out of the bowl, then gradually increase the speed to medium. You want to beat this mixture for a good 3 to 5 minutes, or until it becomes noticeably light, fluffy, and pale in color. This process is called creaming, and it’s not just about mixing the ingredients; it’s about incorporating air into the butter and sugar. The sugar crystals cut into the butter, creating tiny air pockets. These air pockets are essential because they expand during baking, contributing to the cookies’ tender texture and preventing them from becoming dense. Don’t skimp on this step! It’s one of the most important for light and airy Chocolate Peanut Butter Cookies.
Once your butter and sugar mixture is beautifully light and fluffy, it’s time to introduce the star flavor: peanut butter. Add the entire cup of creamy peanut butter to the bowl. Continue to beat on medium speed for another 1 to 2 minutes, or until the peanut butter is thoroughly combined and evenly distributed throughout the mixture. You want a smooth, homogenous base. Make sure to scrape down the sides of the bowl with a rubber spatula periodically to ensure everything is getting incorporated. We want every bit of that delicious peanut butter flavor in every bite of our Chocolate Peanut Butter Cookies.
Next up are the eggs and vanilla. Add the two room temperature large eggs, one at a time, beating well after each addition. After adding the first egg, mix until it’s fully incorporated into the dough, then add the second and repeat. Be sure to scrape down the sides of the bowl once more to catch any stray bits. Finally, pour in the pure vanilla extract. Beat for another 30 seconds to a minute until the vanilla is fully mixed in. The mixture should now look creamy, cohesive, and incredibly inviting. It’s starting to smell amazing already, isn’t it? This smooth, rich base is what will make our Chocolate Peanut Butter Cookies so wonderfully decadent.
Phase 3: Incorporating Dry Ingredients and Chocolate Goodness for Our Chocolate Peanut Butter Cookies
We’ve built a wonderfully rich and creamy base for our Chocolate Peanut Butter Cookies; now it’s time to add structure and, of course, the glorious chocolate! This phase requires a gentle hand to ensure the perfect texture in your finished cookies.
In a separate medium-sized bowl, we’re going to prepare our dry ingredients. Add the all-purpose flour, baking soda, and fine sea salt. Take a whisk and whisk these ingredients together thoroughly for about 30 seconds to 1 minute. The goal here is to evenly distribute the baking soda and salt throughout the flour. This ensures that the leavening agent (baking soda) works consistently across the entire batch of cookies and that the salt’s flavor-enhancing properties are present in every bite. An uneven distribution can lead to pockets of saltiness or inconsistent rising in your Chocolate Peanut Butter Cookies, so don’t skip this quick whisking step.
Now, with your stand mixer on low speed, or by hand if you’re using a large bowl and a sturdy wooden spoon or spatula, begin adding the dry ingredient mixture to the wet mixture in three separate additions. Add about a third of the flour mixture, mix on low speed just until it’s barely combined, then add the next third, and finally the last third. The key here is to mix just until the flour streaks disappear. Overmixing the flour will develop the gluten too much, resulting in tough, dry, and less tender Chocolate Peanut Butter Cookies. We want a soft, tender crumb, so a light hand is best. As soon as you see no more dry flour pockets, stop mixing.
This next part is arguably the most exciting: adding the chocolate! Gently fold in the 1 ½ cups of semi-sweet chocolate chips or chunks. I prefer using a rubber spatula for this step. Fold them in until they are evenly distributed throughout the cookie dough. Be careful not to overmix here either, as vigorously stirring at this stage can also contribute to overdeveloping the gluten. If you prefer, you can even save a small handful of chocolate chips to press onto the tops of the cookie dough balls before baking, which gives them a more aesthetically pleasing, “chocolatey” look fresh out of the oven.
The dough for your Chocolate Peanut Butter Cookies should now be thick, slightly sticky, and absolutely studded with chocolate. It will smell incredibly appealing and will be a testament to the deliciousness that’s about to unfold!
Phase 4: Shaping and Preparing Your Chocolate Peanut Butter Cookies for Baking
With our glorious dough for Chocolate Peanut Butter Cookies ready, it’s time to transform it into individual portions, ready for the oven. This stage is all about consistency and presentation, which ultimately affects how evenly your cookies bake and how appealing they look.
Firstly, some bakers swear by chilling the dough at this point. While not strictly mandatory for these Chocolate Peanut Butter Cookies, if you have the time, a chill in the refrigerator for 30 minutes to an hour can definitely be beneficial. Chilling the dough solidifies the fats, which helps prevent the cookies from spreading too much in the oven, leading to a thicker, chewier cookie. It also allows the flavors to meld and deepen. If you do chill the dough, you might need to let it sit at room temperature for a few minutes before scooping, as it will be quite firm.
Now, let’s talk about portioning. The best way to ensure uniform Chocolate Peanut Butter Cookies is by using a cookie scoop. I typically use a 1.5-tablespoon capacity scoop (a standard ice cream scoop size often found for cookies). Scooping the dough ensures that each cookie is roughly the same size, which means they will all bake at a similar rate, preventing some from being underbaked while others are overbaked. If you don’t have a scoop, you can use two spoons, but try to be as consistent as possible.
Once scooped, gently roll each portion of dough between your palms to form a smooth ball. This helps to create a more appealing, rounded shape for your Chocolate Peanut Butter Cookies. Place the dough balls onto your prepared baking sheets, leaving about 2 inches of space between each one. These cookies will spread, so giving them ample room is essential to prevent them from merging into one giant cookie blob!
Now for the classic peanut butter cookie signature: the crosshatch pattern. Take a fork and gently press down on the top of each dough ball, first in one direction, and then rotate the fork 90 degrees and press again to create a crisscross pattern. This isn’t just for aesthetics; it also helps to flatten the cookies slightly, encouraging even spreading and baking, and provides those lovely crevices for a slightly crispier edge. Be gentle, you don’t want to flatten them completely, just indent them enough to make the pattern visible. This iconic mark instantly signals that these are indeed delicious peanut butter cookies, further enhanced by the chocolate we’ve added!
Once all your dough balls are shaped and adorned with their fork marks, your baking sheets are ready to go into the preheated oven. You’ve done all the hard work; now the oven will do the rest!
Phase 5: Baking Your Delicious Chocolate Peanut Butter Cookies to Perfection
The moment of truth is here! Your perfectly shaped and prepped Chocolate Peanut Butter Cookies are ready to enter the warmth of your oven. This stage is relatively hands-off, but knowing what to look for will ensure you pull out perfectly baked, irresistibly chewy treats.
Carefully place one baking sheet at a time into your preheated 375°F (190°C) oven. If your oven has multiple racks, place the first sheet on the middle rack. This position usually offers the most consistent heat circulation, leading to even baking for your Chocolate Peanut Butter Cookies. If you’re baking two sheets at once, place one on the upper-middle rack and the other on the lower-middle rack, ensuring there’s still good airflow around them. About halfway through the baking time, you’ll want to rotate and swap the sheets – moving the top one to the bottom and vice-versa, and rotating them 180 degrees – to ensure uniform baking across all your cookies. Every oven is a little different, and hot spots are common, so this rotation helps prevent some cookies from browning more quickly than others.
The baking time for these Chocolate Peanut Butter Cookies will typically be between 9 to 12 minutes. However, the exact time can vary depending on your oven and the size of your cookies, so it’s essential to watch them closely. Don’t rely solely on the timer; use your senses!
Here’s what you’re looking for to determine doneness:
- Edges: The edges of the cookies should appear lightly golden brown and set. This indicates they’re cooked through and have developed that lovely crisp texture around the perimeter.
- Centers: The centers of the cookies should still look slightly pale and appear soft or even a tiny bit underbaked. This is the secret to a wonderfully chewy Chocolate Peanut Butter Cookie. As they cool, the residual heat will continue to cook them, firming up the centers without making them dry. If you wait until the centers are fully set and golden in the oven, they will likely be overbaked and crumbly once cooled.
- Puffs: They should have puffed up nicely, and the crosshatch pattern should still be visible, though slightly softened.
When you see these signs, carefully remove the baking sheet from the oven. Resist the urge to overbake! A slightly underbaked cookie is often a perfectly chewy cookie, whereas an overbaked one quickly turns dry and hard. If you’re unsure, it’s better to pull them out a minute early rather than leave them in too long. The chocolate chips will be melty and glistening, which is exactly what we want.
Allow the cookies to remain on the hot baking sheet for 5 to 10 minutes. This brief resting period is incredibly important. Freshly baked cookies are very delicate, and trying to move them too soon can cause them to break apart. During this time, the residual heat from the baking sheet continues to cook the cookies gently, helping them to set up and become firmer, making them much easier to transfer later. This patience is key to maintaining the perfect shape and texture of your Chocolate Peanut Butter Cookies.
Phase 6: Cooling and Enjoying Your Homemade Chocolate Peanut Butter Cookies
You’re almost there! The tantalizing aroma of your freshly baked Chocolate Peanut Butter Cookies is filling your kitchen, and the hardest part—waiting—is about to begin. But a little patience now will be richly rewarded with the most delightful texture and flavor.
As mentioned in the previous phase, your cookies have been resting on the baking sheets for about 5 to 10 minutes. This crucial period has allowed them to firm up slightly, making them much more manageable. Now it’s time to move them to a wire cooling rack. Using a sturdy, wide metal spatula, gently transfer the warm Chocolate Peanut Butter Cookies from the baking sheet to the cooling rack. Arrange them in a single layer, ensuring there’s space between each cookie for air to circulate freely. This open-air cooling is important because it allows the cookies to cool completely and evenly, preventing them from becoming soggy on the bottom due to trapped heat and moisture. A wire rack is truly indispensable for achieving that perfect crisp edge and chewy center.
Allow the Chocolate Peanut Butter Cookies to cool completely on the wire rack. Depending on the ambient temperature and humidity in your kitchen, this can take anywhere from 30 minutes to an hour, or even longer. While it’s incredibly tempting to devour them warm (and a warm cookie straight from the oven is a beautiful thing!), completely cooled cookies have a more developed flavor and a firmer, more stable texture. The chocolate will set, and the peanut butter flavor will truly shine through without being overpowered by heat. If you bite into them too soon, the centers might still be a bit too soft and crumbly.
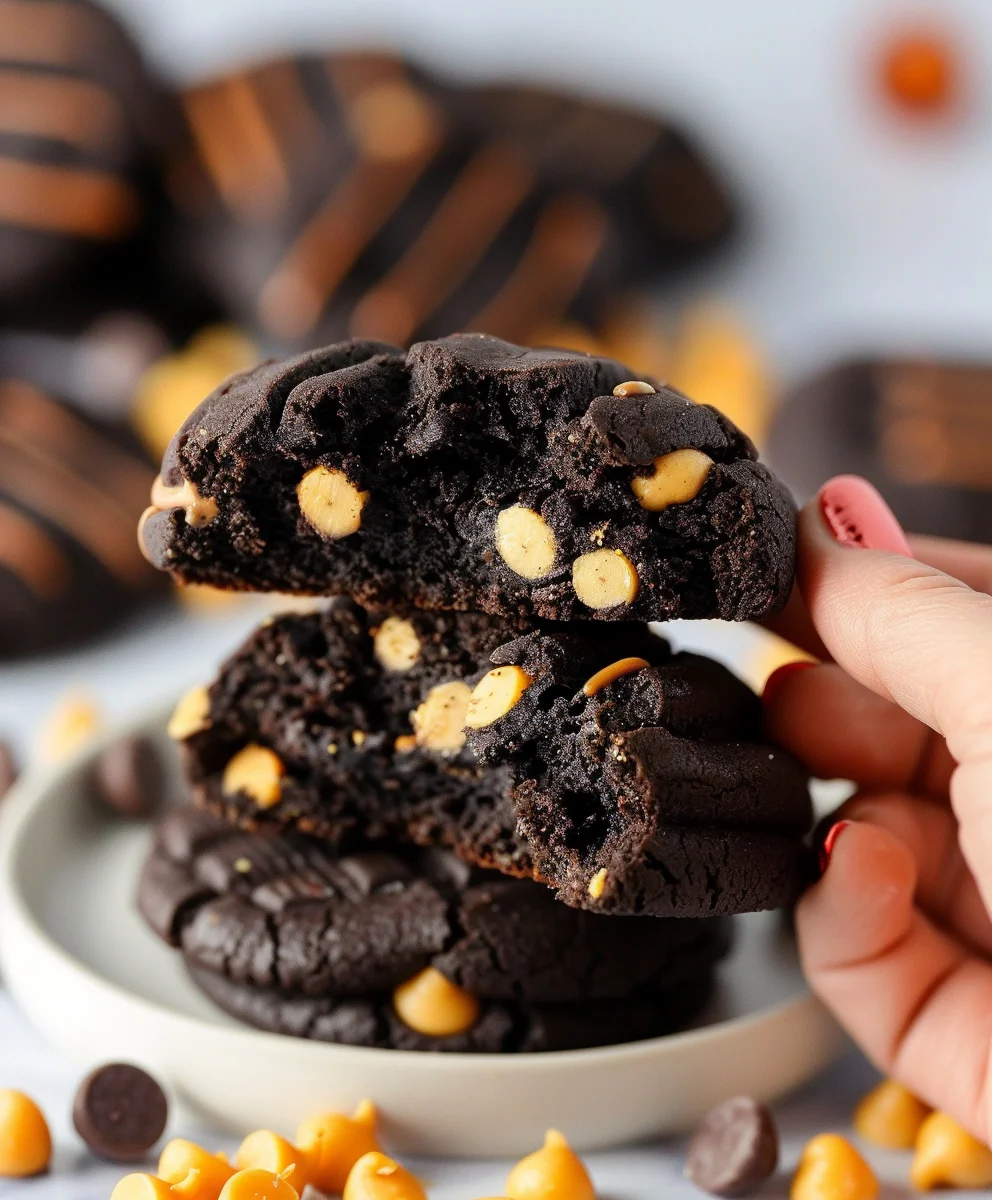
Once fully cooled, your Chocolate Peanut Butter Cookies are ready to be enjoyed! Grab a tall glass of cold milk, a cup of coffee, or simply savor them on their own. These cookies are absolutely fantastic for an afternoon treat, a lunchbox surprise, or a comforting dessert after dinner. Their rich peanut butter base, combined with gooey pockets of semi-sweet chocolate, creates an irresistible flavor combination that appeals to almost everyone.
For storage, if by some miracle you have any left, place your cooled Chocolate Peanut Butter Cookies in an airtight container at room temperature. They will stay fresh and delicious for up to 3-5 days. To maintain their freshness and chewy texture, you can even place a slice of bread inside the container with the cookies; the bread will help keep them soft by providing moisture. If you want to keep them for longer, these cookies also freeze exceptionally well. Place them in a single layer on a baking sheet and freeze until solid, then transfer them to a freezer-safe bag or container for up to 2-3 months. Just let them thaw at room temperature when you’re ready to enjoy them again.
There you have it – the ultimate guide to baking your very own batch of perfectly chewy, deeply flavorful, and utterly delightful Chocolate Peanut Butter Cookies. Happy baking!
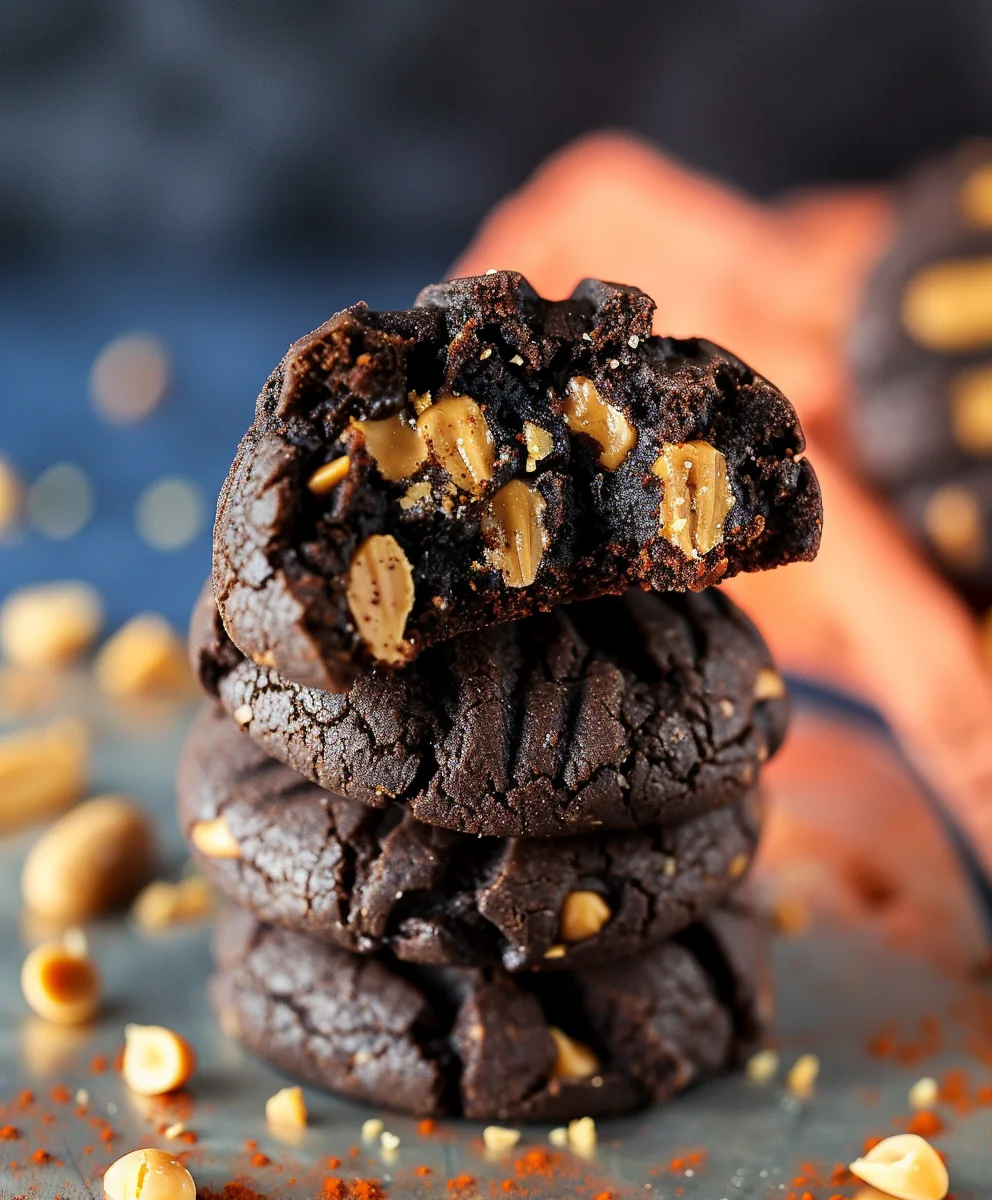
Conclusion:
So, there you have it, my friends! We’ve journeyed through the simple steps to create something truly magical in your own kitchen. I genuinely believe that these aren’t just any cookies; they are an experience, a moment of pure, unadulterated bliss waiting to happen. What makes this particular recipe for Chocolate Peanut Butter Cookies an absolute must-try, you ask? Well, it’s the symphony of flavors, for starters – that perfect harmony where the rich, melt-in-your-mouth chocolate meets the creamy, salty embrace of peanut butter. It’s a classic combination, yes, but one that, when executed correctly, transports you to a place of ultimate comfort and satisfaction. Think about that first bite: the slight crispness on the outside yielding to a wonderfully chewy, gooey center, brimming with pockets of melted chocolate and the unmistakable, comforting taste of peanut butter. It’s not just a snack; it’s a mood booster, a perfect pick-me-up for any time of day. This recipe is incredibly forgiving, making it perfect for both seasoned bakers and those just starting their culinary adventures. You don’t need fancy equipment or a pastry chef’s degree to achieve bakery-quality results right in your own home. Trust me, the aroma alone as these bake will have your whole household gathered in anticipation, making it a truly communal, heartwarming event. These cookies really hit that sweet spot, satisfying every craving with their perfect balance of salty and sweet.
Now that you’ve mastered the art of baking these delightful treats, let’s talk about enjoying them! While they are absolutely divine straight from the cooling rack (once they’ve cooled enough not to burn your tongue, of course!), there are countless ways to elevate your cookie experience. For a classic pairing, a tall glass of cold milk is simply unbeatable – the perfect contrast to the rich, chewy cookie. If you’re a coffee or tea lover, a warm cup of your favorite brew makes for an exquisite afternoon indulgence, providing a cozy counterpoint to the cookie’s sweetness. Feeling a little more adventurous? Try crumbling one over a scoop of vanilla bean ice cream for an instant dessert transformation, creating a textural wonderland of creamy and chewy. You could even create elegant mini ice cream sandwiches by pressing a scoop of your favorite frozen treat between two cooled cookies. Don’t forget, these cookies also make fantastic edible gifts; beautifully packaged in a decorative tin or cellophane bag, they are sure to bring a smile to anyone’s face. They are perfect for school lunchboxes, office treats, or as a welcome addition to any dessert platter at your next gathering. I’ve even been known to enjoy one for breakfast with my coffee – hey, who’s judging? They truly are versatile!
One of the best things about a beloved recipe like this is how easily it lends itself to creative variations. Once you’ve got the basic recipe down, feel free to experiment! For an extra layer of crunch, consider adding a handful of chopped roasted peanuts or pecans to the dough. If you’re a serious chocolate enthusiast, swap out some of the semi-sweet chips for dark chocolate chunks, or even a mix of milk and white chocolate for a different flavor profile. Miniature Reese’s Peanut Butter Cups, chopped into smaller pieces and folded into the dough, would also be an incredible addition, doubling down on that iconic flavor combination. For those who enjoy a hint of spice, a tiny pinch of cayenne pepper or chili powder could add a surprising, yet delightful, warmth to the chocolate – a popular trick to enhance chocolate’s depth. You could also try making them into sandwich cookies, filling them with extra peanut butter frosting or a simple cream cheese glaze. And for a truly decadent treat, dip half of a cooled cookie into melted dark chocolate, allowing it to set before serving. The possibilities are truly endless, limited only by your imagination!
So, my dear readers, I implore you: don’t just read about these amazing cookies – go make them! Gather your ingredients, preheat your oven, and prepare to fill your home with the most incredible aromas. There’s a special kind of joy that comes from baking something delicious with your own hands, and I promise you, this recipe delivers that joy in spades. Once you’ve taken that first glorious bite, I would absolutely love to hear all about your experience. Did you make any fun variations? What was your favorite serving suggestion? Please, share your stories, your triumphs, and even your funny baking mishaps in the comments section below. Tag me in your photos on social media – I’m always thrilled to see your creations! Your feedback and experiences not only brighten my day but also inspire other home bakers in our wonderful community. So, roll up your sleeves, embrace the sweet journey, and let’s get baking these unforgettable cookies together. Happy baking!
Chocolate Peanut Butter Cookies
Indulge in these irresistible Chocolate Peanut Butter Cookies, a beloved classic that perfectly harmonizes rich, decadent chocolate with creamy, salty peanut butter. This recipe delivers a symphony of flavors and textures, promising instant joy and a profound sense of nostalgia.
Ingredients
-
½ cup (130g) peanut butter
-
1½ cups (150g) powdered sugar
-
1½ ounces whole milk
-
1 teaspoon vanilla extract
-
¼ teaspoon salt
-
2 cups (260g) all-purpose flour
-
¼ cup (25g) unsweetened cocoa powder
-
¼ cup (30g) black cocoa powder
-
1 (3.4oz/110g) box instant chocolate fudge pudding mix, unprepared
-
2 tablespoons (10g) powdered milk
-
½ teaspoon salt
-
¼ teaspoon baking soda
-
1 cup (220g) granulated sugar
-
½ cup (113g) salted butter, softened
-
1 large egg, room temperature
Instructions
-
Step 1
Preheat oven to 375°F (190°C). Line two large baking sheets with parchment paper. Ensure butter and eggs are at room temperature. Measure out all ingredients to streamline the baking process. -
Step 2
In a large mixing bowl, cream softened unsalted butter with granulated sugar and packed light brown sugar for 3-5 minutes until light, fluffy, and pale. Add creamy peanut butter; beat for 1-2 minutes until thoroughly combined. Incorporate eggs one at a time, beating well after each, then mix in pure vanilla extract. -
Step 3
In a separate medium bowl, whisk together all-purpose flour, baking soda, and fine sea salt. Gradually add the dry mixture to the wet ingredients in three additions, mixing on low speed just until flour streaks disappear. Gently fold in semi-sweet chocolate chips or chunks until evenly distributed. -
Step 4
Optionally, chill dough for 30-60 minutes. Use a 1.5-tablespoon cookie scoop to portion dough, then roll into smooth balls. Place dough balls 2 inches apart on prepared baking sheets. Create a classic crosshatch pattern on top of each ball by gently pressing with a fork. -
Step 5
Bake cookies for 9-12 minutes at 375°F (190°C) until edges are lightly golden brown and centers still appear slightly pale and soft. Avoid overbaking. Remove from oven and let rest on the hot baking sheet for 5-10 minutes to set. -
Step 6
After resting, gently transfer the warm cookies to a wire cooling rack to cool completely (30 minutes to 1 hour or longer). Once fully cooled, store in an airtight container at room temperature for 3-5 days. For longer storage, cookies can be frozen for up to 2-3 months.
Important Information
Nutrition Facts (Per Serving)
It is important to consider this information as approximate and not to use it as definitive health advice.
Allergy Information
Please check ingredients for potential allergens and consult a health professional if in doubt.


Leave a Comment