
It was a sun-drenched afternoon in my grandmother’s garden, the air heavy with the scent of blooming hibiscus flowers. I remember sitting on her porch, the warm breeze tousling my hair, as she sliced into a tray of her legendary lemon bars. But these weren’t just any lemon bars; they were infused with the vibrant, floral notes of hibiscus. The first bite was pure magic—tart yet sweet, with a delicate hint of floral that danced on my palate. That day, I learned that food could carry not just flavors, but memories and love, too.
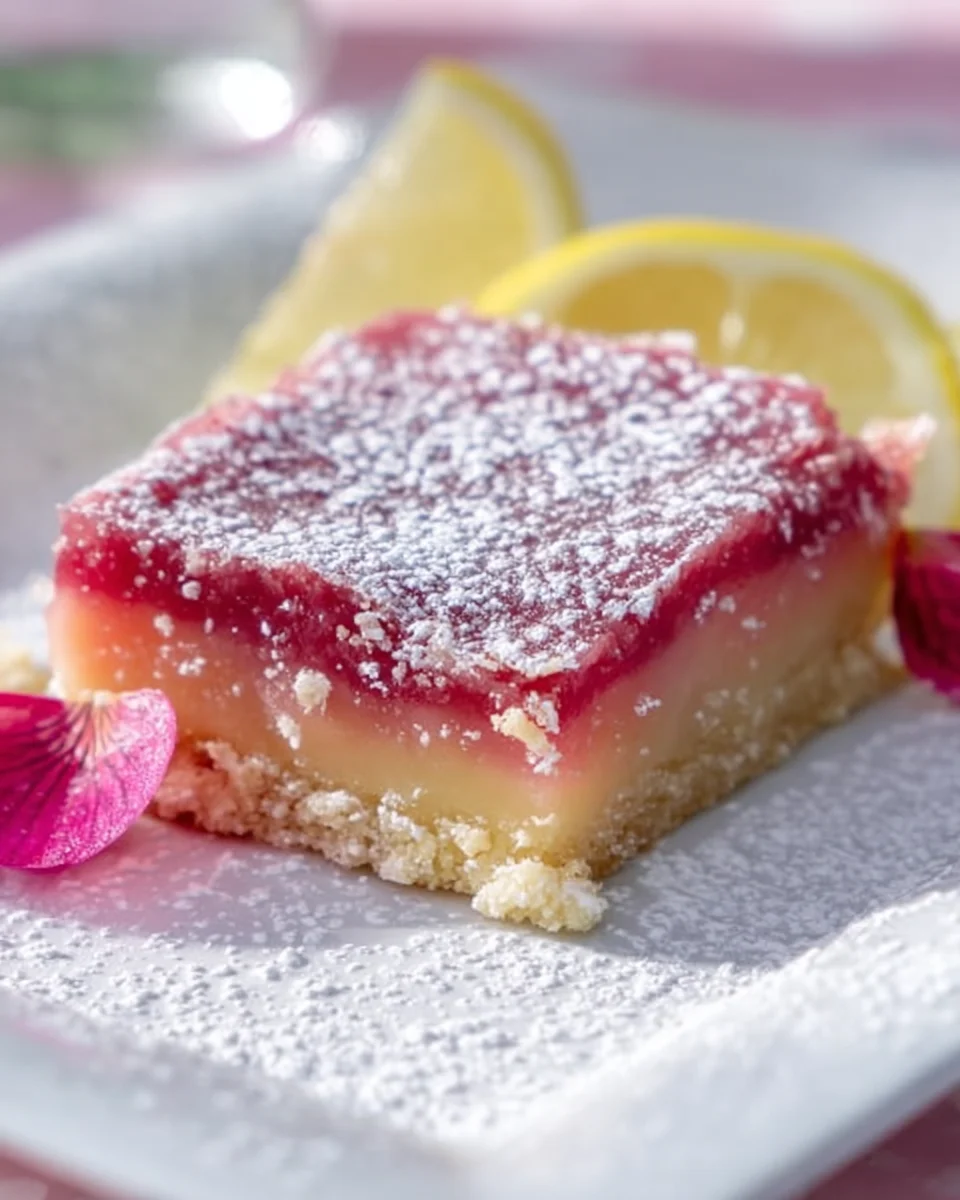
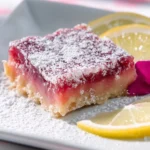
My Hibiscus Lemon Bars are a tribute to that cherished time. Imagine a buttery, crumbly crust that cradles a luscious, creamy filling, tinted a soft pink from the hibiscus infusion. The zesty aroma of fresh lemons mingles with the floral fragrance, inviting you to take a bite. The tartness of the lemon is perfectly balanced by the subtle sweetness of the hibiscus, creating a delightful explosion of flavor that will leave you yearning for more.
This recipe is special to me because it combines nostalgia with a unique twist, transforming a classic dessert into something extraordinary. The hibiscus not only adds a beautiful hue but also enriches the flavor profile, making each bar a little piece of sunshine and comfort. Now, let me show you exactly how to make these delightful Hibiscus Lemon Bars so you can create your own memorable moments.

Why You’ll Love This Recipe
- Infused with the unique flavor of hibiscus, these bars deliver a delightful twist on traditional lemon bars, offering a vibrant color and slightly tart, berry-like taste.
- Each bite has a perfect balance of creamy filling and a buttery shortbread crust that melts in your mouth, providing a satisfying contrast in texture.
- This recipe is quick and easy, taking only about 55 minutes from start to finish, making it perfect for impromptu gatherings or weeknight desserts.
- With common pantry ingredients, it’s budget-friendly and doesn’t require any special tools — just a mixing bowl and a whisk will do!
- These bars can be made ahead of time, allowing the flavors to meld overnight for an even more delicious experience the next day.
Ingredients
- 1/2 cup (1 stick) unsalted butter, room temperature
- 1/4 cup sugar
- 1 cup flour
- Pinch of salt
- 1 tsp vanilla bean paste
- 1/2 cup fresh squeezed lemon juice
- 1 Tbsp dried hibiscus or hibiscus tea
- 3 large eggs
- 1 1/2 cups sugar
- 1/2 cup flour
- Confectioner’s sugar for dusting
Let’s dive into the key ingredients that make these Hibiscus Lemon Bars irresistible. First, the unsalted butter creates a rich, tender crust. Using room temperature butter ensures it incorporates smoothly with sugar, resulting in a perfectly flaky base. If you’re in a pinch, you can substitute with coconut oil for a dairy-free option, though this will slightly alter the flavor.
The hibiscus is the star of the show, providing both color and a unique tartness. When steeped in the lemon juice, it releases its vibrant pigments and deep berry notes. Make sure to choose high-quality dried hibiscus flowers; they should smell fragrant and fruity. If you can’t find dried hibiscus, hibiscus tea bags can serve as a convenient alternative — just use the equivalent amount of tea instead of loose hibiscus.
Step-by-Step Instructions
- Preheat the Oven: Set your oven to 350°F (175°C) to ensure it’s hot and ready. This is crucial as you want your crust to bake evenly.
- Cream the Butter and Sugar: In a mixing bowl, combine 1/2 cup of room temperature unsalted butter, 1/4 cup sugar, and 1 tsp vanilla bean paste. Use a stand mixer and cream until light and fluffy, about 2-3 minutes. This step adds air, which helps achieve a tender crust.
- Add Dry Ingredients: Gradually mix in 1 cup of flour and a pinch of salt until just combined. Avoid overmixing to prevent a tough crust. The dough should be crumbly yet hold together when pressed.
- Press into Baking Pan: Lightly flour your fingers to prevent sticking, then press the dough evenly into a 9×9-inch baking pan. Chill in the refrigerator for 15 minutes to firm up the dough, which helps prevent it from shrinking during baking.
- Bake the Crust: Bake the crust for 15 minutes until it’s just lightly browned around the edges. Keep an eye on it to ensure it doesn’t become too dark. Remove it from the oven and let it cool slightly while you prepare the filling.
- Prepare the Hibiscus Lemon Juice: In a bowl, stir 1 Tbsp of dried hibiscus into 1/2 cup of fresh squeezed lemon juice and let it sit for 15 minutes. The juice will turn a lovely dark pink color. Strain the mixture to discard the hibiscus, retaining the infused juice.
- Mix the Filling: In another mixing bowl, whisk together 3 large eggs and 1 1/2 cups sugar until well blended, about 2 minutes. Then, add the strained hibiscus lemon juice and mix until combined. Finally, blend in 1/2 cup flour until smooth.
- Pour and Bake: Pour the filling over the cooled crust, smoothing it out with a spatula. Return the pan to the oven and bake for another 20-25 minutes, until the center is set and no longer jiggly. You want the filling to be slightly firm to the touch.
- Cool and Slice: Allow the bars to cool completely in the pan. Once cooled, dust the top with confectioner’s sugar for a beautiful finish, and slice into squares. The bars will be easier to cut once they have chilled in the refrigerator for a bit.
Pro Tips for the Best Hibiscus Lemon Bars Recipe
- Don’t Overmix: When combining the crust ingredients, mix just until they come together. Overmixing can create a dense crust rather than a light, flaky one.
- Quality Ingredients Matter: Use fresh lemons for the juice and high-quality dried hibiscus flowers. The flavor and aroma will elevate your bars significantly.
- Use a Sharp Knife: For neat slices, use a sharp knife and wipe it clean between cuts. This prevents the filling from sticking to the blade and makes for a prettier presentation.
- Watch for Doneness: Every oven is different, so keep an eye on the bars during the last few minutes of baking. They should be set but slightly wobbly in the center.
- Chill Before Serving: These bars taste even better after chilling for a few hours or overnight. This allows the flavors to meld and the filling to firm up for a cleaner bite.
Variations & Serving Ideas
- Berry Hibiscus Lemon Bars: Add a handful of fresh berries such as raspberries or blueberries to the filling for added texture and flavor.
- Vegan Option: Substitute eggs with flaxseed meal mixed with water (1 Tbsp flaxseed meal + 3 Tbsp water per egg) and use coconut oil instead of butter for a vegan-friendly version.
- Herbal Infusion: Experiment with other herbal teas, like chamomile or lavender, instead of hibiscus for a different aromatic experience.
For serving suggestions, consider pairing your Hibiscus Lemon Bars with a refreshing mint tea to complement the tartness. A scoop of vanilla ice cream adds a creamy contrast that balances the flavors beautifully. Lastly, a side of fresh fruit salad can enhance the dish, providing a vibrant and healthy accompaniment that echoes the fruity notes of the bars.
Storage, Make-Ahead & Reheating
Store your Hibiscus Lemon Bars in an airtight container in the refrigerator, where they’ll stay fresh for up to 5 days. They can also be frozen for up to 3 months. To freeze, cut them into squares, place them on a parchment-lined baking sheet until firm, then transfer to a freezer-safe container. When ready to enjoy, just thaw in the fridge overnight. These bars actually taste better the next day as the flavors have time to develop and meld together!
Frequently Asked Questions
Can I make Hibiscus Lemon Bars Recipe ahead of time?
Yes — in fact, it tastes even better the next day! Allowing the bars to chill in the refrigerator overnight enhances the flavors and helps the filling set nicely.
What can I use instead of hibiscus?
If you can’t find dried hibiscus, you can substitute with hibiscus tea bags. Just use the same amount of brewed tea in place of the hibiscus and lemon juice mixture.
Can I make these bars gluten-free?
Absolutely! You can substitute the all-purpose flour with a gluten-free flour blend, ensuring it has a good binding agent such as xanthan gum for the best texture.
How do I know when the bars are done baking?
The center should be set and no longer wobbly when gently shaken. It should have a light golden color around the edges while the center remains slightly soft.
How do I prevent the crust from getting too hard?
Make sure not to overbake the crust. It should be just lightly browned; baking it too long can lead to a tough texture. Also, ensure your butter is at room temperature for optimal mixing.
Final Thoughts
These Hibiscus Lemon Bars are truly a delightful fusion of tart and floral flavors that create a refreshing treat perfect for any occasion. The vibrant hibiscus adds a unique twist to the classic lemon bar, making each bite a burst of satisfaction that lingers long after you’ve finished.
This is the kind of recipe I come back to again and again, especially when I’m seeking a light dessert that feels both indulgent and refreshing. The beautiful color and enticing aroma make it a joy to share with friends and family.
I encourage you to give this recipe a try! Whether you stick to the original or put your own spin on it, I would love to hear about your experience. Share your results, and let the world know how you made these hibiscus lemon bars your own!
Delightful Hibiscus Lemon Bars
- Total Time: 55 minutes
- Yield: 16 servings 1x
Description
These Hibiscus Lemon Bars combine the tartness of fresh lemons with the floral notes of hibiscus for a refreshing dessert. Perfectly balanced and easy to make, they are sure to impress at any gathering.
Ingredients
- 1/2 cup (1 stick) unsalted butter, room temperature
- 1/4 cup sugar
- 1 cup flour
- Pinch of salt
- 1 tsp vanilla bean paste
- 1/2 cup fresh squeezed lemon juice
- 1 Tbsp dried hibiscus or hibiscus tea
- 3 large eggs
- 1 1/2 cups sugar
- 1/2 cup flour
- Confectioner's sugar for dusting
Instructions
- Preheat the Oven: Set your oven to 350°F (175°C) to ensure it’s hot and ready.
- Cream the Butter and Sugar: In a mixing bowl, combine 1/2 cup of room temperature unsalted butter, 1/4 cup sugar, and 1 tsp vanilla bean paste. Use a stand mixer and cream until light and fluffy, about 2-3 minutes.
- Add Dry Ingredients: Gradually mix in 1 cup of flour and a pinch of salt until just combined. Avoid overmixing.
- Press into Baking Pan: Lightly flour your fingers to prevent sticking, then press the dough evenly into a 9×9-inch baking pan. Chill in the refrigerator for 15 minutes.
- Bake the Crust: Bake the crust for 15 minutes until it’s just lightly browned around the edges. Remove it from the oven and let it cool slightly.
- Prepare the Hibiscus Lemon Juice: In a bowl, stir 1 Tbsp of dried hibiscus into 1/2 cup of fresh squeezed lemon juice and let it sit for 15 minutes. Strain the mixture to discard the hibiscus.
- Mix the Filling: In another mixing bowl, whisk together 3 large eggs and 1 1/2 cups sugar until well blended. Add the strained hibiscus lemon juice and mix until combined. Blend in 1/2 cup flour until smooth.
- Pour and Bake: Pour the filling over the cooled crust, smoothing it out with a spatula. Return the pan to the oven and bake for another 20-25 minutes.
- Cool and Slice: Allow the bars to cool completely in the pan. Dust the top with confectioner's sugar and slice into squares.
- Prep Time: 15 mins
- Cook Time: 40 mins
- Category: Dessert
- Method: Baking
- Cuisine: American
Nutrition
- Serving Size: 1 bar
- Calories: 150
- Sugar: 20 g
- Sodium: 50 mg
- Fat: 7 g
- Saturated Fat: 4 g
- Unsaturated Fat: 2 g
- Trans Fat: 0 g
- Carbohydrates: 22 g
- Fiber: 1 g
- Protein: 2 g
- Cholesterol: 50 mg
Keywords: Don’t overmix the crust ingredients to avoid a dense texture. Use fresh lemons and high-quality dried hibiscus for the best flavor.

Leave a Comment