
Crispy Chicken Ranch Wrap – just hearing those words evokes a sense of delicious anticipation, doesn’t it? Imagine sinking your teeth into a perfectly crafted handheld meal where every bite delivers an exciting medley of textures and flavors. This isn’t merely a lunch option; it’s a culinary experience that has rapidly ascended to cult-favorite status in kitchens and eateries worldwide.
While the concept of wrapping ingredients for a convenient meal boasts ancient roots across various cultures, the modern rendition, particularly one starring succulent crispy chicken and the universally adored ranch dressing, represents a truly triumphant evolution of comfort food. It speaks to our contemporary desire for dishes that are both incredibly satisfying and wonderfully practical.
Why do people absolutely adore this creation? It’s the exquisite balance: the irresistible crunch of golden-brown chicken, perfectly contrasted by the fresh crispness of lettuce and the vibrant juiciness of tomatoes. All these delightful elements are harmoniously brought together by the cool, tangy, and herby notes of a creamy ranch dressing, lovingly enfolded within a soft, pliable tortilla. This delightful fusion of familiar and comforting flavors makes the Crispy Chicken Ranch Wrap a go-to choice for busy weeknights, casual lunches, or whenever a truly satisfying and flavorful meal is desired. It’s an easy-to-love classic that promises a burst of joy in every single bite.

Ingredients:
- Two (2) boneless, skinless chicken breasts (approximately 6-8 ounces each), ideally pounded to an even ½-inch thickness. This ensures quicker, more consistent cooking and tenderness, leading to those perfectly juicy chicken pieces we’re after.
- One (1) cup all-purpose flour, for dredging. This is our first layer, essential for helping the egg wash adhere evenly.
- Two (2) large eggs, beaten with one tablespoon of water or milk. This creates the “glue” that binds our crispy coating to the chicken.
- One and a half (1½) cups Panko breadcrumbs. I absolutely love Panko for its superior crunch factor compared to regular breadcrumbs; it’s key to achieving that ultimate crispiness.
- One (1) teaspoon garlic powder. We’ll mix this into our flour for an extra layer of flavor.
- One (1) teaspoon onion powder. Another fantastic aromatic to infuse our chicken with savory goodness.
- One (1) teaspoon paprika. Adds a beautiful color and a mild, sweet pepper flavor to the chicken.
- One-half (½) teaspoon cayenne pepper (optional, but highly recommended if you enjoy a little kick!). A pinch of heat really elevates the flavor profile.
- Salt and freshly ground black pepper, to taste. Season generously at each stage for maximum flavor.
- Two (2) to three (3) cups vegetable oil, canola oil, or peanut oil, for frying. Choose an oil with a high smoke point that’s neutral in flavor.
- Four (4) large (10-inch) flour tortillas. Fresh, pliable tortillas are essential for a good wrap – sometimes warming them slightly can make them more cooperative.
- One-half (½) cup ranch dressing. This is the heart of our wrap’s flavor; a good quality, creamy ranch makes all the difference. Feel free to use your favorite store-bought brand or even a homemade version if you’re feeling ambitious!
- One (1) cup shredded iceberg or romaine lettuce. We want that refreshing crunch to balance the richness of the chicken and ranch.
- One (1) ripe tomato, thinly sliced or diced. Fresh, juicy tomatoes add a burst of acidity and color.
- One-half (½) cup shredded cheddar cheese, Monterey Jack, or a blend. Cheese adds another layer of flavor and creamy texture, complementing the other ingredients beautifully.
- One-quarter (¼) cup red onion, thinly sliced (optional, but fantastic for a sharp, fresh bite). If you find raw red onion too strong, you can soak it in ice water for 10 minutes to mellow its flavor.
- Fresh cilantro or parsley, chopped (optional, for garnish and added freshness). A little sprinkle of herbs brightens everything up.
Preparing the Crispy Chicken
This is where we lay the foundation for our incredibly delicious Crispy Chicken Ranch Wrap. Achieving truly crispy, flavorful chicken is a process worth savoring, and I promise, the effort will pay off big time!
-
Pound the Chicken to Perfection: First things first, let’s get our chicken ready. Place each chicken breast between two sheets of plastic wrap or in a large resealable plastic bag. Using a meat mallet or the bottom of a heavy skillet, pound the chicken breasts until they are an even ½-inch thickness. This step is crucial not only for tenderness but also for ensuring the chicken cooks quickly and uniformly, preventing dry spots and promoting even crispiness on the outside. Aim for consistency across the entire breast. Once pounded, pat them thoroughly dry with paper towels. Removing excess moisture is a secret weapon for achieving a truly crispy coating.
-
Set Up Your Breading Station: Now, let’s create our magical crispy coating. Prepare three shallow dishes or pie plates.
- In the first dish, combine the all-purpose flour with the garlic powder, onion powder, paprika, cayenne pepper (if using), ½ teaspoon of salt, and ¼ teaspoon of black pepper. Whisk these together until everything is well combined. This seasoned flour is our initial layer, crucial for flavor and for giving the egg wash something to cling to.
- In the second dish, whisk the two large eggs with a tablespoon of water or milk until well combined and slightly frothy. This is our binding agent, ensuring our Panko breadcrumbs stick perfectly.
- In the third dish, spread out the Panko breadcrumbs. This will be our ultimate crispiness provider.
-
Bread the Chicken with Care: Take one pounded chicken breast and dredge it completely in the seasoned flour, ensuring every surface is coated. Gently shake off any excess flour – we want a thin, even layer, not a thick pasty one. Next, immerse the floured chicken breast into the egg wash, turning to coat both sides. Let any excess egg drip off before transferring it to the Panko breadcrumbs. Now, this is the fun part! Press the chicken firmly into the Panko, ensuring the breadcrumbs adhere to every nook and cranny. Flip it over and repeat, pressing gently but firmly so you have a thick, even coating of Panko. Don’t be shy; really get those crumbs on there! Place the breaded chicken on a clean plate or a wire rack set over a baking sheet and repeat the process with the second chicken breast. If you have time, let the breaded chicken rest in the refrigerator for 15-20 minutes. This little chill time helps the coating adhere even better during frying.
-
Prepare for Frying (or Baking):
Deep Frying Method (for ultimate crispiness):
Pour the vegetable, canola, or peanut oil into a large, heavy-bottomed skillet or Dutch oven until it reaches a depth of about 1½ to 2 inches. Heat the oil over medium-high heat until it reaches 350-375°F (175-190°C). If you don’t have a thermometer, you can test the oil by dropping a tiny pinch of Panko into it; if it sizzles vigorously and turns golden within 30 seconds, it’s ready. Maintaining the correct oil temperature is paramount for crispy, non-greasy chicken. Too low, and the chicken will absorb oil and become soggy; too high, and the coating will burn before the chicken is cooked through.
Baking Method (a healthier alternative):
If you prefer a lighter option, preheat your oven to 400°F (200°C). Lightly grease a baking sheet or line it with parchment paper. For an even crispier baked chicken, you can place a wire rack on top of the baking sheet and spray it with cooking spray. Place the breaded chicken breasts on the prepared baking sheet or wire rack. Lightly spray the tops of the chicken with cooking spray – this helps achieve that golden, crispy finish. Bake for 20-25 minutes, flipping halfway through, until the internal temperature reaches 165°F (74°C) and the coating is golden brown and crispy. Keep an eye on it to prevent burning.
-
Fry the Chicken: Carefully place one or two breaded chicken breasts into the hot oil, ensuring not to overcrowd the pan. Overcrowding will drop the oil temperature and lead to soggy chicken. Fry for 4-6 minutes per side, or until the chicken is golden brown, deeply crispy, and cooked through, with an internal temperature reaching 165°F (74°C). The cooking time will vary slightly depending on the thickness of your chicken. Use tongs to gently turn the chicken. Once cooked, transfer the crispy chicken to a wire rack set over a baking sheet lined with paper towels. This allows excess oil to drain off and helps maintain that beautiful crispness. Don’t skip the draining step! Repeat with the remaining chicken breasts.
-
Slice the Crispy Chicken: Once all the chicken is cooked and has rested for a couple of minutes, slice each breast into strips or bite-sized pieces. This makes it much easier to distribute evenly within our wraps and ensures every bite gets a piece of that glorious crispy chicken.
Assembling the Crispy Chicken Ranch Wrap
Now for the grand finale! This is where all our delicious components come together to create the perfect Crispy Chicken Ranch Wrap. Get ready to build your masterpiece!
-
Prepare Your Toppings: While your chicken is cooking or resting, take a moment to get all your fresh ingredients ready. Wash and shred your iceberg or romaine lettuce. Thinly slice your ripe tomato, or dice it if you prefer smaller pieces. If using red onion, slice it super thinly – a mandoline can be your best friend here, but a sharp knife works too! Have your shredded cheese ready to go. Having all your components prepped and within reach makes assembly a breeze and much more enjoyable.
-
Warm the Tortillas: This is a small but mighty step that makes a huge difference in the pliability and overall experience of your wrap. You want the tortillas warm enough to be soft and flexible, not brittle.
- Microwave Method: Stack the tortillas and wrap them in a damp paper towel. Microwave for 20-30 seconds, or until warm and flexible.
- Skillet Method: Heat a dry skillet over medium heat. Place one tortilla in the skillet for about 15-20 seconds per side, until it’s warmed through and slightly pliable, with a few small air bubbles appearing. Don’t overcook them, or they’ll become stiff.
- Oven Method: Wrap a stack of tortillas in aluminum foil and warm in a preheated 350°F (175°C) oven for 8-10 minutes.
-
Spread the Ranch Dressing: Lay one warm tortilla flat on a clean surface or a large cutting board. Spread a generous tablespoon or two of ranch dressing evenly over the entire surface of the tortilla, leaving about a ½-inch border around the edges. This ranch layer is critical for both flavor and moisture, acting as the delicious binder for our wrap. Don’t be shy with the ranch; it’s a ranch wrap, after all!
-
Layer Your Ingredients: Now comes the artistic part! We’re building flavor and texture with each layer.
- First, arrange a portion of your sliced crispy chicken pieces down the center of the tortilla, creating a horizontal line across the middle. We want a good amount of chicken in every bite!
- Next, sprinkle a generous handful of shredded lettuce over the chicken. The crispness of the lettuce provides a fantastic contrast to the chicken.
- Then, layer on some tomato slices or diced tomato.
- Follow that with a sprinkle of shredded cheese.
- If you’re using red onion, now’s the time to add a few thin slices for that delightful pungent kick.
- Optionally, add a sprinkle of fresh cilantro or parsley for a burst of herbaceous freshness.
-
The Art of Wrapping: This step can sometimes feel tricky, but with a little practice, you’ll be a wrap-folding pro!
- First, fold in the two opposite sides of the tortilla (the left and right sides, if your ingredients are in a horizontal line) inward, about 1-2 inches over the filling. This creates a neat package and prevents ingredients from spilling out the sides.
- Next, starting from the bottom edge (the edge closest to you), tightly fold the tortilla up and over the filling.
- As you roll, tuck in the filling and maintain a firm, even pressure to create a snug, compact wrap. Roll it all the way up until you reach the top edge. The tighter you roll, the better the wrap will hold together and the less mess you’ll have!
- Repeat this process for the remaining tortillas and fillings.
-
Serve and Enjoy Immediately: Your Crispy Chicken Ranch Wraps are best enjoyed fresh, while the chicken is still warm and crispy, and the vegetables are at their prime. You can cut them in half diagonally for an attractive presentation and easier eating, or simply serve them whole. These wraps make a fantastic lunch, a quick dinner, or even a hearty snack. They’re incredibly satisfying and packed with so many wonderful textures and flavors, from the crunchy chicken to the creamy ranch and crisp veggies. I often serve them with a side of extra ranch for dipping, just because you can never have too much ranch, right? Enjoy every flavorful bite!

Conclusion:
Well, my friends, we’ve reached the end of our culinary journey, and I genuinely hope you’re feeling as excited as I am about this incredible recipe. If there’s one dish I could urge you to add to your rotation immediately, it would undoubtedly be this one. I’m talking about a game-changer, a weeknight hero, and a flavor explosion all wrapped up into one delightful package. What truly sets this recipe apart is its brilliant fusion of textures and tastes. Imagine that satisfying crunch from the perfectly prepared chicken, a beautiful contrast to the soft, warm tortilla. Then, the creamy, tangy ranch dressing ties everything together with a delightful zest, making each bite an absolute joy. It’s more than just a meal; it’s an experience that tantalizes your taste buds and leaves you feeling utterly content.
I’ve made countless recipes over the years, and few have garnered such consistent praise and eager requests for repeats from my family and friends. It’s the kind of dish that disappears quickly, with everyone reaching for a second, or even a third, before you’ve barely had time to put the serving platter down. The simplicity involved in bringing it all together is another huge win. We all have those busy evenings when time is a luxury, but compromising on flavor isn’t an option. This recipe perfectly bridges that gap, allowing you to whip up something truly spectacular without spending hours slaving away in the kitchen. The ingredients are accessible, the steps are straightforward, and the result is nothing short of extraordinary. Trust me when I say this isn’t just another meal; it’s a culinary triumph that will earn you rave reviews and solidify your reputation as a kitchen wizard. It’s comforting, it’s exciting, and frankly, it’s just plain delicious.
Now, let’s talk about making this dish truly your own. While the core recipe for this magnificent Crispy Chicken Ranch Wrap is stellar as written, there are so many ways to customize it to suit your preferences or what you have on hand. For a quick lunch, these wraps are fantastic on their own, but if you’re serving them for dinner, consider pairing them with a vibrant side salad dressed in a light vinaigrette to add a refreshing counterpoint. A bowl of warm, chunky tomato soup or even some seasoned sweet potato fries would also make for an excellent accompaniment, offering a hearty and comforting complete meal. Don’t be afraid to experiment with your dipping sauces either; while the ranch is already integrated, a side of extra zesty ranch, a spicy sriracha mayo, or even a sweet honey mustard can add another layer of flavor.
Thinking about variations? The possibilities are endless! For those looking for a lighter option, you could easily turn this into a lettuce wrap by using large, crisp lettuce leaves instead of tortillas, giving you an extra burst of freshness and reducing the carbs. If chicken isn’t your preferred protein, consider using crispy seasoned tofu or even grilled shrimp for a seafood twist. Feel free to pile in extra veggies – finely diced bell peppers, shredded carrots, or even some fresh spinach or arugula would add fantastic color, crunch, and nutritional value. For a bit of heat, a sprinkle of red pepper flakes in the chicken coating or a few slices of pickled jalapeños inside the wrap will give it a fiery kick. You could also try different types of cheese; while cheddar is classic, a sharp Monterey Jack or a smoky provolone could introduce new dimensions of flavor. Remember, the kitchen is your playground, and these suggestions are merely starting points for your own delicious adventures.
So, what are you waiting for? I wholeheartedly encourage you to roll up your sleeves and give this recipe a try. You won’t regret it, I promise. Once you’ve experienced the sheer deliciousness and ease of preparing your very own Crispy Chicken Ranch Wrap, I have a feeling it will become an instant favorite in your household, just as it has in mine. And when you do make it – because I know you will – please don’t keep your triumph to yourself! I would absolutely love to hear all about your experience. Did you make any fun variations? What did your family think? Share your culinary creations, your photos, and your feedback in the comments section below. Your insights and ideas not only inspire me but also help our growing community of food lovers discover new ways to enjoy these recipes. Let’s make some delicious food and share the joy!

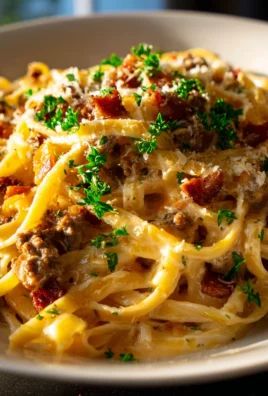
Crispy Chicken Ranch Wrap
Imagine sinking your teeth into a perfectly crafted handheld meal where every bite delivers an exciting medley of textures and flavors. This Crispy Chicken Ranch Wrap is a culinary experience, a triumphant evolution of comfort food that combines golden-brown crispy chicken with fresh lettuce, juicy tomatoes, and creamy ranch dressing, all enfolded in a soft tortilla.
Ingredients
-
2 boneless, skinless chicken breasts (6-8 oz each), pounded to ½-inch thickness
-
1 cup all-purpose flour
-
2 large eggs, beaten with 1 tbsp water or milk
-
1½ cups Panko breadcrumbs
-
1 tsp garlic powder
-
1 tsp onion powder
-
1 tsp paprika
-
½ tsp cayenne pepper (optional)
-
Salt and freshly ground black pepper, to taste
-
2-3 cups vegetable, canola, or peanut oil, for frying
-
4 large (10-inch) flour tortillas
-
½ cup ranch dressing
-
1 cup shredded iceberg or romaine lettuce
-
1 ripe tomato, thinly sliced or diced
-
½ cup shredded cheddar, Monterey Jack, or blend cheese
-
¼ cup red onion, thinly sliced (optional)
-
Fresh cilantro or parsley, chopped (optional)
Instructions
-
Step 1
Pound chicken breasts to an even ½-inch thickness, then pat thoroughly dry. -
Step 2
In Dish 1, combine flour, garlic powder, onion powder, paprika, cayenne (optional), ½ tsp salt, and ¼ tsp pepper. In Dish 2, whisk eggs with water/milk. In Dish 3, spread Panko breadcrumbs. -
Step 3
Dredge each chicken breast in seasoned flour, shake off excess. Dip in egg wash, letting excess drip. Press firmly into Panko breadcrumbs to fully coat. For best results, refrigerate breaded chicken for 15-20 minutes. -
Step 4
{‘@type’: ‘HowToStep’, ‘name’: ‘Cook Chicken (Frying or Baking)’, ‘disambiguatingDescription’: ‘Choose your preferred cooking method for the chicken.’, ‘itemListElement’: [{‘@type’: ‘HowToStep’, ‘name’: ‘Deep Frying (for ultimate crispiness)’, ‘text’: ‘Heat 2-3 cups vegetable, canola, or peanut oil in a large skillet to 350-375°F (175-190°C). Carefully fry chicken for 4-6 minutes per side until golden brown, deeply crispy, and cooked to an internal temperature of 165°F (74°C). Do not overcrowd the pan. Transfer to a wire rack set over paper towels to drain.’}, {‘@type’: ‘HowToStep’, ‘name’: ‘Baking (a healthier alternative)’, ‘text’: ‘Preheat oven to 400°F (200°C). Place breaded chicken on a lightly greased baking sheet or wire rack sprayed with cooking spray. Lightly spray tops of chicken with cooking spray. Bake for 20-25 minutes, flipping halfway through, until golden brown, crispy, and cooked to an internal temperature of 165°F (74°C).’}]} -
Step 5
Once cooked, let chicken rest for a few minutes, then slice into strips or bite-sized pieces. -
Step 6
Shred lettuce, slice/dice tomato, slice red onion (if using), and have shredded cheese ready. Warm flour tortillas using a microwave, skillet, or oven until soft and pliable. -
Step 7
Lay a warm tortilla flat. Spread 1-2 tablespoons of ranch dressing evenly, leaving a ½-inch border. Layer sliced crispy chicken, shredded lettuce, tomato, shredded cheese, red onion (optional), and cilantro/parsley (optional) down the center. -
Step 8
Fold in the two opposite sides of the tortilla (about 1-2 inches) over the filling. Starting from the bottom edge, tightly fold the tortilla up and over the filling, tucking firmly as you roll to create a snug, compact wrap. -
Step 9
Serve Crispy Chicken Ranch Wraps immediately, whole or cut diagonally. Enjoy!
Important Information
Nutrition Facts (Per Serving)
It is important to consider this information as approximate and not to use it as definitive health advice.
Allergy Information
Please check ingredients for potential allergens and consult a health professional if in doubt.


Leave a Comment