
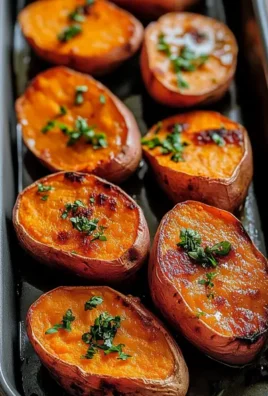
Blooming Onion In Oven might sound like a challenging culinary feat, but I am absolutely thrilled to share a method that transforms this iconic restaurant appetizer into a delightful, homemade reality. Imagine a beautifully fanned, golden-brown onion, each petal perfectly tender on the inside with an incredibly crispy exterior, all achieved without the fuss and mess of deep-frying. This classic dish, often celebrated for its impressive presentation and addictive savory flavor, has long captivated food lovers, becoming a go-to choice for gatherings and special occasions. While its origins are typically tied to popular American steakhouses, making it at home offers a healthier, equally delicious alternative. You’ll discover just how simple it is to achieve that perfect crispness and tenderness right from your own kitchen, truly elevating your appetizer game. My recipe for this amazing Blooming Onion In Oven focuses on convenience without compromising on that irresistible taste and satisfying texture we all adore. It’s a dish that truly excites the senses, promising a show-stopping centerpiece that’s as fun to eat as it is to make.

Ingredients:
-
For the Blooming Onion:
- 1 large (about 1.5-2 pounds) yellow onion, preferably globe-shaped for best results
- 2 cups all-purpose flour, divided
- 2 teaspoons smoked paprika
- 1 teaspoon garlic powder
- 1 teaspoon onion powder
- ½ teaspoon cayenne pepper (adjust to your spice preference for more or less heat)
- 1 teaspoon dried oregano
- 1 teaspoon dried thyme
- 1 teaspoon salt, plus more for seasoning at the end
- ½ teaspoon black pepper, freshly ground
- 1 ½ cups buttermilk, cold
- 2 large eggs, cold
- 1 tablespoon hot sauce (optional, for an extra kick and depth of flavor)
- 2-3 tablespoons olive oil or avocado oil, for drizzling before baking
-
For the Dipping Sauce (my go-to creamy sauce!):
- ½ cup good quality mayonnaise (full-fat for richness and the best texture!)
- ¼ cup sour cream
- 1 tablespoon prepared horseradish (adjust to taste; start with less if you’re unsure about the spice level)
- 1 teaspoon smoked paprika
- ½ teaspoon garlic powder
- ¼ teaspoon cayenne pepper (optional, for a subtle warmth in the sauce)
- ½ teaspoon Worcestershire sauce
- 1 tablespoon fresh chives, finely chopped (optional, for garnish and a fresh oniony note)
- Salt and black pepper to taste
Preparation:
- Preheat Your Oven: My absolute first step is always to set my oven to a robust 400°F (200°C). This high temperature is absolutely key for getting that beautiful, crispy exterior on our “Blooming Onion In Oven” without having to deep-fry it. While the oven preheats, I like to place a large baking sheet, preferably lined with parchment paper or a silicone mat, right into the oven. This preheating of the sheet helps in ensuring that the bottom of the onion gets a head start on cooking and crisping, preventing it from becoming soggy.
-
Prepare Your Dredging Stations: Organization is crucial for a smooth breading process! I grab three large, shallow bowls – trust me, you’ll want ample space for coating the onion.
- In the first bowl, I combine 1 cup of the all-purpose flour with all the wonderful spices: the smoked paprika, garlic powder, onion powder, cayenne pepper, oregano, thyme, 1 teaspoon of salt, and ½ teaspoon of freshly ground black pepper. I whisk everything together thoroughly until all the spices are perfectly and evenly distributed throughout the flour. This is our incredibly flavorful dry dredge – it’s not just plain flour, it’s a flavor bomb!
- In the second bowl, I whisk together the cold buttermilk, the two cold large eggs, and the optional hot sauce until everything is well combined and fully emulsified. The cold temperature of these ingredients helps create a thicker, more adherent coating. This is our wet dredge, and it acts as the “glue” that will hold our crispy coating in place.
- In the third bowl, I simply place the remaining 1 cup of all-purpose flour. This will be our final coating layer, providing that extra crunch and ensuring maximum breading adhesion.
- Whip Up the Dipping Sauce: While the oven is diligently preheating, I like to quickly get our amazing dipping sauce ready. In a small bowl, I combine the mayonnaise, sour cream, prepared horseradish, smoked paprika, garlic powder, optional cayenne pepper, and Worcestershire sauce. I whisk it until it’s completely smooth and wonderfully creamy. I always make sure to taste it at this point and adjust the seasoning with salt and freshly ground black pepper as needed – sometimes it needs a little more zing! If I’m using fresh chives, I’ll either stir them in now or save a few for a pretty garnish right before serving. Once it’s perfect, I cover it and pop it into the refrigerator until serving, allowing those beautiful flavors to meld and deepen. Trust me, this homemade sauce is an absolute game-changer and elevates your “Blooming Onion In Oven” experience from great to truly unforgettable!
Creating the Blooming Onion Shape:
- Prepare the Onion for Cutting: This is where we start transforming a humble onion into something spectacular! First, I carefully peel off all the outer papery skin from my large yellow onion. Then, using a very sharp knife, I slice off about ½ inch from the top (the stem end) of the onion. This creates a perfectly stable, flat base for the onion to sit on, which is absolutely crucial for safe and even cutting in the next step. It’s important to remember: do NOT cut off the root end! The root end is the magical anchor that holds all the “petals” together, ensuring your blooming onion stays intact.
- The Incisions – A Key Step for Success! Now for the artistic part! I place the onion, cut-side down, on a sturdy cutting board. Using a very sharp chef’s knife – sharpness here is non-negotiable for clean cuts – I carefully make a cut straight down from the top, stopping about ½ inch from the root end. The goal is to cut all the way through the onion flesh, but to leave that root end completely intact. This is often the trickiest part, and it definitely requires a steady hand and a bit of patience. Don’t rush it!
- Repeat and Fan Out: Once that first cut is made, I gently rotate the onion slightly and make another identical cut. I continue this process, making 12-16 evenly spaced cuts all around the onion. The more cuts you make, the more “petals” your blooming onion will have, which generally means more crispy surface area – yum! I always try to aim for as much symmetry as possible to create a beautiful, even bloom.
- Open Up Your Onion: With all the cuts successfully made, it’s time to reveal the bloom! I gently use my fingers to carefully separate the “petals” of the onion. I start from the center and slowly work my way outwards, being very gentle to avoid breaking any of the delicate petals. The goal is for them to fan out beautifully, just like a flower in full bloom. If some of the inner pieces are a bit stubborn and don’t want to separate easily, I sometimes find it helpful to gently pry them open with the tip of a small spoon or even a butter knife, being ever so careful. This is truly where the magic of the “Blooming Onion In Oven” truly begins to take its magnificent shape!
- Soak for Separation and Mildness (Optional but Highly Recommended): For even easier breading and to help those petals separate even further, I often submerge the cut onion in a large bowl of ice water for about 15-30 minutes. This little trick also has the added benefit of helping to reduce some of the raw sharpness of the onion. After its refreshing soak, it’s absolutely crucial to thoroughly pat the onion dry with paper towels, making sure to get into all the nooks and crannies between the petals. Any excess moisture will prevent the breading from sticking properly, and we definitely don’t want that!
The Breading Process:
- First Flour Dusting: This is our initial layer of flavor and texture! I carefully place the bloomed onion into the first bowl, the one with our wonderfully seasoned flour mixture. With my fingers, I gently open up the petals as much as I can and spoon the seasoned flour mixture generously over and in between all the layers and crevices of the onion. I make sure that every single surface, both inside and out, is thoroughly coated. Once it’s completely covered, I gently shake off any excess flour – we want a good, even coating, not clumps.
- The Buttermilk Bath: Next, I carefully transfer the flour-dusted onion to the second bowl, which holds our buttermilk-egg mixture. Again, I gently open the petals and spoon the wet mixture over the entire onion, ensuring that every crevice and every part of the onion is fully saturated. I let it sit in the buttermilk mixture for about 1-2 minutes, allowing the liquid to really soak into the flour. This step is incredibly important as this wet layer will act as the “glue” for our next, and final, crispy coating.
- Second Flour Coating – The Key to Ultimate Crispness: Carefully lifting the onion from the buttermilk mixture, I let any excess liquid drip off for a moment. Then, I transfer it to the third bowl, containing just the plain all-purpose flour. This is where we build that serious crust! I repeat the process of spooning flour over and into the petals, gently but firmly pressing the flour onto all the wet surfaces. You want a really good, thick, and even coating here. This double-flour method is absolutely essential for achieving that irresistible, restaurant-quality crunch and perfectly golden-brown finish that we expect from our “Blooming Onion In Oven”. Don’t skimp on this step!
- Ensure Complete Coverage: Take your time with this final breading step. I often use my fingers to ensure that every part of the onion, especially deep within the petals, is fully and thickly coated. A comprehensive, even breading is what will ultimately give you that desired, incredibly crisp texture and protect the onion as it bakes. Once I’m satisfied that it’s thoroughly coated everywhere, I give it one final, gentle shake to remove any loose flour.
Baking the Blooming Onion In Oven:
- Prepare for Baking: With my perfectly breaded blooming onion ready, I carefully remove the hot baking sheet from the preheated oven. I always use good oven mitts, as that sheet will be intensely hot! The preheated sheet is a silent hero in getting that initial crisp.
- Place the Onion: Gently but confidently, I lift my beautifully breaded blooming onion and carefully place it right in the center of the hot baking sheet. I try to disturb the breading as little as possible.
- The Drizzle – Essential for Golden Crispness: This step is critical for achieving that glorious, golden-brown finish and incredible crisp texture without deep frying. I generously drizzle 2-3 tablespoons of olive oil or avocado oil all over the top of the onion, making sure some of it seeps down into all those beautiful petals. This oil is absolutely crucial for encouraging the breading to crisp up and brown beautifully, transforming our “Blooming Onion In Oven” into a truly golden masterpiece.
- Initial Bake: I carefully return the baking sheet with the blooming onion to the preheated oven. It’s now time for the first phase of baking. I set the timer for 30 minutes.
- Rotate and Continue Baking: After the initial 30 minutes, I carefully remove the baking sheet from the oven. If your oven, like many, has hot spots, this is the perfect time to rotate the sheet 180 degrees to ensure even cooking and browning. At this point, I might also gently try to open up some of the outer petals a bit more if they seem a little closed, to expose less cooked areas to the direct heat. If the onion looks dry, I drizzle a tiny bit more oil over it. Then, it goes back into the oven to continue baking for another 20-30 minutes, or until the onion is deeply golden brown, invitingly crispy, and the petals are tender-crisp.
- Visual Cues for Doneness: During the last 10-15 minutes, it’s really important to keep a close eye on your blooming onion. You’re looking for a rich, deep golden-brown color across all the petals, and a truly satisfying crispness when you gently tap them. The very edges of the petals should be visibly crispy, and the interior onion should be cooked through and tender. Every oven is a little different, so please use the cooking times as a guide; your eyes are your best tool here! Don’t be afraid to let it get really golden – that’s where all the incredible flavor and texture truly reside. This is the magical moment your “Blooming Onion In Oven” truly transforms into an impressive and irresistible appetizer!
Serving Suggestions and Tips:
- Immediate Gratification: As soon as your gorgeous “Blooming Onion In Oven” emerges from the oven, glowing and crispy, I recommend transferring it immediately to a serving platter. A large spatula or two can be very helpful here, allowing you to move it without damaging those beautifully fanned petals.
- Seasoning Finish: If you’re like me and love that extra pop of flavor, I always sprinkle a little extra salt – a flaky sea salt works wonders here – over the warm onion right before serving. The warmth helps it adhere and truly enhances all those wonderful breading flavors.
- Dipping Delight: Now for the grand finale! I typically place my chilled homemade dipping sauce right into the center hole of the onion – it’s a fantastic presentation! Alternatively, you can serve it elegantly on the side in a small bowl. The delightful contrast of the warm, incredibly crispy onion with the cool, creamy, and zesty sauce is absolutely divine and truly makes the dish complete.
- The Best Way to Eat It: This is a fun, interactive appetizer! Encourage everyone to simply pull off the crispy petals individually and dip them generously into that amazing sauce. It’s a wonderfully communal dish, perfect for sharing.
- Don’t Be Afraid to Experiment: My recipes are always a guide, not a strict law! Feel free to adjust the spices in the breading or the dipping sauce to perfectly suit your personal taste preferences. Craving more heat? Go ahead and add an extra pinch of cayenne! Love a deep, smoky flavor? Increase that smoked paprika! This recipe for “Blooming Onion In Oven” is truly a fantastic canvas for your culinary creativity, so make it your own.
- Serving Size: This recipe, featuring one large blooming onion, typically serves 4-6 people comfortably as an appetizer. If you’re hosting a larger gathering or anticipate it being a huge hit (which it undoubtedly will be!), I highly recommend making two! They have a tendency to disappear incredibly fast!
- Storage (if any leftovers miraculously exist!): While this “Blooming Onion In Oven” is absolutely best enjoyed immediately for peak crispness, any rare leftovers can be stored in an airtight container in the refrigerator for up to 2 days. To reheat and attempt to regain some of that beautiful crispness, place it in a preheated oven at 350°F (175°C) for 10-15 minutes. Just be aware that it likely won’t be quite as fresh or intensely crispy as it was right out of the oven the first time around.

Conclusion:
Well, my friends, we’ve reached the delicious culmination of our culinary journey! I truly hope you’re as excited as I am about the prospect of bringing this incredible dish to your own kitchen. What we’ve explored together is more than just a recipe; it’s an invitation to elevate your snack game, impress your guests, and discover a surprisingly simple way to create something truly spectacular. This isn’t just any old appetizer; it’s a showstopper, a conversation starter, and a flavor explosion that consistently delights. We’ve tackled the challenge of replicating a beloved restaurant classic, and not just replicating it, but perfecting it for the home cook.
The magic of this particular approach lies in its ingenious simplicity and its ability to deliver on all fronts: texture, taste, and presentation. Gone are the days of wrestling with huge vats of hot oil, the lingering smell of deep-frying, and the guilt that sometimes accompanies such indulgence. Instead, we’ve harnessed the power of your oven to create something that’s every bit as crispy, tender, and utterly addictive as its deep-fried counterpart, but with a fraction of the fuss and a much lighter touch. Think about it: that perfectly fanned onion, those golden-brown petals, each one ready to be pulled apart and dipped into a creamy, dreamy sauce. It’s a culinary triumph, pure and simple, and one that I genuinely believe will become a regular fixture in your entertaining repertoire. This recipe is a testament to the fact that you don’t need a professional kitchen to produce restaurant-quality dishes; all you need is a little guidance and the willingness to try something new and exciting.
Now, let’s talk about taking this masterpiece from great to absolutely legendary with some serving suggestions and delightful variations. While a classic tangy ranch dip is undeniably a match made in heaven, don’t be afraid to experiment! Imagine a spicy Sriracha aioli, perhaps a rich honey-mustard, or even a vibrant chimichurri for a fresh, herbaceous kick. For those who love a cheesy indulgence, a sprinkle of Parmesan or a sharp cheddar over the onion during the last few minutes of baking could add an extra layer of savory goodness. Just ensure it melts beautifully without burning.
Consider this gorgeous blooming onion not just as an appetizer, but also as a fantastic side dish. Picture it alongside a juicy grilled steak, some perfectly roasted chicken, or even as the star of a casual brunch spread. It’s incredibly versatile! For a twist on the traditional, you could try experimenting with different types of onions – a sweet Vidalia would offer a milder flavor profile, while a red onion might lend a slightly sharper, more dramatic visual. And for my gluten-free friends, remember that with a simple swap of flour (ensure it’s a good all-purpose gluten-free blend), this entire recipe remains accessible, ensuring everyone can partake in the crispy, savory joy.
Don’t stop at the seasoning we discussed either. A pinch of smoked paprika can add depth, a touch of garlic powder enhances the savory notes, and for those who enjoy a little heat, a subtle dusting of cayenne pepper can provide a lovely warmth without overwhelming the delicate onion flavor. The beauty is in its adaptability; this recipe is a canvas for your culinary creativity. Think about themed nights – a Tex-Mex twist with chili powder and cumin, served with a cilantro-lime crema, or an Italian inspired version with oregano and basil, alongside a marinara dipping sauce. The possibilities are truly endless, and each variation offers a fresh, exciting way to enjoy this incredible dish, making it a staple you’ll never tire of.
So, there you have it – my strong encouragement to clear your schedule, gather your ingredients, and dive headfirst into creating this absolute gem. I promise you, the satisfaction of pulling that perfectly golden, fanned onion out of your oven is an experience unlike any other. You’ll be amazed at how achievable it is to recreate such a seemingly complex dish right in your own kitchen. This isn’t just about following steps; it’s about making culinary memories, impressing your loved ones, and treating yourself to something truly special.
Ready to master the Blooming Onion In Oven?
I genuinely cannot wait for you to experience the delight that comes from preparing and devouring your very own Blooming Onion In Oven. Once you’ve made it, once you’ve seen the smiles it brings to faces around your table, I know you’ll understand why I’m so passionate about sharing this particular recipe. Your kitchen is about to become the epicenter of deliciousness, and this blooming onion will be the star of the show. It’s an easy win, a guaranteed crowd-pleaser, and a truly rewarding cooking project that will build your confidence and expand your culinary horizons.
But my journey with you doesn’t end here! I am absolutely thrilled to hear about your culinary adventures. Please, do me a favor and come back to share your experiences in the comments section below. Did you try a new dip? Did you use a different seasoning blend? Perhaps you served it with an unexpected main course? Your insights, tips, and photos are not only incredibly valuable to me, but they also inspire other home cooks in our community. Let’s build a wonderful collection of blooming onion success stories together!
Tag me on social media if you share your photos – I’d love to see your beautiful creations! Your success is my success, and there’s nothing more rewarding than knowing I’ve helped you bring a little extra joy and flavor into your home. So go forth, bake with confidence, and prepare for some serious compliments. Happy cooking, my friends!

Crispy Blooming Onion In Oven
Transform this iconic restaurant appetizer into a delightful, homemade reality. A beautifully fanned, golden-brown onion, each petal tender on the inside with an incredibly crispy exterior, all achieved without deep-frying. This recipe focuses on convenience without compromising on irresistible taste and satisfying texture.
Ingredients
-
1 large yellow onion
-
1/2 cup all-purpose flour
-
1 teaspoon paprika
-
1/2 teaspoon garlic powder
-
1/4 teaspoon cayenne pepper (optional)
-
1/2 teaspoon salt
-
1/4 teaspoon black pepper
-
1/2 cup milk
-
1 large egg
-
2 tablespoons olive oil
-
For the dipping sauce:
-
1/2 cup mayonnaise
-
2 tablespoons ketchup
-
1 tablespoon prepared horseradish
-
1/2 teaspoon paprika
Instructions
-
Step 1
Preheat oven to 400°F (200°C) with a large baking sheet (lined with parchment paper or silicone mat) inside. -
Step 2
In a small bowl, whisk together 1/2 cup mayonnaise, 2 tablespoons ketchup, 1 tablespoon prepared horseradish, and 1/2 teaspoon paprika. Season with salt and pepper to taste. Refrigerate until serving. -
Step 3
Peel the onion and slice off about 1/2 inch from the top (stem end) to create a flat base. Do NOT cut off the root end, as it holds the petals together. -
Step 4
Place the onion cut-side down. Using a sharp knife, make 12-16 evenly spaced cuts straight down, stopping about 1/2 inch from the root end to keep the petals attached. Gently use your fingers to fan out the petals, separating them from the center outwards. -
Step 5
For easier breading and to reduce onion sharpness, submerge the cut onion in a large bowl of ice water for 15-30 minutes. Afterward, thoroughly pat the onion dry with paper towels, ensuring all crevices are dry. -
Step 6
In a shallow bowl, whisk together 1/2 cup all-purpose flour, 1 teaspoon paprika, 1/2 teaspoon garlic powder, 1/4 teaspoon cayenne pepper (optional), 1/2 teaspoon salt, and 1/4 teaspoon black pepper. In a second shallow bowl, whisk together 1/2 cup milk and 1 large egg. -
Step 7
First, carefully place the fanned onion into the seasoned flour mixture. Gently open petals and spoon flour over, ensuring all layers and crevices are thoroughly coated. Shake off excess. Second, transfer the onion to the milk-egg mixture. Spoon the mixture over the entire onion, ensuring full saturation. Let excess liquid drip off. -
Step 8
Carefully remove the hot baking sheet from the oven. Gently place the wet, breaded onion right in the center of the hot baking sheet. Drizzle generously with 2 tablespoons olive oil all over the top of the onion, ensuring oil seeps into the petals. -
Step 9
Return the baking sheet to the oven. Bake for 30 minutes. After 30 minutes, carefully remove, rotate the sheet 180 degrees for even cooking, and continue baking for another 20-30 minutes, or until the onion is deeply golden brown, crispy, and the petals are tender-crisp. Watch closely during the last 10-15 minutes for desired crispness. -
Step 10
Immediately transfer the baked blooming onion to a serving platter. Sprinkle with extra salt if desired. Serve immediately with the chilled homemade dipping sauce, either placed in the center of the onion or in a small bowl on the side. Encourage guests to pull off individual petals and dip generously.
Important Information
Nutrition Facts (Per Serving)
It is important to consider this information as approximate and not to use it as definitive health advice.
Allergy Information
Please check ingredients for potential allergens and consult a health professional if in doubt.


Leave a Comment