
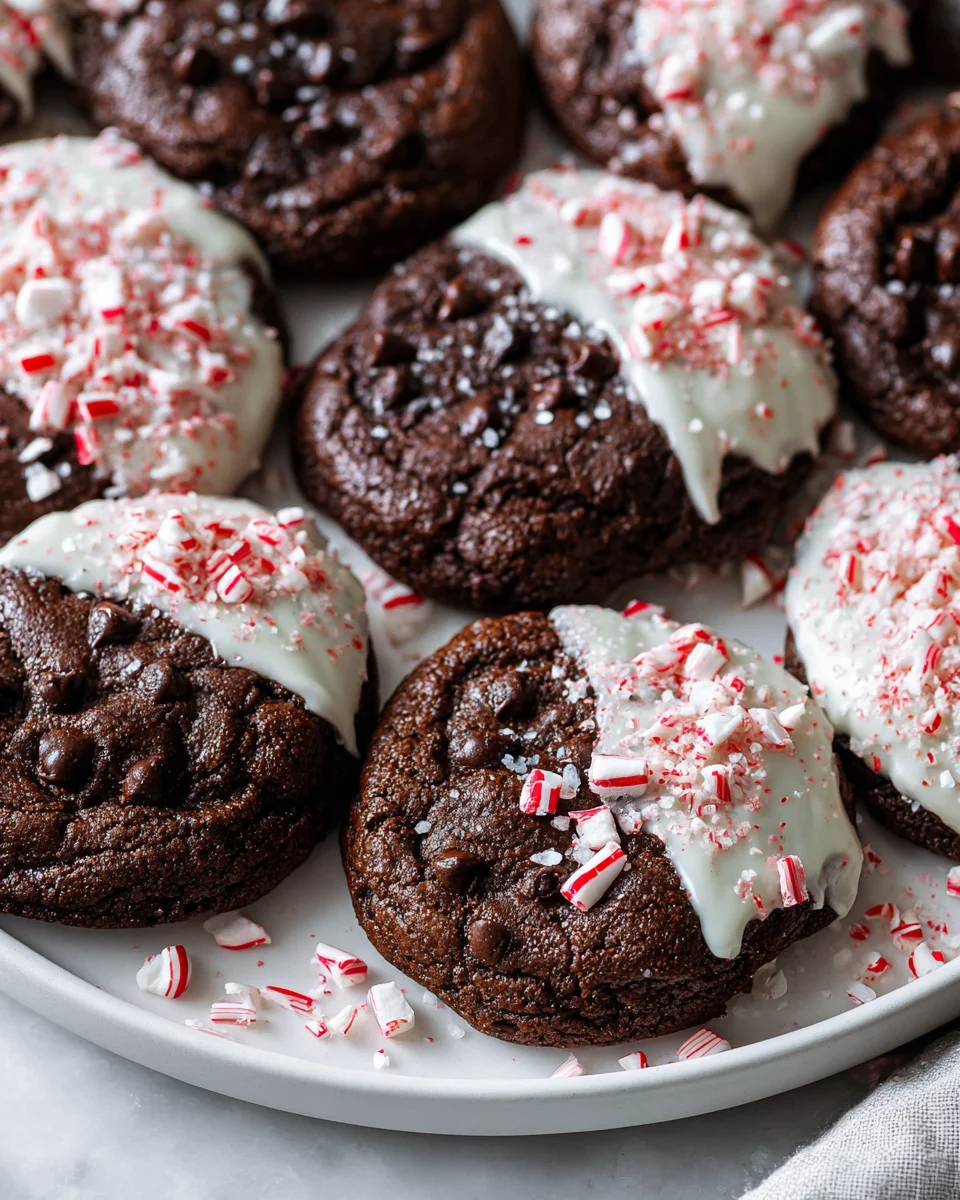
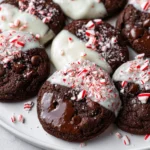
Chocolate Peppermint Cookies
Oh, Chocolate Peppermint Cookies! Just saying the name brings a smile to my face and a delicious scent to my imagination. This isn’t just any cookie; it’s a little bite of winter wonderland magic that truly captures the spirit of the season. What makes these cookies so incredibly special, you ask? It’s that perfect harmony of deep, decadent chocolate, sometimes fudgy and rich, meeting the cool, invigorating kiss of peppermint. It’s a flavor combination that’s absolutely iconic, bringing warmth and cheer with every single bite.
I know you’re going to absolutely adore these cookies! Imagine biting into a soft, chewy chocolate base – perhaps dark and intense, or sweet and mellow, depending on your preference – that’s then beautifully complemented by a refreshing burst of peppermint. Whether it’s the crunch of a candy cane, a subtle peppermint extract in the dough, or a creamy peppermint glaze, the contrast is simply divine. They’re visually stunning too, often sporting festive colors or delightful cracks that make them look homemade in the best possible way. These cookies are a total crowd-pleaser, perfect for holiday parties, cozy evenings by the fire, or as thoughtful homemade gifts. Get ready to fill your kitchen with the most inviting aromas and your cookie jar with these irresistible treats!

Ingredient Notes
Crafting the perfect batch of Chocolate Peppermint Cookies truly begins with understanding your ingredients. Each component plays a vital role in achieving that decadent chocolate flavor and refreshing peppermint kick we all love. Here’s a rundown of what I typically use and some thoughts on substitutions.
The Chocolate Elements
- Unsweetened Cocoa Powder: This is where a significant portion of our rich chocolate flavor comes from. I always recommend using a good quality Dutch-processed cocoa powder. It has a smoother, less acidic flavor and contributes to a darker, more appealing cookie. Natural cocoa powder will work too, but the final taste and color might be slightly different.
- Chocolate Chips or Chunks: For these cookies, I love a mix! Semi-sweet chocolate chips are a classic for a reason, offering a balanced sweetness. However, if you’re a dark chocolate enthusiast like me, feel free to use dark chocolate chips or even chopped dark chocolate bars (around 60-70% cacao) for an intense chocolatey burst in every bite. Milk chocolate chips can be used if you prefer a sweeter, creamier chocolate, but be aware they might make the cookie a bit richer.
The Peppermint Power
- Peppermint Extract: This is the heart of our peppermint flavor. A little goes a long way, so always start with the recommended amount and taste a tiny bit of the raw dough if you’re unsure before adding more. Quality matters here – a good peppermint extract will provide a clean, vibrant flavor, while a cheaper one might taste artificial. Avoid spearmint extract, as it has a distinctly different flavor profile.
- Crushed Candy Canes: These provide both a delightful crunch and an extra burst of peppermint, along with that iconic festive look. I typically use traditional red and white striped candy canes. You can crush them yourself using a food processor or by placing them in a Ziploc bag and smashing them with a rolling pin. If you can’t find candy canes, peppermint baking chips can be a substitute for the flavor, but you’ll miss the crunch and visual appeal of the crushed canes.
The Cookie Foundation
- All-Purpose Flour: Standard all-purpose flour works perfectly for these cookies. Make sure to measure it correctly, either by weight (my preferred method) or by spooning it into a measuring cup and leveling it off, rather than scooping directly from the bag. For a gluten-free alternative, a 1:1 gluten-free baking blend that contains xanthan gum should work, though the texture might vary slightly.
- Unsalted Butter: I always opt for unsalted butter so I can control the salt content in my baking. Ensure it’s at room temperature – this is crucial for creaming with the sugars, creating a light and airy base for our cookies. If you only have salted butter, you can use it, but reduce the added salt in the recipe by about ¼ teaspoon. For a dairy-free option, a plant-based butter alternative can be used, keeping in mind that some brands may affect the texture.
- Granulated Sugar & Brown Sugar: The combination of both sugars gives these cookies a lovely balance of crisp edges and a chewy center. Granulated sugar contributes to crispness, while brown sugar (I prefer light brown) adds moisture and chewiness, along with a subtle molasses flavor.
- Eggs: Large eggs, at room temperature, help bind the ingredients together and add moisture.
- Baking Soda & Salt: Baking soda is our leavening agent, giving the cookies a slight lift and chewiness. Salt enhances all the flavors, balancing the sweetness and intensifying the chocolate.
Step-by-Step Instructions
Let’s get baking! Here’s how I bring these delicious Chocolate Peppermint Cookies to life, step by step, ensuring a perfect batch every time. Remember, having your ingredients measured out and ready to go makes the process much smoother.
Step 1: Prep Your Workspace and Ingredients
- Preheat your oven to 350°F (175°C). Line two baking sheets with parchment paper or silicone baking mats. This prevents sticking and helps with even baking.
- Make sure your unsalted butter and eggs are at room temperature. This helps them incorporate smoothly into the batter, leading to a better texture.
- Crush your candy canes. I like to place them in a sturdy freezer bag and use a rolling pin or the bottom of a heavy pan to break them into small pieces – not powder, but small enough to stick to the cookies.
Step 2: Combine Dry Ingredients
- In a medium bowl, whisk together the all-purpose flour, unsweetened cocoa powder, baking soda, and salt. Whisking ensures these ingredients are evenly distributed, so you don’t end up with pockets of baking soda! Set this bowl aside.
Step 3: Cream Butter and Sugars
- In a large bowl, using an electric mixer (either hand-held or stand mixer with the paddle attachment), cream together the softened unsalted butter, granulated sugar, and light brown sugar on medium speed. Beat until the mixture is light, fluffy, and pale in color, usually about 2-3 minutes. This step is crucial for incorporating air and creating a tender cookie.
Step 4: Add Eggs and Extracts
- Beat in the eggs one at a time, mixing well after each addition until fully incorporated. Scrape down the sides of the bowl as needed to ensure everything is mixed evenly.
- Now, add the vanilla extract and, importantly, the peppermint extract. Start with the recommended amount of peppermint extract. Remember, it’s potent! Mix until just combined.
Step 5: Gradually Add Dry to Wet
- With the mixer on low speed, gradually add the dry ingredient mixture to the wet ingredients, mixing until just combined. Be careful not to overmix! Overmixing can develop the gluten in the flour too much, leading to tough cookies. Stop mixing as soon as no streaks of flour remain.
Step 6: Fold in Chocolate Chips
- Remove the bowl from the mixer and, using a spatula or wooden spoon, fold in your chosen chocolate chips or chunks. Distribute them evenly throughout the dough.
Step 7: Chill the Dough (Recommended!)
- This step is optional but highly recommended for best results. Cover the bowl with plastic wrap and refrigerate the dough for at least 30 minutes, or up to 2 hours. Chilling helps to firm up the butter, preventing the cookies from spreading too much in the oven, and allows the flavors to meld.
Step 8: Scoop and Roll
- Once chilled, use a 1.5-2 tablespoon cookie scoop or roll rounded spoonfuls of dough into balls.
- Place the crushed candy canes in a shallow dish. Roll each cookie dough ball in the crushed candy canes, gently pressing to ensure they adhere well on all sides.
- Arrange the coated dough balls about 2 inches apart on your prepared baking sheets.
Step 9: Bake!
- Bake for 9-11 minutes, or until the edges are set and the centers still look slightly soft. The cookies will continue to set as they cool. Overbaking will result in dry cookies.
Step 10: Cool and Enjoy
- Once baked, remove the baking sheets from the oven and let the cookies cool on the sheets for about 5 minutes before carefully transferring them to a wire rack to cool completely. This prevents them from breaking and allows them to firm up.
- Once cooled, they are ready to be devoured!
Tips & Suggestions
Making Chocolate Peppermint Cookies is a joyful experience, and over the years, I’ve picked up a few tricks that really elevate them from good to absolutely fantastic. Here are my go-to tips and suggestions to help you bake the best batch possible!
Mastering the Dough
- Don’t Overmix: This is my golden rule for almost any cookie. Once you add the dry ingredients to the wet, mix only until just combined. Overmixing develops the gluten in the flour, leading to tougher, chewier cookies rather than soft, tender ones.
- Chilling is Your Friend: I mentioned it in the instructions, but I’ll stress it again – chilling the dough is a game-changer. It helps prevent the cookies from spreading too much, intensifies the flavors, and results in a thicker, chewier cookie. Even 30 minutes makes a difference, but an hour or two is ideal.
- Room Temperature Ingredients Matter: For butter and eggs, this isn’t just a suggestion, it’s a foundation for success. Room temperature butter creams beautifully with sugar, incorporating air that gives cookies their light texture. Cold butter won’t cream properly, and cold eggs can cause your batter to curdle.
Flavor and Texture Enhancements
- Peppermint Extract Precision: Peppermint extract is potent! Always measure carefully. If you’re unsure, start with a tiny bit less than recommended, and you can always add a drop or two more to the dough (before baking, of course!) if you feel it needs more zing. You can’t take it away once it’s in.
- Quality Chocolate: Since chocolate is a star here, using good quality cocoa powder and chocolate chips/chunks truly makes a difference in the depth of flavor. Splurge a little – you won’t regret it!
- Perfectly Round Cookies: For perfectly round cookies, once they come out of the oven, use a large round cookie cutter (or the rim of a glass) slightly larger than your cookie. Swirl it around the hot cookie to gently push the edges inwards. This neatens them up beautifully!
Crushing Candy Canes Like a Pro
- Crushing Method: My favorite way to crush candy canes is to place them in a sturdy freezer bag, remove as much air as possible, and then go at them with a rolling pin or the flat side of a meat tenderizer. Aim for a mix of fine dust and small crunchy bits for the best texture and visual appeal.
- Adding Candy Canes: While I roll them in before baking, you can also sprinkle a few extra crushed candy canes on top of the cookies immediately after they come out of the oven. The residual heat will help them adhere, giving you an even more vibrant, fresh-looking peppermint garnish.
Making Ahead & Freezing
- Freeze Dough Balls: If you want to bake a fresh batch anytime, scoop your dough into balls, roll them in the crushed candy canes, and then freeze them on a parchment-lined baking sheet until solid. Transfer them to a freezer-safe bag or container. When you’re ready to bake, place them directly from the freezer onto a baking sheet and add 2-3 minutes to the baking time.
Storage
Once you’ve gone through the effort of baking these delightful Chocolate Peppermint Cookies, you’ll want to ensure they stay fresh and delicious for as long as possible. Here’s how I recommend storing them to preserve their perfect texture and festive flavor.
At Room Temperature
- Baked Cookies: For short-term storage, your baked Chocolate Peppermint Cookies will do best in an airtight container at room temperature. A good quality airtight container will protect them from drying out and keep them fresh for up to 3-5 days. I like to place a piece of parchment paper between layers if I’m stacking them to prevent sticking. They’ll remain soft and chewy, though the crushed candy canes might start to soften slightly after a couple of days.
In the Refrigerator
- Baked Cookies: While not strictly necessary for baked cookies, if your kitchen is particularly warm or humid, you can store them in an airtight container in the refrigerator for up to a week. Just be aware that chilling can sometimes alter the texture of cookies, making them a bit firmer. I often let them come back to room temperature for about 15-20 minutes before serving to enjoy their optimal texture.
- Cookie Dough: Unbaked cookie dough can be stored in an airtight container or tightly wrapped in plastic wrap in the refrigerator for up to 3 days. This is perfect if you want to make the dough ahead of time and bake fresh cookies later.
In the Freezer
- Baked Cookies: These cookies freeze beautifully! Once completely cooled, place them in a single layer on a baking sheet and freeze until solid (this prevents them from sticking together). Then, transfer the frozen cookies to a freezer-safe airtight container or heavy-duty freezer bag. They’ll stay fresh for up to 2-3 months. To thaw, simply take them out and let them come to room temperature on the counter for a few hours, or you can even gently warm them in a low oven for a few minutes for a “freshly baked” experience.
- Cookie Dough (Pre-scooped): This is my absolute favorite method for having fresh cookies on demand! Scoop the dough into individual balls, roll them in the crushed candy canes (if desired for freezing), and arrange them on a parchment-lined baking sheet. Freeze until solid. Once frozen, transfer the dough balls to a freezer-safe bag or container. They can be stored for up to 3 months. When you’re ready to bake, you can bake them directly from frozen, adding an extra 2-3 minutes to the baking time. This is fantastic for unexpected guests or a quick treat!
Final Thoughts
And there you have it! I truly hope you’re feeling inspired to bake up a batch of these absolutely delightful Chocolate Peppermint Cookies. I promise you, they are so much more than just a sweet treat; they’re a little piece of joy, perfectly crafted for sharing or for savoring all by yourself. The way the deep, rich chocolate melds with the vibrant, cool burst of peppermint is simply magical, creating a flavor profile that’s both comforting and invigorating. It’s a classic combination for a reason, and in these cookies, it truly shines.
Whether you’re looking to impress friends and family, add some festive cheer to your home, or simply indulge in a moment of pure bliss, these Chocolate Peppermint Cookies are an absolute must-try. Their perfect chewiness and beautiful aroma will fill your kitchen with happiness. Go on, give them a whirl – I just know you’ll fall in love with every single bite!
Festive Chocolate Peppermint Cookies: Quick & Easy Recipe
- Total Time: 26 minutes
- Yield: 24 cookies 1x
Description
Indulge in the delightful combination of rich chocolate and refreshing peppermint with these Festive Chocolate Peppermint Cookies. Perfect for holiday gatherings or cozy evenings, these cookies are sure to spread cheer with every bite.
Ingredients
- 1 cup unsweetened cocoa powder
- 1 cup chocolate chips or chunks (semi-sweet or dark)
- 1 teaspoon peppermint extract
- 1/2 cup crushed candy canes
- 2 cups all-purpose flour
- 1/2 cup unsalted butter, softened
- 1/2 cup granulated sugar
- 1/2 cup light brown sugar
- 2 large eggs
- 1 teaspoon baking soda
- 1/4 teaspoon salt
- 1 teaspoon vanilla extract
Instructions
- Preheat your oven to 350°F (175°C). Line two baking sheets with parchment paper or silicone baking mats.
- Make sure your unsalted butter and eggs are at room temperature.
- Crush your candy canes in a sturdy freezer bag using a rolling pin.
- In a medium bowl, whisk together the all-purpose flour, unsweetened cocoa powder, baking soda, and salt. Set this bowl aside.
- In a large bowl, cream together the softened unsalted butter, granulated sugar, and light brown sugar on medium speed until light and fluffy.
- Beat in the eggs one at a time, mixing well after each addition. Scrape down the sides of the bowl as needed.
- Add the vanilla extract and peppermint extract, mixing until just combined.
- Gradually add the dry ingredient mixture to the wet ingredients, mixing until just combined.
- Fold in your chosen chocolate chips or chunks using a spatula.
- Cover the bowl with plastic wrap and refrigerate the dough for at least 30 minutes.
- Once chilled, scoop the dough into balls and roll each ball in the crushed candy canes.
- Arrange the coated dough balls about 2 inches apart on your prepared baking sheets.
- Bake for 9-11 minutes, or until the edges are set and the centers still look slightly soft.
- Let the cookies cool on the sheets for about 5 minutes before transferring them to a wire rack to cool completely.
- Prep Time: 15 mins
- Cook Time: 11 mins
- Category: Dessert
- Method: Baking
- Cuisine: American
Nutrition
- Serving Size: 1 cookie
- Calories: 150
- Sugar: 10 g
- Sodium: 50 mg
- Fat: 7 g
- Saturated Fat: 4 g
- Unsaturated Fat: 2 g
- Trans Fat: 0 g
- Carbohydrates: 20 g
- Fiber: 1 g
- Protein: 2 g
- Cholesterol: 30 mg
Keywords: Chilling the dough is highly recommended for best results. Use good quality cocoa powder and chocolate for a richer flavor.


Leave a Comment