
Winter Wonderland Chocolate Chip Cookies
Your New Favorite Winter Treat
Oh my goodness, get ready to experience a little bit of magic in your kitchen! I’m absolutely thrilled to share my recipe for Winter Wonderland Chocolate Chip Cookies with you. You might think, “another chocolate chip cookie?” but trust me, this isn’t just any cookie; it’s a hug from a snow angel, a twinkling light on a cold evening, a pure moment of joy!
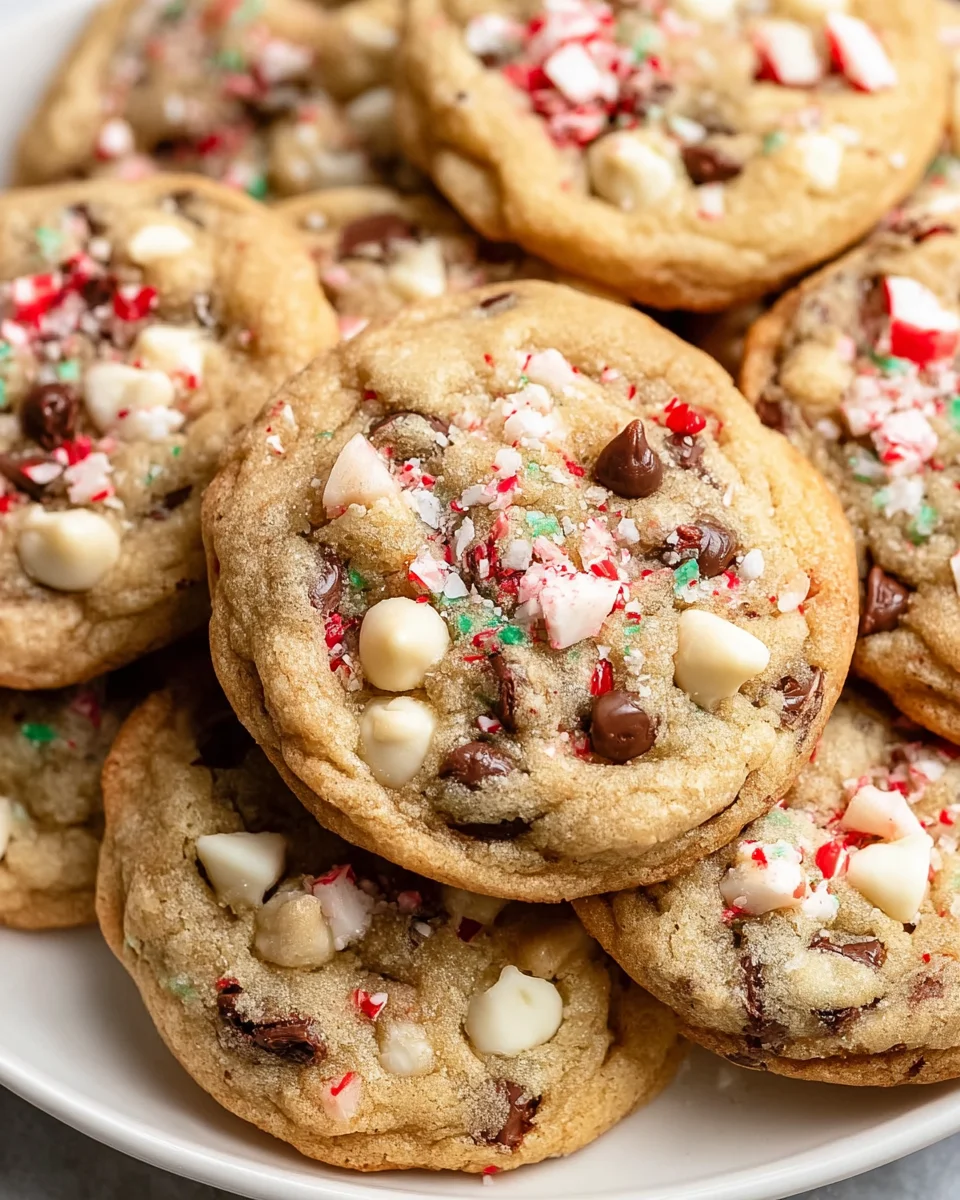
What makes these so incredibly special, you ask? Well, I’ve taken our beloved classic chocolate chip cookie – that perfect balance of chewy edges and a soft, gooey center – and infused it with the spirit of a frosty, enchanting winter landscape. We’re talking about a symphony of rich chocolate chips alongside creamy white chocolate, perhaps a delicate hint of non-alcohol peppermint flavoring, and often finished with a whisper of powdered sugar, making each bite feel like a gentle snowfall on your tongue. It’s comforting, it’s festive, and it truly captures the wonder of the season.
You’ll absolutely adore making and sharing these because they bring an instant smile to everyone’s face. They’re perfect for cozy evenings by the fireplace, holiday gatherings, or simply when you need a little dose of warmth and sweetness. Imagine biting into a cookie that tastes like a festive dream – that’s what we’re creating here! This dish is essentially a classic chocolate chip cookie, elevated with beautiful wintery additions that make it irresistible and truly magical.

Ingredient Notes
Oh, I’m so thrilled you’re diving into these Winter Wonderland Chocolate Chip Cookies with me! These aren’t just any chocolate chip cookies; they’re designed to evoke the magic and sparkle of a snowy winter landscape, all while delivering that irresistible classic cookie comfort. Getting the right ingredients is key to making them truly shine.
Flour
- All-Purpose Flour: This is our base, providing the structure for our delightfully chewy cookies. I always use unbleached all-purpose flour for consistency.
- Substitution: If you’re looking for a gluten-free option, a 1:1 gluten-free baking blend that contains xanthan gum works wonderfully. Just make sure to follow the specific instructions on your chosen blend, as some might absorb liquid a bit differently.
Sugars
- Granulated Sugar: For crispness and that essential sweetness.
- Light Brown Sugar: This is where we get that lovely chewiness and a subtle caramel note. Make sure it’s packed firmly when measuring.
- Substitution: While alternative sweeteners can be used, they can significantly alter the texture of cookies, sometimes making them less chewy or more crumbly. For best results, I recommend sticking to the sugar types listed. If you must substitute, experiment with erythritol-based blends, but be prepared for a different outcome.
Fats
- Unsalted Butter: I always opt for unsalted so I can control the salt content precisely. Make sure your butter is softened to room temperature – not melted, not cold, but perfectly soft enough to indent with your finger. This is crucial for creating that light, creamy base when you mix it with the sugars.
- Substitution: For a dairy-free version, a high-quality plant-based butter substitute (like those made for baking) can be used in a 1:1 ratio. The flavor and texture might be slightly different, but still delicious!
Leavening & Flavor
- Baking Soda: Our trusty leavening agent that helps the cookies spread and become tender. Don’t skip it!
- Salt: Essential for balancing the sweetness and enhancing all the other flavors. I prefer fine sea salt.
- Eggs: Large eggs, at room temperature, bind everything together and add richness.
- Vanilla Extract: A generous splash of good quality vanilla extract is non-negotiable for that warm, comforting flavor.
- Peppermint Extract (Optional, but highly recommended for the ‘Wonderland’ touch): Just a tiny bit of pure peppermint extract truly elevates these to a winter wonderland experience. It’s subtle, refreshing, and pairs beautifully with white chocolate.
- Substitution (Peppermint): If peppermint isn’t your thing, you can omit it entirely, or swap it for almond extract for a different, equally delightful twist.
The ‘Wonderland’ Additions
- White Chocolate Chips: These are absolutely critical for the “winter wonderland” aesthetic, giving us those lovely snowy-white chunks. I like to use a good quality brand that melts smoothly.
- Milk Chocolate Chips (or Semi-Sweet): While the focus is on white chocolate, a good balance with classic milk or semi-sweet chocolate chips provides a lovely contrast in flavor and color.
- Festive Sprinkles/Edible Glitter (Optional): For that extra sparkle! Look for blue, silver, or iridescent white sprinkles. Add these right before baking for the best visual effect.
- Crushed Peppermint Candies/Candy Canes (Optional): For an extra burst of peppermint flavor and a lovely crunch. Fold them in carefully at the end to avoid them dissolving too much.
Step-by-Step Instructions
Alright, let’s get baking! Follow these steps carefully, and you’ll be enjoying your magical Winter Wonderland Chocolate Chip Cookies in no time.
- Preheat & Prep: First things first, preheat your oven to 375°F (190°C). Line two large baking sheets with parchment paper or silicone baking mats. This makes cleanup a breeze and prevents sticking!
- Whisk Dry Ingredients: In a medium bowl, whisk together the all-purpose flour, baking soda, and salt. Make sure it’s all well combined so the leavening is evenly distributed. Set this aside.
- Cream Butter & Sugars: In the bowl of a stand mixer fitted with the paddle attachment (or a large bowl with an electric hand mixer), cream together the softened unsalted butter, granulated sugar, and light brown sugar on medium speed until light and fluffy. This usually takes about 2-3 minutes. Scrape down the sides of the bowl as needed.
- Add Eggs & Vanilla: Beat in the eggs, one at a time, mixing well after each addition. Then, stir in the vanilla extract and the optional peppermint extract. Mix until just combined. Don’t overmix at this stage!
- Combine Wet & Dry: Gradually add the dry ingredient mixture to the wet ingredients, mixing on low speed until just combined. Be careful not to overmix; stop as soon as you no longer see streaks of flour. Overmixing can lead to tough cookies.
- Fold in the Wonderland Goodies: Remove the bowl from the mixer and, with a sturdy spatula, gently fold in the white chocolate chips, milk chocolate chips, and any optional crushed peppermint candies or candy canes. I like to leave a few extra white chocolate chips aside to press into the tops of the dough balls later for extra prettiness!
- Scoop & Decorate: Drop rounded tablespoons of dough onto your prepared baking sheets, leaving about 2 inches between each cookie. If you have extra white chocolate chips, now’s the time to gently press a few onto the top of each dough ball. If using sprinkles or edible glitter, lightly sprinkle them over the dough balls now.
- Bake: Bake for 9-12 minutes, or until the edges are golden brown and the centers are still slightly soft. Remember that ovens vary, so keep an eye on them! They might look a little underbaked in the middle, but they’ll continue to set as they cool.
- Cool & Enjoy: Let the cookies cool on the baking sheets for 5 minutes before transferring them to a wire rack to cool completely. This helps them firm up and prevents them from breaking. Once cooled, they’re ready to be devoured!
Tips & Suggestions
I want your Winter Wonderland Chocolate Chip Cookies to be absolutely perfect, so here are a few extra tips and suggestions to help you achieve cookie perfection and make them truly magical!
- Don’t Overbake! This is my number one rule for chewy, delightful cookies. Cookies continue to bake for a few minutes after they come out of the oven, so pull them out when the edges are set and lightly golden, but the centers still look a little soft. They’ll firm up as they cool, leaving you with that perfect chewy texture.
- Chill the Dough: If you have the time, chilling the dough for at least 30 minutes (or up to 24 hours) makes a significant difference. It allows the flavors to meld, the butter to firm up, and results in thicker cookies that spread less. This is especially good for that ‘wonderland’ texture.
- Room Temperature Ingredients are Key: This might sound like a small detail, but softened butter and room temperature eggs cream together much more smoothly, creating an emulsified base that holds air better, leading to lighter, fluffier cookies.
- Use a Cookie Scoop: For uniform cookies that bake evenly, a cookie scoop is your best friend. Plus, it makes portioning out the dough so much quicker and cleaner.
- Extra Sparkle: For an even more “winter wonderland” effect, once the cookies are completely cool, you can lightly dust them with powdered sugar using a fine-mesh sieve. It looks just like fresh fallen snow!
- Flavor Boosts:
- Spices: A tiny pinch of ground cardamom or a whisper of cinnamon can add another layer of warmth, perfect for a winter treat. Add it to your dry ingredients.
- Extract Variety: If you’re not a fan of peppermint, try a little almond extract for a different festive flavor.
- Decorating Post-Bake: For an extra touch, you could melt a little white chocolate and drizzle it over the cooled cookies, then immediately sprinkle with blue or silver edible glitter before it sets. This adds another layer of visual appeal.
Storage
You’ve baked these glorious Winter Wonderland Chocolate Chip Cookies, now how do you keep them fresh and delicious for as long as possible? Here’s my advice:
- At Room Temperature: Once your cookies are completely cool, store them in an airtight container at room temperature. They’ll stay wonderfully fresh and chewy for up to 3-5 days. To help maintain their softness, you can place a half slice of bread in the container with them (just replace the bread every day or two).
- Freezing Baked Cookies: If you’ve made a big batch or want to save some for later, these cookies freeze beautifully! Once completely cooled, arrange them in a single layer on a baking sheet and freeze until solid (about 1-2 hours). Then, transfer the frozen cookies to a freezer-safe bag or airtight container. They’ll keep well for up to 2-3 months. When you’re ready to enjoy them, simply let them thaw at room temperature. For a “freshly baked” feel, you can warm them briefly in a microwave or a low oven.
- Freezing Cookie Dough: This is a fantastic trick for always having fresh cookies on hand! Scoop the raw cookie dough into individual balls and place them on a parchment-lined baking sheet. Freeze until solid. Once firm, transfer the frozen dough balls to a freezer-safe bag or container. They can be stored for up to 3 months. When you’re ready to bake, you can bake them directly from frozen – just add an extra 2-4 minutes to the baking time.
Final Thoughts
And there you have it! I truly hope you’re as excited as I am about these delightful Winter Wonderland Chocolate Chip Cookies. They truly are more than just a sweet treat; they’re a little piece of edible magic, designed to bring warmth and joy to even the chilliest of days. With every bite, you’ll experience that perfect balance of classic comfort and festive cheer, making them absolutely irresistible. Whether you’re baking them for a cozy evening in, a holiday gathering, or simply to brighten someone’s day, I promise these Winter Wonderland Chocolate Chip Cookies will be a resounding success. Get ready to fill your home with the most wonderful aromas and your hearts with pure, cookie-induced happiness. Happy baking!

Best Winter Wonderland Chocolate Chip Cookies for Holidays
- Total Time: 27 minutes
- Yield: 24 cookies 1x
Description
Experience the magic of winter with these delightful Winter Wonderland Chocolate Chip Cookies, combining classic flavors with festive additions. Perfect for cozy gatherings, these cookies are a sweet hug from a snow angel!
Ingredients
- 2 1/4 cups All-Purpose Flour
- 1 tsp Baking Soda
- 1/2 tsp Salt
- 3/4 cup Unsalted Butter, softened
- 1/2 cup Granulated Sugar
- 3/4 cup Light Brown Sugar, packed
- 2 Large Eggs, at room temperature
- 1 tsp Vanilla Extract
- 1/4 tsp Peppermint Extract (optional)
- 1 cup White Chocolate Chips
- 1 cup Milk Chocolate Chips or Semi-Sweet Chocolate Chips
- Festive Sprinkles/Edible Glitter (optional)
- Crushed Peppermint Candies/Candy Canes (optional)
Instructions
- Preheat your oven to 375°F (190°C). Line two large baking sheets with parchment paper or silicone baking mats.
- In a medium bowl, whisk together the all-purpose flour, baking soda, and salt. Set this aside.
- In the bowl of a stand mixer fitted with the paddle attachment, cream together the softened unsalted butter, granulated sugar, and light brown sugar on medium speed until light and fluffy, about 2-3 minutes.
- Beat in the eggs, one at a time, mixing well after each addition. Stir in the vanilla extract and the optional peppermint extract until just combined.
- Gradually add the dry ingredient mixture to the wet ingredients, mixing on low speed until just combined. Be careful not to overmix.
- Remove the bowl from the mixer and gently fold in the white chocolate chips, milk chocolate chips, and any optional crushed peppermint candies or candy canes.
- Drop rounded tablespoons of dough onto your prepared baking sheets, leaving about 2 inches between each cookie. If using extra white chocolate chips, press a few onto the top of each dough ball.
- Bake for 9-12 minutes, or until the edges are golden brown and the centers are still slightly soft.
- Let the cookies cool on the baking sheets for 5 minutes before transferring them to a wire rack to cool completely.
- Prep Time: 15 mins
- Cook Time: 12 mins
- Category: Dessert
- Method: Baking
- Cuisine: American
Nutrition
- Serving Size: 1 cookie
- Calories: 150
- Sugar: 10 g
- Sodium: 100 mg
- Fat: 7 g
- Saturated Fat: 4 g
- Unsaturated Fat: 2 g
- Trans Fat: 0 g
- Carbohydrates: 20 g
- Fiber: 1 g
- Protein: 2 g
- Cholesterol: 20 mg
Keywords: For best results, do not overbake the cookies. Chilling the dough for at least 30 minutes can improve texture. Use a cookie scoop for uniform cookies.


Leave a Comment