
Teriyaki Chicken Wrap Recipe A Quick Flavor Adventure is precisely what I’m thrilled to share with you today. Are you often looking for a meal that hits all the right notes – delicious, satisfying, and ready without a lengthy cooking marathon? Then prepare to embark on a truly delightful culinary journey! Teriyaki, originating from Japan, traditionally refers to a cooking method where food is grilled or broiled with a glaze of soy sauce, mirin, sugar, and sake, developing that signature glossy, sweet, and savory finish that we all adore. While the traditional teriyaki glaze has a rich history, its application in a versatile wrap format is a modern marvel, bringing global flavors right into your hands.
The Irresistible Allure of Teriyaki Chicken Wraps
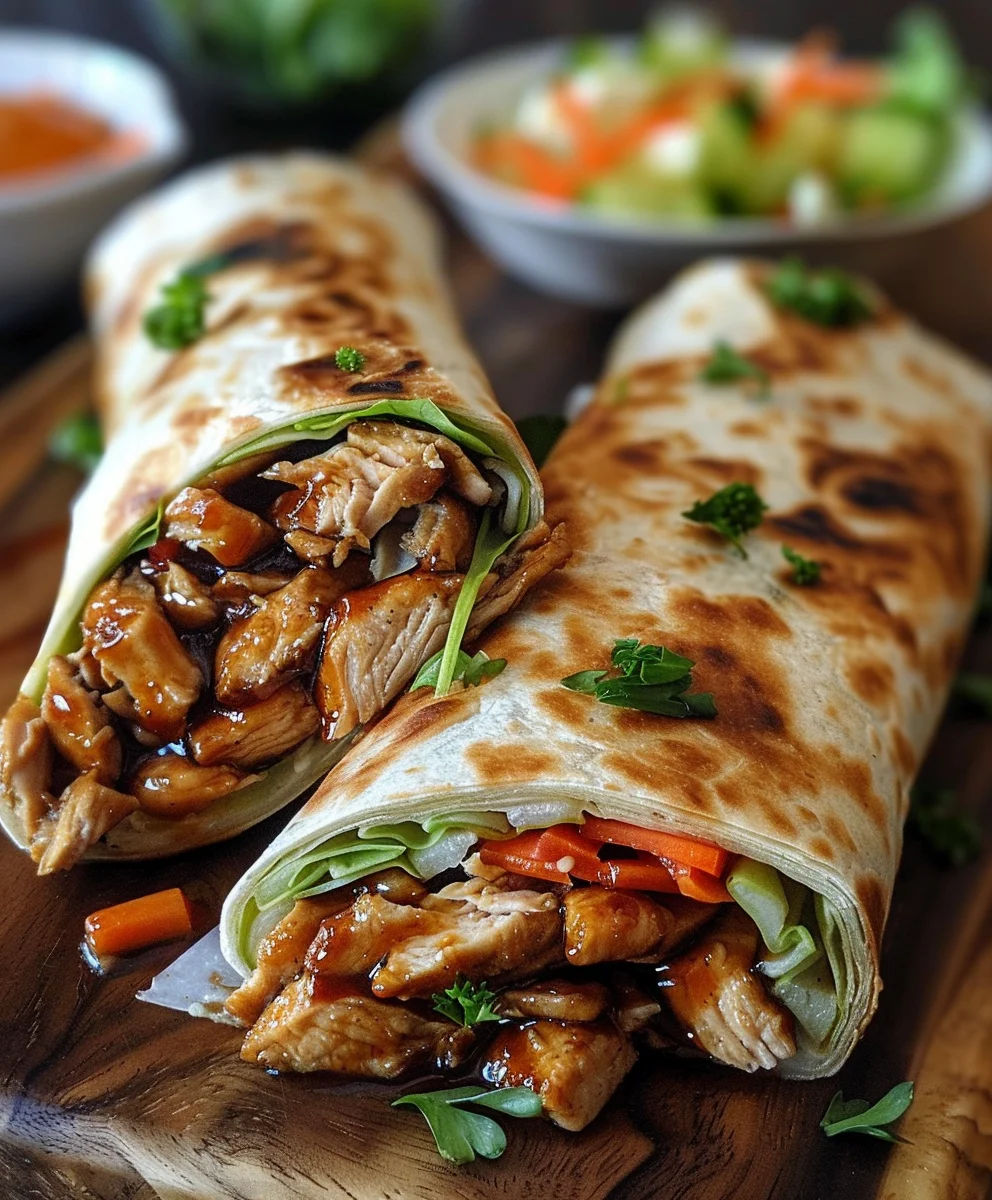
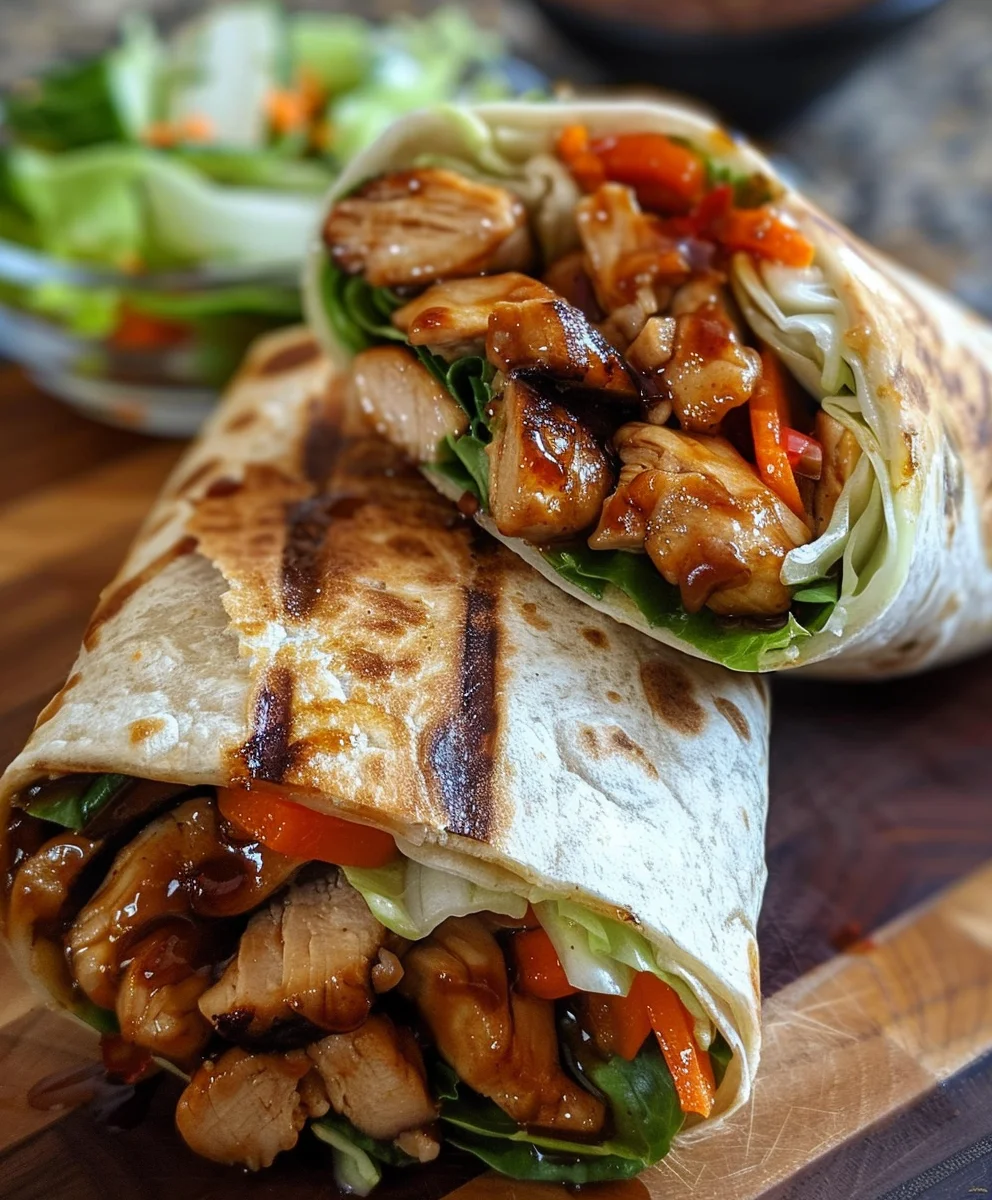
People absolutely adore this dish for countless reasons. It’s the perfect harmony of tender, succulent chicken coated in that irresistible umami-rich teriyaki sauce, combined with crisp, fresh vegetables, all nestled within a soft, pliable wrap. It offers an incredible balance of textures and flavors that are both comforting and exciting. Whether you’re seeking a speedy weeknight dinner, a portable lunch option, or a fresh idea for entertaining, this Teriyaki Chicken Wrap Recipe truly delivers a quick flavor adventure. I find myself turning to this recipe time and again because it effortlessly combines convenience with gourmet taste, proving that incredible meals don’t always require hours in the kitchen.

Ingredients:
Embarking on this delightful Teriyaki Chicken Wrap Recipe A Quick Flavor Adventure requires a handful of fresh, vibrant ingredients that come together to create a symphony of tastes and textures. Here’s what you’ll need to gather:
- For the Teriyaki Chicken:
- 1.5 lbs (approximately 680g) boneless, skinless chicken breasts or thighs, cut into 1/2-inch to 3/4-inch bite-sized pieces
- 2 tablespoons olive oil or vegetable oil, plus extra for cooking
- 1/2 cup (120ml) quality store-bought teriyaki sauce, or homemade (see note below for homemade option)
- 1 tablespoon sesame oil (optional, for extra depth of flavor)
- 1 tablespoon freshly grated ginger (or 1 teaspoon ginger powder)
- 2 cloves garlic, minced (or 1 teaspoon garlic powder)
- 1/2 teaspoon black pepper
- Pinch of red pepper flakes (optional, for a little kick)
- 1 tablespoon cornstarch or arrowroot powder (for thickening the sauce slightly)
- 2 tablespoons water (to mix with cornstarch)
- For the Wraps and Fresh Fillings:
- 6-8 large flour tortillas or whole wheat wraps (10-12 inches in diameter), depending on how generously you fill them
- 4 cups mixed greens or shredded iceberg lettuce, washed and dried
- 1 large carrot, julienned or shredded
- 1/2 English cucumber, thinly sliced into half-moons or julienned
- 1 red bell pepper, thinly sliced
- 1/4 red onion, very thinly sliced (optional, for a sharp bite)
- 1/4 cup fresh cilantro, roughly chopped (optional, for herbacious freshness)
- Optional Garnishes and Sauces:
- 2 tablespoons toasted sesame seeds, for sprinkling
- 2 green onions (scallions), thinly sliced, for garnish
- Sriracha mayonnaise or a drizzle of sriracha, for an extra spicy kick
- Extra teriyaki sauce, for dipping or drizzling
- Homemade Teriyaki Sauce (if you prefer to make your own):
- 1/2 cup soy sauce (low sodium preferred)
- 1/4 cup mirin (sweet rice wine)
- 2 tablespoons sake (optional, for authentic flavor)
- 2 tablespoons brown sugar or honey
- 1 tablespoon rice vinegar
- 1 teaspoon grated fresh ginger
- 1 clove garlic, minced
- 1 teaspoon cornstarch mixed with 1 tablespoon water (slurry)
- Combine all ingredients except slurry in a saucepan, bring to a simmer, then whisk in slurry until thickened.
Having all your ingredients ready and prepped before you start cooking is truly the secret to a smooth and enjoyable cooking experience. It’s what chefs call “mise en place,” and it makes a world of difference, especially when you’re aiming for a quick flavor adventure!
Preparing Your Ingredients for the Teriyaki Chicken Wrap Adventure
Let’s get all our components ready to go. This initial prep work is crucial for ensuring a seamless cooking process and guarantees that your Teriyaki Chicken Wrap Recipe A Quick Flavor Adventure comes together effortlessly. Think of this as laying the delicious groundwork!
- Prepare the Chicken: If you haven’t already, take your boneless, skinless chicken breasts or thighs and cut them into uniform 1/2-inch to 3/4-inch bite-sized pieces. Aim for consistency here; similarly sized pieces will cook more evenly. Once cut, gently pat the chicken dry with paper towels. This step is important! Removing excess moisture allows the chicken to sear beautifully and develop a lovely golden crust, rather than just steaming in the pan.
- Marinate (or Season) the Chicken: In a medium bowl, combine your cut chicken pieces with 1 tablespoon of olive oil or vegetable oil, the freshly grated ginger, minced garlic, black pepper, and optional red pepper flakes. Toss everything together to ensure each piece of chicken is lightly coated. If you have the time, letting the chicken marinate for 15-30 minutes at room temperature (or up to a few hours in the refrigerator) will infuse it with even more flavor. If you’re short on time, don’t worry, cooking it immediately will still yield fantastic results thanks to the teriyaki sauce we’ll add later.
- Prepare the Teriyaki Sauce Slurry: In a small bowl, whisk together the cornstarch or arrowroot powder with 2 tablespoons of cold water until smooth. This is your “slurry,” and it will be used at the end of the cooking process to thicken your teriyaki sauce, giving it that wonderfully glossy, clingy texture we all love. Set this aside. If you’re making your own homemade teriyaki sauce, ensure it’s already prepped and ready to go.
- Wash and Prepare Fresh Vegetables: This is where the vibrancy of your wrap truly shines!
- Mixed Greens/Lettuce: Wash your mixed greens or lettuce thoroughly under cold running water. Use a salad spinner or gently pat them dry with paper towels. Excess water can make your wraps soggy, so ensure they are as dry as possible.
- Carrots: Peel and julienne your carrot. If you don’t have a julienne peeler, you can use a standard peeler to make thin ribbons, or simply grate it. The goal is thin, easily chewable pieces.
- Cucumber: Wash and thinly slice your English cucumber. English cucumbers are great because they have fewer seeds and thinner skins. If using a regular cucumber, you might want to scoop out some of the seeds.
- Red Bell Pepper: Wash the red bell pepper, remove the stem and seeds, and then slice it very thinly into strips.
- Red Onion: If using, peel and slice the red onion as thinly as possible. A mandoline slicer works wonders here, but a sharp knife and a steady hand are perfectly fine.
- Cilantro/Green Onions: Chop your fresh cilantro (if using) and thinly slice your green onions for garnish.
- Arrange Your Workstation: Gather all your prepped ingredients—chicken, sauce slurry, wraps, and all your lovely vegetables—and arrange them on your kitchen counter. This “assembly line” approach makes the final wrap building super efficient and enjoyable.
With all your ingredients prepped and ready, you’re now perfectly poised to transition into cooking the star of our show: the savory teriyaki chicken!
Crafting the Irresistible Teriyaki Chicken Filling
Now comes the exciting part: cooking our flavorful teriyaki chicken! This is where the magic truly happens, transforming simple chicken pieces into a glossy, sticky, and utterly delicious filling for your wraps. Pay attention to the cooking temperatures and timing to achieve perfectly tender chicken and a beautifully coated sauce.
- Heat the Pan: Place a large skillet or wok over medium-high heat. Add 1-2 tablespoons of olive oil or vegetable oil, swirling to coat the bottom of the pan. Allow the oil to heat up until it just begins to shimmer and you can feel the heat radiating from it when you hold your hand a few inches above the surface. Don’t rush this step; a hot pan is key for a good sear.
- Cook the Chicken: Carefully add the marinated (or seasoned) chicken pieces to the hot skillet in a single layer. You might need to do this in two batches if your pan isn’t large enough to avoid overcrowding. Overcrowding the pan will lower the temperature and cause the chicken to steam rather than sear, which means no delicious browning! Let the chicken cook undisturbed for 3-4 minutes until a beautiful golden-brown crust forms on one side.
- Flip and Cook Through: Flip the chicken pieces and continue to cook for another 3-5 minutes, stirring occasionally, until they are cooked through and no longer pink in the center. The internal temperature of the chicken should reach 165°F (74°C). Once cooked, transfer the chicken to a clean plate and set aside for a moment. Don’t worry if there are a few delicious browned bits stuck to the bottom of the pan; those are flavor powerhouses!
- Deglaze and Add Teriyaki Sauce: If your pan looks a little dry or has excessive browned bits, you can add another teaspoon of oil. Pour in your 1/2 cup of teriyaki sauce into the hot pan. Immediately use a wooden spoon or spatula to scrape up any browned bits (fond) from the bottom of the pan. This deglazing action incorporates all that concentrated flavor into your sauce.
- Bring to a Simmer and Thicken: Bring the teriyaki sauce to a gentle simmer. Once simmering, give your cornstarch slurry (the cornstarch and water mixture) a quick re-whisk, as cornstarch tends to settle. Slowly pour the slurry into the simmering sauce while whisking continuously. Continue whisking and simmering for 1-2 minutes until the sauce thickens to a beautiful, glossy consistency that will perfectly coat the chicken.
A quick tip: If the sauce gets too thick, you can always add a tablespoon or two of water or chicken broth to thin it out slightly. If it’s not thick enough, you can quickly whisk another 1/2 teaspoon of cornstarch with a tablespoon of cold water and add that in.
- Combine Chicken with Sauce: Return the cooked chicken pieces to the skillet with the thickened teriyaki sauce. Toss everything gently to ensure that every single piece of chicken is thoroughly coated in that luscious, glistening teriyaki goodness. Allow it to simmer for another minute or two, just long enough for the chicken to heat through and absorb all those fantastic flavors.
- Finish with Sesame Oil and Garnish: Remove the skillet from the heat. If you’re using sesame oil, drizzle in the 1 tablespoon now and stir it through. The aroma of toasted sesame oil adds a wonderful authentic touch. You can also stir in half of your sliced green onions or toasted sesame seeds at this stage, reserving the rest for garnish. Your irresistible Teriyaki Chicken filling is now ready!
The aroma filling your kitchen right now must be absolutely incredible! This sticky, sweet, and savory chicken is the heart of our Teriyaki Chicken Wrap Recipe A Quick Flavor Adventure. It’s bursting with umami and just the right amount of sweetness, ready to be nestled into our fresh wraps. Next up, the exciting part of bringing it all together!
Assembling Your Flavor-Packed Teriyaki Chicken Wraps
Alright, it’s time for the grand finale – assembling these incredible Teriyaki Chicken Wraps! This is where all your hard work in prepping and cooking comes together into a beautiful, handheld meal. The key here is layering to ensure every bite offers a delightful balance of flavors and textures, making each Teriyaki Chicken Wrap Recipe A Quick Flavor Adventure a truly satisfying experience.
- Warm the Tortillas (Optional but Recommended): While not strictly necessary, gently warming your tortillas or wraps makes them more pliable and less likely to crack when you roll them. You can do this in a few ways:
- Microwave: Stack 2-3 tortillas and microwave for 15-20 seconds.
- Dry Skillet: Heat a dry skillet over medium heat and warm each tortilla for about 15-20 seconds per side until soft and slightly puffed.
- Oven: Wrap a stack of tortillas in foil and warm in a preheated oven at 300°F (150°C) for about 10 minutes.
Place the warmed tortillas on a clean plate or cutting board, ready for filling. Keep them covered with a clean kitchen towel to retain warmth and flexibility if working in batches.
- Spread a Base Layer (Optional Sauce): If you’re using Sriracha mayonnaise or an extra drizzle of teriyaki sauce as a base, spread a thin, even layer over the entire surface of each warm tortilla. This adds an extra layer of moisture and flavor and helps prevent the wrap from getting soggy immediately. However, it’s completely optional if you prefer to let the chicken sauce be the main event.
- Layer the Fresh Greens: Next, lay a generous bed of your washed and dried mixed greens or shredded lettuce down the center of each tortilla, leaving about an inch or two free on the top and bottom edges. This creates a crisp foundation and a barrier between the warm chicken and the tortilla, helping to keep the wrap from becoming too soft too quickly.
- Add the Teriyaki Chicken: Spoon a generous portion of your warm, glossy teriyaki chicken filling over the greens. Distribute it evenly, again keeping it centralized, aiming for a balance that allows for easy rolling without overfilling. Usually, about 1/2 to 3/4 cup of chicken per wrap is a good amount.
- Pile on the Fresh Vegetables: Now for the colorful crunch! Arrange your julienned carrots, sliced cucumber, thinly sliced red bell pepper, and optional red onion and cilantro over the chicken. Don’t be shy with the veggies; they add essential freshness, crunch, and nutritional value to balance the rich chicken.
- Add Optional Garnishes: Sprinkle some of your reserved toasted sesame seeds and thinly sliced green onions over the fillings. If you like an extra kick, a final drizzle of sriracha or sriracha mayo can be added now.
- Fold and Roll the Wrap: This is the crucial step for a neat, portable wrap!
- First, fold in the two opposite sides (the left and right edges) of the tortilla over the filling, bringing them about 1-2 inches towards the center.
- Then, starting from the bottom edge (the one closest to you), tightly fold it up and over the filling.
- Continue to roll the wrap upwards, keeping it as snug and tight as possible, until you reach the top edge. A firm but gentle hand is needed to keep everything tucked in without tearing the tortilla.
- You should now have a beautifully cylindrical, well-contained wrap.
Repeat this process for the remaining tortillas until all your delicious Teriyaki Chicken Wraps are assembled.
Congratulations, you’ve successfully created a batch of magnificent Teriyaki Chicken Wraps! The sight alone is mouth-watering, with vibrant colors peeking out from the neatly rolled tortillas. These are truly a feast for the eyes and the palate. They are perfect for a quick lunch, a satisfying dinner, or even packed for a gourmet picnic. Now, let’s talk about how to serve and enjoy your creation, along with a few extra tips.
Serving Suggestions and Customization Tips
Your Teriyaki Chicken Wrap Recipe A Quick Flavor Adventure is now complete and ready to be devoured! These wraps are incredibly versatile and can be enjoyed in many ways. Here are some suggestions for serving them, along with ideas for how you can customize this recipe to make it truly your own, ensuring every bite is as exciting as the last.
- Immediate Enjoyment: The best way to enjoy these wraps is immediately after assembly when the chicken is still warm, and the vegetables are at their crispest. Serve them whole for a hearty meal, or for easier eating and a more appealing presentation, you can slice each wrap in half diagonally. This reveals all the colorful layers inside and makes them perfect for a grab-and-go lunch or a party appetizer.
- Accompaniments:
- Dipping Sauces: Offer extra teriyaki sauce, sriracha mayonnaise, or even a light peanut dipping sauce on the side for those who love to dip.
- Side Salad: A simple side salad with a light vinaigrette would complement the wraps beautifully, adding more fresh greens to your meal.
- Asian-Inspired Sides: Consider serving with a side of edamame, a small bowl of miso soup, or a light cucumber salad for a complete Asian-inspired meal.
- Fruit: A fresh fruit salad or some orange slices can provide a refreshing contrast to the savory wraps.
- Make-Ahead & Storage Tips:
- Chicken Filling: The teriyaki chicken filling can be cooked ahead of time and stored in an airtight container in the refrigerator for up to 3-4 days. Reheat gently on the stovetop or in the microwave before assembling the wraps.
- Prepped Veggies: Your washed and chopped vegetables can also be prepped a day in advance and stored in separate airtight containers in the refrigerator.
- Assembled Wraps: While best fresh, if you need to make them a few hours in advance, wrap each tightly in plastic wrap to prevent them from drying out or getting soggy. Store them in the refrigerator. Just be aware that the tortillas might soften slightly, and the greens might lose a bit of their crispness over time. They are generally not ideal for storing overnight once fully assembled.
- Customization Ideas for Your Next Flavor Adventure:
- Protein Variations: Not a fan of chicken? This recipe works wonderfully with thinly sliced beef (like flank steak), shrimp, or even firm tofu for a vegetarian option. Just adjust cooking times accordingly.
- Vegetable Swap-Ins: Feel free to experiment with other vegetables! Thinly sliced avocado adds a creamy texture, bell peppers of different colors (yellow, orange) add more visual appeal, shredded cabbage offers extra crunch, or even a handful of bean sprouts for an authentic Asian touch.
- Spice Level: For more heat, increase the red pepper flakes in the chicken marinade or add extra sriracha to your wraps. For less heat, omit the red pepper flakes and sriracha.
- Grain Bowls: Instead of wraps, serve the teriyaki chicken and fresh vegetables over a bed of steamed rice or quinoa for a delicious and hearty teriyaki bowl. This is a fantastic gluten-free option if you use tamari for the teriyaki sauce.
- Cheese Addition (Unconventional but Tasty!): For a fusion twist, a sprinkle of shredded Monterey Jack or a mild cheddar cheese can surprisingly complement the flavors, though it’s certainly not traditional.
Remember: Cooking should be an adventure! Don’t hesitate to play with ingredients and find what truly excites your taste buds.
This Teriyaki Chicken Wrap Recipe A Quick Flavor Adventure is a testament to how simple ingredients, when thoughtfully prepared, can create a truly memorable meal. It’s fast, fresh, and bursting with the sweet, savory, and umami flavors of a classic teriyaki dish, all wrapped up in a convenient, delicious package. Enjoy every single bite!
Conclusion:
Well, friends, we’ve reached the end of our culinary journey for today, and I genuinely hope you’re feeling inspired and, perhaps, a little hungry! What we’ve explored together isn’t just another recipe; it’s an invitation to elevate your weeknight meals, to infuse your kitchen with vibrant aromas, and to delight your taste buds with a truly unforgettable dish. This isn’t merely about assembling ingredients; it’s about crafting an experience, a moment of pure culinary bliss that’s both accessible and incredibly satisfying. I truly believe that once you try this, it will quickly become a cherished part of your regular cooking repertoire. It strikes that perfect balance of being delightfully complex in flavor while remaining wonderfully simple in execution, making it a champion for busy schedules.
Why This Recipe is an Absolute Must-Try
In a world where time often feels like our most precious commodity, finding a recipe that delivers big on flavor without demanding hours of your attention is like striking gold. And that, my friends, is exactly what we have here. This dish offers a symphony of tastes – the sweet, sticky glaze of the teriyaki, the savory depth of perfectly cooked chicken, and the refreshing crispness of fresh vegetables, all harmoniously nestled within a soft, pliable wrap. It’s a complete meal in one convenient package, perfect for a quick lunch at home, a grab-and-go option for a picnic, or a relaxed family dinner. You won’t find yourself slaving over a hot stove for ages, nor will you need an extensive list of obscure ingredients. Everything comes together beautifully, promising a flavorful payoff that feels far more gourmet than the effort required. It’s light yet satisfying, full of texture, and just bursting with fresh, vibrant flavors that dance on your palate. It’s a testament to how simple, quality ingredients can be transformed into something truly spectacular with just a little know-how.
A Truly Adaptable Dish: Serving Suggestions and Delicious Variations
One of the many reasons I adore this recipe is its incredible versatility. While the core concept of the wrap is fantastic on its own, there are so many ways to customize it to your liking or to suit whatever ingredients you happen to have on hand. For a simple serving suggestion, these wraps are fantastic served alongside a light side salad, perhaps with an Asian-inspired vinaigrette to complement the flavors. A small bowl of miso soup or even some crispy edamame would also make a wonderful accompaniment, adding an extra layer of texture and freshness. If you’re hosting a casual get-together, consider cutting the wraps in half or thirds and arranging them artfully on a platter for an impressive appetizer that disappears almost instantly.
Now, let’s talk about variations – this is where you can truly make this recipe your own! Feeling adventurous? Instead of chicken, why not try thinly sliced beef or succulent shrimp? For my vegetarian and vegan friends, firm tofu or tempeh, marinated and pan-fried until golden, works absolute wonders as a protein substitute. You could even use a medley of mushrooms for an earthy alternative. Don’t limit yourself to the vegetables I’ve suggested either! Bell peppers of various colors, thinly sliced red onion (perhaps quick-pickled for an extra tang), shredded carrots, cucumber sticks, or even a sprinkle of toasted sesame seeds can all enhance both the flavor and visual appeal. For an added layer of creaminess, a few slices of ripe avocado would be heavenly. Want a bit of heat? A drizzle of sriracha mayo or a sprinkle of red pepper flakes will definitely do the trick. And if you’re looking to reduce carbs, you can easily turn this into a lettuce wrap or a vibrant salad bowl, ditching the tortilla altogether. The possibilities are truly endless, allowing you to tailor this fantastic dish to your preferences and dietary needs every single time.
Your Culinary Adventure Awaits!
So, what are you waiting for? I wholeheartedly encourage you to roll up your sleeves and give this Teriyaki Chicken Wrap Recipe A Quick Flavor Adventure a try this week. You’ll be amazed at how effortlessly it comes together and how incredibly satisfying the results are. It’s more than just a meal; it’s an experience that’s destined to bring joy to your kitchen and smiles to those you share it with. Don’t be afraid to experiment with the variations I’ve mentioned, or even invent some of your own unique twists. Cooking should be an adventure, a creative outlet, and this recipe is the perfect canvas for your culinary artistry. Once you’ve whipped up your delicious wraps, I would absolutely love to hear all about it! Please come back and share your experiences, your favorite variations, and even photos of your beautiful creations in the comments section below. Your insights and culinary adventures inspire not only me but also our entire community of food lovers. Let’s embark on this flavorful journey together!
Teriyaki Chicken Wrap: A Quick Flavor Adventure
A delicious, satisfying, and quick Teriyaki Chicken Wrap recipe featuring tender chicken, fresh vegetables, and a savory teriyaki sauce, all nestled in a soft tortilla. Perfect for a speedy weeknight dinner, portable lunch, or entertaining.
Ingredients
-
1.5 lbs boneless, skinless chicken (breasts or thighs), cut into bite-sized pieces
-
2 tbsp olive or vegetable oil, plus extra for cooking
-
1/2 cup store-bought or homemade teriyaki sauce
-
1 tbsp sesame oil (optional)
-
1 tbsp fresh ginger, grated (or 1 tsp ginger powder)
-
2 cloves garlic, minced (or 1 tsp garlic powder)
-
1/2 tsp black pepper
-
Pinch red pepper flakes (optional)
-
1 tbsp cornstarch or arrowroot powder
-
2 tbsp water (for cornstarch slurry)
-
6-8 large flour or whole wheat tortillas (10-12 inches)
-
4 cups mixed greens or shredded lettuce
-
1 large carrot, julienned
-
1/2 English cucumber, thinly sliced
-
1 red bell pepper, thinly sliced
-
1/4 red onion, thinly sliced (optional)
-
1/4 cup fresh cilantro, chopped (optional)
-
2 tbsp toasted sesame seeds (for garnish)
-
2 green onions, thinly sliced (for garnish)
-
Sriracha mayonnaise or sriracha (optional, for kick)
-
Extra teriyaki sauce (optional, for dipping)
-
For Homemade Teriyaki Sauce (non-alcoholic option):
-
1/2 cup low sodium soy sauce
-
1/4 cup rice vinegar + 2 tsp sugar (replaces mirin)
-
2 tbsp chicken broth or water (replaces sake)
-
2 tbsp brown sugar or honey
-
1 tbsp rice vinegar
-
1 tsp grated fresh ginger
-
1 clove garlic, minced
-
1 tsp cornstarch mixed with 1 tbsp water (slurry)
Instructions
-
Step 1
Cut chicken into 1/2-3/4 inch bite-sized pieces; pat dry. In a bowl, toss chicken with 1 tbsp oil, ginger, garlic, pepper, and red pepper flakes (optional). Marinate 15-30 min if time permits. -
Step 2
Whisk cornstarch with 2 tbsp cold water to create a slurry; set aside. Wash and dry greens/lettuce. Julienne carrot. Thinly slice cucumber, red bell pepper, and red onion (if using). Chop cilantro and green onions. Arrange all prepped ingredients for easy assembly. -
Step 3
Heat 1-2 tbsp oil in a large skillet over medium-high heat. Cook chicken in single layers (in batches if needed) for 3-4 min per side until golden brown and cooked through (165°F). Transfer to a plate. -
Step 4
Add 1/2 cup teriyaki sauce to the pan, scraping up any browned bits. Bring to a simmer. Re-whisk slurry, then slowly whisk into sauce until thickened (1-2 min). Return cooked chicken to pan; toss to coat in sauce. Simmer 1-2 min. Remove from heat. Stir in 1 tbsp sesame oil (if using) and half of sliced green onions/sesame seeds. Set aside. -
Step 5
Warm tortillas (microwave, skillet, or oven) to make them pliable. Spread an optional thin layer of Sriracha mayonnaise or extra teriyaki sauce on each tortilla. Lay a generous bed of mixed greens/shredded lettuce down the center of each tortilla. Spoon teriyaki chicken filling over the greens. Layer with julienned carrots, sliced cucumber, red bell pepper, red onion (optional), and cilantro (optional). Sprinkle with reserved sesame seeds and green onions. Add sriracha (optional). -
Step 6
Fold in the two opposite sides of the tortilla, then tightly roll from the bottom edge upwards. Repeat for remaining wraps. Serve immediately, whole or sliced diagonally. Enjoy!
Important Information
Nutrition Facts (Per Serving)
It is important to consider this information as approximate and not to use it as definitive health advice.
Allergy Information
Please check ingredients for potential allergens and consult a health professional if in doubt.
Leave a Comment