
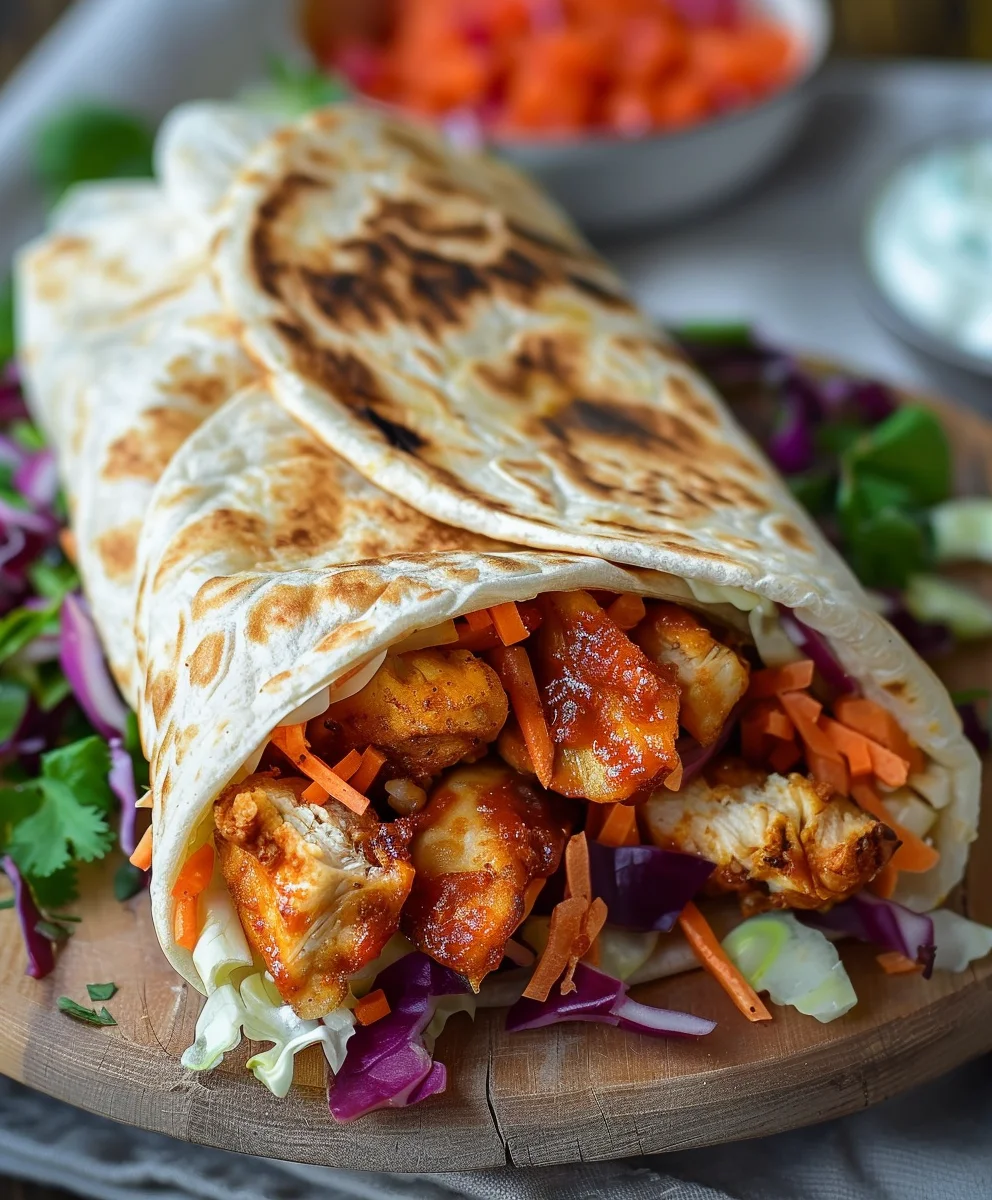
Crispy Bbq Chicken Wrap is more than just a meal; it’s an experience—a harmonious blend of textures and flavors that promises to elevate your culinary day. I am so excited to share this recipe with you because I truly believe it represents the pinnacle of comforting, yet conveniently prepared, cuisine. While the concept of wrapping delicious fillings in flatbreads boasts a rich history spanning diverse cultures worldwide, this particular iteration – combining smoky, sweet, and tangy BBQ chicken with a perfectly golden, crispy exterior – feels distinctly modern and utterly irresistible. It’s the ingenious evolution of a beloved backyard staple into a portable, crave-worthy sensation.
Why We Love the Crispy Bbq Chicken Wrap
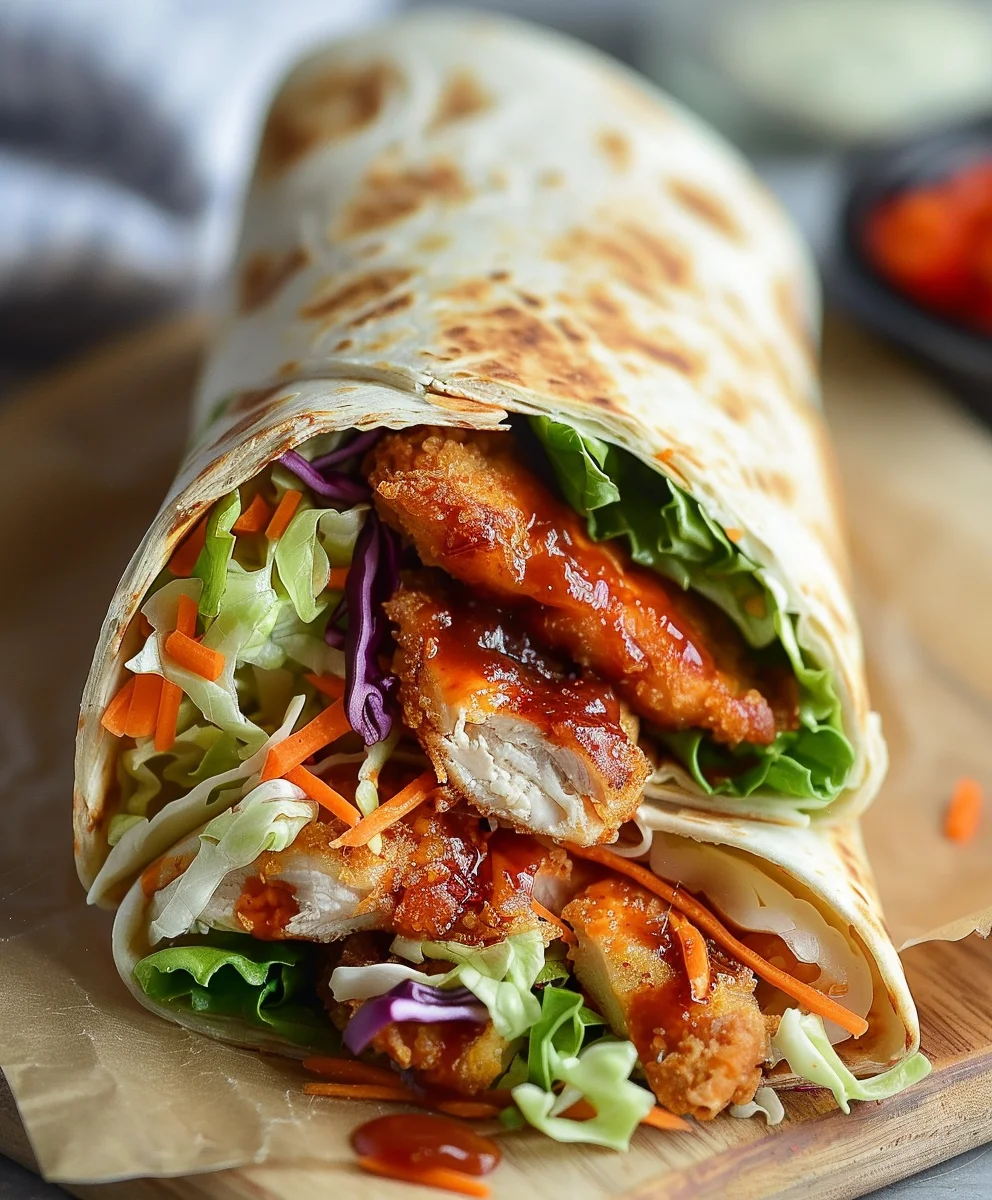
People absolutely adore this dish, and for excellent reason: it delivers that coveted satisfying crunch alongside tender, flavorful chicken, often complemented by fresh, crisp vegetables and creamy dressings. Every bite offers a delightful contrast, making the Crispy Bbq Chicken Wrap an undeniable favorite for everything from a quick, impressive lunch to a casual dinner party. Get ready to discover your new go-to recipe that combines all your favorite BBQ flavors with an irresistible texture!

Ingredients:
Here’s what you’ll need to create your very own delicious Crispy Bbq Chicken Wrap. I’ve carefully selected these components to ensure a perfect balance of texture and flavor, making each bite an absolute delight. Don’t worry if you don’t have everything; I’ll offer some substitution ideas along the way!
- For the Crispy BBQ Chicken:
- 2 boneless, skinless chicken breasts: About 1.5 to 2 pounds total. I love using fresh chicken for the best flavor, but thawed frozen breasts work wonderfully too. We’ll be slicing these into tenders, so uniformity is key for even cooking.
- 1 cup all-purpose flour: For our initial dredge, this creates the perfect base for the egg wash to adhere to.
- 2 large eggs: Whisked well, these act as the glue for our panko breading.
- 2 cups Panko breadcrumbs: This is my secret weapon for truly crispy chicken! Panko delivers a much crunchier texture than regular breadcrumbs, which is essential for our Crispy Bbq Chicken Wrap.
- 1 teaspoon salt: To season the chicken and the flour mixture.
- ½ teaspoon black pepper: Freshly ground if you can, for a little extra zing.
- 1 teaspoon garlic powder: Adds a lovely aromatic depth to our chicken.
- ½ teaspoon smoked paprika: This enhances the BBQ flavor even before we add the sauce! It also gives the breading a beautiful golden hue.
- ¼ cup vegetable oil or olive oil: For baking or air frying the chicken. If you prefer to shallow fry, you might need a bit more.
- 1 cup of your favorite BBQ sauce: Sweet, smoky, spicy – whatever you love! This is where you can really personalize the flavor profile of your Crispy Bbq Chicken Wrap.
- For Assembling the Wraps:
- 6 large flour tortillas (10-inch or burrito size): These need to be flexible and sturdy enough to hold all our wonderful fillings without tearing.
- 1 cup shredded cheddar cheese or a cheddar-Monterey Jack blend: Melts beautifully and adds a creamy, savory element. Feel free to use your favorite cheese; pepper jack would add a nice kick!
- 2 cups shredded Romaine lettuce or iceberg lettuce: The crispier, the better! This adds a refreshing crunch and vibrant color to contrast with the rich chicken.
- ½ small red onion: Thinly sliced. Its sharp, tangy bite cuts through the richness of the BBQ chicken. If you find raw red onion too strong, you can soak it in ice water for 10 minutes to mellow it out.
- ½ cup dill pickle slices: Drained and roughly chopped or left as slices. This might sound unusual to some, but the briny, tangy crunch of pickles is an absolute game-changer in a BBQ chicken wrap. Trust me on this one!
- ¼ cup Ranch dressing or blue cheese dressing: For drizzling. This adds a cool, creamy counterpoint to the BBQ flavor and ties all the ingredients together beautifully.
Preparing the Crispy BBQ Chicken
The star of our show, the crispy BBQ chicken, requires a little love and attention to get just right. We want that perfect golden-brown crunch on the outside and tender, juicy chicken on the inside, all coated in a flavorful BBQ glaze. This process is key to achieving the ultimate Crispy Bbq Chicken Wrap experience.
- Prepare the Chicken: First things first, grab your boneless, skinless chicken breasts. Lay them flat on a cutting board. Using a sharp knife, carefully slice each chicken breast horizontally into two thinner cutlets. This helps them cook more evenly and creates more surface area for that delightful crispy breading. Once you have thinner cutlets, you can either slice them lengthwise into finger-sized strips, often called tenders, or if you prefer larger pieces for a heartier bite, you can simply leave them as flatter cutlets. I usually go for tenders, about 1-inch wide, as they fit perfectly into a wrap and are easier to eat. Patting the chicken dry with paper towels is a crucial step here; excess moisture can prevent the breading from sticking properly, leading to less crispy results.
- Season the Breading Mix: In a shallow dish or a wide, shallow bowl, combine the all-purpose flour, 1 teaspoon of salt, ½ teaspoon of black pepper, 1 teaspoon of garlic powder, and ½ teaspoon of smoked paprika. Whisk these dry ingredients together thoroughly. This seasoned flour is our first layer of flavor and helps to create a good base for the egg wash. Don’t skip the seasoning in this layer; it adds depth to the chicken itself, not just the BBQ sauce.
- Set Up Your Breading Station: For efficient and clean breading, I like to set up a three-station assembly line.
- Station 1 (Flour): Place your seasoned flour mixture in the first shallow dish.
- Station 2 (Egg Wash): In a second shallow dish, crack and lightly whisk your two large eggs until the yolks and whites are fully combined. This is our “glue.”
- Station 3 (Panko): In a third shallow dish, spread out the 2 cups of Panko breadcrumbs. This will give us that glorious crunch for our Crispy Bbq Chicken Wrap.
- Preparation Tip: Keep one hand designated for handling wet ingredients (the egg) and the other hand for dry ingredients (flour and panko) to avoid getting clumpy breading on your fingers, which makes the process much messier.
- Bread the Chicken: Now for the fun part! Take one piece of chicken at a time and follow these steps:
- First, dredge the chicken piece thoroughly in the seasoned flour mixture, ensuring it’s completely coated. Gently shake off any excess flour.
- Next, dip the flour-coated chicken into the egg wash, allowing any excess egg to drip off. Make sure the entire piece is covered.
- Finally, transfer the chicken to the Panko breadcrumbs. Press the Panko gently onto all sides of the chicken, ensuring an even and generous coating. The more Panko, the crispier your chicken will be! Set the breaded chicken on a clean plate or baking sheet as you continue with the remaining pieces. Repeat this process until all your chicken pieces are beautifully breaded.
- Cook the Crispy Chicken: We’re going for crispy, so let’s get cooking! I find baking or air frying offers a fantastic crisp without the mess of deep-frying, perfect for our Crispy Bbq Chicken Wrap.
- For Baking: Preheat your oven to 400°F (200°C). Lightly grease a large baking sheet or line it with parchment paper for easy cleanup. Arrange the breaded chicken pieces in a single layer on the prepared baking sheet, making sure they aren’t touching each other. Drizzle or spray the tops of the chicken pieces lightly with about ¼ cup of vegetable or olive oil. This helps achieve that golden-brown crispness. Bake for 20-25 minutes, flipping them halfway through, until they are golden brown, crispy, and cooked through to an internal temperature of 165°F (74°C). The cooking time might vary depending on the thickness of your chicken pieces, so keep an eye on them.
- For Air Frying: If you have an air fryer, this is an excellent option for super crispy chicken! Preheat your air fryer to 375°F (190°C). Lightly spray the air fryer basket with cooking oil. Place the breaded chicken pieces in a single layer in the basket, ensuring not to overcrowd it; you’ll likely need to cook in batches. Spray the tops of the chicken pieces with oil. Air fry for 12-18 minutes, flipping halfway through, until they are golden brown, wonderfully crispy, and cooked to an internal temperature of 165°F (74°C). Air frying often yields a slightly crisper result than baking in my experience, which is ideal for a Crispy Bbq Chicken Wrap.
- Toss with BBQ Sauce: Once your chicken is beautifully cooked and crispy, transfer it to a large bowl. Pour your favorite BBQ sauce over the hot chicken. Using tongs or a spoon, gently toss the chicken until each piece is evenly coated in that rich, tangy, or sweet BBQ goodness. The warmth of the chicken will help the sauce adhere perfectly. This step infuses our crispy chicken with the signature BBQ flavor we’re looking for.
Preparing the Wrap Components
While your crispy BBQ chicken is resting and cooling slightly, let’s get all the other fantastic ingredients ready. Having everything prepped before assembly makes the wrapping process a breeze and ensures every Crispy Bbq Chicken Wrap is bursting with flavor and texture.
- Prep Your Veggies:
- Shred the Lettuce: Take your Romaine or iceberg lettuce, wash it thoroughly, and then dry it very well. Excess water on the lettuce can make your wraps soggy. I like to use a salad spinner for this. Once dry, thinly slice or roughly chop the lettuce into bite-sized pieces. We want about 2 cups for our wraps.
- Slice the Red Onion: Peel your red onion and then slice it as thinly as possible. A mandoline slicer can achieve paper-thin slices, which are ideal, but a sharp knife works perfectly too. If the raw onion taste is too strong for your palate, you can place the sliced onions in a bowl of ice water for about 10-15 minutes, then drain and pat them dry. This mellows their flavor beautifully.
- Chop the Pickles: If you’re using whole dill pickle slices, you might want to roughly chop them into smaller, more manageable pieces. This ensures you get a burst of tangy pickle in every bite of your Crispy Bbq Chicken Wrap.
- Shred the Cheese: If you’re not using pre-shredded cheese, now’s the time to grate about 1 cup of cheddar or cheddar-Monterey Jack blend. Freshly shredded cheese often melts better and has a more vibrant flavor, but pre-shredded works just fine for convenience.
- Warm the Tortillas: This is a small but mighty step that makes a huge difference in the pliability and taste of your wraps. Warm tortillas are much easier to roll without cracking and are generally more pleasant to eat.
- Microwave Method: Stack your tortillas and wrap them in a slightly damp paper towel. Microwave for 20-30 seconds, or until they are warm and flexible.
- Stovetop Method: Heat a dry skillet over medium heat. Place one tortilla at a time in the skillet for about 15-20 seconds per side, until soft and pliable with a few browned spots. Keep them covered in a clean kitchen towel to keep them warm while you warm the rest.
Assembling the Crispy BBQ Chicken Wrap
Now for the grand finale – bringing all these amazing components together to create the ultimate Crispy Bbq Chicken Wrap! This is where all our hard work pays off. The key to a good wrap is thoughtful layering and a secure fold.
- Layer the Ingredients: Lay one warm tortilla flat on a clean work surface. Think of the bottom third of the tortilla as your starting point.
- Cheese First: Sprinkle a generous layer of shredded cheese across the center third of the tortilla. Placing the cheese down first sometimes helps to create a barrier and can prevent the tortilla from getting soggy from other ingredients, especially if your chicken is still very warm.
- Crispy BBQ Chicken: Next, arrange a good portion of your BBQ-coated crispy chicken pieces horizontally across the cheese layer, aiming for the middle of the tortilla. Don’t overload it, or it will be difficult to wrap!
- Veggies & Pickles: Pile on a handful of shredded lettuce, followed by a sprinkle of thinly sliced red onion and those delightful chopped dill pickles. This adds freshness, tang, and that essential crunch to our Crispy Bbq Chicken Wrap.
- Dressing Drizzle: Finish this vibrant filling with a generous drizzle of Ranch or blue cheese dressing. This creamy element is vital for balancing the flavors and adding moisture.
- Fold the Wrap: This technique will ensure a tight, secure wrap that holds all your delicious fillings in place.
- First, take the bottom edge of the tortilla and fold it up tightly over the filling. This initial fold is crucial for securing the ingredients.
- Next, fold in both the left and right sides of the tortilla over the filling, creating a neat envelope shape.
- Finally, starting from the folded-up bottom, tightly roll the wrap upwards towards the top edge. Keep the roll firm and snug as you go. You want a compact, cylindrical wrap that’s easy to hold and eat.
- Serve Immediately: Repeat the layering and folding process for the remaining tortillas and fillings. These Crispy Bbq Chicken Wraps are best enjoyed fresh, right after assembly, when the chicken is still crispy and warm, and the vegetables are at their freshest.
Serving Suggestions & Tips
Once you’ve mastered the art of making these delightful Crispy Bbq Chicken Wraps, you might be wondering about the best ways to enjoy them or how to adapt them to your tastes. Here are a few friendly suggestions to elevate your wrap experience even further!
- Cut for Sharing: For an easy-to-share appetizer or if you’re serving these for a party, you can cut each finished wrap in half diagonally. This makes them visually appealing and perfect for smaller portions. You can secure them with toothpicks if needed.
- Pairing Perfection: These wraps are quite hearty on their own, but they pair wonderfully with a simple side. A fresh green salad with a light vinaigrette, some crispy sweet potato fries, or even a classic coleslaw would complement the flavors beautifully.
- Spice it Up: If you love a bit of heat, consider adding a dash of cayenne pepper to your flour seasoning for the chicken, or choosing a spicy BBQ sauce. A few slices of jalapeño within the wrap itself would also provide a fantastic kick!
- Cheese Variations: Don’t limit yourself to cheddar! Provolone, Muenster, or even a smoked gouda could offer interesting flavor twists to your Crispy Bbq Chicken Wrap.
- Add Avocado: Sliced or mashed avocado would add a creamy, rich texture and healthy fats to the wrap, enhancing its overall satisfaction. It’s always a welcome addition in my kitchen.
- Make Ahead Tips: While the wraps are best enjoyed fresh, you can definitely prepare the crispy BBQ chicken ahead of time. Store the cooked chicken in an airtight container in the refrigerator for up to 3 days. When ready to assemble, you can gently reheat the chicken in the oven or air fryer to regain some of its crispness before tossing it with BBQ sauce. Have all your vegetables prepped and stored separately in the fridge as well. This makes quick work of assembling delicious Crispy Bbq Chicken Wraps on a busy day.
- Lunchbox Hero: These wraps make an excellent packed lunch! To prevent sogginess, you can pack the BBQ chicken and other wet ingredients separately, and assemble the wrap just before eating. This ensures maximum crispiness and freshness.
Conclusion:
So there you have it, my friends! We’ve journeyed through the simple yet utterly satisfying steps to create a dish that I genuinely believe will become a staple in your kitchen. This isn’t just another meal; it’s an experience, a symphony of textures and flavors that will leave you craving more. What truly sets this recipe apart is its incredible balance: the succulence of perfectly cooked chicken, the smoky sweetness of BBQ sauce, and that unbeatable crunch that makes every bite an absolute delight.
I’ve poured my heart into perfecting this particular concoction because I wanted something that felt both comforting and exciting, something that could effortlessly transition from a quick weeknight dinner to a show-stopping brunch item or a fantastic party appetizer. And honestly, I think we’ve hit the nail on the head. This recipe delivers on all fronts: flavor, texture, and pure, unadulterated satisfaction. It’s a testament to how simple ingredients, when treated with a little care and a lot of love, can transform into something truly extraordinary.
Think about that moment when you first bite into it – the initial crispness giving way to tender, flavorful chicken, all harmonized by that signature BBQ tang. It’s an explosion of taste that awakens the senses and reminds you just how delightful home cooking can be. This isn’t just a recipe; it’s an invitation to elevate your mealtime, to bring a little bit of culinary joy into your everyday life without any fuss or complicated techniques. I promise you, once you try this, you’ll understand exactly what I mean.
Why This Crispy Bbq Chicken Wrap Will Be Your New Obsession
This isn’t just a simple wrap; it’s a culinary revelation. I truly believe that once you experience the harmony of flavors and textures, you’ll be adding the Crispy Bbq Chicken Wrap to your weekly rotation. The magic lies in that perfect crisp exterior, which isn’t just an afterthought but a crucial element that elevates the entire dish. It’s not just about the crunch, though that is undeniably addictive; it’s about how that crispness contrasts with the juicy, tender BBQ-glazed chicken and the fresh, vibrant fillings within. Every single ingredient plays a vital role in creating this masterpiece.
I’ve always been a firm believer that the best recipes are those that offer a delightful surprise with every forkful (or bite, in this case!). This wrap truly embodies that philosophy. The smoky, sweet, and tangy notes of the BBQ chicken are perfectly complemented by the cool, crisp lettuce and perhaps a hint of creamy dressing or a slice of sharp cheese, depending on your preference. It’s a symphony of sensations that makes eating it an absolute pleasure. Moreover, it’s incredibly versatile. Whether you’re a seasoned chef or a kitchen novice, the steps are straightforward and forgiving, allowing you to achieve fantastic results every time.
The beauty of this recipe also lies in its adaptability. It’s fantastic for meal prep, holding up surprisingly well for a quick lunch on the go, or transforming into a more elaborate dinner. The flavors deepen and meld beautifully, making leftovers an absolute treat. I often find myself making a double batch just so I can enjoy it for a couple of days because, trust me, you’ll want to. It’s that perfect blend of hearty and refreshing, substantial enough to satisfy but light enough not to weigh you down. It truly is a testament to how humble ingredients can be transformed into something truly spectacular with just a little love and attention.
Beyond the Basic: Creative Serving Suggestions and Flavorful Variations
While the classic Crispy Bbq Chicken Wrap is phenomenal as is, I always encourage you to let your culinary imagination run wild! This recipe is incredibly adaptable, making it a fantastic base for all sorts of delicious experiments. For serving, consider pairing your wraps with a fresh, vibrant coleslaw for an extra layer of crunch and tang, or a simple side salad with a zesty vinaigrette to cut through the richness of the BBQ sauce. Sweet potato fries or a bowl of creamy mac and cheese also make incredibly comforting companions, especially if you’re aiming for a heartier meal.
Now, let’s talk variations. If you’re feeling adventurous, try swapping out the traditional BBQ sauce for a spicy buffalo sauce for a fiery kick, or a tangy honey-mustard for a different flavor profile. You could also experiment with different types of cheese – Monterey Jack or smoked gouda would be absolutely divine! Don’t be afraid to load up on extra veggies too; finely diced red onion, bell peppers, or even a sprinkle of fresh cilantro can add wonderful depth and freshness. For those who love a bit of creamy texture, a drizzle of ranch or blue cheese dressing inside the wrap can elevate it to a whole new level of indulgence.
And who says wraps are just for lunch or dinner? You could easily deconstruct this into a delicious BBQ chicken salad for a lighter option, or serve the crispy chicken over rice or quinoa bowls for a satisfying, nutrient-packed meal. For a fun party appetizer, slice the wraps into pinwheels before serving. The possibilities are truly endless, and that’s one of the things I love most about this recipe. It’s a canvas for your creativity, inviting you to put your own unique spin on it every single time.
Your Turn: Embrace the Crunch and Share Your Culinary Journey!
Now that I’ve shared all my secrets and enthusiasm for this incredible dish, it’s your turn to bring it to life in your own kitchen. I genuinely hope you’ll give this Crispy Bbq Chicken Wrap a try. It’s designed to be simple, satisfying, and utterly delicious – a recipe that brings joy without stress. Don’t be shy about making it your own; adjust the spice, add your favorite vegetables, or experiment with different sauces. That’s the beauty of cooking – it’s an expression of your personal taste!
And once you’ve whipped up your masterpiece, please, please, please come back and tell me all about it! I absolutely adore hearing about your cooking adventures. Share your triumphs, your clever adaptations, and even your funny kitchen mishaps in the comments below. What did you pair it with? Did you add any unique ingredients? Your feedback and experiences not only brighten my day but also inspire other readers in our wonderful cooking community. Let’s make this Crispy Bbq Chicken Wrap a new favorite for everyone. Happy cooking!
Crispy BBQ Chicken Wrap
Experience a delightful blend of textures and flavors with this Crispy BBQ Chicken Wrap. Featuring tender, flavorful BBQ-glazed chicken with a golden, crispy exterior, complemented by fresh vegetables and creamy dressing, all wrapped in a warm tortilla. This recipe delivers a satisfying crunch and is perfect for a quick lunch or casual dinner.
Ingredients
-
2 boneless, skinless chicken breasts (1.5-2 lbs)
-
1 cup all-purpose flour
-
2 large eggs, whisked
-
2 cups Panko breadcrumbs
-
1 tsp salt
-
1/2 tsp black pepper
-
1 tsp garlic powder
-
1/2 tsp smoked paprika
-
1/4 cup vegetable or olive oil
-
1/4 cup BBQ sauce
-
6 large flour tortillas (10-inch or burrito size)
-
1 cup shredded cheddar or cheddar-Monterey Jack cheese
-
2 cups shredded Romaine or iceberg lettuce
-
1/4 cup red onion, diced
-
1/2 cup dill pickle slices, chopped
-
1/4 cup Ranch or blue cheese dressing
Instructions
- Step 1
Slice chicken breasts horizontally into two thinner cutlets, then cut into 1-inch tenders. Pat chicken dry with paper towels. - Step 2
In a shallow dish, combine all-purpose flour, 1 tsp salt, 1/2 tsp black pepper, 1 tsp garlic powder, and 1/2 tsp smoked paprika. Whisk well. - Step 3
Set up a breading station with three shallow dishes: one for the seasoned flour, one for the two whisked eggs, and one for the Panko breadcrumbs. - Step 4
Dredge each chicken piece in the seasoned flour, shaking off excess. Dip in egg wash, allowing excess to drip. Coat generously with Panko breadcrumbs, pressing firmly to adhere. Place breaded chicken on a clean plate. - Step 5
Cook chicken until golden brown, crispy, and cooked through (165°F internal temperature). You can either: - Step 6
Preheat oven to 400°F (200°C). Arrange chicken on a lightly greased or parchment-lined baking sheet, drizzle or spray with 1/4 cup vegetable or olive oil. Bake for 20-25 minutes, flipping halfway. - Step 7
Preheat air fryer to 375°F (190°C). Place chicken in a single layer in the basket (do not overcrowd), spray tops with oil. Air fry for 12-18 minutes, flipping halfway. - Step 8
Transfer hot cooked chicken to a large bowl. Pour 1/4 cup BBQ sauce over chicken and toss gently with tongs or a spoon until evenly coated. - Step 9
Wash and thoroughly dry 2 cups Romaine or iceberg lettuce, then chop. Dice 1/4 cup red onion. Roughly chop 1/2 cup dill pickle slices. Shred 1 cup cheddar or cheddar-Monterey Jack cheese. - Step 10
Warm 6 large flour tortillas using either: microwave (20-30 seconds wrapped in a damp paper towel) or stovetop (15-20 seconds per side in a dry skillet) until soft and pliable. - Step 11
Lay one warm tortilla flat. Sprinkle a generous layer of shredded cheese across the center. Arrange a portion of BBQ-coated crispy chicken pieces horizontally. Pile on shredded lettuce, diced red onion, and chopped dill pickles. Drizzle with 1/4 cup Ranch or blue cheese dressing. - Step 12
Fold the bottom edge of the tortilla up tightly over the filling. Fold in both the left and right sides. Tightly roll the wrap upwards from the bottom to create a secure, compact cylinder. Repeat for remaining wraps and serve immediately.
Important Information
Nutrition Facts (Per Serving)
It is important to consider this information as approximate and not to use it as definitive health advice.
Allergy Information
Please check ingredients for potential allergens and consult a health professional if in doubt.


Leave a Comment