
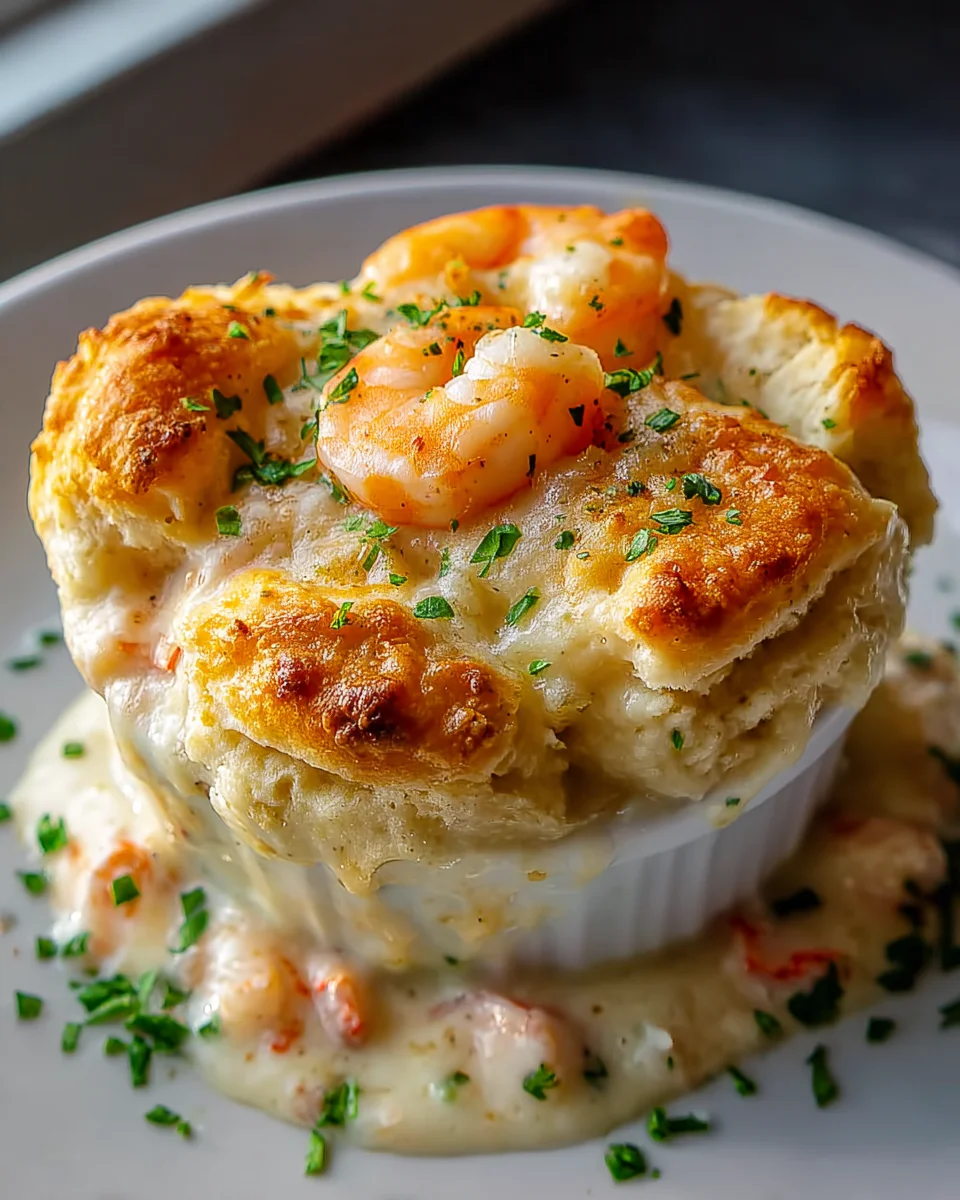
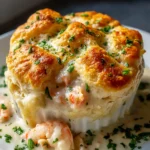
Shrimp Lobster Cheddar Bay Biscuit Pot Pie – Oh my goodness, get ready to experience a dish that will utterly transform your idea of comfort food! I first dreamt up this recipe to combine the ultimate indulgence with that familiar, beloved cozy feeling, and let me tell you, it delivers on every single level. What makes this pot pie so incredibly special, you ask? It’s not just any pot pie; we’re talking about succulent, tender shrimp and luxurious lobster bathed in a rich, creamy, and deeply savory sauce. But the real showstopper? It’s all crowned with the most incredible topping imaginable: fluffy, cheesy, garlicky Cheddar Bay Biscuits!
You are absolutely going to adore how this recipe takes a classic, comforting pot pie and elevates it to something truly extraordinary. Imagine breaking through that golden-brown, buttery biscuit crust to reveal a bubbly, seafood-packed filling – it’s pure culinary bliss! Perfect for a cozy night in, a special occasion, or simply when you want to treat yourself and your loved ones to an unforgettable meal, this Shrimp Lobster Cheddar Bay Biscuit Pot Pie is guaranteed to become a new favorite in your kitchen.

Ingredient Notes
Creating an extraordinary Shrimp Lobster Cheddar Bay Biscuit Pot Pie starts with understanding the stars of the show – your ingredients. Each component plays a crucial role in building the rich, comforting flavors we’re aiming for.
- Shrimp and Lobster: These are the undisputed heroes of our pot pie. For shrimp, I usually go for large or jumbo shrimp, peeled and deveined. You can use fresh or frozen; just make sure to thaw frozen shrimp properly. For the lobster, cooked lobster meat is often the easiest route, whether it’s from pre-cooked tails, claws, or a whole steamed lobster you’ve shelled yourself. If using raw lobster, you’ll want to par-cook it lightly before adding to the filling to prevent overcooking in the oven. The key here is quality seafood – it really makes a difference.
- Cheddar Bay Biscuit Mix: This is where the magic happens and what truly elevates this pot pie. I always keep a box (or two!) of the famous Cheddar Bay Biscuit mix on hand. It’s incredibly convenient and consistently delivers those fluffy, cheesy, garlic-infused biscuits that are just perfect for topping our rich filling. If you’re feeling ambitious or can’t find the mix, you can certainly make your own cheesy garlic biscuits from scratch. Just ensure they have plenty of sharp cheddar and garlic powder in the dough for that signature flavor.
- Aromatics: Onion, celery, and garlic form the foundational flavor base for our creamy filling. A good yellow onion, crisp celery stalks, and fresh garlic cloves minced finely will lend a beautiful depth. I often sauté these until softened and fragrant before building the roux.
- Butter and Flour (for the Roux): Unsalted butter is my go-to for making the roux, which is essential for thickening our pot pie filling. All-purpose flour works perfectly here to create a smooth, rich sauce. The butter-to-flour ratio is important for the right consistency.
- Broth and Cream: For the liquid base, I prefer a good quality seafood or fish broth to complement the shrimp and lobster. However, chicken broth or even vegetable broth can work wonderfully as alternatives if you don’t have fish broth on hand. Whole milk and heavy cream (or half-and-half for a slightly lighter touch) are crucial for that decadent, creamy texture in the filling.
- Seasonings: Old Bay seasoning is non-negotiable for me in any seafood dish, especially this one! It brings that quintessential Chesapeake Bay flavor profile. Beyond that, simple salt, freshly ground black pepper, and a pinch of cayenne for a subtle kick are all you need. Fresh parsley, chopped and stirred in at the end, adds a touch of color and freshness.
- Frozen Vegetables: A bag of frozen peas and carrots is perfect for adding color, texture, and a touch of sweetness to the filling without much fuss. You could also include corn or diced potatoes if you like, but I find peas and carrots offer a classic pot pie aesthetic.
Substitutions to Consider:
- Other Seafood: If shrimp or lobster are not available, or you want to mix things up, consider using crab meat, scallops, or even firm white fish like cod or haddock. Just be mindful of cooking times to avoid overcooking.
- Biscuit Topping: While I highly recommend the Cheddar Bay Biscuits, regular homemade buttermilk biscuits with added cheese and garlic powder will also make a delicious topping.
- Broth Alternatives: As mentioned, chicken or vegetable broth can be used in place of seafood broth.
- Cream Alternatives: For a slightly less rich option, use all whole milk or a combination of whole milk and half-and-half instead of heavy cream.
- Flavor Boost: If you’re looking to deepen the flavor even further, a teaspoon of dry white grape juice concentrate (diluted as per package instructions) can mimic the complexity often found with white wine in savory sauces, without any alcohol.
Step-by-Step Instructions
Here’s how I bring this comforting and incredibly delicious Shrimp Lobster Cheddar Bay Biscuit Pot Pie to life. It might seem like a few steps, but each one is straightforward, and the result is absolutely worth it!
- Prepare Your Biscuit Dough: First things first, let’s get those glorious Cheddar Bay Biscuits ready. If you’re using a mix, follow the package directions exactly for preparing the dough. Usually, this involves adding water and shredded cheddar cheese, then mixing until just combined. Don’t overmix! If you’re making your own cheesy garlic biscuits from scratch, prepare your dough and set it aside. You’ll want to have this ready to go when your filling is done.
- Sauté the Aromatics: In a large, deep oven-safe skillet or Dutch oven (one that you can also bake in, if possible, to save on dishes!), melt about 4 tablespoons of unsalted butter over medium heat. Add your chopped onion and celery. Sauté them gently for about 5-7 minutes, until they’ve softened and become translucent. Then, stir in the minced garlic and cook for another minute until it’s fragrant, being careful not to let it brown.
- Build the Roux: Sprinkle about 1/4 cup of all-purpose flour over the sautéed vegetables. Stir constantly for 1-2 minutes, cooking out the raw flour taste. This creates your roux, which is essential for thickening the sauce.
- Whisk in Liquids: Gradually, slowly whisk in 2 cups of seafood or chicken broth, ensuring there are no lumps. Continue to whisk as the mixture thickens. Once smooth, slowly pour in 1.5 cups of whole milk and 1 cup of heavy cream (or half-and-half, if you prefer). Keep whisking until the sauce comes to a gentle simmer and begins to thicken nicely, coating the back of a spoon. This usually takes about 5-8 minutes.
- Season the Sauce: Now for the flavor! Stir in 2-3 teaspoons of Old Bay seasoning (adjust to your preference), 1 teaspoon of salt, and 1/2 teaspoon of black pepper. If you like a little heat, a pinch of cayenne pepper is a welcome addition. Taste and adjust seasonings as needed. This is your chance to make the sauce perfectly flavorful.
- Add the Seafood and Veggies: Reduce the heat to low. Gently fold in your peeled, deveined shrimp, cooked lobster meat, and the frozen peas and carrots. Cook just until the shrimp turn pink and opaque, about 3-5 minutes. The lobster is already cooked, so you’re just heating it through. Don’t overcook the seafood at this stage, as it will continue to cook in the oven.
- Prepare for Baking: If your skillet isn’t oven-safe or large enough, carefully transfer the hot filling into a 9×13-inch baking dish or another appropriate oven-safe dish.
- Top with Biscuits: Drop spoonfuls of your prepared Cheddar Bay Biscuit dough over the hot filling, leaving a little space between each dollop. You want the biscuits to cover most of the surface but also allow some steam to escape and the filling to bubble up.
- Bake to Golden Perfection: Place the baking dish into your preheated oven (usually around 375°F or 190°C). Bake for 20-25 minutes, or until the biscuits are golden brown on top, cooked through, and the filling is bubbly around the edges.
- The Grand Finale (Garlic Butter): While the pot pie bakes, prepare the garlic butter that usually comes with the Cheddar Bay Biscuit mix (or make your own by melting butter with garlic powder and a bit of dried parsley). Once the pot pie is out of the oven, immediately brush the tops of the hot biscuits generously with this glorious garlic butter. It adds an incredible aroma and irresistible finish.
- Serve Immediately: Let the pot pie rest for a few minutes before serving to allow the sauce to set slightly. Then, scoop out generous portions and enjoy the ultimate comfort food!
Tips & Suggestions
To ensure your Shrimp Lobster Cheddar Bay Biscuit Pot Pie is nothing short of spectacular, I’ve gathered a few personal tips and suggestions from my own kitchen experiences:
- Don’t Overcook the Seafood: This is probably my most important tip! Shrimp, especially, can become rubbery if overcooked. When you add the seafood to the sauce, cook it just until the shrimp turn pink and the lobster is heated through. Remember, it will continue to cook in the oven, so slightly undercooking it in the sauce is better than overcooking.
- Thick Sauce is Key: A good pot pie filling should be thick enough to cling to the seafood and vegetables, not watery. If your sauce seems too thin after simmering, you can make a quick slurry of a tablespoon of cornstarch mixed with an equal amount of cold water, then whisk it into the simmering sauce a little at a time until it reaches your desired consistency.
- Season Liberally: Seafood loves seasoning, and Old Bay is your best friend here. Don’t be shy! Taste the sauce before adding the seafood and adjust the salt, pepper, and Old Bay as needed. It’s much easier to adjust seasoning at this stage.
- For Extra Richness: Want to take it up a notch? Stir in about 2 ounces of softened cream cheese or a tablespoon of mascarpone cheese into the hot sauce just before adding the seafood. It adds an incredible silkiness and depth. Also, a splash of non-alcoholic dry white grape juice at the beginning with the broth can add a lovely layer of complexity.
- Even Biscuit Topping: When placing your biscuit dough, try to distribute it evenly over the filling. This ensures each serving gets a delightful piece of biscuit and helps the biscuits cook through uniformly. Avoid clumping them too much in one area.
- Prevent Soggy Biscuits: Make sure your filling is hot when you place the biscuit dough on top. This helps the biscuits start cooking immediately and reduces the chance of them absorbing too much moisture from the filling before they bake. Also, don’t cover the pot pie with foil during the initial baking phase, as this can steam the biscuits and make them soggy. Only cover if the biscuits are browning too quickly before the filling is bubbly.
- Make Ahead Option: The filling can be prepared a day in advance. Let it cool completely, then cover and refrigerate. When ready to bake, transfer the cold filling to your baking dish, top with fresh biscuit dough, and bake as directed, adding about 10-15 minutes to the baking time to ensure the filling heats through properly. You might want to cover it with foil for the first part of the bake to ensure the filling warms up without over-browning the biscuits.
- Serving Suggestion: This pot pie is a complete meal on its own, but a light side salad with a vinaigrette dressing provides a lovely contrast to the richness of the pot pie.
Storage
Here’s how I handle storing any leftover Shrimp Lobster Cheddar Bay Biscuit Pot Pie, though honestly, leftovers are a rare occurrence in my house!
- Cool Completely: Before storing, it’s crucial to let the pot pie cool down to room temperature. This prevents condensation from building up inside the container, which can lead to soggy biscuits and an increased risk of bacterial growth.
- Refrigeration: Once cooled, cover the baking dish tightly with plastic wrap or aluminum foil, or transfer individual portions to airtight containers. Store in the refrigerator for up to 3-4 days. The biscuits will soften a bit over time, but the flavors of the filling actually meld even more.
- Reheating:
- Oven: For the best results, especially to help crisp up the biscuits slightly, I recommend reheating in the oven. Preheat your oven to 300-325°F (150-160°C). Place the pot pie (covered with foil to prevent the biscuits from drying out or burning) in the oven and heat for 20-30 minutes, or until the filling is hot and bubbly throughout. Remove the foil for the last 5-10 minutes if you want to try and re-crisp the biscuits.
- Microwave: If you’re in a hurry, individual portions can be reheated in the microwave. Place a serving in a microwave-safe dish and heat on medium power for 2-4 minutes, stirring the filling occasionally, until heated through. Be aware that the biscuits will become quite soft when microwaved.
- Freezing:
- Filling Only: Freezing the entire pot pie with the biscuits already baked isn’t ideal, as the biscuits tend to become very soggy and crumbly upon thawing and reheating. However, the pot pie filling itself freezes beautifully! Prepare the filling as directed in the steps, let it cool completely, then transfer it to freezer-safe bags or airtight containers. It can be frozen for up to 2-3 months.
- Baking After Freezing Filling: To enjoy, thaw the frozen filling in the refrigerator overnight. Transfer it to a baking dish, prepare fresh Cheddar Bay Biscuit dough, top the thawed filling, and bake as per the original instructions (you might need to add a few extra minutes to the baking time since the filling will be starting cold). This is my preferred method for making ahead!
Final Thoughts
And there you have it! I truly believe the Shrimp Lobster Cheddar Bay Biscuit Pot Pie isn’t just a recipe; it’s an indulgence you absolutely deserve. The way the rich, creamy seafood filling, packed with plump shrimp and decadent lobster, harmonizes with the savory, cheesy, and impossibly tender Cheddar Bay Biscuit topping is pure culinary magic. It’s comfort food reimagined, offering a gourmet experience that’s surprisingly approachable to make. I promise you, one spoonful of this extraordinary pot pie will have you wondering where it’s been all your life. Go ahead, treat yourself and your loved ones to this unforgettable dish – you won’t regret it!
Ultimate Shrimp Lobster Cheddar Bay Biscuit Pot Pie
- Total Time: 1 hour
- Yield: 6 servings
Description
Experience the ultimate indulgence with this Shrimp Lobster Cheddar Bay Biscuit Pot Pie, combining succulent seafood with a rich, creamy filling topped with fluffy, cheesy biscuits. Perfect for cozy nights and special occasions, this dish is sure to become a new favorite!
Ingredients
- Large or jumbo shrimp, peeled and deveined
- Cooked lobster meat
- Cheddar Bay Biscuit mix
- Yellow onion, chopped
- Celery stalks, chopped
- Fresh garlic cloves, minced
- Unsalted butter
- All-purpose flour
- Seafood or fish broth
- Whole milk
- Heavy cream or half-and-half
- Old Bay seasoning
- Salt
- Freshly ground black pepper
- Cayenne pepper
- Fresh parsley, chopped
- Frozen peas
- Frozen carrots
Instructions
- Prepare Your Biscuit Dough: If you’re using a mix, follow the package directions exactly for preparing the dough. Usually, this involves adding water and shredded cheddar cheese, then mixing until just combined. Don't overmix! If you're making your own cheesy garlic biscuits from scratch, prepare your dough and set it aside.
- Sauté the Aromatics: In a large, deep oven-safe skillet or Dutch oven, melt about 4 tablespoons of unsalted butter over medium heat. Add your chopped onion and celery. Sauté them gently for about 5-7 minutes until they’ve softened and become translucent. Then, stir in the minced garlic and cook for another minute until it’s fragrant.
- Build the Roux: Sprinkle about 1/4 cup of all-purpose flour over the sautéed vegetables. Stir constantly for 1-2 minutes, cooking out the raw flour taste.
- Whisk in Liquids: Gradually whisk in 2 cups of seafood or chicken broth, ensuring there are no lumps. Continue to whisk as the mixture thickens. Once smooth, slowly pour in 1.5 cups of whole milk and 1 cup of heavy cream (or half-and-half). Keep whisking until the sauce comes to a gentle simmer and begins to thicken nicely.
- Season the Sauce: Stir in 2-3 teaspoons of Old Bay seasoning, 1 teaspoon of salt, and 1/2 teaspoon of black pepper. Add a pinch of cayenne pepper if desired. Taste and adjust seasonings as needed.
- Add the Seafood and Veggies: Reduce the heat to low. Gently fold in your peeled, deveined shrimp, cooked lobster meat, and the frozen peas and carrots. Cook just until the shrimp turn pink and opaque, about 3-5 minutes.
- Prepare for Baking: If your skillet isn't oven-safe, carefully transfer the hot filling into a 9×13-inch baking dish.
- Top with Biscuits: Drop spoonfuls of your prepared Cheddar Bay Biscuit dough over the hot filling, leaving a little space between each dollop.
- Bake to Golden Perfection: Place the baking dish into your preheated oven at 375°F (190°C). Bake for 20-25 minutes, or until the biscuits are golden brown on top and the filling is bubbly.
- The Grand Finale (Garlic Butter): While the pot pie bakes, prepare the garlic butter that usually comes with the Cheddar Bay Biscuit mix. Once the pot pie is out of the oven, brush the tops of the hot biscuits generously with this garlic butter.
- Serve Immediately: Let the pot pie rest for a few minutes before serving to allow the sauce to set slightly.
- Prep Time: 30 mins
- Cook Time: 30 mins
- Category: Dinner
- Method: Baking
- Cuisine: American
Nutrition
- Serving Size: 1 bowl
- Calories: 600
- Sugar: 5 g
- Sodium: 800 mg
- Fat: 35 g
- Saturated Fat: 20 g
- Unsaturated Fat: 10 g
- Trans Fat: 0 g
- Carbohydrates: 50 g
- Fiber: 3 g
- Protein: 25 g
- Cholesterol: 150 mg
Keywords: Don't overcook the seafood to prevent it from becoming rubbery. A thick sauce is key for a good pot pie filling. Adjust seasonings liberally, and consider adding cream cheese for extra richness. Ensure the filling is hot before placing the biscuit dough on top to prevent soggy biscuits.


Leave a Comment