
Sushi Bake: Prepare to ditch the complicated rolling and embrace the deconstructed deliciousness of this viral sensation! Forget spending hours meticulously crafting individual sushi rolls. This recipe delivers all the satisfying flavors of your favorite sushi in a fraction of the time and with minimal effort.
While not steeped in centuries of tradition like its meticulously rolled counterpart, the Sushi Bake has quickly become a modern classic, a testament to our ever-evolving culinary landscape. Its origins are debated, but many believe it emerged from home kitchens seeking a simpler way to enjoy the beloved flavors of sushi. It’s a dish born from ingenuity and a desire for convenience, perfectly suited for busy weeknights or potlucks with friends.
What makes this dish so irresistible? It’s the harmonious blend of textures and tastes. Imagine fluffy, seasoned sushi rice layered with creamy, savory toppings like imitation crab, avocado, and spicy mayo. The contrast between the warm rice and the cool toppings is simply divine. Plus, it’s incredibly customizable! You can easily adapt the ingredients to suit your preferences, making it a guaranteed crowd-pleaser. I personally love adding a sprinkle of toasted sesame seeds for an extra layer of nutty flavor. Get ready to experience sushi in a whole new, incredibly satisfying way!

Ingredients:
- 2 cups cooked sushi rice (short-grain rice), cooled
- 2 tablespoons rice vinegar
- 1 tablespoon sugar
- 1 teaspoon salt
- 1 pound sushi-grade salmon, finely diced
- 4 ounces cream cheese, softened
- 1/4 cup mayonnaise (Japanese Kewpie mayonnaise preferred)
- 2 tablespoons sriracha (adjust to taste)
- 1 tablespoon soy sauce
- 1 teaspoon sesame oil
- 1 avocado, diced
- 2 green onions, thinly sliced
- 2 sheets nori seaweed, cut into small strips or crumbled
- Sesame seeds, for garnish (black and white)
- Optional toppings: masago, tobiko, eel sauce
Preparing the Sushi Rice:
The foundation of any good sushi bake is, of course, the rice! Getting this right is crucial for the overall texture and flavor. I’ve found that using short-grain rice, specifically sushi rice, yields the best results. Don’t skimp on this step!
- Cook the Rice: Start by rinsing your sushi rice thoroughly under cold water until the water runs clear. This removes excess starch and prevents the rice from becoming too sticky. I usually rinse it about 4-5 times. Then, cook the rice according to your rice cooker’s instructions or on the stovetop. If cooking on the stovetop, use a 1:1.25 rice-to-water ratio (e.g., 2 cups rice to 2.5 cups water). Bring to a boil, then reduce heat to low, cover, and simmer for 15-20 minutes, or until all the water is absorbed. Let it sit, covered, for another 10 minutes after cooking.
- Prepare the Sushi Vinegar Mixture: While the rice is cooking, prepare the sushi vinegar mixture. In a small saucepan, combine the rice vinegar, sugar, and salt. Heat over low heat, stirring constantly, until the sugar and salt are completely dissolved. Do not boil! This mixture is what gives the rice that signature sushi flavor.
- Combine Rice and Vinegar: Once the rice is cooked and slightly cooled (but still warm), gently transfer it to a large bowl. Pour the sushi vinegar mixture over the rice. Using a rice paddle or a wooden spoon, gently fold the vinegar mixture into the rice, being careful not to mash the grains. You want to coat each grain evenly. Fan the rice while mixing to help it cool down quickly and evenly. This also helps to create a glossy sheen on the rice.
Preparing the Salmon Mixture:
Now for the star of the show – the salmon! Make sure you’re using sushi-grade salmon for this recipe. It’s important for safety and taste. The creamy, spicy salmon mixture is what makes this sushi bake so addictive.
- Dice the Salmon: Finely dice the sushi-grade salmon into small, even pieces. The smaller the pieces, the better it will mix with the other ingredients.
- Combine Ingredients: In a medium bowl, combine the softened cream cheese, mayonnaise (Kewpie is highly recommended for its richer flavor), sriracha, soy sauce, and sesame oil. Mix well until everything is smooth and creamy.
- Add Salmon: Gently fold the diced salmon into the cream cheese mixture until it’s evenly distributed. Be careful not to overmix, as this can make the salmon mushy.
Assembling the Sushi Bake:
This is where the magic happens! Layering the rice and salmon mixture correctly is key to achieving the perfect bite. I like to use a glass baking dish for easy serving, but any oven-safe dish will work.
- Prepare the Baking Dish: Lightly grease a 9×13 inch baking dish (or similar size) with cooking spray. This will prevent the rice from sticking to the bottom.
- Layer the Rice: Spread the prepared sushi rice evenly over the bottom of the baking dish. Gently press down on the rice to create a compact layer. You want it to be firm enough to hold its shape when you scoop it out later.
- Layer the Salmon Mixture: Spread the salmon mixture evenly over the rice layer. Make sure to cover the entire surface of the rice.
Baking the Sushi Bake:
Baking the sushi bake is optional, but I highly recommend it! It warms everything through and gives the salmon mixture a slightly caramelized top. If you prefer, you can skip this step and serve it cold.
- Bake (Optional): Preheat your oven to 350°F (175°C). Bake the sushi bake for 10-15 minutes, or until the salmon mixture is heated through and slightly golden on top. Keep a close eye on it to prevent it from burning.
- Broil (Optional): For an extra crispy top, you can broil the sushi bake for the last 1-2 minutes. Watch it very carefully, as it can burn quickly under the broiler.
Finishing Touches and Serving:
The final touches are what really elevate this dish! The fresh avocado, green onions, and nori add texture and flavor, while the sesame seeds provide a beautiful visual appeal. Get creative with your toppings!
- Add Toppings: Remove the sushi bake from the oven (if baked) and let it cool slightly. Top with diced avocado, sliced green onions, and crumbled or cut nori seaweed.
- Garnish: Sprinkle sesame seeds (both black and white) over the top. You can also add other optional toppings like masago, tobiko, or eel sauce for extra flavor and visual appeal.
- Serve: Serve the sushi bake warm or at room temperature. I like to serve it with extra soy sauce for dipping. You can scoop it out with a spoon or use nori sheets to wrap individual portions. Enjoy!
Conclusion:
So, there you have it! This Sushi Bake recipe is truly a game-changer. It’s not just a meal; it’s an experience, a conversation starter, and a guaranteed crowd-pleaser. I know, I know, I’m gushing, but trust me, once you taste that creamy, savory, and slightly sweet combination of flavors, you’ll understand my enthusiasm. It’s the perfect solution for satisfying your sushi cravings without the fuss of rolling or the expense of takeout.
Why is this a must-try? Well, beyond the incredible taste, it’s incredibly versatile and adaptable. It’s perfect for a weeknight dinner when you’re short on time but still want something special. It’s also fantastic for potlucks, parties, or any gathering where you want to impress your guests with minimal effort. Plus, it’s a great way to introduce sushi flavors to those who might be a little hesitant to try traditional raw fish. The baked element makes it approachable and comforting, while still delivering that authentic sushi taste.
But the fun doesn’t stop there! Feel free to experiment with different variations to make it your own. For a spicier kick, add a drizzle of sriracha mayo on top or mix some gochujang into the rice. If you’re a fan of avocado, dice some up and sprinkle it over the finished bake for added creaminess and healthy fats. You could even try using different types of seafood, like cooked shrimp or smoked salmon, to create unique flavor profiles. For a vegetarian option, substitute the imitation crab with marinated tofu or shiitake mushrooms. The possibilities are endless!
Serving Suggestions: I personally love serving this Sushi Bake with a side of crispy seaweed snacks for extra crunch and a bowl of edamame for a complete and satisfying meal. A simple cucumber salad with a light rice vinegar dressing also complements the richness of the bake perfectly. And don’t forget the soy sauce, wasabi, and pickled ginger for dipping! These condiments are essential for enhancing the overall sushi experience.
Variations to Explore:
- Spicy Tuna Bake: Substitute the imitation crab with spicy tuna mixed with sriracha mayo.
- Salmon Avocado Bake: Use cooked salmon and diced avocado for a creamy and flavorful twist.
- Vegetarian Sushi Bake: Replace the seafood with marinated tofu or shiitake mushrooms.
- Shrimp Tempura Bake: Top the bake with crispy shrimp tempura for added texture and flavor.
I truly believe this recipe will become a staple in your kitchen. It’s easy, delicious, and endlessly customizable. So, what are you waiting for? Gather your ingredients, preheat your oven, and get ready to experience the magic of Sushi Bake! I’m confident you’ll love it as much as I do.
And now, for the most important part: I want to hear from you! Once you’ve tried this recipe, please share your experience in the comments below. Did you make any modifications? What were your favorite toppings? What did your family and friends think? Your feedback is invaluable and helps me continue to create recipes that you’ll love. So, go ahead, give it a try, and let me know what you think. Happy baking!
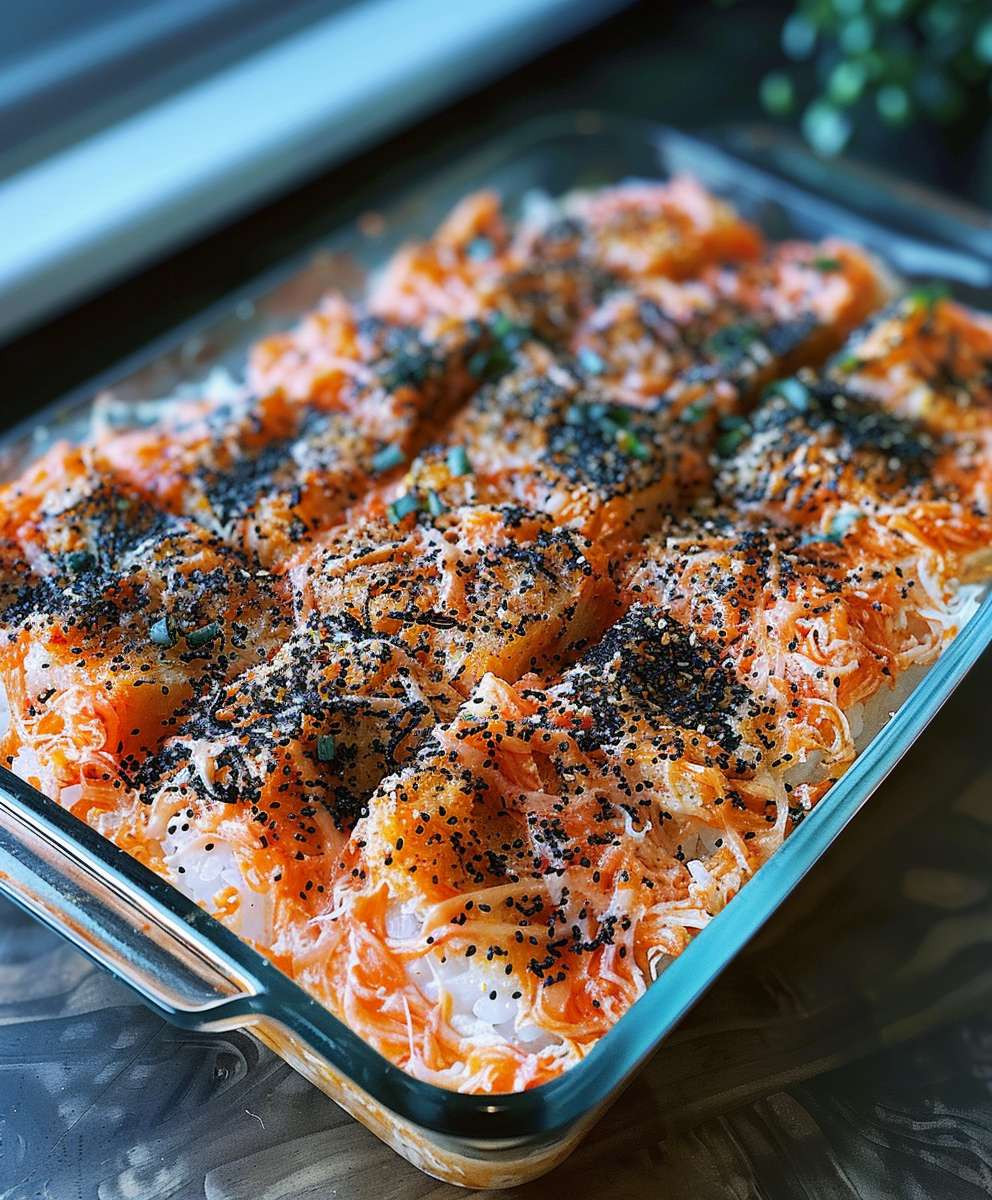
Sushi Bake: The Ultimate Guide to Making This Delicious Trend
Deconstructed sushi bake with layers of seasoned rice, creamy spicy salmon, avocado, green onions, and nori. A fun, easy way to enjoy sushi flavors!
Ingredients
Instructions
Recipe Notes
- Use sushi-grade salmon for safety and best flavor.
- Kewpie mayonnaise is recommended for its richer flavor.
- Adjust sriracha to your preferred spice level.
- Baking is optional; you can serve the sushi bake cold.
- Be careful not to overmix the salmon mixture.
- Watch carefully when broiling to prevent burning.


Leave a Comment