
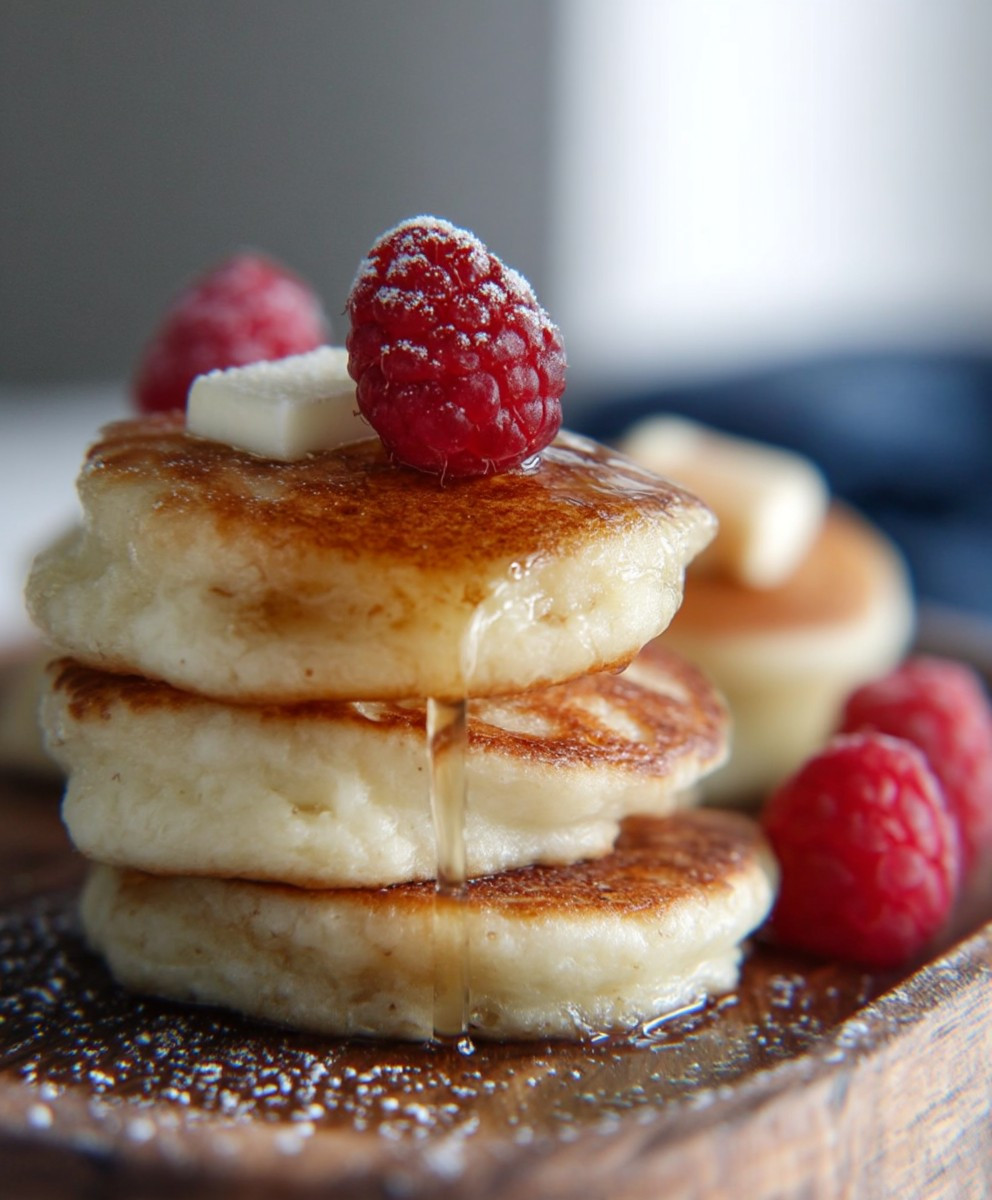
Silver Dollar Pancakes: Tiny, fluffy, and utterly irresistible, these miniature marvels are guaranteed to bring a smile to faces of all ages! Forget boring breakfasts; we’re about to embark on a culinary adventure that transforms the humble pancake into a delightful, bite-sized treat. Have you ever wondered why these little pancakes are so popular? Is it their perfect portion size, their playful appearance, or the sheer joy of stacking a tower of them high?
While the exact origins of silver dollar pancakes are shrouded in a bit of mystery, their popularity soared in the mid-20th century, becoming a staple on diner menus across America. Their small size made them ideal for children, and their novelty appealed to adults as well. They represent a simpler time, a nostalgic nod to classic American comfort food.
But beyond the nostalgia, the real reason people adore these miniature pancakes is their delightful texture and taste. They’re light, airy, and slightly sweet, with a tender crumb that melts in your mouth. Plus, their small size makes them incredibly versatile. Top them with fresh berries, a drizzle of maple syrup, a dollop of whipped cream, or even a sprinkle of chocolate chips. The possibilities are endless! And let’s be honest, who can resist the fun of creating a towering stack of these adorable little pancakes? Get ready to flip your way to breakfast bliss!

Ingredients:
- 1 陆 cups all-purpose flour
- 3 陆 teaspoons baking powder
- 1 teaspoon salt
- 1 tablespoon granulated sugar
- 1 录 cups milk
- 1 large egg
- 3 tablespoons unsalted butter, melted
- Vegetable oil or cooking spray, for greasing
Preparing the Pancake Batter
Okay, let’s get started with the most important part: the batter! This is where the magic happens, and a little attention to detail here will make all the difference in your silver dollar pancake success. I’ve made these hundreds of times, and I’ve learned a few tricks along the way.
- Combine the Dry Ingredients: In a large mixing bowl, whisk together the flour, baking powder, salt, and sugar. Make sure you whisk thoroughly! You want to ensure the baking powder is evenly distributed throughout the flour. This is crucial for light and fluffy pancakes. Lumps of baking powder can lead to uneven rising and a slightly bitter taste. I usually whisk for about 30 seconds to a minute, just to be sure.
- Incorporate the Wet Ingredients: In a separate bowl, whisk together the milk, egg, and melted butter. The butter should be melted but not hot. If it’s too hot, it could start to cook the egg, which we definitely don’t want. Room temperature milk is also preferable, as it helps the batter come together more smoothly.
- Combine Wet and Dry: Now, here’s the key to avoiding tough pancakes: gently pour the wet ingredients into the dry ingredients. Use a rubber spatula or a wooden spoon to fold the ingredients together until just combined. Do not overmix! A few lumps are perfectly fine. Overmixing develops the gluten in the flour, which will result in pancakes that are dense and chewy instead of light and airy. I usually stop mixing when I still see a few streaks of flour. They’ll disappear as the batter sits.
- Let the Batter Rest: This is a step that many people skip, but it’s essential for the best results. Let the batter rest for 5-10 minutes. This allows the gluten to relax and the baking powder to activate, resulting in lighter, fluffier pancakes. While the batter is resting, you can prepare your griddle or pan.
Cooking the Silver Dollar Pancakes
Now for the fun part: cooking those adorable little pancakes! Getting the heat right is key here. Too hot, and they’ll burn on the outside before they’re cooked through on the inside. Too low, and they’ll be pale and flat. It takes a little practice, but you’ll get the hang of it.
- Prepare the Cooking Surface: Heat a lightly oiled griddle or non-stick frying pan over medium heat. You can use vegetable oil, canola oil, or even cooking spray. I prefer using a griddle because it allows me to cook several pancakes at once. To test if the griddle is hot enough, sprinkle a few drops of water onto the surface. If the water sizzles and evaporates quickly, it’s ready. If it just sits there, it’s not hot enough. If it splatters violently, it’s too hot.
- Pour the Batter: For each pancake, pour about 1-2 tablespoons of batter onto the hot griddle. Remember, we’re making silver dollar pancakes, so they should be small! Leave a little space between each pancake so they don’t run together. I like to use a small cookie scoop to portion out the batter, but a spoon works just fine too.
- Cook the First Side: Cook for 1-2 minutes, or until bubbles start to form on the surface and the edges look set. This is your signal that it’s time to flip. Don’t flip them too early, or they’ll stick to the griddle.
- Flip and Cook the Second Side: Carefully flip the pancakes with a thin spatula and cook for another 1-2 minutes, or until golden brown on the bottom. The second side usually cooks faster than the first.
- Keep Warm (Optional): If you’re making a large batch, you can keep the cooked pancakes warm in a preheated oven (200掳F) until you’re ready to serve them. Place them on a baking sheet in a single layer to prevent them from getting soggy.
Serving Suggestions
These little pancakes are delicious on their own, but they’re even better with toppings! Here are a few of my favorite ways to serve them:
- Classic: Maple syrup and butter. You can’t go wrong with the classics!
- Fruity: Fresh berries (strawberries, blueberries, raspberries), sliced bananas, or a fruit compote.
- Chocolatey: Chocolate chips, Nutella, or a chocolate syrup drizzle.
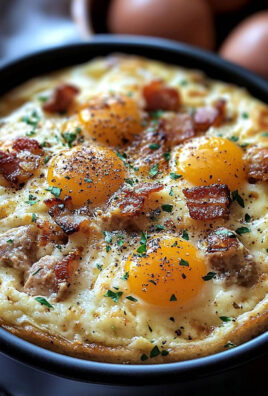
- Savory: A fried egg and a sprinkle of cheese.
- Whipped Cream: A dollop of whipped cream adds a touch of elegance.
- Powdered Sugar: A dusting of powdered sugar makes them look extra fancy.
Tips and Tricks for Perfect Pancakes
Over the years, I’ve learned a few extra tips and tricks that can help you make the best silver dollar pancakes ever. Here are a few of my secrets:
- Don’t Overmix the Batter: I can’t stress this enough! Overmixing is the enemy of fluffy pancakes.
- Use a Hot Griddle: A hot griddle is essential for achieving that golden-brown color and crispy edges.
- Don’t Press Down on the Pancakes: Resist the urge to press down on the pancakes with your spatula. This will flatten them and make them tough.
- Use a Thin Spatula: A thin spatula will make it easier to flip the pancakes without tearing them.
- Adjust the Heat as Needed: If the pancakes are browning too quickly, lower the heat. If they’re not browning enough, raise the heat.
- Add a Splash of Vanilla Extract: A teaspoon of vanilla extract added to the batter will enhance the flavor of the pancakes.
- Substitute Buttermilk for Milk: Buttermilk will make the pancakes even more tender and tangy.
- Add a Pinch of Cinnamon: A pinch of cinnamon adds a warm and cozy flavor.
- Experiment with Different Flours: You can use whole wheat flour, oat flour, or even gluten-free flour to make these pancakes.
- Make a Big Batch and Freeze Them: Cooked pancakes freeze well. Just let them cool completely, then place them in a freezer bag or container. To reheat, simply pop them in the toaster or microwave.
Troubleshooting Common Pancake Problems
Even with the best recipe and instructions, sometimes things can go wrong. Here are a few common pancake problems and how to fix them:
- Pancakes are Flat: This is usually caused by using old baking powder or overmixing the batter. Make sure your baking powder is fresh, and don’t overmix the batter.
- Pancakes are Tough: This is almost always caused by overmixing the batter. Remember, a few lumps are okay!
- Pancakes are Burning on the Outside but Raw on the Inside: This means your griddle is too hot. Lower the heat and cook the pancakes for a longer period of time.
- Pancakes are Sticking to the Griddle: This could be because your griddle isn’t hot enough or because you’re not using enough oil. Make sure your griddle is properly heated and lightly oiled.
- Pancakes are Pale and Doughy: This means your griddle isn’t hot enough. Raise the heat and cook the pancakes for a longer period of time.
Variations on the Classic Silver Dollar Pancake
Once you’ve mastered the basic silver dollar pancake recipe, you can start experimenting with different variations. Here are a few ideas to get you started:
- Blueberry Pancakes: Gently fold fresh or frozen blueberries into the batter before cooking.
- Chocolate Chip Pancakes: Gently fold chocolate chips into the batter before cooking.
- Banana Pancakes: Mash a ripe banana and add it to the batter.
- Cinnamon Roll Pancakes: Swirl a mixture of melted butter, brown sugar, and cinnamon into the batter before cooking.
- Pumpkin Pancakes: Add pumpkin puree and pumpkin pie spice to the batter.
- Lemon Ricotta Pancakes: Add ricotta cheese and lemon zest to the batter.
Nutritional Information (Approximate)
Please note that the following nutritional information is an estimate and may vary depending on the specific ingredients you use and the portion sizes.
- Calories: Approximately 80-100 per
Conclusion:
And there you have it! These aren’t just any pancakes; these Silver Dollar Pancakes are a bite-sized burst of breakfast bliss that will have everyone reaching for more. I truly believe this recipe is a must-try for so many reasons. First, the sheer simplicity of the ingredients and the straightforward instructions make it accessible to even the most novice cooks. You don’t need fancy equipment or years of experience to whip up a batch of these golden beauties. Second, their adorable size makes them incredibly versatile. They’re perfect for kids, great for parties, and ideal for anyone who wants a little taste of pancake perfection without committing to a full-sized stack.
But beyond the ease and the cuteness, it’s the taste that truly seals the deal. These pancakes are light, fluffy, and subtly sweet, providing the perfect canvas for all your favorite toppings. I’ve made these countless times, and they always disappear in a flash. The slightly crisp edges and soft interior create a delightful textural contrast that keeps you coming back for more.
Now, let’s talk about serving suggestions and variations, because the possibilities are truly endless! For a classic touch, serve them with a generous drizzle of maple syrup and a dollop of whipped cream. If you’re feeling adventurous, try topping them with fresh berries, sliced bananas, or a sprinkle of chocolate chips. For a more savory twist, consider serving them with a fried egg and a side of bacon or sausage.
Looking for variations? Oh, I have plenty! Add a teaspoon of vanilla extract to the batter for a richer flavor. Stir in a handful of blueberries or raspberries for a fruity twist. Or, for a truly decadent treat, add a tablespoon of Nutella to the batter. You can even experiment with different flours, such as whole wheat or almond flour, to create a healthier version. Get creative and have fun with it!
These Silver Dollar Pancakes are also fantastic for meal prepping. Simply cook a large batch ahead of time and store them in the refrigerator or freezer. When you’re ready to eat, just pop them in the toaster or microwave for a quick and easy breakfast. They’re also great for packing in lunchboxes or taking on road trips.
I’m so confident that you’ll love this recipe, and I can’t wait to hear about your experience. So, gather your ingredients, preheat your griddle, and get ready to make some magic. Don’t be afraid to experiment with different toppings and variations to create your own signature version.
I truly believe that sharing food is one of the best ways to connect with others, so I encourage you to make these pancakes for your family and friends. Watch their faces light up as they savor each bite. And most importantly, don’t forget to share your creations with me! I’d love to see your photos and hear about your favorite toppings and variations. You can tag me on social media using [Your Social Media Handle] or leave a comment below.
So, what are you waiting for? Go ahead and give these Silver Dollar Pancakes a try. I promise you won’t be disappointed. Happy cooking! I am sure that this recipe will become a family favorite in your home, just as it has in mine. I am excited to see all of your pancake creations!
Silver Dollar Pancakes: The Ultimate Guide to Fluffy Perfection
Fluffy and delicious silver dollar pancakes, perfect for a quick breakfast or brunch. Easy to make and customizable with your favorite toppings!
By: LilaCategory: BreakfastDifficulty: EasyCuisine: AmericanYield: 15-20 pancakesDietary: VegetarianIngredients
Instructions
Recipe Notes
- Don’t Overmix: Overmixing develops gluten and results in tough pancakes.
- Hot Griddle: A hot griddle is key for golden-brown color and crispy edges.
- Resting the Batter: Resting the batter allows the gluten to relax and the baking powder to activate, resulting in lighter, fluffier pancakes.
- Topping Ideas: Maple syrup, butter, fresh berries, chocolate chips, Nutella, whipped cream, powdered sugar, fried egg and cheese.
- Troubleshooting:
- Flat Pancakes: Fresh baking powder, don’t overmix.
- Tough Pancakes: Don’t overmix.
- Burning Outside, Raw Inside: Lower heat.
- Sticking: Hotter griddle, more oil.
- Pale and Doughy: Hotter griddle.
Frequently Asked Questions
→ How do I ensure the bread stays moist?Use fresh, ripe ingredients and avoid overmixing the batter. Store in an airtight container.→ Can I substitute ingredients?Yes, you can substitute similar ingredients while maintaining the basic ratios for best results.→ How long does this bread keep?Store tightly wrapped at room temperature for 2-3 days, or refrigerate for up to a week.→ What if I don't have all the spices?You can adjust spices to taste or substitute with similar warming spices.→ Can I freeze this bread?Yes, wrap individual slices and freeze for up to 3 months. Thaw at room temperature before serving.


Leave a Comment