
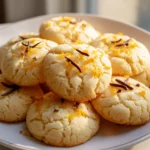
Orange Clove Cookies
Oh, get ready, because I am absolutely thrilled to share my recipe for Orange Clove Cookies with you today! These aren’t just any cookies; they’re a little burst of sunshine and warmth, perfectly packaged in a tender, chewy bite. What makes them so incredibly special, you ask? It’s that magical dance between the vibrant, zesty notes of fresh orange and the deep, comforting, aromatic embrace of ground clove. This isn’t a common cookie flavor, and that’s precisely why I know you’re going to fall head over heels for them!
You’ll love these cookies not just for their unique, irresistible flavor profile, but also for the way they make your kitchen smell like the coziest, happiest place on earth as they bake. They’re wonderfully balanced, offering a sophisticated sweetness with just the right amount of spice and citrus brightness. Whether you’re looking for the perfect treat to share during the holidays, a thoughtful gift for a friend, or simply a comforting snack to enjoy with your afternoon tea, these Orange Clove Cookies fit the bill perfectly. They’re soft, flavorful, and incredibly satisfying – a true delight for the senses that I can’t wait for you to experience!

Ingredient Notes
Crafting the perfect batch of Orange Clove Cookies truly begins with understanding the stars of the show and a few supporting players. I’ve found that using high-quality ingredients makes all the difference in these delightfully aromatic treats.
The Citrus Kick: Oranges
For me, the fresh orange zest is absolutely non-negotiable. It’s where all that vibrant, sunny orange flavor lives! I always recommend using organic oranges if you can, as you’ll be using a good amount of the zest. Make sure to only zest the bright orange part, avoiding the bitter white pith underneath. A fine microplane works wonders here. While the recipe calls for a bit of orange juice, the zest is really the powerhouse. If you’re in a pinch and don’t have fresh oranges, a good quality orange extract can work for the flavor, but you’ll miss the bright aroma and visual flecks of zest.
The Warm Spice: Ground Clove
Clove is what gives these cookies their distinctive warmth and depth, pairing beautifully with the bright orange. I use ground clove, which is readily available in the spice aisle. It’s a potent spice, so I measure it carefully to ensure it enhances, rather than overwhelms, the orange. If you’re a big fan of spice, you might be tempted to add more, but I suggest sticking to the recipe first to find your sweet spot. For those who aren’t keen on clove, you could try a pinch of ground ginger or cinnamon as a substitute, but it will fundamentally change the cookie from an “Orange Clove” to something else entirely.
The Foundation: Flour, Butter, and Sugar
I rely on standard all-purpose flour for these cookies. If you need a gluten-free option, a 1:1 gluten-free baking blend can often be substituted, though I recommend checking the blend’s instructions for exact measurements or liquid adjustments, as texture might vary slightly. For butter, unsalted butter is my go-to, allowing me to control the salt content precisely. Make sure it’s softened to room temperature – this is crucial for creaming it properly with the sugar to create a light and airy base. Granulated sugar provides the sweetness and helps create that crisp edge, while a touch of light brown sugar can add a subtle chewiness and deeper flavor if you prefer.
Leavening and Enhancers
Baking powder ensures our cookies rise beautifully. Always check the expiry date on your baking powder; old leavening agents can lead to flat, dense cookies. Large eggs act as a binder and add moisture, so ensure they are also at room temperature for better emulsification. A splash of good vanilla extract rounds out the flavors and brings everything together harmoniously. Finally, a pinch of salt balances the sweetness and brings out the other flavors.
Step-by-Step Instructions
Making these Orange Clove Cookies is a joy, and I’ll walk you through each step to ensure you get perfect, fragrant results every time. Follow these steps, and you’ll have a batch of warm, spiced citrus cookies in no time!
-
Prepare Your Workspace
First things first, I always preheat my oven to 375°F (190°C). While the oven heats up, I line two large baking sheets with parchment paper or silicone baking mats. This makes for easy cleanup and prevents sticking.
-
Cream the Wet Ingredients
In a large mixing bowl, I combine the softened unsalted butter and both the granulated and light brown sugars. Using an electric mixer (either a stand mixer with the paddle attachment or a hand mixer), I beat them together on medium speed until the mixture is light, fluffy, and pale in color. This usually takes about 2-3 minutes. This creaming step is vital for incorporating air into the dough, which contributes to the cookies’ texture.
Next, I crack in the large egg and add the vanilla extract and all of that wonderful fresh orange zest. I beat the mixture again until everything is just combined, making sure to scrape down the sides of the bowl with a spatula to ensure all ingredients are evenly incorporated.
-
Whisk the Dry Ingredients
In a separate medium bowl, I whisk together the all-purpose flour, ground clove, baking powder, and salt. Whisking them separately ensures that the leavening and spices are evenly distributed throughout the dough, preventing pockets of unmixed ingredients.
-
Combine Wet and Dry
Now, it’s time to bring everything together! I gradually add the dry ingredients to the wet ingredients, mixing on low speed until just combined. I’m careful not to overmix the dough at this stage, as overmixing can lead to tough cookies. As soon as there are no visible streaks of flour, I stop the mixer. Finally, I stir in the fresh orange juice until it’s just incorporated.
-
Chill the Dough (Important!)
This step is crucial for flavor and texture. I cover the bowl with plastic wrap and refrigerate the cookie dough for at least 30 minutes. Chilling allows the flavors to meld beautifully and prevents the cookies from spreading too much during baking, giving them a thicker, chewier texture.
-
Scoop and Bake
Once the dough is chilled, I grab my trusty cookie scoop (a medium-sized one, about 1.5 tablespoons) and drop rounded scoops of dough onto the prepared baking sheets, leaving about 2 inches between each cookie to allow for spreading. I often give them a very gentle flattening with the palm of my hand if I want a slightly wider cookie.
I bake the cookies for 9-11 minutes, or until the edges are lightly golden and set, but the centers still look slightly soft. Remember that ovens can vary, so keep an eye on them. Overbaking will result in a drier cookie, and we want them moist and chewy!
-
Cooling
Once baked, I remove the baking sheets from the oven and let the cookies cool on the sheets for about 5 minutes. They’ll continue to set during this time. After 5 minutes, I carefully transfer them to a wire rack to cool completely. This allows air to circulate around them, preventing sogginess and ensuring a crisp bottom.
-
Optional Glaze
For an extra burst of orange flavor and a lovely finish, I often make a simple glaze. In a small bowl, I whisk together about 1 cup of powdered sugar with 2-3 tablespoons of fresh orange juice until smooth. Once the cookies are completely cool, I drizzle or lightly spread the glaze over them. Let the glaze set before stacking the cookies.
Tips & Suggestions
Having made countless batches of these Orange Clove Cookies, I’ve gathered a few insights that I’d love to share. These tips will help you perfect your technique and even explore some delightful variations.
-
Zest Smart, Not Bitter
When zesting your oranges, always use a microplane and rotate the orange as you go. Your goal is to get only the bright orange peel, leaving behind the white pith. The pith is quite bitter and can impart an unpleasant flavor to your cookies. More zest equals more orange flavor!
-
Don’t Skimp on Chilling
I know it’s tempting to skip the chilling step, especially when the aroma of the dough is already so inviting! However, chilling the dough for at least 30 minutes, or even an hour, is crucial. It allows the butter to firm up, preventing excessive spreading during baking, resulting in a thicker, chewier cookie. It also gives the orange and clove flavors a chance to really meld and deepen, making for a more nuanced cookie.
-
Room Temperature Ingredients are Key
I can’t stress this enough! Softened butter and room temperature eggs emulsify much better, creating a smoother, more uniform dough. This leads to a better texture in your final cookies. If you forget to take your butter out, you can cut it into small pieces and let it sit for 15-20 minutes, or gently microwave it on very low power for a few seconds (be careful not to melt it!). For eggs, a quick warm water bath for 5 minutes does the trick.
-
Measure Flour Accurately
Baking is a science, and flour measurement is often where things go wrong. I always recommend using a kitchen scale for the most accurate results. If you don’t have one, use the “spoon and level” method: spoon flour into your measuring cup until it overflows, then level it off with the back of a knife. Never scoop directly from the bag, as this compacts the flour and you’ll end up with too much.
-
Don’t Overbake!
For a soft, chewy cookie, keep a close eye on your baking time. These Orange Clove Cookies are best when their edges are just barely golden and set, while the centers still look a little soft. They will continue to cook slightly on the hot baking sheet once removed from the oven. Overbaking leads to dry, crumbly cookies.
-
Spice Level Adjustments
If you’re particularly fond of clove, you could try adding an extra pinch (about ¼ teaspoon) to the dough. Conversely, if you’re introducing these to someone who might be sensitive to strong spices, you could reduce the clove slightly. Always taste a tiny bit of the raw dough (minus the egg, if you’re concerned) to gauge the flavor profile before baking, though baking often mellows and transforms spices.
-
Flavor Variations
While I adore the classic orange and clove pairing, sometimes I like to experiment! You could fold in a half cup of white chocolate chips to the dough for an extra layer of sweetness, or even some finely chopped candied orange peel for a more intense citrus punch. A sprinkle of turbinado sugar on top of each dough ball before baking adds a lovely crunch and sparkle.
Storage
Once you’ve baked a batch of these irresistible Orange Clove Cookies, you might find yourself with a few leftovers (if you’re lucky!). Here’s how I like to store them to keep them fresh and delicious for as long as possible.
At Room Temperature
My go-to method for storing baked cookies is in an airtight container at room temperature. This helps them maintain their soft texture. I usually place a piece of parchment paper between layers of cookies if I’m stacking them to prevent sticking, especially if they have a glaze. Stored this way, my Orange Clove Cookies stay fresh and delightful for up to 3-5 days. After that, they tend to start losing their moisture and become a bit drier, though still perfectly edible.
Freezing Baked Cookies
If I’ve made a big batch or want to save some for later, freezing baked cookies is a fantastic option. Once the cookies are completely cooled (especially if they have a glaze, make sure it’s fully set), I arrange them in a single layer on a baking sheet and pop them in the freezer for about 30 minutes. This flash-freezing prevents them from sticking together. After they’re firm, I transfer them to a freezer-safe bag or an airtight container, placing parchment paper between layers. They can be stored in the freezer for up to 2-3 months.
To enjoy them, I simply take out as many as I need and let them thaw at room temperature for an hour or so. Sometimes, I even warm them slightly in the microwave for 10-15 seconds for that fresh-baked feel.
Freezing Cookie Dough
For ultimate convenience, I often freeze portions of the raw cookie dough. This means I can have warm, freshly baked Orange Clove Cookies whenever a craving strikes! I scoop the dough onto a parchment-lined baking sheet, just as if I were going to bake them, then flash-freeze the dough balls until solid (about 1-2 hours). Once frozen, I transfer them to a freezer-safe bag, labeling it with the date and baking instructions.
When ready to bake, I simply place the frozen dough balls on a prepared baking sheet and bake them directly from frozen. You might need to add an extra 2-4 minutes to the baking time, so keep an eye on them until the edges are golden and the centers are set. This is a brilliant way to always have homemade treats on hand!

Final Thoughts
There’s something truly magical about a cookie that perfectly blends vibrant zest with warm spice, and that’s precisely what you’ll discover with these Orange Clove Cookies. I find the way the bright, citrusy orange dances with the cozy, aromatic clove utterly captivating, creating a flavor profile that is both invigorating and deeply comforting. This isn’t just another cookie; it’s a delightful experience, a little bite of sunshine with a comforting hug. If you’re searching for a unique, incredibly flavorful treat that will stand out and bring a smile to everyone’s face, I wholeheartedly recommend making these Orange Clove Cookies. They are an absolute must-try and are sure to become a beloved favorite in your kitchen!
Delightful Orange Clove Cookies Recipe: Warm, Spicy & Citrusy Treat!
- Total Time: 26 minutes
- Yield: 24 cookies 1x
Description
Experience the unique blend of vibrant orange zest and warm clove in these delightful cookies. Perfect for sharing during the holidays or enjoying with afternoon tea!
Ingredients
- 2 cups all-purpose flour
- 1 teaspoon ground clove
- 1 teaspoon baking powder
- 1/2 teaspoon salt
- 3/4 cup unsalted butter, softened
- 1/2 cup granulated sugar
- 1/4 cup light brown sugar
- 1 large egg
- 1 teaspoon vanilla extract
- Zest of 1 large orange
- 2 tablespoons fresh orange juice
- Optional: 1 cup powdered sugar for glaze
- Optional: 2-3 tablespoons fresh orange juice for glaze
Instructions
- Preheat the oven to 375°F (190°C) and line two large baking sheets with parchment paper or silicone baking mats.
- In a large mixing bowl, cream together the softened unsalted butter, granulated sugar, and light brown sugar using an electric mixer until light and fluffy, about 2-3 minutes.
- Add the large egg, vanilla extract, and fresh orange zest to the mixture, beating until just combined.
- In a separate medium bowl, whisk together the all-purpose flour, ground clove, baking powder, and salt.
- Gradually add the dry ingredients to the wet ingredients, mixing on low speed until just combined, then stir in the fresh orange juice until incorporated.
- Cover the bowl with plastic wrap and refrigerate the cookie dough for at least 30 minutes.
- Scoop rounded tablespoons of dough onto the prepared baking sheets, leaving about 2 inches between each cookie.
- Bake for 9-11 minutes, or until the edges are lightly golden and the centers look slightly soft.
- Let the cookies cool on the baking sheets for about 5 minutes before transferring them to a wire rack to cool completely.
- For the optional glaze, whisk together 1 cup of powdered sugar with 2-3 tablespoons of fresh orange juice until smooth, then drizzle over the cooled cookies.
- Prep Time: 15 mins
- Cook Time: 11 mins
- Category: Dessert
- Method: Baking
- Cuisine: American
Nutrition
- Serving Size: 1 cookie
- Calories: 120
- Sugar: 10 g
- Sodium: 50 mg
- Fat: 5 g
- Saturated Fat: 3 g
- Unsaturated Fat: 2 g
- Trans Fat: 0 g
- Carbohydrates: 18 g
- Fiber: 0 g
- Protein: 1 g
- Cholesterol: 20 mg
Keywords: Ensure to zest only the bright orange part of the orange to avoid bitterness. Chilling the dough is crucial for the best texture and flavor.


Leave a Comment