
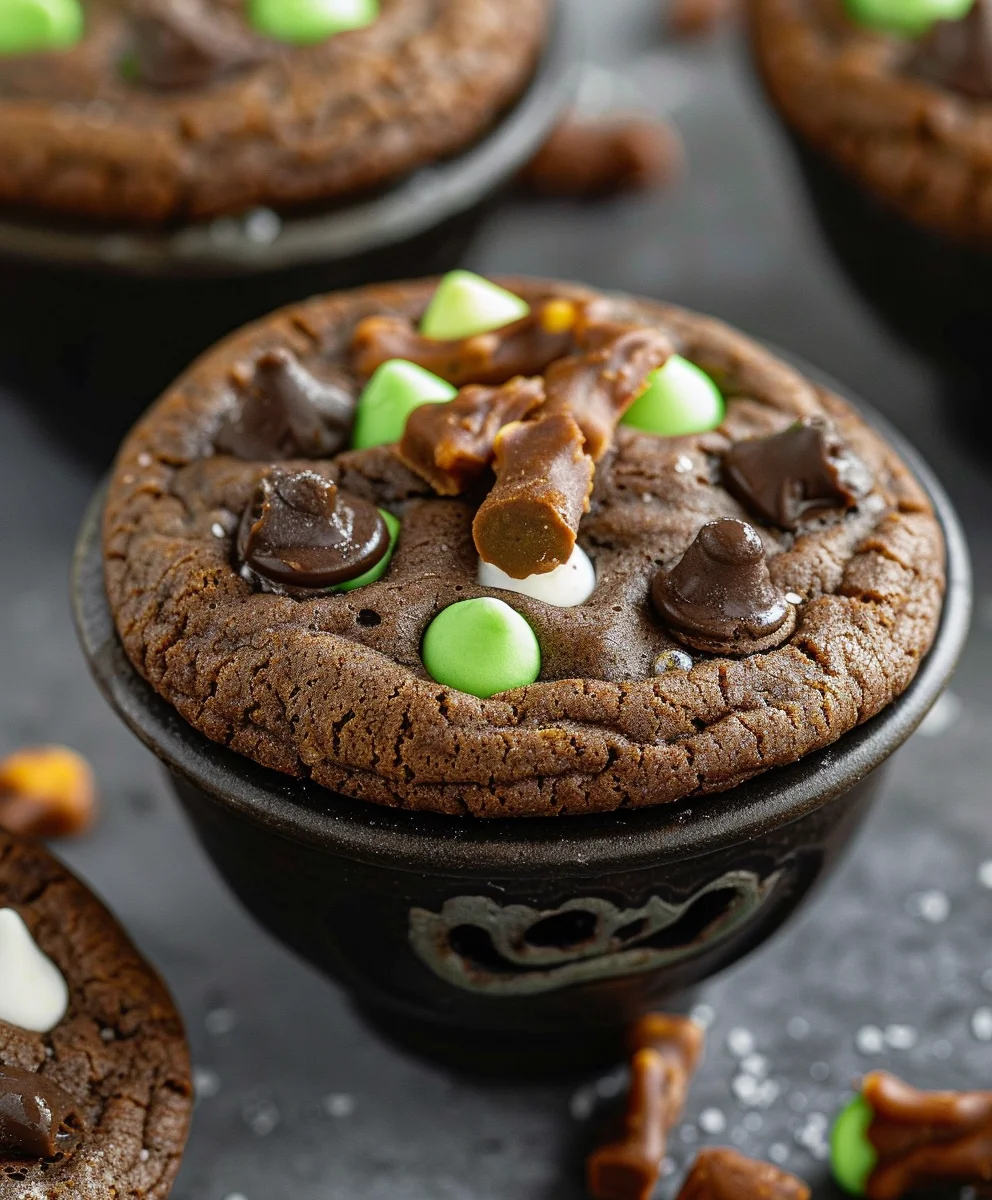
Cauldron Cookies are not just a simple dessert; they are an invitation to a world of enchantment, a bite of pure, comforting magic that delights both the eyes and the palate. Imagine sinking your teeth into a confection that perfectly blends rich, dark flavors with an unexpectedly delightful texture, all encased in a wonderfully craggy, almost ‘bubbling’ exterior. This isn’t merely a cookie; it’s a captivating experience, reminiscent of ancient tales and cozy, mystical evenings.
The Enchanting Lore of Cauldron Cookies
While the precise origins of these whimsical treats are delightfully shrouded in mystery, many believe Cauldron Cookies emerged from time-honored traditions celebrating the turning of seasons, especially autumn. They were originally crafted as a comforting delight, shared around hearths and at festive gatherings, symbolizing warmth, shared enchantment, and perhaps a touch of good fortune during the cooler months. Their unique appearance is said to mimic the bubbling concoctions of old, inviting an element of playful magic into everyday life.
What truly makes these enchanting Cauldron Cookies so universally adored? Beyond their undeniably captivating visual appeal, it is their complex flavor profile – a deep, almost earthy sweetness often highlighted by a hint of spice, offering a comforting warmth with every chew. Their wonderfully chewy texture, dotted with glistening “bubbles” of melted chocolate or delightful inclusions, makes them utterly irresistible. They are truly the perfect indulgence, simple enough for a beginner to master yet impressive enough to wow any guest.

Ingredients:
- For the Cauldron Cookies:
- 2 ½ cups (300g) all-purpose flour, spooned and leveled
- ¾ cup (75g) unsweetened cocoa powder, Dutch-processed for a deeper color
- 1 teaspoon baking soda
- ½ teaspoon salt
- 1 cup (226g) unsalted butter, softened to room temperature
- 1 ½ cups (300g) granulated sugar
- ½ cup (100g) packed light brown sugar
- 2 large eggs, at room temperature
- 2 teaspoons pure vanilla extract
- 2-3 tablespoons whole milk, at room temperature (as needed)
- 1-2 teaspoons black gel food coloring (optional, but highly recommended for that true cauldron depth!)
- For the Enchanting Cauldron Frosting:
- 1 cup (226g) unsalted butter, softened to room temperature
- 4 cups (480g) powdered sugar, sifted
- ¼ cup (60ml) whole milk or heavy cream, plus more if needed
- 1 teaspoon pure mint extract (or vanilla, if preferred)
- ½ teaspoon green gel food coloring (or more, to achieve your desired magical hue!)
- For the Bewitching Decorations:
- Edible glitter (silver, gold, or iridescent for a mystical shimmer)
- Assorted Halloween or celestial sprinkles (stars, moons, bat shapes)
- Small pretzel sticks (optional, for “stirring” wands)
Preparing the Cauldron Cookie Dough
Let’s get started on creating the foundation for our magical Cauldron Cookies! The key here is patience and precision to ensure our cookies are perfectly chewy and rich.
-
Whisk the Dry Ingredients: In a medium-sized bowl, I always begin by whisking together my all-purpose flour, cocoa powder, baking soda, and salt. This step is more important than you might think! Sifting or thorough whisking ensures that the leavening agents and cocoa are evenly distributed throughout the flour, preventing pockets of baking soda or clumps of cocoa, which could lead to an uneven texture or taste in your finished Cauldron Cookies. Set this mysterious dark mixture aside for a moment.
-
Cream the Butter and Sugars: In the bowl of a stand mixer fitted with the paddle attachment, or with a large bowl and a sturdy electric hand mixer, I combine my softened unsalted butter with both the granulated sugar and light brown sugar. I like to beat these on medium-high speed for about 3 to 5 minutes, or until the mixture becomes wonderfully light, fluffy, and visibly paler in color. This creaming process incorporates air into the butter, which will contribute significantly to the soft and chewy texture of our Cauldron Cookies. Make sure your butter is truly room temperature – it should yield slightly when pressed, but not be melted or greasy. If it’s too cold, it won’t cream properly; if too warm, the cookies might spread too much.
-
Incorporate Eggs and Vanilla: With the mixer on medium-low speed, I add the eggs one at a time, mixing well after each addition until fully incorporated. It’s important to scrape down the sides of the bowl frequently with a rubber spatula to ensure everything is evenly combined. Once both eggs are in, I pour in the pure vanilla extract and mix until just combined. Vanilla adds a beautiful depth of flavor that complements the rich cocoa base of our Cauldron Cookies perfectly.
-
Combine Wet and Dry: Now, it’s time to bring our two mixtures together! I gradually add the dry ingredient mixture to the wet ingredients, mixing on low speed until just combined. The golden rule here is to avoid overmixing. Overmixing develops the gluten in the flour too much, which can result in tough, dry cookies instead of the delightfully tender Cauldron Cookies we’re aiming for. Stop mixing as soon as you see no more streaks of flour.
-
Achieving Cauldron Color (Optional but Fun!): If you’re going for that deep, mysterious cauldron look, this is when I add the black gel food coloring. I typically start with 1 teaspoon and mix it in until the dough is uniformly dark. If you want an even more dramatic black, add another ½ to 1 teaspoon until you reach your desired hue. Gel food coloring is fantastic because it provides intense color without adding excess liquid to your dough. If the dough seems a little too stiff, especially after adding the cocoa and coloring, I’ll drizzle in a tablespoon or two of room temperature milk, mixing just until it reaches a soft, pliable consistency. It should be easy to scoop and roll, not crumbly.
-
Chill the Dough: This step is non-negotiable for the best Cauldron Cookies! I cover the bowl with plastic wrap and refrigerate the dough for at least 1 hour, or up to 24 hours. Chilling the dough allows the flavors to meld beautifully, and more importantly, it helps prevent the cookies from spreading too much in the oven, ensuring they hold their delightful shape. Cold dough also makes the Cauldron Cookies much easier to handle and scoop. If you chill it for longer than an hour, you might need to let it sit out at room temperature for 10-15 minutes before scooping to make it more manageable.
Baking Your Magical Cauldron Cookies
With our dough perfectly chilled and ready, it’s time to transform it into delectable cookies that will be the vessel for our enchanting frosting.
-
Preheat and Prepare: About 15 minutes before you’re ready to bake, preheat your oven to 350°F (175°C). Line several baking sheets with parchment paper or silicone baking mats. This is a game-changer for easy cleanup and ensures your Cauldron Cookies don’t stick.
-
Shape Your Cookies: Using a medium cookie scoop (about 1.5 tablespoons) or by rolling portions of dough, I scoop or roll my chilled dough into uniform balls. For a true “cauldron” effect, I sometimes gently flatten the tops a tiny bit or even make them slightly irregular, like a bubbling pot. Uniform sizing is important for even baking, so try to make them all roughly the same size. Place the dough balls about 2 inches apart on your prepared baking sheets – they will spread a little.
-
Bake to Perfection: I bake one sheet at a time, or two if my oven has excellent air circulation, for 10 to 12 minutes. You’ll know your Cauldron Cookies are done when the edges are set and appear slightly firm, but the centers still look a tiny bit soft and puffy. It’s crucial not to overbake these cookies if you want them to remain soft and chewy. They will continue to set up as they cool on the baking sheet.
-
Cooling Down: Once out of the oven, I let the Cauldron Cookies cool on the baking sheets for about 5 minutes. This brief resting period allows them to firm up enough to be safely transferred. Then, I carefully move them to a wire rack to cool completely. Ensuring your cookies are completely cool before frosting is absolutely essential! If they are even slightly warm, your beautiful frosting will melt and slide right off, turning your magical creation into a sad puddle.
Crafting the Enchanting Cauldron Frosting
Now for the truly magical part – creating the vibrant, potion-like frosting that will adorn our Cauldron Cookies. This buttercream is wonderfully rich and holds its shape beautifully.
-
Cream the Butter: In the bowl of your stand mixer with the paddle attachment (or using a hand mixer), beat the softened unsalted butter on medium speed for 2-3 minutes until it’s light and fluffy. Just like with the cookie dough, room temperature butter is key here for a smooth, lump-free frosting.
-
Gradually Add Powdered Sugar: With the mixer on low speed, I gradually add the sifted powdered sugar, about 1 cup at a time. Sifting the powdered sugar beforehand is a small but mighty step that prevents lumps, giving you a silky-smooth frosting. Once all the powdered sugar is incorporated, the mixture will be quite thick and crumbly.
-
Add Liquid and Flavoring: Now, I pour in the whole milk (or heavy cream) and the mint extract. Start with the suggested amount. Beat on medium-high speed for another 2-3 minutes, until the frosting is light, fluffy, and smooth. This whipping stage makes the frosting airy and delightful.
-
Achieve Your Potion Hue: Add the green gel food coloring, starting with ½ teaspoon, and mix until you reach your desired “cauldron potion” green. You can go for a vibrant, almost neon green, or a more subtle, earthy green – it’s entirely up to your magical aesthetic! If the frosting seems too thick, I add more milk or cream, ½ teaspoon at a time, until it reaches a spreadable, pipeable consistency. If it’s too thin, a tablespoon or two of extra sifted powdered sugar will help thicken it up. Remember to mix well after each adjustment.
Decorating Your Bewitching Cauldron Cookies
This is where our Cauldron Cookies truly come alive! Let your creativity flow as you transform these dark discs into sparkling, enchanting treats.
-
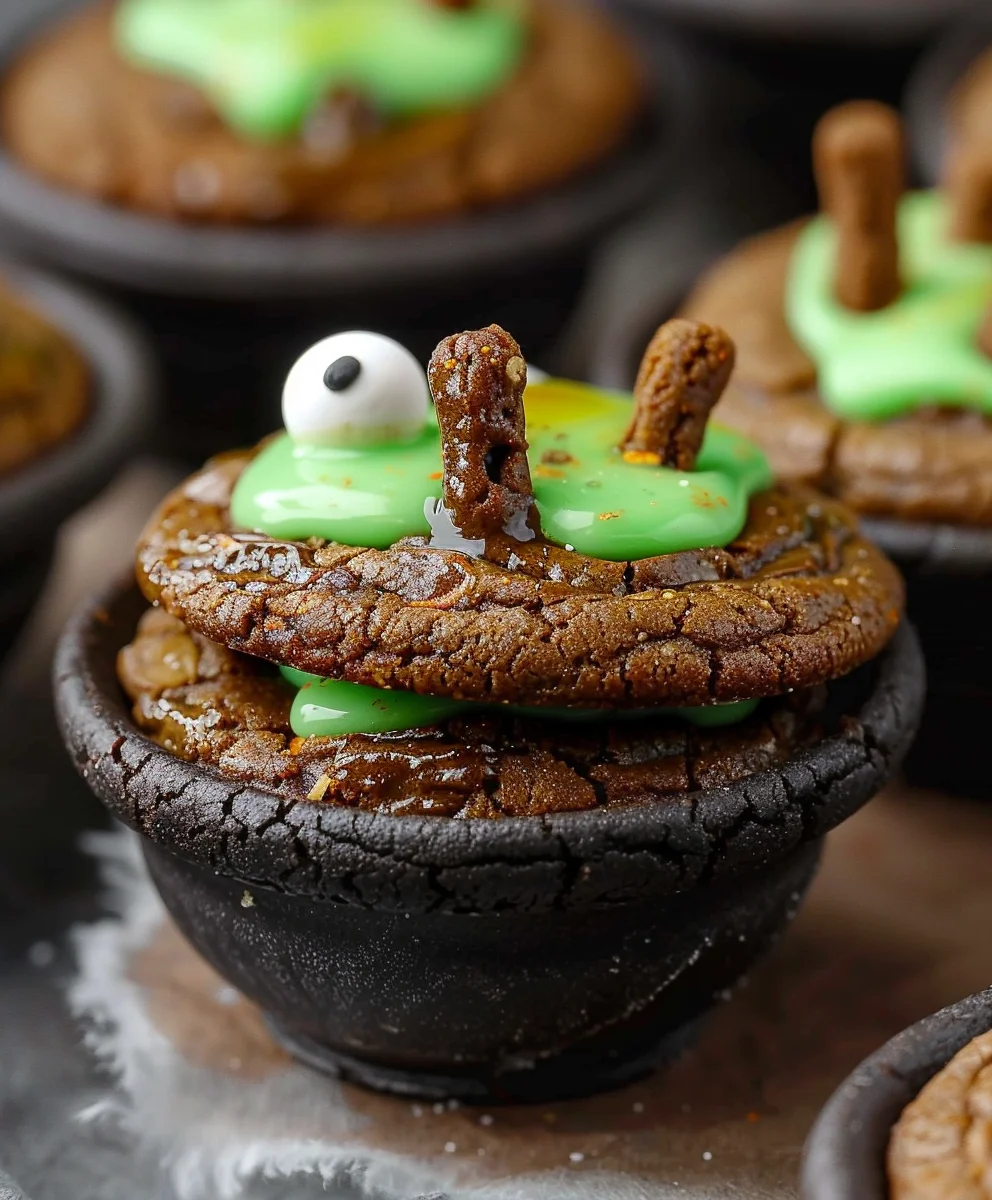
Frosting Your Cookies: Once your Cauldron Cookies are completely cool, it’s time to frost them. I like to use an offset spatula or the back of a spoon to spread a generous dollop of our vibrant green frosting over the top of each cookie. You can create gentle swirls for a “bubbling potion” effect or keep it smooth – whatever look you prefer. Don’t be afraid to make them look a little rustic; it adds to the homemade charm of these magical Cauldron Cookies.
-
Add a Touch of Sparkle: Immediately after frosting, while the frosting is still wet, sprinkle edible glitter over the top of each cookie. I love using silver or iridescent glitter to give them a truly mystical, shimmering appearance, like magic dust catching the light. A little goes a long way to add that bewitching sparkle.
-
Sprinkle Some Charm: Next, carefully place your assorted Halloween or celestial sprinkles onto the frosting. Stars, moons, tiny bat shapes, or even just regular festive sprinkles will make each Cauldron Cookie unique and eye-catching. This is the perfect opportunity to customize each cookie with a different “ingredient” for your magical brew.
-
The “Stirring Wand” (Optional): For an extra whimsical touch, I sometimes gently insert a small pretzel stick into the edge of the frosting, making it look like a tiny stirring wand just pulled from the bubbling cauldron. This detail is especially fun and adds a lovely salty crunch that balances the sweetness of the cookie and frosting. Just make sure the frosting is soft enough to allow the pretzel to go in without cracking the cookie.
-
Final Set and Storage: Allow the frosting to set for about 30 minutes at room temperature, or a bit faster in the refrigerator, especially if your kitchen is warm. Once the frosting is slightly firm to the touch, your Cauldron Cookies are ready to be served and enjoyed! Store any leftover Cauldron Cookies in an airtight container at room temperature for up to 3-4 days, or in the refrigerator for up to a week. They are truly a treat that embodies a fun, enchanting spirit!
Conclusion:
And there you have it, my friends! We’ve reached the enchanting end of our journey through this truly special recipe. I genuinely hope that reading through these steps has filled you with the same excitement and anticipation that I feel every single time I whip up a batch of these extraordinary treats. This isn’t just another cookie recipe; it’s an invitation to create something truly magical in your own kitchen, something that will undoubtedly become a treasured favorite for anyone lucky enough to taste it.
Why are these Cauldron Cookies an absolute must-try? Well, let me count the ways! First and foremost, their flavor profile is simply out of this world. Imagine a perfect balance of rich, deep notes with hints of unexpected delight, all conspiring to create a symphony on your palate. Then there’s the texture – a glorious contrast between a delightfully crisp edge and a wonderfully soft, chewy center that practically melts in your mouth. They’re also surprisingly simple to make, proving that you don’t need complicated techniques to achieve gourmet results. The sheer joy of watching them come to life in your oven, transforming from a simple dough into these mystical, delectable morsels, is an experience in itself. They truly embody comfort, warmth, and a touch of whimsical charm, making them perfect for any occasion, big or small.
Elevate Your Cauldron Cookie Experience with These Serving Suggestions!
While these cookies are undeniably fantastic straight out of the oven, still warm and slightly gooey, there are countless ways to enhance their deliciousness. Imagine them paired with a scoop of creamy vanilla bean ice cream, the warm cookie melting slightly against the cold sweetness – pure bliss! They’re also an impeccable companion to a piping hot mug of coffee on a chilly morning, or a calming cup of Earl Grey tea in the afternoon. For a truly decadent treat, crumble a warm cookie over a bowl of Greek yogurt with a drizzle of honey, or serve them alongside a fruit platter for a delightful balance of flavors. Thinking of them as gifts? Package a few Cauldron Cookies in a charming box with a ribbon, and you’ve got a homemade present that speaks volumes of your thoughtfulness and culinary prowess. Trust me, they’ll be devoured instantly!
Unleash Your Creativity: Exciting Variations to Try
The beauty of this recipe lies not just in its perfection, but also in its incredible versatility. Once you’ve mastered the basic technique, feel free to let your imagination run wild with variations. For a different twist, try swapping out some of the chocolate chips for white chocolate chunks, butterscotch chips, or even dried cranberries and orange zest for a burst of festive flavor. If you’re a nut-lover, a handful of chopped pecans or walnuts folded into the dough adds a delightful crunch and earthy note. Feeling adventurous? A pinch of cayenne pepper can introduce a subtle, intriguing warmth that’s surprisingly addictive, or a dash of espresso powder can deepen the chocolate notes beautifully. You could even experiment with different extracts – almond, peppermint, or even a touch of rum extract can transform the entire profile. For those special occasions, a sprinkle of sea salt before baking can enhance the sweetness and add a gourmet touch, or a light dusting of powdered sugar after they’ve cooled can give them an elegant finish. The possibilities are truly endless, allowing you to tailor these incredible Cauldron Cookies to your personal taste and the preferences of your loved ones.
Your Baking Journey Starts Now!
So, what are you waiting for? I wholeheartedly encourage you to roll up your sleeves, gather your ingredients, and embark on this wonderful baking adventure. Don’t be shy – dive into the magic of creating these sensational treats. There’s something incredibly therapeutic about the process of baking, and the reward of seeing the smiles on people’s faces as they enjoy your homemade creations is truly priceless. Once you’ve made your batch, I would absolutely love to hear about your experience! Did you stick to the original recipe, or did you venture into some exciting variations? How did your Cauldron Cookies turn out? Please share your thoughts, your photos, and any tips or tricks you discovered along the way in the comments below. Your feedback not only brightens my day but also inspires and assists fellow bakers in our growing community. Happy baking, my dear friends, and may your kitchens always be filled with the wonderful aroma of fresh, homemade delights!
Magical Cauldron Cookies: A Bewitching Halloween Dessert
Cauldron Cookies are not just a simple dessert; they are an invitation to a world of enchantment, a bite of pure, comforting magic that delights both the eyes and the palate. Imagine sinking your teeth into a confection that perfectly blends rich, dark flavors with an unexpectedly delightful texture, all encased in a wonderfully craggy, almost ‘bubbling’ exterior. This isn’t merely a cookie; it’s a captivating experience, reminiscent of ancient tales and cozy, mystical evenings.
Ingredients
-
1 (15.25 ounce) box Devil’s Food cake mix
-
2 large eggs
-
1/2 cup canola or vegetable oil
-
Black food coloring (optional)
-
1 cup unsalted butter, softened
-
3 cups powdered sugar
-
1 teaspoon vanilla extract
-
1/2 teaspoon salt
-
1-3 tablespoons milk
-
Green food coloring
-
Round green sprinkles
-
Halloween sprinkles
-
Candy eyeballs
-
Pretzel sticks
Instructions
-
Step 1
Preheat your oven to 350°F (175°C) and line baking sheets with parchment paper. In a large bowl, combine the Devil’s Food cake mix, eggs, and canola or vegetable oil. Mix until a soft dough forms. Add black food coloring at this stage if you desire a deeper black cookie base. -
Step 2
Scoop the dough into approximately 1.5-inch balls and place them about 2 inches apart on the prepared baking sheets. Bake for 10 to 12 minutes, or until the edges are set. Allow cookies to cool on the baking sheets for 5 minutes before transferring them to a wire rack to cool completely. Ensure cookies are entirely cool before frosting. -
Step 3
In a mixing bowl, beat the softened unsalted butter until light and fluffy (2-3 minutes). Gradually add the powdered sugar, mixing until combined. Stir in the vanilla extract and salt. Add 1-3 tablespoons of milk and the green food coloring. Beat on medium-high speed for 2-3 minutes until the frosting is light, fluffy, and reaches your desired ‘potion’ hue and spreadable consistency. -
Step 4
Once the cookies are completely cool, spread a generous dollop of the green frosting over the top of each cookie using an offset spatula or spoon. Immediately apply round green sprinkles, assorted Halloween sprinkles, and candy eyeballs onto the wet frosting. For an extra whimsical touch, gently insert a small pretzel stick into the edge of the frosting, resembling a ‘stirring wand’. -
Step 5
Allow the frosting to set for about 30 minutes at room temperature before serving. Store any leftover Cauldron Cookies in an airtight container at room temperature for up to 3-4 days, or in the refrigerator for up to a week.
Important Information
Nutrition Facts (Per Serving)
It is important to consider this information as approximate and not to use it as definitive health advice.
Allergy Information
Please check ingredients for potential allergens and consult a health professional if in doubt.

Leave a Comment