
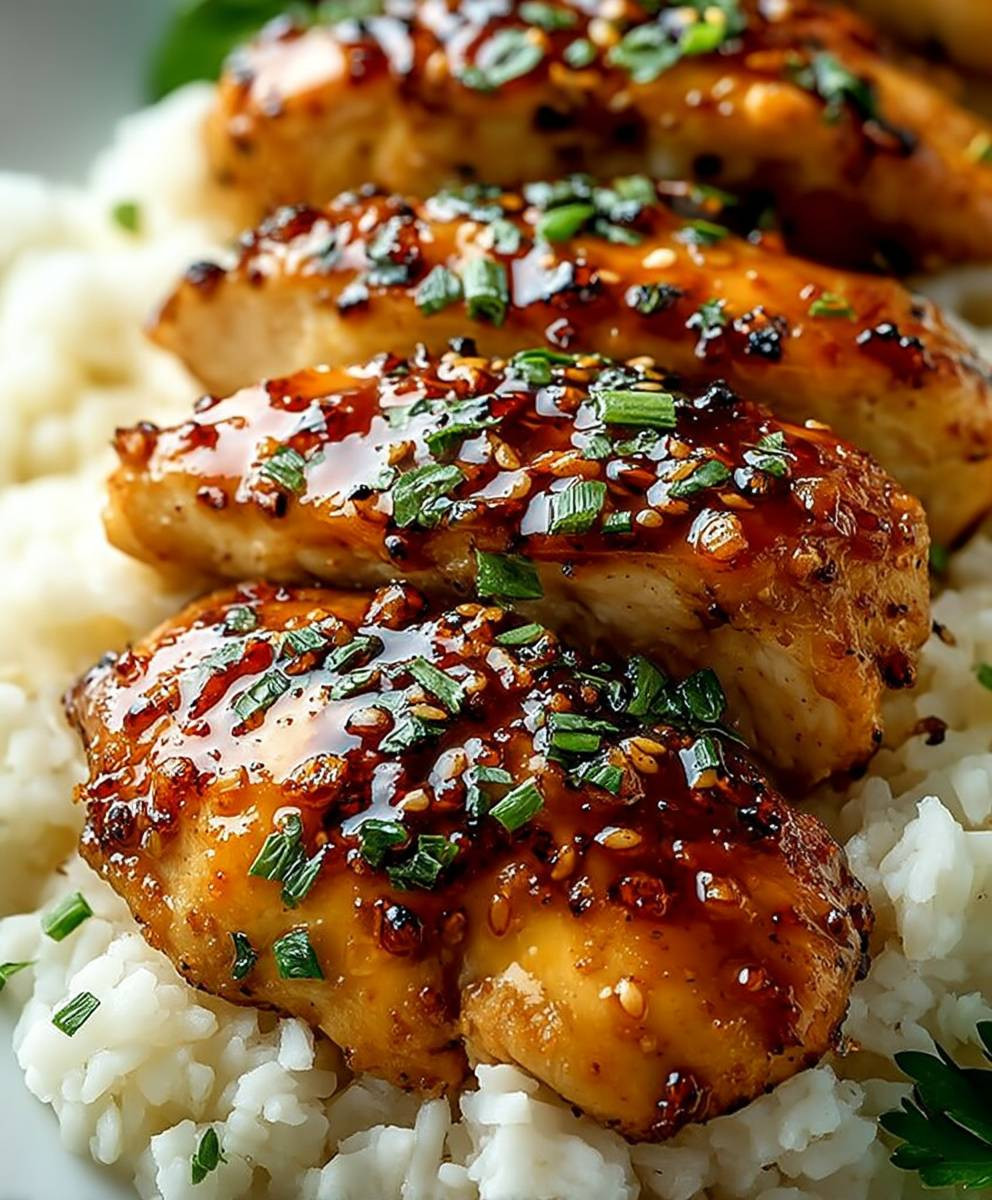
Honey Garlic Chicken: just the name conjures up images of glistening, perfectly glazed chicken, doesn’t it? Imagine sinking your teeth into tender, juicy chicken, coated in a sweet and savory sauce that’s both comforting and incredibly satisfying. This isn’t just dinner; it’s an experience!
While the exact origins of Honey Garlic Chicken are debated, the combination of honey and garlic as a flavor pairing has roots in ancient Chinese cuisine, where sweet and savory elements are often harmoniously balanced. Over time, this delicious combination has spread globally, adapting to local tastes and ingredients, resulting in countless variations of this beloved dish.
But what makes Honey Garlic Chicken so universally appealing? It’s the perfect marriage of flavors, of course! The sweetness of the honey beautifully complements the pungent aroma of garlic, creating a symphony of taste that dances on your palate. Beyond the incredible flavor, it’s also incredibly easy to make, making it a weeknight dinner champion. Whether you’re craving a quick and delicious meal or looking to impress your guests with minimal effort, Honey Garlic Chicken is always a winning choice. The sticky, caramelized glaze is irresistible, and the tender chicken is sure to please even the pickiest eaters. Get ready to experience a flavor explosion that will leave you wanting more!

Ingredients:
- For the Chicken:
- 2 lbs boneless, skinless chicken breasts, cut into 1-inch cubes
- 1/4 cup cornstarch
- 1/4 teaspoon salt
- 1/4 teaspoon black pepper
- 1 tablespoon olive oil
- For the Honey Garlic Sauce:
- 1/2 cup honey
- 1/4 cup soy sauce (low sodium recommended)
- 1/4 cup water
- 4 cloves garlic, minced
- 1 tablespoon rice vinegar
- 1 teaspoon sesame oil
- 1/2 teaspoon red pepper flakes (optional, for heat)
- 1 tablespoon cornstarch
- For Garnish (optional):
- Sesame seeds
- Chopped green onions
- Serving Suggestions:
- Cooked rice (white or brown)
- Steamed broccoli
- Quinoa
Preparing the Chicken:
Okay, let’s get started with prepping our chicken. This is a crucial step to ensure we get that lovely crispy exterior when we cook it.
- Cut the Chicken: First, take your chicken breasts and cut them into roughly 1-inch cubes. Try to keep them relatively uniform in size so they cook evenly. Nobody wants some pieces overcooked while others are still raw!
- Prepare the Coating: In a medium-sized bowl, combine the cornstarch, salt, and pepper. This simple mixture is the key to a beautifully browned and slightly crispy chicken. The cornstarch helps to absorb moisture and create that desirable texture.
- Coat the Chicken: Add the cubed chicken to the bowl with the cornstarch mixture. Toss everything together really well, making sure each piece of chicken is evenly coated. You might need to use your hands to ensure everything is properly covered. Don’t be shy!
Making the Honey Garlic Sauce:
Now, let’s move on to the star of the show – the honey garlic sauce! This is where all the magic happens, transforming simple chicken into a flavor explosion.
- Combine the Sauce Ingredients: In a separate medium-sized bowl (or a saucepan, if you prefer to cook the sauce directly), whisk together the honey, soy sauce, water, minced garlic, rice vinegar, sesame oil, red pepper flakes (if using), and cornstarch. Make sure the cornstarch is fully dissolved to prevent any lumps in your sauce.
- Adjust to Taste: Give the sauce a little taste. If you prefer a sweeter sauce, add a touch more honey. If you like it saltier, add a tiny splash more soy sauce. Remember, you can always adjust the flavors to your liking! The red pepper flakes add a nice kick, but feel free to omit them if you’re not a fan of spice.
Cooking the Chicken:
Alright, time to get cooking! This is where we bring everything together and create that delicious honey garlic chicken we’ve been dreaming about.
- Heat the Oil: Heat the olive oil in a large skillet or wok over medium-high heat. Make sure the pan is hot before adding the chicken; this will help it to brown properly.
- Cook the Chicken: Add the coated chicken to the hot skillet in a single layer. Avoid overcrowding the pan, as this will lower the temperature and cause the chicken to steam instead of brown. If necessary, cook the chicken in batches. Cook for about 5-7 minutes, flipping occasionally, until the chicken is cooked through and golden brown on all sides. The internal temperature should reach 165°F (74°C).
- Remove the Chicken: Once the chicken is cooked, remove it from the skillet and set it aside on a plate.
Cooking the Sauce:
Now, we’ll cook the sauce to perfection, creating a luscious glaze that coats every piece of chicken.
- Pour in the Sauce: Pour the honey garlic sauce into the same skillet you used to cook the chicken. The leftover bits from the chicken will add even more flavor to the sauce!
- Simmer the Sauce: Bring the sauce to a simmer over medium heat, stirring constantly. As the sauce heats up, it will begin to thicken. Continue to simmer for about 3-5 minutes, or until the sauce has reached your desired consistency. It should be thick enough to coat the back of a spoon.
- Adjust Consistency (if needed): If the sauce is too thick, add a tablespoon or two of water to thin it out. If it’s too thin, continue to simmer it for a few more minutes until it thickens up.
Combining Chicken and Sauce:
This is the moment we’ve been waiting for! Let’s bring the chicken and sauce together for a truly unforgettable dish.
- Add the Chicken to the Sauce: Add the cooked chicken back to the skillet with the honey garlic sauce.
- Toss to Coat: Toss the chicken in the sauce until each piece is evenly coated. Make sure every nook and cranny is covered in that delicious glaze!
- Heat Through: Cook for another 1-2 minutes, stirring constantly, until the chicken is heated through and the sauce is nicely glazed onto the chicken.
Serving and Garnishing:
Almost there! Now, let’s plate up our masterpiece and add those final touches to make it truly irresistible.
- Serve Immediately: Serve the honey garlic chicken immediately over cooked rice (white or brown), quinoa, or with a side of steamed broccoli.
- Garnish (optional): Garnish with sesame seeds and chopped green onions for added flavor and visual appeal. A sprinkle of red pepper flakes can also add a touch of heat.
Tips and Variations:
- Chicken Thighs: You can substitute chicken thighs for chicken breasts. Chicken thighs tend to be more flavorful and stay more moist during cooking. Just make sure to trim any excess fat before cutting them into cubes.
- Vegetables: Add your favorite vegetables to the skillet along with the chicken. Broccoli florets, bell peppers, snap peas, and carrots all work well.
- Ginger: Add a teaspoon of grated ginger to the sauce for an extra layer of flavor.
- Pineapple: For a sweet and tangy twist, add some pineapple chunks to the skillet along with the chicken.
- Spicy Honey Garlic Chicken: Increase the amount of red pepper flakes or add a dash of sriracha to the sauce for a spicier dish.
- Make it Gluten-Free: Use tamari instead of soy sauce to make this recipe gluten-free.
- Air Fryer Option: You can also cook the chicken in an air fryer. Preheat your air fryer to 400°F (200°C). Place the coated chicken in the air fryer basket in a single layer and cook for 10-12 minutes, flipping halfway through, until cooked through and golden brown. Then, toss the cooked chicken with the honey garlic sauce.
- Meal Prep: This recipe is perfect for meal prepping. Cook the chicken and sauce separately and store them in airtight containers in the refrigerator. When you’re ready to eat, simply reheat the chicken and sauce and serve over rice or quinoa.
Storage Instructions:
Leftover honey garlic chicken can be stored in an airtight container in the refrigerator for up to 3-4 days. Reheat in the microwave or in a skillet over medium heat until heated through.
Enjoy!
I hope you enjoy this delicious and easy honey garlic chicken recipe! It’s a guaranteed crowd-pleaser and a perfect weeknight meal. Don’t be afraid to experiment with the flavors and make it your own. Happy cooking!
Conclusion:
This Honey Garlic Chicken recipe isn’t just another weeknight dinner; it’s a flavor explosion waiting to happen! The perfect balance of sweet honey, savory garlic, and tender chicken creates a dish that’s both comforting and exciting. I truly believe this will become a staple in your household, just as it has in mine. It’s quick, easy, and guaranteed to satisfy even the pickiest eaters.
Why is this a must-try? Well, beyond the incredible taste, it’s the sheer versatility. You can have it on the table in under 30 minutes, making it ideal for those busy evenings when you’re short on time but still craving something delicious and homemade. Plus, the ingredients are readily available, so you probably have most of them in your pantry already! But the real magic lies in the sauce – it’s sticky, glossy, and utterly irresistible. It clings to the chicken perfectly, ensuring every bite is bursting with flavor.
And the possibilities don’t stop there! Feel free to get creative with your serving suggestions. I love serving this Honey Garlic Chicken over a bed of fluffy rice or quinoa to soak up all that delicious sauce. Steamed broccoli, roasted asparagus, or a simple side salad are all fantastic accompaniments. For a heartier meal, try pairing it with mashed potatoes or even creamy polenta.
Looking for variations? You got it! If you like a little heat, add a pinch of red pepper flakes to the sauce. For a richer flavor, try using dark soy sauce instead of light. And if you’re feeling adventurous, you can even add a splash of rice vinegar for a touch of tanginess. You can also use chicken thighs instead of breasts for a juicier, more flavorful result. Just remember to adjust the cooking time accordingly. Another great variation is to add some sesame seeds and chopped green onions as a garnish for added flavor and visual appeal.
Serving Suggestions:
- Serve over rice or quinoa.
- Pair with steamed broccoli or roasted asparagus.
- Add a side salad for a light and refreshing meal.
- Try it with mashed potatoes or creamy polenta for a heartier option.
Variations:
- Add red pepper flakes for a spicy kick.
- Use dark soy sauce for a richer flavor.
- Add a splash of rice vinegar for a touch of tanginess.
- Use chicken thighs instead of breasts for a juicier result.
- Garnish with sesame seeds and chopped green onions.
I’m so confident that you’ll love this recipe, and I can’t wait to hear what you think! Don’t be afraid to experiment and make it your own. Cooking should be fun, so relax, get in the kitchen, and let your creativity flow.
So, what are you waiting for? Grab your ingredients, preheat your oven (or fire up your skillet!), and get ready to experience the magic of this incredible Honey Garlic Chicken. I promise you won’t be disappointed.
Once you’ve tried it, please come back and share your experience in the comments below. I’d love to hear about your variations, your serving suggestions, and any tips you have for making this recipe even better. Happy cooking! I am sure that this recipe will be a hit with your family and friends. Don’t forget to take a picture of your creation and share it on social media using #HoneyGarlicChickenRecipe. I can’t wait to see your culinary masterpieces!
Honey Garlic Chicken: The Ultimate Recipe Guide
Crispy chicken coated in a luscious homemade honey garlic sauce. A quick and easy weeknight meal that's sure to become a family favorite!
Ingredients
Instructions
Recipe Notes
- Chicken Thighs: Substitute chicken thighs for chicken breasts for a more flavorful and moist option.
- Vegetables: Add your favorite vegetables like broccoli, bell peppers, or carrots to the skillet along with the chicken.
- Ginger: Add a teaspoon of grated ginger to the sauce for an extra layer of flavor.
- Pineapple: For a sweet and tangy twist, add some pineapple chunks to the skillet along with the chicken.
- Spicy Honey Garlic Chicken: Increase the amount of red pepper flakes or add a dash of sriracha to the sauce for a spicier dish.
- Gluten-Free: Use tamari instead of soy sauce to make this recipe gluten-free.
- Air Fryer Option: Cook the chicken in an air fryer at 400°F (200°C) for 10-12 minutes, flipping halfway through, until cooked through and golden brown. Then, toss the cooked chicken with the honey garlic sauce.
- Meal Prep: Cook the chicken and sauce separately and store them in airtight containers in the refrigerator. Reheat when ready to eat.
- Storage Instructions: Leftover honey garlic chicken can be stored in an airtight container in the refrigerator for up to 3-4 days. Reheat in the microwave or in a skillet over medium heat until heated through.


Leave a Comment