Halloween Breadsticks
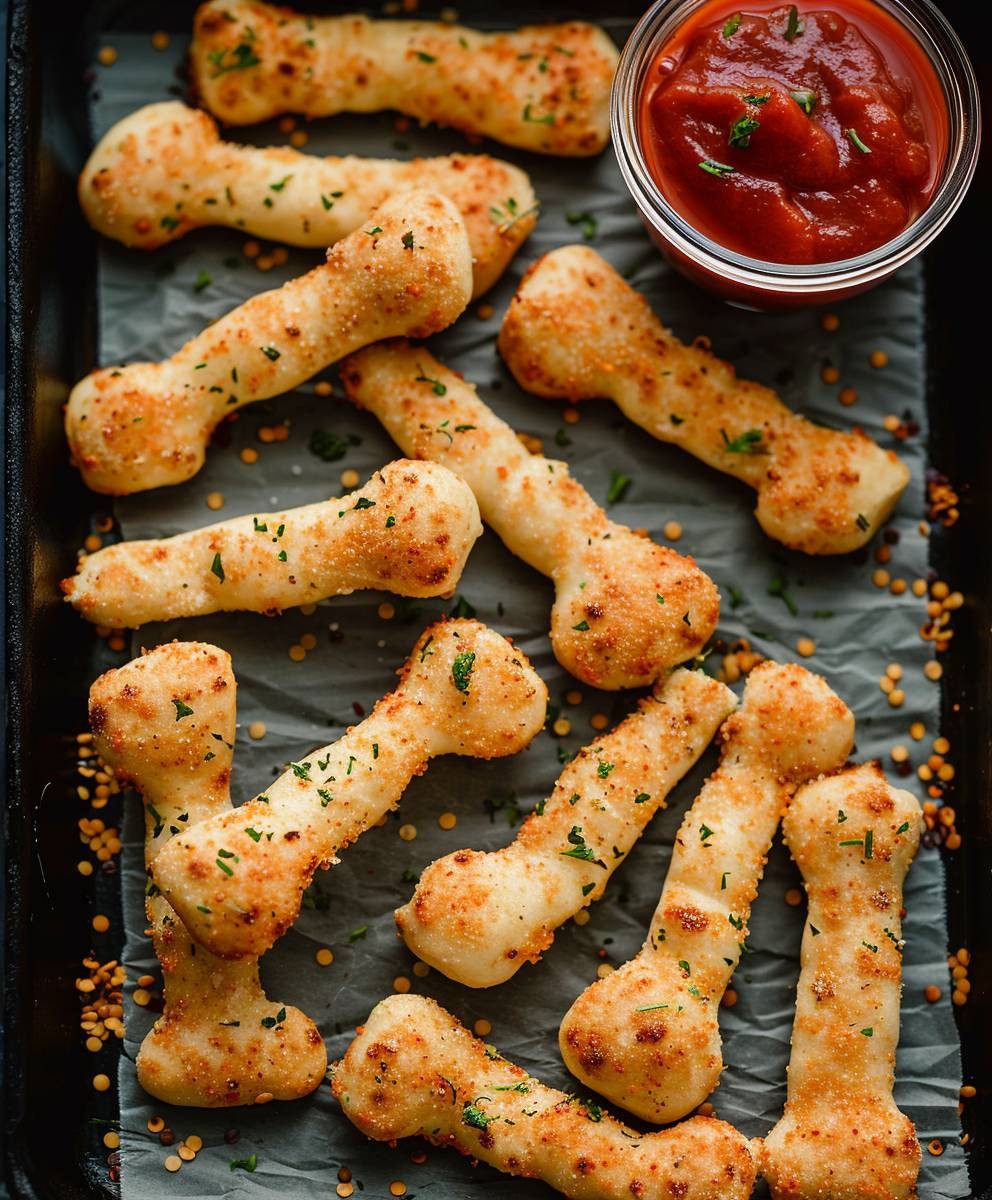
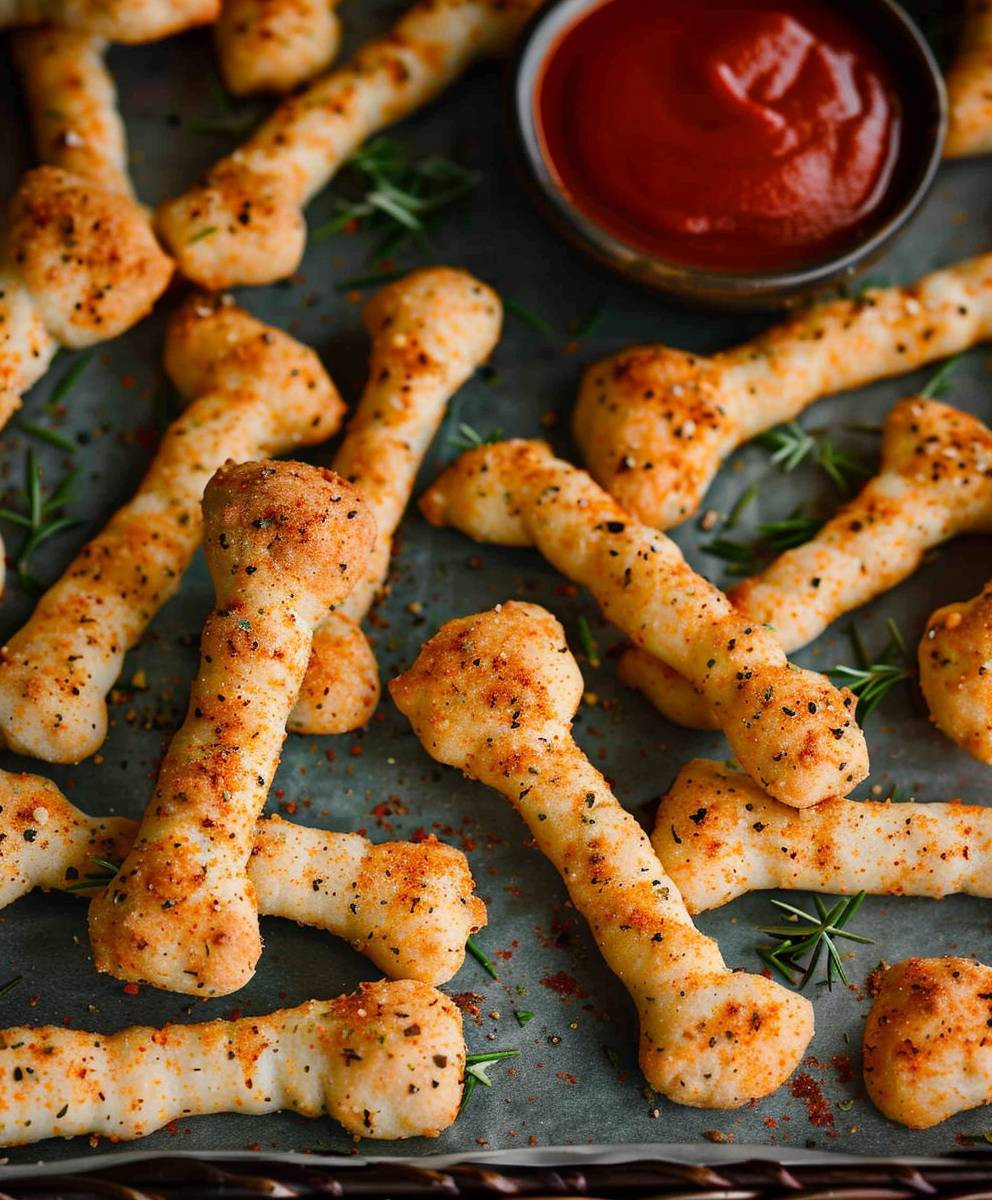
Halloween Breadsticks: Are you ready to conjure up some spooky deliciousness this Halloween? Forget the same old store-bought treats; this year, I’m sharing my recipe for frightfully fun and incredibly tasty Halloween Breadsticks. These aren’t your average breadsticks; we’re talking about crispy, savory perfection, perfectly shaped and decorated to match the spooky spirit of the holiday.
While the precise origins of breadsticks are a bit hazy, lost in the mists of time and various culinary traditions, their popularity is undeniable. Many cultures boast their own versions, from the grissini of Italy to the breadsticks enjoyed across Europe and beyond. What makes my Halloween Breadsticks special is their adaptability. You can easily customize them to fit your own Halloween aesthetic, making them a perfect addition to any spooky gathering, whether it’s a family dinner or a haunted Halloween party.
The beauty of these Halloween Breadsticks lies in their versatility. Their slightly salty, perfectly crisp texture provides a delightful contrast to any dipping sauce you choose – from a creamy pumpkin dip to a spicy marinara. They’re also incredibly easy to make, requiring minimal ingredients and prep time, leaving you more time to focus on the other spooky details of your Halloween celebration. Plus, the kids will absolutely love helping to shape and decorate them, making it a fun family activity. So, gather your ingredients, put on your witch’s hat (optional, but encouraged!), and let’s get baking!
Ingredients:
- 2 cups (250g) all-purpose flour, plus extra for dusting
- 1 teaspoon salt
- 1 teaspoon sugar
- 1 packet (2 1/4 teaspoons) active dry yeast
- 1 cup (240ml) warm water (105-115°F)
- 2 tablespoons olive oil
- 1 large egg, beaten
- 1/2 cup (60g) grated Parmesan cheese
- 1/4 cup (30g) finely chopped fresh rosemary
- For the Halloween Decorations:
- 1/2 cup (60g) black olive slices
- 1/4 cup (30g) orange cheddar cheese, shredded
- 1/4 cup (30g) green bell pepper, finely chopped
- 1/4 cup (30g) red bell pepper, finely chopped
- Melted butter, for brushing
- Coarse sea salt, for sprinkling (optional)
Preparing the Dough
- In a large bowl, whisk together the flour, salt, and sugar. Make a well in the center.
- In a small bowl, dissolve the yeast in the warm water. Let it stand for 5-10 minutes until foamy. This is crucial for ensuring the breadsticks rise properly. If it doesn’t foam, your yeast might be dead, and you’ll need a fresh packet.
- Pour the yeast mixture into the well of the flour mixture. Add the olive oil and beaten egg.
- Using a wooden spoon or your hands, gradually incorporate the flour into the wet ingredients until a shaggy dough forms. Don’t worry if it’s a little sticky at this stage.
- Turn the dough out onto a lightly floured surface and knead for 5-7 minutes, or until the dough becomes smooth and elastic. If it’s too sticky, add a little more flour, a tablespoon at a time. If it’s too dry, add a teaspoon of water at a time.
- Place the dough in a lightly oiled bowl, turning to coat. Cover the bowl with plastic wrap and let it rise in a warm place for 1-1.5 hours, or until doubled in size. A slightly warmer oven (turned off) can help speed up this process.
Shaping the Breadsticks
- Once the dough has risen, punch it down gently to release the air. This is important for a good texture.
- On a lightly floured surface, roll out the dough to about 1/4 inch thickness. I find it easier to work in batches, rolling out a portion of the dough at a time.
- Using a pizza cutter or a sharp knife, cut the dough into long strips, about 1/2 inch wide. You can make them thicker or thinner depending on your preference.
- Place the breadsticks onto a baking sheet lined with parchment paper, leaving a little space between each one. They will expand slightly during baking.
- In a small bowl, combine the Parmesan cheese and rosemary. Sprinkle this mixture evenly over the breadsticks.
Adding the Halloween Decorations
- Creating the faces: Use the black olive slices for eyes. For the mouths, you can use small pieces of the black olives or create a simple smile using the red bell pepper.
- Adding a spooky touch: Use small pieces of the green bell pepper to create stems for the “ghosts” or other spooky elements. The orange cheddar cheese can be used to create a pumpkin-like effect on some of the breadsticks.
- Experiment with designs: Don’t be afraid to get creative! You can use a toothpick to add details to your designs. The possibilities are endless!
- Important Note: Arrange the decorations before the final rise to ensure they stay in place.
Baking the Breadsticks
- Let the decorated breadsticks rise for another 15-20 minutes, or until slightly puffy. This allows the flavors to meld and the breadsticks to rise a bit more.
- Preheat your oven to 400°F (200°C). Make sure your oven is properly preheated for even baking.
- Brush the breadsticks with melted butter. This adds flavor and gives them a beautiful golden-brown color.
- Sprinkle with coarse sea salt, if desired. This adds a nice textural contrast.
- Bake for 12-15 minutes, or until golden brown and cooked through. Keep a close eye on them towards the end of baking to prevent burning.
- Remove the breadsticks from the oven and let them cool slightly on a wire rack before serving. This prevents them from becoming soggy.
Serving Suggestions
- Serve these Halloween breadsticks warm with your favorite dipping sauce, such as marinara sauce, pesto, or even a garlic aioli.
- They are perfect for Halloween parties, or as a fun and spooky addition to any autumnal gathering.
- Storage: Store leftover breadsticks in an airtight container at room temperature for up to 3 days, or freeze them for longer storage.
Conclusion:
So there you have it – my recipe for spooktacular Halloween Breadsticks! I truly believe this recipe is a must-try for several reasons. First, it’s incredibly versatile. You can easily adjust the seasonings to match your preferences, adding garlic powder, onion powder, or even a sprinkle of parmesan cheese for a savory twist. The basic dough itself is incredibly forgiving, making it perfect for even beginner bakers. And let’s be honest, the fun of shaping these breadsticks into creepy crawlies and spooky designs is half the fun! It’s a fantastic activity to do with kids, making it a perfect addition to your Halloween festivities.
Beyond the ease and adaptability, the taste is simply phenomenal. That golden-brown crust gives way to a soft, fluffy interior, perfectly complemented by the subtle sweetness of the dough and the delightful crunch of the sesame seeds. The combination of textures and flavors is truly irresistible, making these Halloween Breadsticks a guaranteed crowd-pleaser at any Halloween gathering, from a casual get-together to a more elaborate party.
Serving Suggestions:
These Halloween Breadsticks are incredibly delicious on their own, but they also pair wonderfully with a variety of dips. Think creamy pumpkin hummus, a spicy marinara sauce, or even a simple garlic aioli. For a truly festive touch, consider serving them alongside a Halloween-themed soup or chili. They also make a great addition to a charcuterie board, adding a fun and flavorful element to the spread. And if you’re feeling extra creative, you could even use them as a base for mini pizzas, topping them with your favorite Halloween-colored ingredients!
Variations to Explore:
The beauty of this recipe lies in its adaptability. Feel free to experiment with different shapes and designs. Instead of just simple twists, try creating spooky spider shapes, miniature mummies, or even little ghosts using pretzel sticks for arms. You can also incorporate different herbs and spices into the dough, such as rosemary, thyme, or oregano, for a more complex flavor profile. For a sweeter treat, consider adding a touch of cinnamon or nutmeg to the dough and glazing them with a simple honey-butter mixture after baking.
If you’re looking for a gluten-free option, you can easily substitute the all-purpose flour with a gluten-free blend. Just be sure to check the package instructions for any specific adjustments you might need to make to the recipe. Similarly, you can experiment with different types of seeds, such as poppy seeds or sunflower seeds, to add a unique texture and visual appeal to your Halloween Breadsticks.
Don’t Forget to Share!
I genuinely hope you give this recipe a try and create your own spooky masterpieces! I’d love to see your creations, so please share your photos and experiences on social media using the hashtag #HalloweenBreadsticks. Let me know what variations you tried and how they turned out. Your feedback is invaluable, and I’m always excited to hear from fellow baking enthusiasts. Happy baking, and have a frightfully fun Halloween!
Remember: These Halloween Breadsticks are more than just a recipe; they’re a fun and engaging activity that brings people together. So gather your friends and family, get creative in the kitchen, and enjoy the delicious results of your spooky baking adventure. I can’t wait to see what you create!
Halloween Breadsticks: Spooky & Delicious Recipe Ideas
Fun, festive Halloween breadsticks perfect for parties or a spooky snack. Easy to make and customize with creative decorations!
Ingredients
Instructions
Recipe Notes
- Ensure yeast is active before proceeding.
- Don’t overcrowd the baking sheet.
- Get creative with your Halloween designs!
- Store leftover breadsticks in an airtight container at room temperature for up to 3 days, or freeze for longer storage.

Leave a Comment