
Easy Peanut Butter Desserts With Pantry Ingredients
Hello fellow dessert lovers! I’m so excited to share with you my absolute favorite collection of treats: Easy Peanut Butter Desserts With Pantry Ingredients. You know those days when a serious sweet craving hits, but the thought of a grocery run or complicated baking just isn’t happening? That’s exactly where this recipe shines! What makes this collection so incredibly special is right there in the title: it’s all about whipping up truly delicious, satisfying peanut butter desserts using only ingredients you likely already have tucked away in your kitchen. No obscure flours, no exotic extracts – just simple, honest staples transformed into something magical.
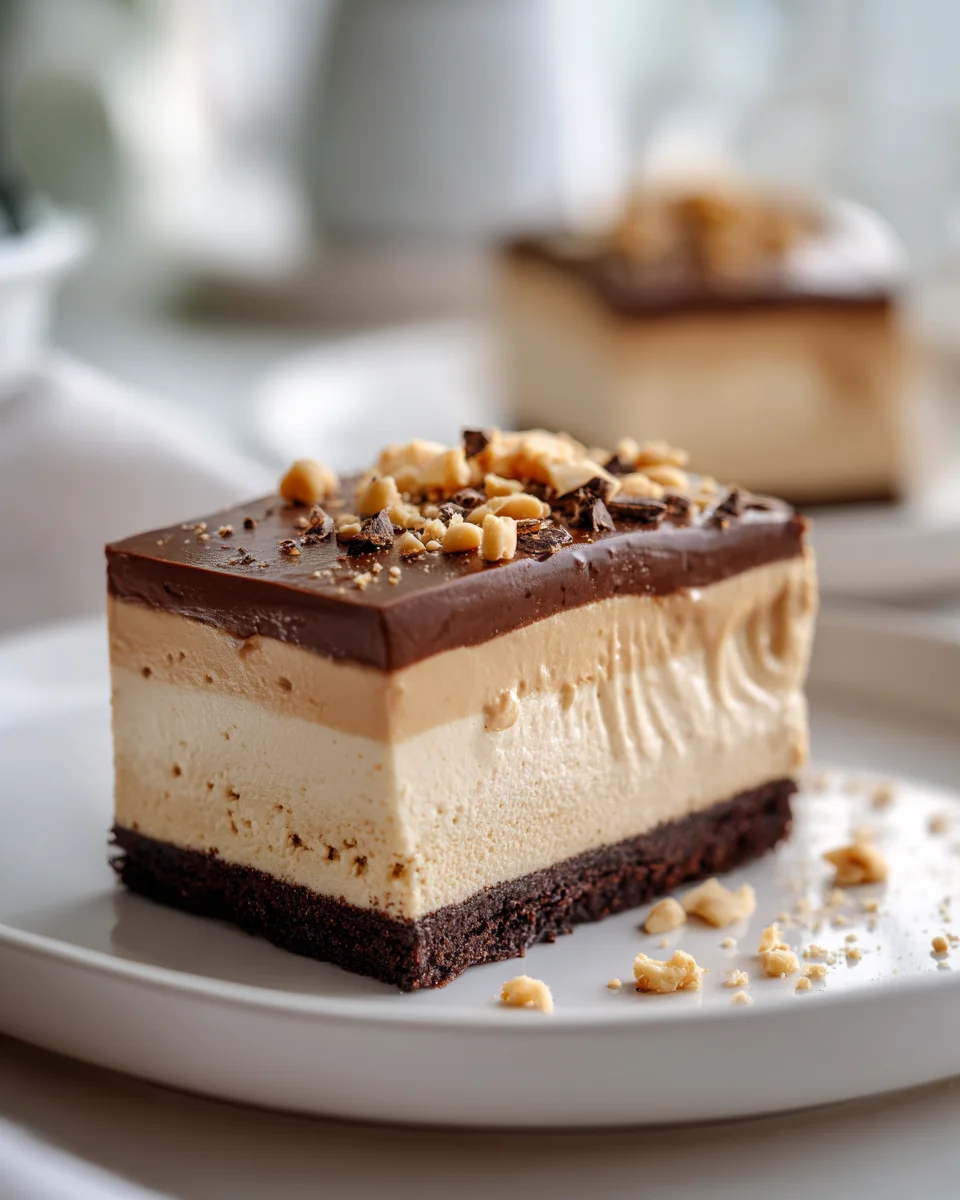
You’re going to absolutely adore these recipes because they’re designed for pure ease and instant gratification. Whether you’re a seasoned baker or just starting out, you’ll find these instructions straightforward and fun. Imagine sinking your teeth into a rich, nutty, and utterly comforting dessert that took minimal effort but tastes like a dream – that’s the promise of this collection! From fudgy bites to chewy cookies and creamy no-bake wonders, this overview gives you a sneak peek into a world of quick fixes for your sweet tooth, all centered around that irresistible peanut butter flavor we all love. Get ready to bake (or not bake!) your way to happiness without a fuss!

Ingredient Notes
Crafting delicious peanut butter desserts from what you already have in your pantry is simpler than you might think! The beauty of these recipes lies in their reliance on common staples. Here’s a rundown of the key ingredients you’ll likely use and some handy substitutions:
- Peanut Butter: This is our star, of course! You can use creamy or crunchy peanut butter, regular or natural. Just be aware that natural peanut butter, which often has just peanuts and salt, can be runnier and might require a slight adjustment to your dry ingredients (a tablespoon or two more flour) to get the right consistency. Regular peanut butter, with added oils and sugar, tends to be thicker and more stable for baking. Both work wonderfully, just embrace the slight textural difference they might impart.
- Sugars: Most recipes will call for granulated white sugar, brown sugar, or a combination. Granulated sugar provides crispness, while brown sugar adds moisture, chewiness, and a lovely molasses note. If a recipe calls for one but you only have the other, you can usually swap them out in equal measure, though it might slightly alter the final texture and sweetness profile. For dusting or a simple glaze, powdered sugar is your friend.
- Flour: All-purpose flour is the standard for most of these easy desserts. It provides structure. If you’re looking for a gluten-free option, a 1:1 gluten-free baking blend can often be substituted directly. Alternatively, oat flour (blended rolled oats) or almond flour can be used, but these may require slight adjustments to liquid content as they absorb moisture differently.
- Eggs: Eggs act as a binder and help with leavening and richness. If you find yourself out of eggs, a “flax egg” (1 tablespoon ground flaxseed meal mixed with 3 tablespoons water, let sit for 5 minutes) can often work as a substitute for one egg in many cookie or bar recipes, though the texture might be slightly denser. Applesauce (1/4 cup per egg) is another option, though it adds moisture and a subtle fruity flavor.
- Fats: Butter (salted or unsalted), vegetable oil, or even coconut oil are commonly used. Butter adds incomparable flavor and richness. Vegetable oil provides a moist crumb. Melted butter and oils are often interchangeable in recipes where the fat is melted, though butter will always give a richer taste.
- Leavening Agents: Baking soda and baking powder are essential for creating light and airy textures. Always ensure they are fresh for optimal results – you can test baking soda by adding a drop of vinegar (it should fizz) and baking powder by adding a drop of hot water (it should bubble).
- Vanilla Extract: A splash of vanilla enhances all the other flavors. If you prefer or need to avoid alcohol, non-alcohol vanilla extract is widely available and works just as well.
- Salt: Don’t skip the salt! It’s crucial for balancing the sweetness and intensifying the peanut butter flavor.
- Optional Mix-ins: This is where you can get creative! Chocolate chips (milk, semi-sweet, dark), chopped nuts (if you’re not using crunchy peanut butter), or even a handful of rolled oats can elevate your dessert.
Step-by-Step Instructions
Let’s walk through the general process for making a classic, easy peanut butter dessert – something like delightful cookies or chewy bars. This method is incredibly versatile and forms the basis for many pantry-friendly treats.
- Preparation is Key: Start by preheating your oven to the temperature specified in your recipe, usually around 350°F (175°C). Line a baking sheet with parchment paper or a silicone baking mat for cookies, or grease and flour an 8×8 or 9×13 inch baking pan for bars. This prevents sticking and makes cleanup a breeze.
- Cream the Wet Ingredients: In a large mixing bowl, combine your softened butter (or oil), peanut butter, and sugars. If you’re using an electric mixer, beat them together on medium speed until the mixture is light, fluffy, and well combined – this usually takes about 2-3 minutes. If mixing by hand, use a sturdy spatula and really work at it until smooth. Next, beat in your egg(s) and non-alcohol vanilla extract until just incorporated. Don’t overmix at this stage; we just want everything nicely blended.
- Whisk the Dry Ingredients: In a separate, medium-sized bowl, whisk together your flour, baking soda (and/or baking powder), and salt. Whisking ensures these ingredients are evenly distributed, which is crucial for a consistent bake and texture.
- Combine Wet and Dry: Gradually add the dry ingredient mixture to the wet ingredient mixture. Do this in two or three additions, mixing on low speed or by hand until just combined. Be careful not to overmix! Overmixing develops the gluten in the flour, which can lead to tough cookies or bars. If you’re adding any optional mix-ins like chocolate chips or nuts, fold them in gently at this stage.
- Form and Shape:
- For Cookies: Scoop the dough using a tablespoon or a small cookie scoop. Roll the dough into uniform balls and place them about 2 inches apart on your prepared baking sheet. For that classic peanut butter cookie look, gently flatten each ball with the tines of a fork, creating a crosshatch pattern. This also helps them bake more evenly.
- For Bars: Press the dough evenly into your prepared baking pan. You can use the back of a spoon or your clean hands to ensure it’s smooth and flat across the bottom of the pan.
- Bake to Perfection: Transfer your baking sheet or pan to the preheated oven. Bake for the time specified in your recipe – typically 10-14 minutes for cookies, or 20-30 minutes for bars. Keep an eye on them! You’re looking for edges that are lightly golden brown and set, while the centers might still look a tiny bit soft. This softness usually firms up as they cool, leading to a perfectly chewy texture.
- Cool Down: Once baked, remove the cookies or bars from the oven. For cookies, let them cool on the baking sheet for 5-10 minutes before transferring them to a wire rack to cool completely. For bars, let them cool completely in the pan on a wire rack before cutting into squares. Patience is key here; cooling properly helps them set and prevents them from falling apart.
Tips & Suggestions
To truly master easy peanut butter desserts, a few key tips can make all the difference, ensuring every bite is as delicious as it is simple to create.
- Do Not Overbake: This is perhaps the most critical tip for any peanut butter dessert. They tend to dry out quickly if left in the oven too long. Remove cookies when the edges are just golden and the centers look slightly soft. They will continue to set as they cool on the hot baking sheet, resulting in a perfectly chewy interior.
- The Power of Salt: A little flaky sea salt sprinkled on top of your peanut butter cookies or bars right after they come out of the oven is a game-changer. It beautifully balances the sweetness and enhances that rich, nutty peanut butter flavor.
- Chill the Dough: If your cookie dough feels too soft or sticky to work with, or if you want to prevent excessive spreading, pop it into the refrigerator for 30 minutes to an hour. Chilling not only firms up the dough but can also deepen the flavors, leading to a more satisfying bake.
- Temperature Matters: Ensure your butter is at room temperature (softened but not melted) unless the recipe specifically calls for melted butter. This helps it cream properly with the sugars, creating a light and airy base for your dessert.
- Experiment with Peanut Butter Types: Don’t be afraid to try different types of peanut butter! A natural, oilier peanut butter might give you a slightly crispier edge, while a thicker, more processed variety might yield a chewier result. Adjust your flour by a tablespoon or two if using a very runny natural peanut butter.
- Flavor Boosters and Variations:
- Chocolate Companions: Peanut butter and chocolate are a match made in heaven. Swirl in some melted chocolate chips, add chocolate chunks to the dough, or even drizzle melted chocolate over your cooled bars.
- Jam It Up: A small dollop of your favorite jam (strawberry, grape, or raspberry work wonderfully) pressed into the center of each cookie dough ball before baking creates a delightful “PB&J” surprise.
- Texture Play: Add a handful of old-fashioned oats for a chewier texture and a slight heartier feel.
- Transform into Bars: Most peanut butter cookie doughs can easily be pressed into a pan and baked as bars, perfect for a grab-and-go treat. Just adjust baking time accordingly (usually longer than individual cookies).
- Portion Control (or Not!): Use a cookie scoop for uniform cookies. This ensures they bake evenly and look consistent.
Storage
Proper storage is key to keeping your easy peanut butter desserts fresh and delicious for as long as possible. Nobody wants a stale treat!
- Room Temperature (Short-Term):
- Most baked peanut butter cookies, bars, or blondies store beautifully at room temperature.
- Once completely cooled, place them in an airtight container. This prevents them from drying out and going stale.
- They will typically stay fresh and wonderfully chewy for 3-5 days.
- If you find they’re losing a little moisture, you can place a half slice of plain bread in the container with them; the bread will absorb moisture from the air, keeping your desserts softer.
- Refrigeration (If Applicable):
- For peanut butter desserts that include fresh dairy elements like cream cheese frosting, or if your kitchen is particularly warm and humid, refrigeration might be a better option.
- Again, store them in an airtight container to prevent them from absorbing refrigerator odors or drying out.
- Refrigerated desserts can last up to a week. Just be aware that some baked goods can firm up considerably when chilled, so you might want to let them come to room temperature for a few minutes before serving for the best texture.
- Freezing (Long-Term):
- Freezing is an excellent option for extending the life of your baked peanut butter treats, or for making a big batch in advance.
- Baked Desserts: Once completely cooled, wrap individual cookies or bars tightly in plastic wrap, then place them in a freezer-safe bag or airtight container. This double layer of protection helps prevent freezer burn. They can be frozen for up to 2-3 months. Thaw them at room temperature or, for a quick warm treat, microwave briefly.
- Dough: Many peanut butter cookie or bar doughs freeze exceptionally well! Scoop individual cookie dough balls onto a baking sheet and flash freeze them until solid (about 1-2 hours). Then, transfer the frozen dough balls to a freezer-safe bag. You can bake them directly from frozen, adding a few extra minutes to the baking time. This is perfect for having fresh-baked cookies on demand! Dough can be frozen for up to 3 months.
Final Thoughts
I hope you’ve enjoyed exploring the delightful simplicity that Easy Peanut Butter Desserts With Pantry Ingredients brings to your table! What I truly cherish about these recipes is their incredible accessibility. There’s just something wonderfully satisfying about creating such delicious, comforting treats with items you likely already have stocked away. No special trips to the store, no complex techniques – just pure, unadulterated peanut butter bliss, ready in a flash.
I genuinely believe that Easy Peanut Butter Desserts With Pantry Ingredients is a must-try for anyone who loves quick fixes without compromising on flavor. It’s my go-to for those moments when a sweet craving hits, or when I want to whip up something impressive with minimal effort. Trust me, you’ll be amazed at the magic you can create with these humble ingredients. Give it a whirl; I’m confident these recipes will become a beloved staple in your dessert repertoire!
Easy Peanut Butter Desserts: Pantry Recipes! Quick & Delicious
- Total Time: 45 minutes
- Yield: 12 servings
Description
Indulge in these delightful easy peanut butter desserts made with simple pantry ingredients. Perfect for satisfying your sweet cravings without the hassle of a grocery run!
Ingredients
- Peanut Butter
- Granulated white sugar
- Brown sugar
- All-purpose flour
- Eggs
- Butter (salted or unsalted)
- Baking soda
- Baking powder
- Salt
- Vanilla extract
- Optional mix-ins: chocolate chips, chopped nuts, rolled oats
Instructions
- Start by preheating your oven to 350°F (175°C). Line a baking sheet with parchment paper or a silicone baking mat for cookies, or grease and flour an 8×8 or 9×13 inch baking pan for bars.
- In a large mixing bowl, combine your softened butter (or oil), peanut butter, and sugars. Beat them together on medium speed until light, fluffy, and well combined, about 2-3 minutes. Beat in your egg(s) and non-alcohol vanilla extract until just incorporated.
- In a separate bowl, whisk together your flour, baking soda (and/or baking powder), and salt.
- Gradually add the dry ingredient mixture to the wet ingredient mixture in two or three additions, mixing on low speed or by hand until just combined. If adding optional mix-ins, fold them in gently.
- For cookies, scoop the dough using a tablespoon or small cookie scoop, roll into balls, and place them 2 inches apart on the baking sheet. Flatten each ball with the tines of a fork. For bars, press the dough evenly into the prepared baking pan.
- Transfer your baking sheet or pan to the preheated oven. Bake for 10-14 minutes for cookies, or 20-30 minutes for bars, until edges are lightly golden brown.
- Once baked, let cookies cool on the baking sheet for 5-10 minutes before transferring to a wire rack. For bars, let cool completely in the pan before cutting into squares.
- Prep Time: 15 mins
- Cook Time: 30 mins
- Category: Dessert
- Method: Baking
- Cuisine: American
Nutrition
- Serving Size: 1 cookie
- Calories: 150
- Sugar: 10 g
- Sodium: 100 mg
- Fat: 7 g
- Saturated Fat: 3 g
- Unsaturated Fat: 4 g
- Trans Fat: 0 g
- Carbohydrates: 18 g
- Fiber: 1 g
- Protein: 3 g
- Cholesterol: 20 mg
Keywords: Do not overbake to maintain chewiness. A sprinkle of flaky sea salt on top enhances flavor. Chill the dough if too soft to work with.

Leave a Comment