
Halloween Crack, prepare your taste buds for an utterly addictive and spooktacular confection that will vanish faster than a phantom!
As we step into the enchanting autumn season, filled with crisp air and the delightful anticipation of Halloween festivities, there’s one treat I always turn to for a guaranteed hit. This simple yet sensational recipe is more than just a dessert; it’s a celebration in every bite. While its precise historical lineage isn’t ancient, this modern classic has rapidly become a beloved staple for festive gatherings, a truly enchanting addition to any autumn celebration, embodying the spirit of playful indulgence and communal joy.
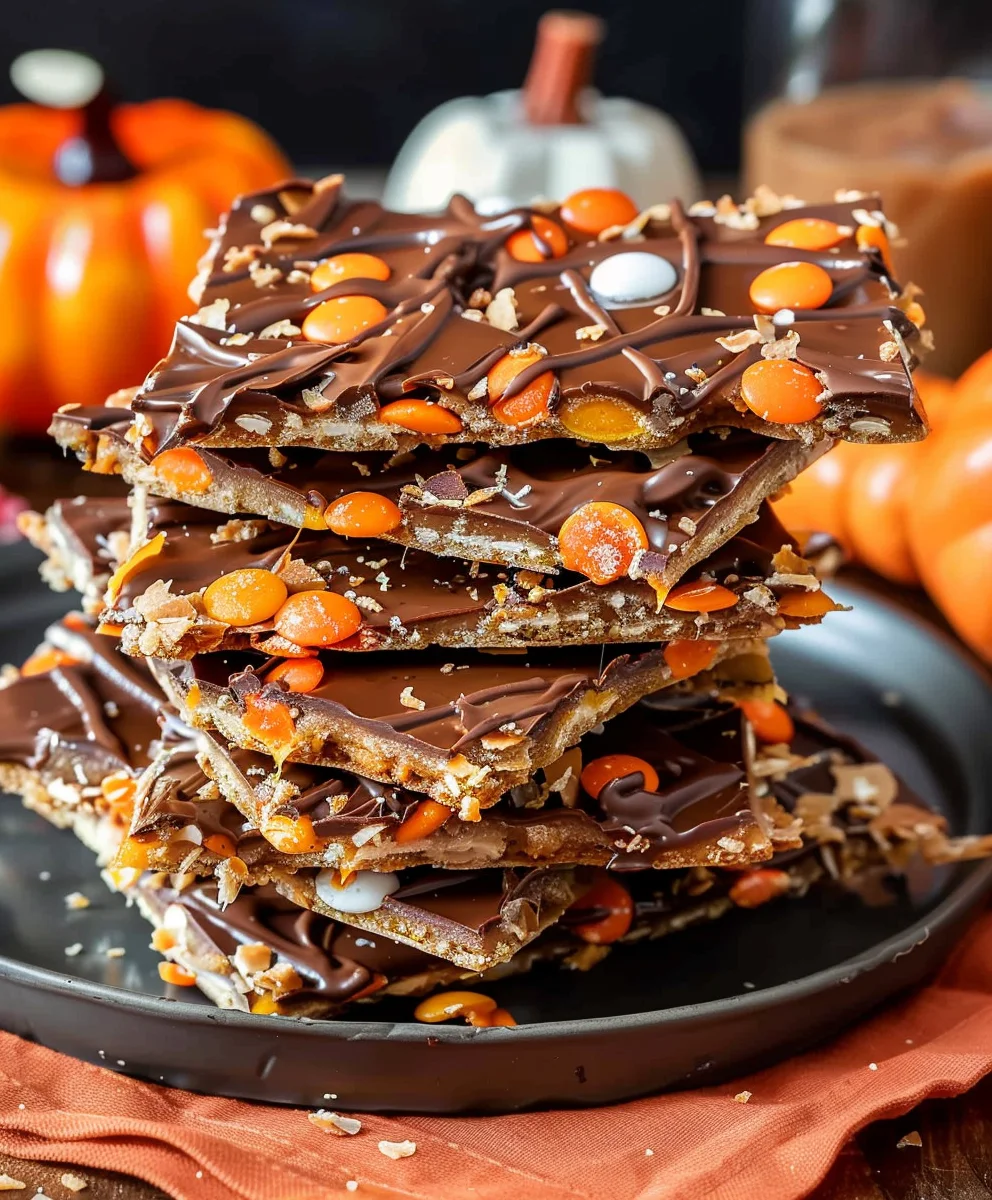
The allure of this dish lies in its perfect symphony of flavors and textures. Imagine the rich, buttery sweetness of homemade toffee, baked to golden perfection, permeating a base of crisp crackers, all generously topped with a blanket of luscious melted chocolate and a sprinkle of vibrant Halloween-themed decorations. People adore it not only for its irresistible sweet-and-salty balance but also for its delightful crunch and melt-in-your-mouth quality, making it incredibly hard to stop at just one piece. I’m thrilled to share this amazing Halloween Crack recipe, confident it will become your go-to for effortless festive fun and a surefire way to impress your guests.

Ingredients:
- Two (2) sleeves of saltine crackers (approximately 80 crackers, depending on brand and size)
- One (1) cup (2 sticks or 226g) unsalted butter
- One (1) cup (200g) packed light brown sugar
- One (1) teaspoon pure vanilla extract (optional, but highly recommended!)
- One (1) bag (12 ounces or 340g) semi-sweet chocolate chips (or milk chocolate chips for a sweeter, creamier finish)
- One (1) bag (10-12 ounces or 280-340g) white chocolate chips or white melting wafers
- Assorted Halloween sprinkles (jimmies, nonpareils, confetti shapes like bats, ghosts, pumpkins)
- Optional: Orange food coloring (gel preferred)
- Optional: Black food coloring (gel preferred)
Preparing Your Workspace and the Crackers
- First things first, let’s get our oven preheating to 350°F (175°C). This temperature is just right for baking our toffee layer without burning it, ensuring that perfect crispy-chewy texture for our Halloween Crack. A correctly preheated oven is a non-negotiable step for any successful baking endeavor, as it allows the toffee to bubble and meld perfectly with the crackers from the moment it enters the heat.
- Next, we’re going to prepare a large baking sheet. I usually grab a standard half-sheet pan, roughly 13×18 inches, as it provides ample space for a generous batch of Halloween Crack. The crucial step here is to line it generously with parchment paper. Do not skip the parchment paper! This isn’t just about easy cleanup, it’s absolutely essential to prevent the Halloween Crack from sticking to your pan once it cools and hardens. Without it, you’ll find yourself in a very sticky situation, trying to chisel off bits of delicious but firmly adhered toffee. Aluminum foil can work in a pinch, but make sure to grease it very, very well or you might still end up with some stubborn bits. Parchment paper, in my opinion, is truly the hero of this recipe, making the removal process effortlessly smooth.
- Once your pan is lined, it’s time for the base of our Halloween Crack: the saltine crackers. Carefully arrange the saltine crackers in a single layer on your parchment-lined baking sheet. You want them to be as close together as possible, touching each other, to form a solid cracker crust. Don’t worry if you have to break a few to fill in any odd gaps around the edges; we want a continuous canvas for our delicious toffee. Depending on the size of your pan and the specific brand of crackers, this will typically use two full sleeves. This cracker layer is what gives our Halloween Crack that delightful salty-sweet contrast and an incredibly satisfying crunch, which is a hallmark of this beloved treat. The slight saltiness of the crackers cuts through the richness of the toffee and chocolate, creating a perfectly balanced flavor profile.
Crafting the Irresistible Toffee Layer
- Now for the heart of the Halloween Crack: the buttery toffee! In a medium-sized, heavy-bottomed saucepan, combine the unsalted butter and the packed light brown sugar. I always recommend a heavy-bottomed pan because it distributes heat more evenly, which helps prevent scorching the sugar – a common pitfall in candy making. Scorched sugar can impart a bitter, unpleasant flavor, so a good quality pan is an asset here. Ensure your brown sugar is truly packed; this means pressing it down into the measuring cup to remove air pockets, guaranteeing you get the correct amount for the perfect toffee consistency.
- Place the saucepan over medium heat. You’ll need to stir constantly as the butter melts and combines with the brown sugar. The mixture will start to bubble, and it’s essential to keep stirring. This continuous stirring is key! We’re aiming to dissolve the sugar completely and prevent it from sticking to the bottom of the pan and burning. If sugar crystals remain undissolved, they can lead to a grainy texture in your finished toffee, which we definitely want to avoid for our smooth and delicious Halloween Crack. Patience and a watchful eye are crucial during this stage.
- Bring the mixture to a rolling boil. A “rolling boil” means it’s bubbling vigorously and continuously, even when you stir it. This indicates that the mixture has reached a high enough temperature to actively cook and transform. Once it reaches this stage, you need to set a timer for exactly 3 to 5 minutes. While it boils, keep stirring frequently, almost constantly, to ensure even cooking and prevent the bottom from burning.
- During this 3-5 minute boil, watch the color of the mixture intently. It will gradually deepen from a pale, creamy tan to a rich, amber caramel color. It will also thicken slightly as the water evaporates and the sugars concentrate. The longer you boil it within this window, the harder and more brittle your toffee will be when cooled. For a perfect balance of chewy and crisp in your Halloween Crack, I usually aim for about 4 minutes. This timing typically yields a toffee that has a satisfying snap but isn’t overly hard on the teeth. If you’re using a candy thermometer, you’re looking for a temperature between 285°F and 300°F (140°C and 150°C), which is the soft crack to hard crack stage. However, for this specific recipe, simply observing the time and color is usually sufficient, making it approachable even for novice candy makers. The aroma at this stage will be incredibly enticing – a sweet, buttery, caramel scent that fills your kitchen.
- Once your timer goes off and the toffee has reached that beautiful amber hue, carefully remove the saucepan from the heat. If you’re using vanilla extract, now is the time to stir in the one teaspoon of pure vanilla. The vanilla adds a wonderful depth of flavor to the toffee that truly elevates the entire Halloween Crack experience, providing a warm, aromatic note. Be careful as you stir, as the mixture will be very hot and may steam up vigorously. Give it a good stir to ensure the vanilla is thoroughly incorporated.
Baking the Toffee onto the Crackers
- Working quickly, immediately pour the hot toffee mixture evenly over the single layer of saltine crackers on your prepared baking sheet. You want to cover every cracker as uniformly as possible, ensuring that each piece of future Halloween Crack gets its fair share of golden goodness. Use an offset spatula or the back of a spoon to gently spread the toffee if needed, coaxing it into any bare spots, but be gentle so you don’t disturb the meticulously arranged cracker layer beneath. It’s perfectly fine if a little spills onto the parchment paper around the edges; that’s what the parchment is for, acting as a protective barrier and making cleanup a breeze!
- Carefully transfer the baking sheet into your preheated 350°F (175°C) oven. Handle the hot pan with oven mitts, always being mindful of the hot toffee.
- Bake for 5 to 7 minutes. During this short baking time, the toffee will continue to bubble and meld with the crackers, creating that signature texture. The crackers underneath will also toast slightly, becoming even crispier and more robust, ready to hold up to the glorious layers we’re about to add. Keep a close eye on it to ensure the edges don’t burn; all ovens vary slightly, and we want perfectly golden, not scorched, toffee. You’ll definitely smell the incredible aroma of toasted butter and caramel filling your kitchen – a sure sign that your Halloween Crack is taking wonderful shape! The slight re-baking helps the toffee fully adhere to the crackers, preventing separation when you break it later.
Adding the Chocolate and Halloween Magic
- Once the baking time is up, carefully remove the baking sheet from the oven. The toffee layer will be wonderfully bubbly and glossy. Immediately sprinkle the semi-sweet chocolate chips (or milk chocolate chips, if you prefer a sweeter, creamier profile) evenly over the hot toffee. The residual heat from the freshly baked toffee is exactly what we need; it will begin to melt the chocolate chips into a luxurious, spreadable state without requiring any extra steps or bowls. This is a wonderfully efficient part of the Halloween Crack making process!
- Let the chocolate chips sit on the hot toffee for about 5 minutes. This resting period gives them enough time to fully soften and melt into a luscious, smooth consistency without burning. Resist the urge to spread them too early; patience here will reward you with a perfectly smooth chocolate layer.
- After 5 minutes, use an offset spatula or the back of a spoon to gently spread the melted chocolate evenly over the entire surface of the toffee-covered crackers. You want a smooth, luscious layer of chocolate that completely covers the toffee. Work quickly but carefully to achieve an even coating. This layer forms the main chocolatey component of our Halloween Crack, providing a rich foundation for our spooky decorations.
- Now, for the artistic Halloween touch! While the semi-sweet chocolate layer is still warm and wet, it’s time to add your spooky decorations. Generously sprinkle your assorted Halloween sprinkles – think vibrant orange and black jimmies, purple nonpareils, and fun confetti shapes like bats, ghosts, and pumpkins – all over the melted chocolate. The warmth of the chocolate will act as a natural adhesive, helping them adhere beautifully. Don’t be shy; the more sprinkles, the merrier and more festive your Halloween Crack will look! This is where the magic truly happens, transforming a simple toffee treat into irresistibly themed Halloween Crack. The visual appeal is a huge part of its charm.
- Now for an extra layer of visual flair and flavor: the white chocolate drizzle. In a microwave-safe bowl, melt the white chocolate chips or wafers. Do this in short 30-second intervals, stirring well after each interval, until completely smooth and melted. White chocolate can be a bit finicky and seize up quickly if overheated, so go slow and stir thoroughly between bursts. Alternatively, you can use a double boiler on the stovetop for a more controlled melt.
- If you want to add colored drizzles for extra Halloween pop, which I highly recommend for that extra wow factor, divide your melted white chocolate into two small bowls. In one bowl, stir in a few drops of orange gel food coloring until you achieve a vibrant, spooky Halloween orange. In the other bowl, stir in a few drops of black gel food coloring for a dramatic, contrasting effect. Gel food coloring works best here as it’s highly concentrated and won’t thin out the chocolate like liquid food coloring can, maintaining that perfect drizzle consistency.
- Using a spoon or a piping bag with a small tip (or even a sturdy Ziploc bag with a tiny corner snipped off), drizzle the plain white, orange, and/or black melted chocolate over the sprinkle-covered semi-sweet chocolate layer. You can do zigzags, random swirls, or any artistic pattern you like! There’s no wrong way to do this; just have fun with it. This artistic drizzle not only adds incredible visual appeal but also another layer of creamy chocolate flavor to our magnificent Halloween Crack, making each bite even more complex and delicious.
Chilling, Breaking, and Enjoying Your Halloween Crack
- Once all your festive layers are in place and looking spectacularly spooky, it’s time to chill our Halloween Crack. Carefully transfer the baking sheet to the refrigerator. Allow it to chill for at least 1 to 2 hours, or until the chocolate is completely set and firm to the touch. You can also place it in the freezer for about 30-45 minutes if you’re in a hurry to get your hands on this delicious treat. Proper chilling is absolutely crucial for achieving that satisfying snap when you break it apart, and for preventing a messy, melty situation. This also allows the toffee to fully harden and become brittle.
- Once completely firm, remove the baking sheet from the refrigerator. You’ll notice the entire slab is now solid and beautifully set. Lift the entire slab of Halloween Crack off the baking sheet using the parchment paper. The parchment paper, our unsung hero, makes this step incredibly easy and mess-free.
- Gently peel away the parchment paper from the bottom of the hardened slab. You should now have a glorious, solid sheet of Halloween Crack, shimmering with chocolate and sprinkles, ready for its final, iconic transformation.
- Now comes the fun part, and the reason it’s called “crack”! Place the hardened slab on a cutting board or a clean, sturdy surface. Using your hands, carefully break the large sheet into irregular pieces. Some people prefer large, dramatic shards, while others like smaller, more manageable, bite-sized bits. The beauty of Halloween Crack is its rustic, organic shape; there’s no need for perfectly uniform pieces. The satisfying “snap” and “crack” sound as you break it apart is incredibly gratifying and truly embodies the spirit of this addictive treat. It’s wonderfully therapeutic!
- Store your Halloween Crack in an airtight container at room temperature for up to a week, or in the refrigerator for even longer if you prefer it extra crisp and firm. Layer pieces between sheets of parchment paper if stacking to prevent sticking. However, I have a feeling it won’t last that long! This Halloween Crack is so incredibly delicious and wonderfully festive, it tends to disappear remarkably fast due to its irresistible combination of textures and flavors.
- Serve your homemade Halloween Crack at parties, as a special treat for trick-or-treaters (if you’re feeling generous!), or simply enjoy it yourself with a warm cup of coffee or cider. The combination of salty crackers, sweet, buttery toffee, rich semi-sweet chocolate, creamy white chocolate, and fun Halloween sprinkles creates a truly irresistible confection that everyone will rave about. It’s a crowd-pleaser for all ages! It’s a perfect addition to any spooky celebration, and its ease of preparation makes it a go-to holiday favorite that you’ll want to make year after year. Enjoy every crunchy, sweet, and salty bite – this Halloween Crack is truly a taste sensation!
Conclusion:
Well, my friends, we’ve reached the end of our delicious journey, and I genuinely hope you’re as excited as I am about this incredible recipe. If there’s one thing I want you to take away from this, it’s that this treat is more than just a simple confection; it’s a game-changer for your dessert repertoire. It’s effortlessly simple to prepare, yet delivers an explosion of flavor and texture that is utterly addictive. I promise you, once you try it, you’ll wonder how you ever hosted a party or celebrated a holiday without it. Its fundamental appeal lies in its approachability and the sheer delight it brings to every single bite.
What truly makes this recipe a must-try is its magical combination of sweet and salty, crunchy and chewy. The way the buttery toffee seeps into the crackers, creating that perfect caramelized base, is nothing short of culinary alchemy. Then, add the rich layer of melted chocolate and your choice of festive sprinkles, and you have a dessert that appeals to everyone, regardless of age. It’s the kind of treat that disappears from the plate faster than you can say “more, please!” This is precisely why I wholeheartedly recommend you dive into making this exceptional Halloween Crack. It’s not just a seasonal delight; it’s a year-round potential for joy, offering an unparalleled texture that is both satisfyingly crisp and wonderfully rich, making it an irresistible temptation for any sweet tooth.
But the fun doesn’t stop at just making it; the serving possibilities are endless! For your upcoming Halloween bash, arrange these beautiful pieces on a large platter alongside some spooky decorations. Imagine little ghosts and goblins grabbing pieces of this delightful treat – it’s guaranteed to be a hit. Beyond the holiday, think about packaging small batches in cute cellophane bags tied with a ribbon for party favors or thoughtful homemade gifts. Your friends and family will adore receiving a personalized bag of these irresistible squares. Consider it for movie nights, potlucks, or even as a special after-dinner indulgence for yourself and your loved ones. It truly fits every occasion where a touch of sweet magic is desired, offering convenience and impressive presentation simultaneously.
And let’s talk about variations – this recipe is a fantastic canvas for your creativity! While we’ve focused on the classic version, feel free to experiment. Instead of classic saltine crackers, why not try pretzel sticks for an even more intense salty crunch, or perhaps graham crackers for a slightly different sweet base? For toppings, beyond the traditional sprinkles, you could drizzle white chocolate, sprinkle chopped nuts like pecans or walnuts, or even crush up your favorite Halloween candies and scatter them over the warm chocolate. Imagine mini candy corn or chopped up chocolate bars for an extra layer of indulgence! For other holidays, simply swap out the sprinkles – red and green for Christmas, pastels for Easter, or red, white, and blue for a summer celebration. You could even add a dash of sea salt flakes over the chocolate for an enhanced flavor contrast, or a pinch of chili powder for an unexpected kick. The adaptability of this recipe means it can become a staple in your kitchen, transforming with each season and celebration, always offering a fresh, exciting twist.
So, what are you waiting for? I genuinely encourage you to roll up your sleeves, gather your ingredients, and give this incredible recipe a try. It’s simple enough for beginners, yet impressive enough to wow even the most discerning palates. I’m confident that you’ll be absolutely thrilled with the results and will find yourself returning to this recipe again and again. Once you’ve made your batch, I would be absolutely delighted to hear about your experience! Please, don’t hesitate to share your photos and stories with me. Did you try a unique variation? Did it disappear from the serving platter in record time? Leave a comment below, or share your creations on social media and tag me! I can’t wait to see your culinary masterpieces and hear how this fantastic Halloween Crack brought joy and deliciousness to your home. Happy baking!

Easy Halloween Crack Recipe
Prepare your taste buds for an utterly addictive and spooktacular confection that will vanish faster than a phantom! This simple yet sensational recipe is a celebration in every bite, blending salty crackers, buttery toffee, rich chocolate, and fun Halloween decorations into an irresistible treat.
Ingredients
-
35 saltine crackers
-
1 cup unsalted butter
-
1 cup packed light brown sugar
-
10 oz semi-sweet chocolate chips
-
Eye candies
-
Candy corn
-
Reese’s Pieces
-
Halloween sprinkles
Instructions
-
Step 1
Preheat oven to 350°F (175°C). Line a large baking sheet with parchment paper. Arrange saltine crackers in a single layer, touching, to form a solid base. -
Step 2
In a heavy-bottomed saucepan, combine 1 cup unsalted butter and 1 cup packed light brown sugar. Cook over medium heat, stirring constantly, until the butter melts and the mixture comes to a rolling boil. -
Step 3
Boil the mixture for 3-5 minutes, stirring frequently, until it deepens to a rich amber caramel color. Remove from heat. -
Step 4
Immediately pour the hot toffee mixture evenly over the saltine crackers on the prepared baking sheet. -
Step 5
Carefully transfer the baking sheet to the preheated oven and bake for 5-7 minutes. The toffee will bubble and meld with the crackers. -
Step 6
Remove the baking sheet from the oven and immediately sprinkle 10 oz semi-sweet chocolate chips evenly over the hot toffee. Let sit for 5 minutes to allow the chocolate to melt from the residual heat. -
Step 7
After 5 minutes, use an offset spatula or the back of a spoon to gently spread the melted chocolate evenly over the entire surface of the toffee-covered crackers. -
Step 8
While the chocolate layer is still warm and wet, generously sprinkle with eye candies, candy corn, Reese’s Pieces, and Halloween sprinkles for a festive look. -
Step 9
Carefully transfer the baking sheet to the refrigerator and chill for at least 1 to 2 hours, or until the chocolate and toffee are completely set and firm to the touch. -
Step 10
Once completely firm, remove the baking sheet from the refrigerator. Lift the entire slab of Halloween Crack off the baking sheet using the parchment paper, then gently peel away the parchment. -
Step 11
Place the hardened slab on a cutting board or a clean, sturdy surface. Using your hands, carefully break the large sheet into irregular pieces. The satisfying ‘snap’ indicates it’s ready! -
Step 12
Store your Halloween Crack in an airtight container at room temperature for up to a week, or in the refrigerator for an even crisper texture. Enjoy every crunchy, sweet, and salty bite!
Important Information
Nutrition Facts (Per Serving)
It is important to consider this information as approximate and not to use it as definitive health advice.
Allergy Information
Please check ingredients for potential allergens and consult a health professional if in doubt.


Leave a Comment