
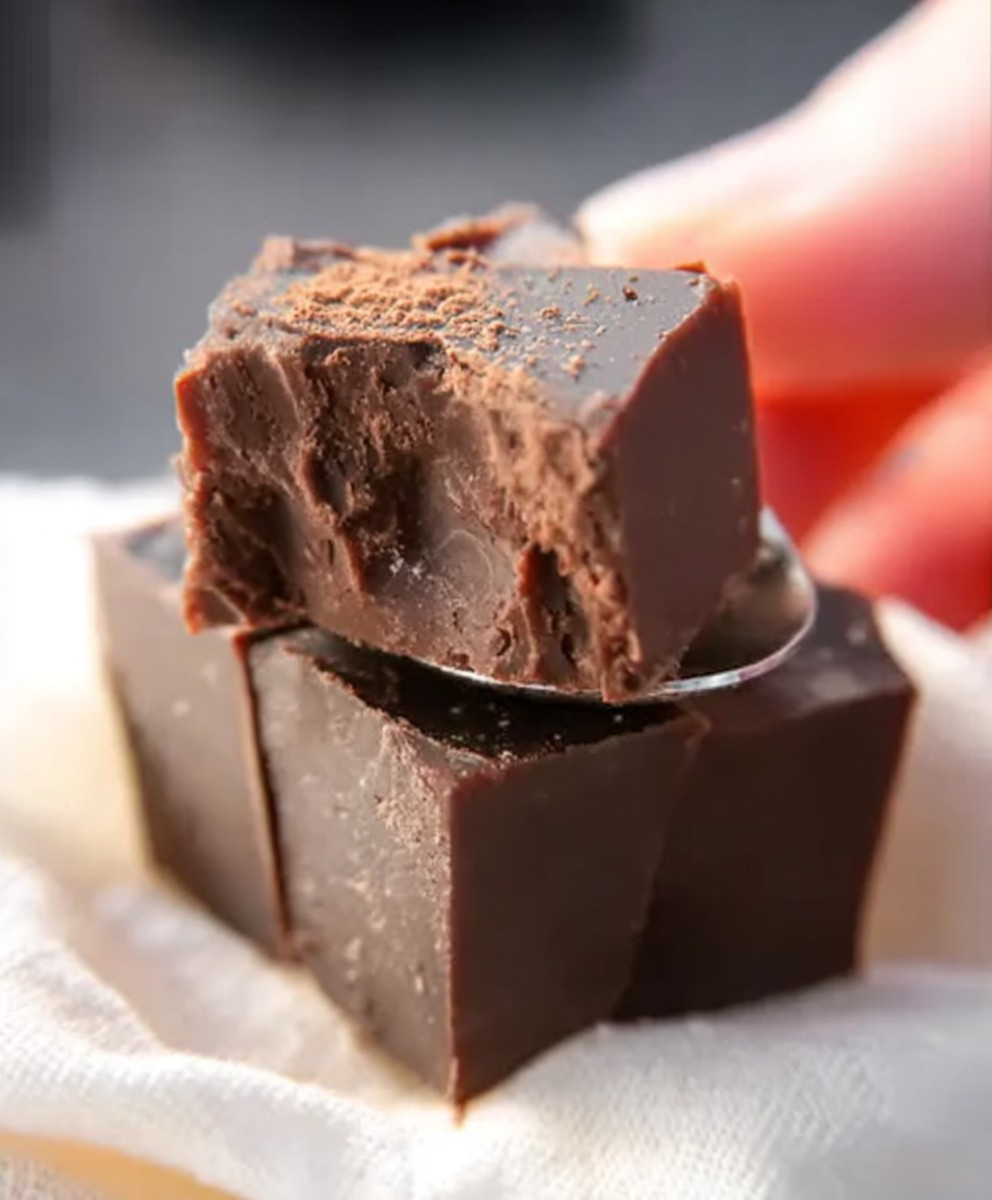
Easy Baileys Fudge No Cook – need I say more? Imagine sinking your teeth into a creamy, decadent fudge, infused with the unmistakable warmth of Baileys Irish Cream. This isn’t just any fudge; it’s a shortcut to pure indulgence, and the best part? There’s absolutely no cooking required!
Fudge, in its essence, is a confection born from happy accidents and a desire for sweet simplicity. While its exact origins are debated, fudge gained popularity in America during the late 19th century. Our boozy twist, incorporating the beloved Baileys, elevates this classic treat to a sophisticated dessert perfect for any occasion. Baileys Irish Cream, with its smooth blend of Irish whiskey, cream, and cocoa, adds a depth of flavor that’s simply irresistible.
People adore this Easy Baileys Fudge No Cook recipe for so many reasons. First and foremost, it’s incredibly easy to make. Forget complicated candy thermometers and hours spent stirring over a hot stove. This recipe comes together in minutes, making it ideal for busy individuals or those new to candy making. The creamy texture melts in your mouth, and the rich Baileys flavor provides a delightful warmth that lingers long after the last bite. Plus, it’s a guaranteed crowd-pleaser, perfect for gifting or serving at holiday gatherings. Who can resist a little boozy fudge?

Ingredients:
- 1 (14 ounce) can sweetened condensed milk
- 3 cups semi-sweet chocolate chips
- 1/2 cup Baileys Irish Cream liqueur
- 1 teaspoon vanilla extract
- Pinch of salt
- Optional: Chopped nuts, sprinkles, or sea salt for topping
Preparing the Fudge Base
Alright, let’s get started on this super easy Baileys Fudge! First things first, grab a medium-sized, microwave-safe bowl. We’re going to be melting our chocolate chips in there, so make sure it’s clean and dry. Any water droplets can cause the chocolate to seize up, and we definitely don’t want that!
- Combine Chocolate Chips and Sweetened Condensed Milk: Pour the entire can of sweetened condensed milk into the bowl. Then, add all three cups of semi-sweet chocolate chips. Make sure the chocolate chips are evenly distributed in the sweetened condensed milk. This will help them melt more evenly.
- Microwave in Intervals: Now, pop the bowl into the microwave. We’re going to microwave it in 30-second intervals, stirring well after each interval. This is crucial! Microwaving for too long at once can burn the chocolate, and nobody wants burnt fudge.
- Stir Thoroughly: After the first 30 seconds, take the bowl out and give it a good stir. You’ll notice the chocolate chips are starting to melt. Put it back in for another 30 seconds, and stir again. Repeat this process until the chocolate is almost completely melted. There might be a few small chunks remaining, and that’s perfectly fine.
- Final Melt and Smoothness: The residual heat from the melted chocolate will melt those last few chunks. Just keep stirring until the mixture is smooth and glossy. If you find that the chocolate isn’t melting completely, you can microwave it for another 10-15 seconds, but be very careful not to overdo it.
Adding the Baileys and Flavor Enhancements
Now for the best part – adding that delicious Baileys Irish Cream! This is what gives our fudge its signature flavor and creamy texture. We’ll also add a touch of vanilla extract and a pinch of salt to really bring out the flavors.
- Incorporate the Baileys: Once the chocolate mixture is smooth, pour in the 1/2 cup of Baileys Irish Cream liqueur. Gently stir it into the chocolate until it’s fully incorporated. Be careful not to overmix, as this can affect the texture of the fudge.
- Add Vanilla Extract and Salt: Next, add the teaspoon of vanilla extract and the pinch of salt. The vanilla extract enhances the sweetness and adds a subtle depth of flavor, while the salt balances the sweetness and brings out the richness of the chocolate and Baileys. Stir everything together until it’s evenly distributed.
- Taste Test (Optional but Recommended!): At this point, I always like to do a quick taste test. Just a tiny spoonful to make sure the flavor is to your liking. If you want a stronger Baileys flavor, you can add a little bit more, but be careful not to add too much liquid, as it can affect the fudge’s consistency.
Setting the Fudge
We’re almost there! Now it’s time to transfer the fudge mixture to a prepared pan and let it set. This is where the magic happens, and the liquid mixture transforms into a firm, sliceable fudge.
- Prepare the Pan: Line an 8×8 inch square baking pan with parchment paper. Make sure the parchment paper overhangs the sides of the pan. This will make it super easy to lift the fudge out later. You can also use aluminum foil, but parchment paper is my preferred method.
- Pour and Spread the Fudge: Pour the fudge mixture into the prepared pan. Use a spatula or the back of a spoon to spread it evenly across the bottom of the pan. Make sure the surface is smooth and uniform.
- Add Toppings (Optional): This is where you can get creative! If you want to add any toppings, now is the time. Chopped nuts, sprinkles, or a sprinkle of sea salt are all great options. Gently press the toppings into the fudge so they adhere properly.
- Chill in the Refrigerator: Cover the pan with plastic wrap and place it in the refrigerator. Let the fudge chill for at least 2-3 hours, or preferably overnight. This will allow it to firm up completely and make it easier to cut.
Cutting and Serving the Fudge
The waiting is the hardest part, but trust me, it’s worth it! Once the fudge is firm, it’s time to cut it into squares and enjoy. Here are a few tips for cutting the fudge cleanly.
- Lift the Fudge from the Pan: Using the overhanging parchment paper, carefully lift the fudge out of the pan and onto a cutting board.
- Cut into Squares: Use a sharp knife to cut the fudge into squares. I usually cut it into 1-inch squares, but you can make them any size you like. For clean cuts, run the knife under hot water and wipe it dry between each cut. This will prevent the fudge from sticking to the knife.
- Serve and Enjoy!: Arrange the fudge squares on a plate or platter and serve. This Baileys Fudge is perfect for parties, holidays, or just a sweet treat any time of day.
- Storage: Store the fudge in an airtight container in the refrigerator. It will keep for up to a week, but I doubt it will last that long! You can also freeze the fudge for longer storage. Just wrap it tightly in plastic wrap and then place it in a freezer bag. It will keep in the freezer for up to 2-3 months.
Tips and Variations
Here are a few extra tips and variations to make this Baileys Fudge even more amazing:
- Use Different Chocolate: You can experiment with different types of chocolate, such as milk chocolate, dark chocolate, or even white chocolate. Just keep in mind that the sweetness level will vary depending on the type of chocolate you use.
- Add Coffee Flavor: For a mocha twist, add a teaspoon of instant coffee granules to the chocolate mixture. This will enhance the chocolate flavor and add a subtle coffee aroma.
- Make it Vegan: To make this fudge vegan, use vegan chocolate chips and a can of sweetened condensed coconut milk. The Baileys Irish Cream liqueur is already vegan-friendly.
- Adjust the Baileys Amount: If you prefer a milder Baileys flavor, you can reduce the amount of liqueur to 1/4 cup. If you want a stronger flavor, you can increase it to 3/4 cup, but be careful not to add too much liquid.
- Add a Swirl: Before chilling the fudge, you can swirl in a spoonful of peanut butter, Nutella, or caramel sauce for an extra layer of flavor.
Troubleshooting
Sometimes things don’t go exactly as planned. Here are a few common issues and how to fix them:
- Fudge is Too Soft: If the fudge is too soft, it could be because you didn’t chill it long enough, or you added too much liquid. Try chilling it for a longer period of time. If it’s still too soft, you can try microwaving it for a few seconds to evaporate some of the excess moisture, but be very careful not to overcook it.
- Fudge is Too Hard: If the fudge is too hard, it could be because you overcooked the chocolate or didn’t add enough liquid. Unfortunately, there’s not much you can do to fix this, but you can try microwaving it for a few seconds to soften it up before serving.
- Chocolate Seized Up: If the chocolate seizes up and becomes grainy, it’s usually because it came into contact with water. Unfortunately, there’s no way to fix seized chocolate. The best thing to do is to start over with a fresh batch.
I hope you enjoy this easy and delicious Baileys Fudge recipe! It’s a guaranteed crowd-pleaser and perfect for any occasion. Happy baking!
Conclusion:
So, there you have it! This Easy Baileys Fudge No Cook recipe is truly a game-changer. It’s quick, it’s simple, and most importantly, it’s absolutely divine. If you’re looking for a decadent treat that requires minimal effort and delivers maximum flavor, then look no further. This fudge is a must-try for any chocolate lover, especially those who appreciate the smooth, creamy taste of Baileys Irish Cream.
But why is this recipe a must-try, you ask? Well, beyond the sheer ease of preparation, it’s the incredible flavor profile that truly sets it apart. The rich, dark chocolate perfectly complements the sweet, creamy Baileys, creating a harmonious blend that will tantalize your taste buds. It’s the perfect balance of indulgence and sophistication, making it ideal for any occasion, from a casual weeknight dessert to a special holiday treat. Plus, the no-cook aspect means you can whip up a batch in minutes, without having to worry about complicated techniques or lengthy baking times.
And the best part? The possibilities are endless! While this recipe is fantastic as is, feel free to get creative and experiment with different variations. For a festive touch, sprinkle some crushed peppermint candies on top before the fudge sets. Or, if you’re a fan of nuts, add a handful of chopped walnuts or pecans for a delightful crunch. You could even swirl in some caramel sauce for an extra layer of sweetness. For a more intense chocolate flavor, use a higher percentage of dark chocolate. The choice is yours!
When it comes to serving suggestions, this fudge is incredibly versatile. It’s perfect on its own, enjoyed with a cup of coffee or tea. You can also crumble it over ice cream or use it as a topping for brownies or cakes. For a truly decadent experience, serve it alongside a glass of Baileys Irish Cream. It also makes a wonderful homemade gift for friends and family. Package it in a pretty box or tin, and you’re sure to impress.
I truly believe that everyone should experience the joy of making and tasting this Easy Baileys Fudge No Cook. It’s a recipe that’s guaranteed to bring a smile to your face and satisfy your sweet tooth. It’s the perfect treat to share with loved ones or to simply enjoy on your own as a little moment of self-indulgence.
So, what are you waiting for? Gather your ingredients, follow the simple steps, and get ready to create a batch of fudge that will disappear in no time. I’m confident that you’ll love it as much as I do.
And now, for the most important part: I want to hear about your experience! Once you’ve tried this recipe, please come back and share your thoughts in the comments below. Did you make any variations? What did you think of the flavor? Did your friends and family enjoy it? I’m eager to hear all about your fudge-making adventures. Your feedback is invaluable and helps me to continue creating delicious and easy-to-follow recipes that you’ll love. Happy fudging!
Easy Baileys Fudge No Cook: Simple Recipe You'll Love
Easy, decadent fudge infused with the rich flavor of Baileys Irish Cream. Perfect for holidays, parties, or a sweet treat any time!
Ingredients
Instructions
Recipe Notes
- Use different chocolate, such as milk chocolate, dark chocolate, or even white chocolate.
- Add Coffee Flavor: For a mocha twist, add a teaspoon of instant coffee granules to the chocolate mixture.
- Make it Vegan: To make this fudge vegan, use vegan chocolate chips and a can of sweetened condensed coconut milk. The Baileys Irish Cream liqueur is already vegan-friendly.
- Adjust the Baileys Amount: If you prefer a milder Baileys flavor, you can reduce the amount of liqueur to 1/4 cup. If you want a stronger flavor, you can increase it to 3/4 cup, but be careful not to add too much liquid.
- Add a Swirl: Before chilling the fudge, you can swirl in a spoonful of peanut butter, Nutella, or caramel sauce for an extra layer of flavor.
- Fudge is Too Soft: If the fudge is too soft, it could be because you didn’t chill it long enough, or you added too much liquid. Try chilling it for a longer period of time. If it’s still too soft, you can try microwaving it for a few seconds to evaporate some of the excess moisture, but be very careful not to overcook it.
- Fudge is Too Hard: If the fudge is too hard, it could be because you overcooked the chocolate or didn’t add enough liquid. Unfortunately, there’s not much you can do to fix this, but you can try microwaving it for a few seconds to soften it up before serving.
- Chocolate Seized Up: If the chocolate seizes up and becomes grainy, it’s usually because it came into contact with water. Unfortunately, there’s no way to fix seized chocolate. The best thing to do is to start over with a fresh batch.


Leave a Comment