
Jalapeno Salt is more than just a seasoning; it’s a revelation for your taste buds, promising to transform your everyday meals into extraordinary culinary experiences. Imagine infusing every bite with the vibrant, zesty heat of fresh jalapeños, perfectly balanced with the essential savory goodness of salt. This simple yet transformative condiment has the power to elevate everything from grilled corn and roasted vegetables to rimming a margarita glass, adding a sophisticated kick that is both distinctive and utterly delicious.
While the concept of flavored salts dates back to ancient times, with cultures around the globe using herbs, spices, and even flowers to enhance their culinary creations, the modern iteration of chili-infused salts truly celebrates the rich heritage of pepper cultivation, particularly from the Americas. I’ve found that people adore homemade Jalapeno Salt not just for its incredible, fiery flavor profile and satisfying crunch, but also for its sheer convenience. It provides all the punch of fresh jalapeños without the added moisture, making it ideal for dishes where you want bold heat but prefer to maintain a crisp texture. Plus, crafting it yourself offers an unparalleled sense of accomplishment and allows for customization of heat levels. It’s truly a game-changer in any kitchen, offering a gourmet touch with minimal effort.

Ingredients:
-
For the Cilantro-Lime Chicken:
- 1 ½ pounds (approximately 680g) Boneless, Skinless Chicken Thighs: I prefer thighs for their tenderness and flavor, but breasts can also work if you adjust cooking times. Cut into 1-inch (2.5 cm) pieces for even cooking and easy taco filling.
- ¼ cup Fresh Lime Juice: From about 2-3 juicy limes. This provides a bright, zesty base for our marinade.
- 2 tablespoons Olive Oil: Extra virgin is perfect for flavor.
- 2 cloves Garlic: Minced very finely, or pressed. Garlic is essential for depth.
- 1 teaspoon Ground Cumin: Adds an earthy, warm spice that pairs beautifully with chicken.
- ½ teaspoon Smoked Paprika: For a touch of smoky sweetness and gorgeous color.
- ¼ teaspoon Cayenne Pepper (optional): If you want to kick up the heat a notch. Adjust to your preference.
- ½ cup Fresh Cilantro: Roughly chopped, for that vibrant herbaceous note in the marinade.
- ½ teaspoon Sea Salt: Or to taste, for seasoning the marinade.
- ¼ teaspoon Black Pepper: Freshly ground is always best.
- 1 tablespoon Butter or Ghee: For searing the chicken, this adds a rich, golden crust.
-
For the Roasted Pineapple Salsa:
- 1 small Fresh Pineapple: About 2-3 pounds (approximately 900g-1.3kg), peeled, cored, and cut into ½-inch (1.2 cm) thick rings or chunks. Make sure it’s ripe for maximum sweetness!
- ½ small Red Onion: Finely diced, for a bit of sharp crunch and color.
- 1 small Jalapeno: Seeded and minced. If you like more heat, leave some of the seeds in.
- ¼ cup Fresh Cilantro: Finely chopped, a classic pairing with pineapple.
- 2 tablespoons Fresh Lime Juice: To brighten the salsa and balance the sweetness.
- Pinch of Sea Salt: To enhance all the flavors.
-
For the Jalapeno Salt Dusted Tortilla Chips:
- 12 Corn Tortillas: Ideally fresh, yellow or white corn tortillas, cut into 6-8 wedges each. These will become our irresistible, crunchy companions.
- 2 tablespoons Vegetable Oil or Canola Oil: For brushing the tortillas before baking, or for shallow frying.
- 1-2 teaspoons Jalapeno Salt: This is our star seasoning! The amount depends on your preference for heat and saltiness. Jalapeno Salt offers a fantastic, complex spicy-salty flavor that’s so much more intriguing than plain salt.
-
For Assembly and Garnish:
- 12 Small Corn or Flour Tortillas: Warmed, for wrapping our delicious filling.
- Optional Garnishes:
- Crumbled Cotija Cheese or Feta Cheese
- Extra Fresh Cilantro
- Avocado Slices or Guacamole
- A drizzle of your favorite hot sauce
Preparing the Cilantro-Lime Chicken
-
Marinate the Chicken for Maximum Flavor:
In a large bowl, I combine the chicken pieces with all the marinade ingredients: the 1/4 cup fresh lime juice, 2 tablespoons olive oil, minced garlic, ground cumin, smoked paprika, optional cayenne pepper, 1/2 cup chopped fresh cilantro, 1/2 teaspoon sea salt, and 1/4 teaspoon black pepper. I make sure every piece of chicken is thoroughly coated, giving it a good mix with my hands. This vibrant marinade is where all the magic starts, infusing the chicken with bright, herbaceous, and smoky notes that are simply irresistible.
Once coated, I cover the bowl and place it in the refrigerator. It’s crucial to let the chicken marinate for at least 30 minutes, but ideally 2-4 hours. If you have the luxury of time, overnight marination (up to 12 hours) will yield even more tender and flavorful chicken. The acidity from the lime juice not only adds flavor but also helps to tenderize the chicken, ensuring each bite is incredibly juicy.
-
Sear the Chicken to Golden Perfection:
When I’m ready to cook, I remove the chicken from the refrigerator about 15-20 minutes beforehand to let it come closer to room temperature. This helps with more even cooking. I heat a large, heavy-bottomed skillet – cast iron is my absolute favorite for this – over medium-high heat. Once the pan is hot, I add 1 tablespoon of butter or ghee. The butter not only adds a lovely richness but also helps achieve that beautiful golden-brown crust we’re looking for.
Once the butter has melted and is slightly foamy, I add the marinated chicken to the pan in a single layer, making sure not to overcrowd it. Overcrowding the pan will steam the chicken instead of searing it, preventing that delicious browning. If necessary, I work in two batches. I let the chicken cook undisturbed for about 3-4 minutes per side, until it develops a beautiful golden-brown sear and is cooked through. The internal temperature should reach 165°F (74°C).
As it cooks, the aroma of garlic, lime, and cumin fills my kitchen, a truly inviting scent. I use tongs to flip the pieces and ensure even cooking on all sides. When all the chicken is cooked, I transfer it to a clean plate and loosely tent it with foil. Allowing the chicken to rest for 5-10 minutes is an important step; it lets the juices redistribute, ensuring every piece remains tender and succulent. I resist the urge to cut into it immediately!
Crafting the Roasted Pineapple Salsa
-
Roast the Pineapple for Enhanced Sweetness:
First, I preheat my oven to 400°F (200°C). While the oven heats, I prepare the pineapple. After peeling and coring, I cut the pineapple into ½-inch (1.2 cm) thick rings or chunks. Laying these pieces out on a baking sheet lined with parchment paper, I ensure they have a little space between them so they roast rather than steam. This step is key because roasting the pineapple caramelizes its natural sugars, intensifying its sweetness and adding a beautiful depth of flavor that raw pineapple just can’t quite achieve.
I roast the pineapple for about 15-20 minutes, or until the edges are slightly browned and the pineapple is tender. I keep a close eye on it, as roasting times can vary. What I’m looking for are those lovely caramelized spots that signal a rich, honeyed sweetness. Once roasted, I remove the pineapple from the oven and let it cool completely on the baking sheet. Allowing it to cool is important before dicing, as it helps maintain its structure and prevents the salsa from becoming watery.
-
Assemble the Vibrant Salsa:
Once the roasted pineapple has cooled, I finely dice it. Then, in a medium bowl, I combine the diced roasted pineapple with the finely diced red onion, minced jalapeno (remember, if you want more heat, leave some seeds in!), and ¼ cup of freshly chopped cilantro. These ingredients come together to form a beautiful riot of color and texture.
To finish the salsa, I add 2 tablespoons of fresh lime juice and a pinch of sea salt. I give it a good stir to ensure all the flavors are well combined. The lime juice provides that essential brightness, cutting through the sweetness of the pineapple and the slight heat of the jalapeno, creating a perfectly balanced flavor profile. I always taste it at this point and adjust the salt or lime juice if needed. Sometimes, a little more salt can really make the fruit notes sing. This salsa is incredibly fresh, sweet, and tangy with just the right amount of kick!
Making the Jalapeno Salt Dusted Tortilla Chips
-
Prepare Your Tortilla Wedges:
This is where we bring in our secret weapon: Jalapeno Salt! Whether you’re using store-bought corn tortillas or making them from scratch, the preparation is simple. I start by stacking about 4-6 corn tortillas at a time and cutting them into 6-8 wedges, depending on how large I want my chips to be. A good, sharp knife makes this task quick and easy.
Once cut, I lay the tortilla wedges out on a large baking sheet (or two, to avoid overcrowding) lined with parchment paper. This parchment paper prevents sticking and makes cleanup a breeze. I then lightly brush both sides of each tortilla wedge with vegetable or canola oil. A light coating of oil is essential for achieving that desirable crispiness and for the Jalapeno Salt to adhere properly. You don’t want them dripping in oil, just a thin, even layer.
-
Bake or Fry to Crispy Perfection:
There are two main methods for making these chips, and both yield fantastic results. I typically opt for baking for a slightly healthier, less messy approach:
-
Baking Method:
I preheat my oven to 375°F (190°C). Once the oiled tortilla wedges are spread out on the baking sheets, I sprinkle them generously with 1-2 teaspoons of Jalapeno Salt. I make sure to distribute the Jalapeno Salt evenly across all the chips. The Jalapeno Salt is truly transformative here; it provides a unique spicy-savory kick that elevates these humble chips far beyond ordinary.
I bake them for 8-12 minutes, or until they are golden brown and wonderfully crisp. About halfway through the baking time, I like to flip them over to ensure even crisping on both sides. I always keep a close watch, as tortillas can go from perfectly golden to slightly burnt quite quickly! Once they are beautifully crisp, I remove them from the oven and let them cool on the baking sheet. As they cool, they will continue to crisp up even further, becoming perfectly crunchy.
-
Frying Method (for ultimate crispiness):
If I’m feeling a bit more indulgent, or simply craving that deep-fried chip crunch, I opt for frying. I pour about 1 inch of vegetable or canola oil into a heavy-bottomed skillet or Dutch oven and heat it over medium-high heat until it reaches 350°F (175°C). If you don’t have a thermometer, a good indicator is when a small piece of tortilla sizzles immediately upon contact.
Working in batches to avoid overcrowding the pan, I carefully place a few tortilla wedges into the hot oil. I fry them for about 1-2 minutes per side, until they are golden brown and bubbly. Using tongs, I flip them to ensure even cooking. As soon as they are perfectly golden and crisp, I remove them from the oil and transfer them to a plate lined with paper towels to drain any excess oil. Immediately after removing them from the hot oil, while they are still warm, I generously sprinkle them with the 1-2 teaspoons of Jalapeno Salt. The warmth of the chips helps the Jalapeno Salt cling perfectly, ensuring every chip delivers that delightful spicy burst. This method creates an incredibly satisfying, restaurant-quality crunch.
No matter which method I choose, the result is a pile of incredibly addictive, spicy, and perfectly seasoned tortilla chips, thanks to our fantastic Jalapeno Salt. They are not just a side; they are an integral part of this taco experience!
-
Assembling Your Delicious Tacos
-
Warm Your Tortillas:
A warm tortilla is absolutely essential for a great taco. It makes them more pliable, preventing tearing, and enhances their flavor and aroma. My favorite way to warm them is by heating a dry skillet or griddle over medium-high heat. I place the tortillas directly on the hot surface for about 15-30 seconds per side, just until they are soft and have a few slightly browned spots. Alternatively, you can wrap them in a damp paper towel and microwave them for 30-60 seconds, or wrap them in foil and heat them in a 350°F (175°C) oven for about 10 minutes. Regardless of the method, keeping them warm is key – I usually stack them in a tortilla warmer or wrap them in a clean kitchen towel until ready to serve.
-
Build Your Tacos:
Now comes the fun part – assembly! I grab a warm tortilla and pile in a generous spoonful of the juicy cilantro-lime chicken. Then, I spoon a dollop of that vibrant roasted pineapple salsa right on top of the chicken. The combination of the savory, zesty chicken with the sweet and spicy salsa is just incredible. For an extra layer of flavor and texture, I often add a sprinkle of crumbled Cotija cheese or feta, some fresh avocado slices, or an extra sprig of cilantro.
And of course, I make sure to have a generous bowl of those crispy, Jalapeno Salt-dusted tortilla chips right alongside. These chips aren’t just a garnish; they’re perfect for scooping up any fallen chicken or salsa, or simply for crunching on between bites of taco. The spicy kick from the Jalapeno Salt on the chips beautifully complements the flavors within the taco, creating a truly harmonious and exciting meal.
-
Serve and Enjoy:
These tacos are best enjoyed immediately, while everything is fresh and warm. I encourage everyone to customize their own, adding extra hot sauce if they dare, or more cilantro if they love that fresh herb flavor. Each bite is a burst of flavor – the tender chicken, the sweet and tangy salsa, and the satisfying crunch of the Jalapeno Salt chips. It’s a truly satisfying and delicious meal that I love sharing with friends and family!
Conclusion:
So, there you have it, my friends! We’ve journeyed through the simple, yet incredibly rewarding process of creating something truly special in your own kitchen. This isn’t just another spice blend; it’s a game-changer, a flavor explosion waiting to happen, and honestly, one of the most satisfying things you’ll ever make from scratch. I’ve found myself reaching for this unique blend almost daily, and I truly believe you will too. The mere act of transforming fresh ingredients into a vibrant, potent seasoning is incredibly gratifying, and the results speak for themselves. This recipe is a testament to the fact that culinary magic doesn’t always require complicated techniques or exotic ingredients; sometimes, it’s found in the thoughtful combination of simple, fresh flavors.
Why is this particular recipe an absolute must-try for every home cook? Well, for starters, its vibrant flavor profile is unlike anything you’ll find pre-made on a supermarket shelf. The fresh, zesty kick of jalapeno, perfectly balanced with the savory depth of salt, creates an addictive seasoning that genuinely elevates everything it touches. It’s incredibly versatile, transforming mundane meals into culinary adventures with just a sprinkle. Imagine the bright, aromatic burst it adds to a simple grilled chicken breast, or the unexpected warmth it brings to a cool cucumber salad. Beyond its amazing taste, there’s a profound sense of accomplishment that comes with crafting your own seasonings. You control the quality of ingredients, the level of spice, and the overall blend, ensuring it’s exactly to your preference and free from unwanted additives. This homemade Jalapeno Salt isn’t just a condiment; it’s a testament to the idea that sometimes, the simplest ingredients, when combined with a little love and creativity, can produce the most extraordinary results. It’s an accessible project for even novice cooks, yielding professional-grade results that will impress anyone you share it with – or simply keep all to yourself! It’s a fundamental building block for a more flavorful kitchen, proving that making your own seasonings can be both easy and incredibly impactful.
Now, let’s talk about the endless possibilities for enjoying your freshly made Jalapeno Salt. Seriously, the sky’s the limit when it comes to how you can incorporate this delightful seasoning into your daily cooking. Its robust flavor profile makes it suitable for a wide array of dishes, offering a consistent burst of heat and savory goodness.
Serving Suggestions & Variations:
- For the Grill Master: Sprinkle it generously over grilled chicken, steaks, pork chops, or even firm white fish like cod or halibut. The heat perfectly complements the smoky char from the grill. It’s fantastic as a dry rub mixed with a little brown sugar or paprika, or stirred into a touch of olive oil for a quick marinade.
- Vegetable Virtuoso: Roasted vegetables like asparagus, broccoli, Brussels sprouts, or sweet potatoes get an incredible flavor boost. Try it on grilled corn on the cob – it’s a revelation that will change your summer barbecues forever! Even a simple side of steamed green beans comes alive with a pinch.
- Snack Enhancer: A simple dusting on homemade popcorn, baked pita chips, crispy kale chips, or even roasted nuts takes them from good to unforgettable. Imagine the zing on your next batch of homemade fries or tater tots – absolutely phenomenal!
- Breakfast Brilliance: A pinch on scrambled eggs, a perfectly fried egg, avocado toast, or even a breakfast burrito adds an unexpected and delightful kick to your morning routine. It pairs wonderfully with the richness of egg yolks.
- Cocktail Companion: Use it to rim a Margarita glass for a spicy twist on a classic, or for a bolder Bloody Mary or Michelada. The heat adds an exciting contrast to the cool, refreshing drink.
- Soup & Stew Savior: Stir a dash into your favorite homemade soups, chilis, or hearty stews right before serving to add a layer of depth and a subtle spicy finish. It’s particularly good in black bean soup or a rich tomato bisque.
- Dips & Spreads: Mix it into hummus, guacamole, cream cheese, or even plain Greek yogurt for a zesty and spicy dip. It’s a fantastic secret ingredient for homemade ranch dressing or a creamy aioli for sandwiches.
- Baked Goods (Yes, really!): For the adventurous palate, a tiny sprinkle on chocolate brownies, dark chocolate bark, or even savory cheese scones can offer a surprising sweet-and-spicy contrast that will intrigue and delight.
Creative Variations to Explore:
- Smoky Jalapeno Salt: Add a touch of smoked paprika, ancho chili powder, or chipotle powder to the blend for a deeper, more complex smoky flavor profile. This variation works wonders on red meats and root vegetables.
- Garlic Jalapeno Salt: Incorporate finely minced dehydrated garlic or a good quality garlic powder for an extra layer of pungent, savory goodness that complements the jalapeno beautifully.
- Lime Zest Jalapeno Salt: For an even brighter, more citrusy kick, add some dried lime zest (or finely grated fresh zest that has been thoroughly dried) to the mix. This is absolutely perfect for fish tacos, chicken, or any dish needing a tangy lift.
- Herbaceous Jalapeno Salt: Blend in dried cilantro, oregano, or a hint of cumin for a more Tex-Mex or Southwestern inspired seasoning. This can transform your everyday tacos or fajitas.
- Extra Hot Jalapeno Salt: If you dare to turn up the heat, add a tiny amount of dried habanero flakes, cayenne pepper, or even a pinch of ghost pepper powder for an intensely spicy kick. Proceed with caution!
I genuinely can’t wait for you to experience the magic of this homemade seasoning. It’s more than just a recipe; it’s an invitation to elevate your culinary game and inject vibrant, exciting flavors into your everyday cooking. So, please, give this Jalapeno Salt recipe a try! Dive in, experiment, and don’t be afraid to make it your own by adjusting the heat or adding other complementary flavors. And when you do, I would absolutely love to hear about your creations. What did you use it on? Did you try a fun variation that you absolutely loved? Share your experiences, your successes, and even your culinary adventures with us in the comments below or on social media. Let’s inspire each other to make every meal a little more exciting. Happy seasoning!
Frequently Asked Questions (FAQs)
Q: How should I store homemade Jalapeno Salt?
A: To maintain its vibrant flavor and prevent clumping, store your homemade Jalapeno Salt in an airtight container in a cool, dark place, such as your pantry or a spice cabinet. Keeping it away from direct sunlight and moisture is crucial for preserving its quality.
Q: How long does Jalapeno Salt last?
A: When stored properly in an airtight container, your Jalapeno Salt can last for 6 months to a year. While it won’t spoil quickly, its potency and vibrant flavor will gradually diminish over time. For the best possible flavor and aroma, I recommend using it within 3-6 months of preparation.
Q: Can I adjust the spiciness of the Jalapeno Salt?
A: Absolutely! The beauty of making it yourself is the complete customization. If you prefer a milder flavor, you can reduce the amount of jalapeno used or be more diligent about removing all the seeds and white pith (which is where most of the capsaicin, or heat, resides). For extra heat, purposefully leave more seeds in, or even consider adding a pinch of dried habanero or cayenne pepper during the blending process for an intense kick.
Q: What if I don’t have fresh jalapenos? Can I use dried ones?
A: While fresh jalapenos offer the best vibrant flavor and color for this specific recipe, you can experiment with dried jalapeno flakes (often labeled as “Jalapeno powder” or “dried green chili flakes”). However, be aware that the resulting flavor profile will be significantly different – less fresh and more concentrated or earthy. You’ll also need to adjust the quantities significantly, as dried peppers are much more potent by weight. For the authentic, bright taste of this Jalapeno Salt, I highly recommend sticking to fresh jalapenos.
Q: Can I use other types of peppers instead of jalapenos to make flavored salt?
A: Yes, you certainly can! This recipe provides a fantastic template for creating other delicious flavored salts. Consider using serrano peppers for a sharper, more intense heat, habaneros for a distinct fruity flavor with considerable spice, or even milder peppers like poblanos for an earthier, less spicy version. Just remember to adjust the quantity of pepper based on its heat level and moisture content to achieve your desired outcome.
Q: My Jalapeno Salt is clumping together. What can I do?
A: Clumping is usually due to residual moisture. Ensure your jalapenos are as dry as possible after processing (perhaps by spreading them on a baking sheet and letting them air dry for a bit, or even a very low oven for a short time), and that your salt is completely dry before blending. If it still clumps after storage, you can spread it out on a baking sheet and bake at a very low temperature (around 150°F / 65°C) for 15-30 minutes to dry it out further, then re-pulse or break up any clumps if needed. Adding a tiny amount of an anti-caking agent like cornstarch (a small pinch) can also help, but proper drying is usually sufficient for preventing this issue.

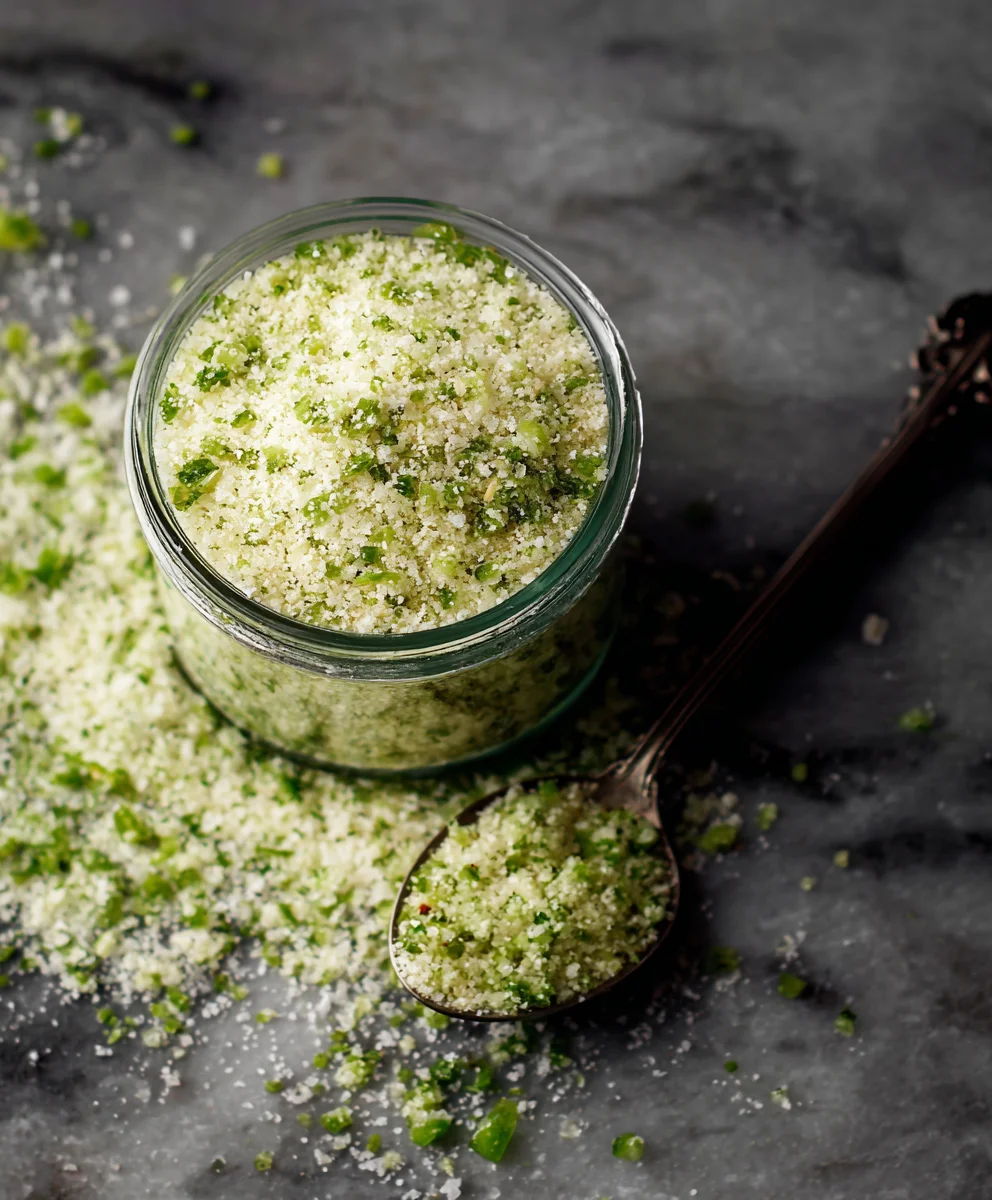
Homemade Jalapeno Salt
Jalapeno Salt is more than just a seasoning; it’s a revelation for your taste buds, promising to transform your everyday meals into extraordinary culinary experiences. This simple yet transformative condiment elevates dishes, adding a sophisticated kick that is both distinctive and utterly delicious.
Ingredients
-
Fresh Jalapenos: 5-7 medium-sized (to yield approx. 1/2 cup dried flakes)
-
Coarse Salt: 1 cup (e.g., sea salt, kosher salt) or to desired ratio with dried jalapenos
Instructions
-
Step 1
Wash and thoroughly dry jalapenos. Wearing gloves, remove stems, de-seed, and finely dice the peppers. -
Step 2
Spread diced jalapenos on a dehydrator tray. Dehydrate at 125°F (52°C) for 6-10 hours until completely brittle. -
Step 3
Transfer brittle, dried jalapenos to a food processor. Pulse 2-3 times to break into small pieces, similar to salt grains. -
Step 4
In a bowl, combine the processed dried jalapeno flakes with the coarse salt. Mix thoroughly. Adjust ratio to taste. -
Step 5
Store homemade jalapeno salt in an airtight container in a cool, dark place for several months.
Important Information
Nutrition Facts (Per Serving)
It is important to consider this information as approximate and not to use it as definitive health advice.
Allergy Information
Please check ingredients for potential allergens and consult a health professional if in doubt.


Leave a Comment