
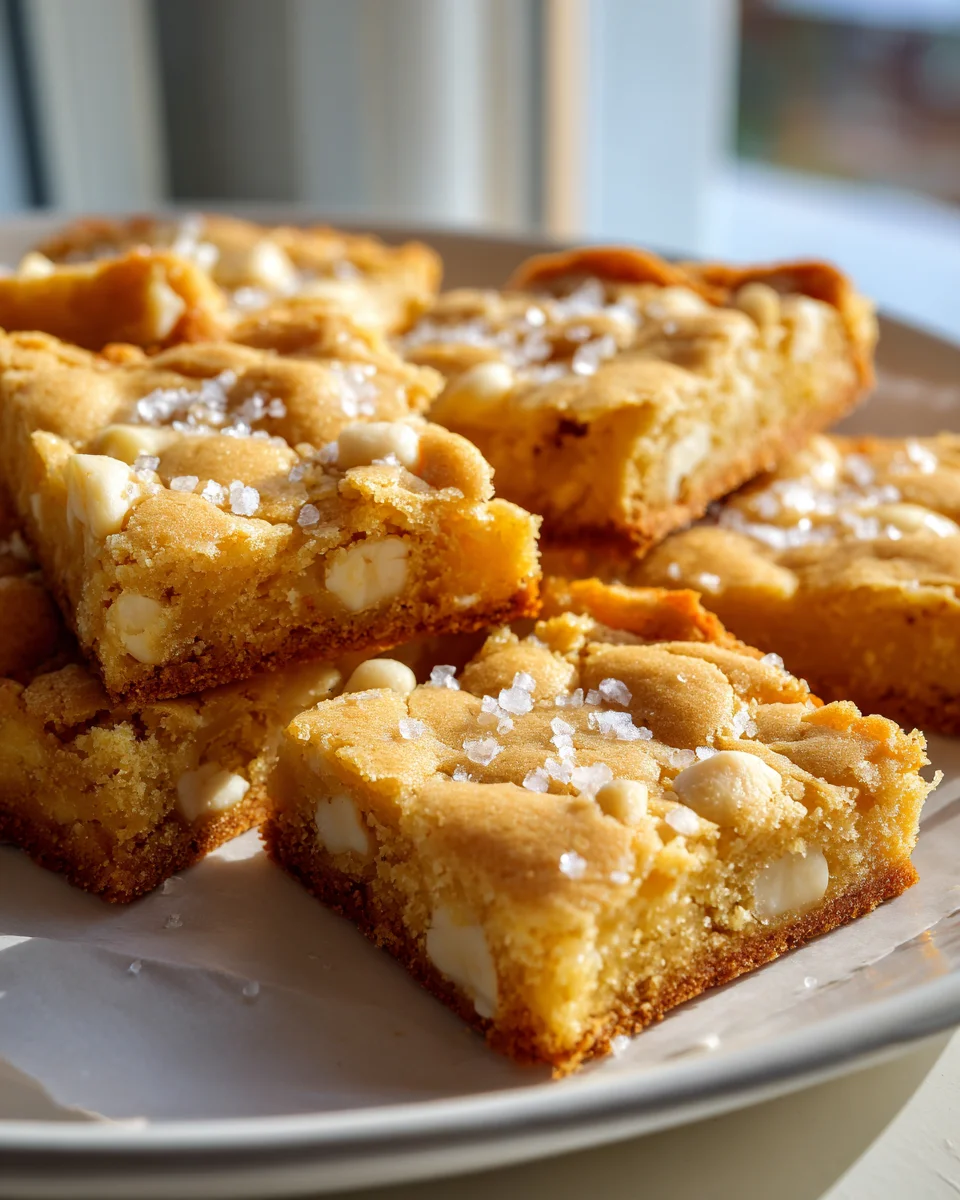
White Chocolate Macadamia Cookie Bars
Oh, prepare yourselves, because I am absolutely thrilled to share with you one of my all-time favorite treat creations: these incredible White Chocolate Macadamia Cookie Bars! If you, like me, adore the dreamy combination of creamy white chocolate and rich, buttery macadamia nuts, then you are in for an absolute delight. What makes this recipe truly special is how it takes all the irresistible chewiness and incredible flavor of a classic white chocolate macadamia nut cookie and transforms it into a convenient, shareable bar. No individual scooping required, just press into a pan, bake, and slice!
I promise you’re going to fall head over heels for these bars. They’re so much more than just a cookie; they’re a comforting hug in dessert form, perfect for potlucks, lunchbox treats, or simply indulging your sweet tooth with a cup of coffee. The texture is divine – a soft, golden-brown base that’s wonderfully chewy, studded generously with those pockets of melty white chocolate and the satisfying crunch of roasted macadamia nuts. It’s a harmonious blend of sweet and nutty that’s utterly addictive. Get ready to impress everyone (or just yourself!) with this easy-to-make, utterly delicious dessert that brings a little bit of sunshine to any day.

Ingredient Notes
Crafting the perfect batch of White Chocolate Macadamia Cookie Bars starts with understanding your ingredients. While this recipe is incredibly forgiving, a little attention to detail here will elevate your bars from good to absolutely irresistible. I’m excited to share my go-to choices and a few handy substitutions!
- Unsalted Butter: I always opt for unsalted butter. This gives me complete control over the saltiness of the bars. Make sure it’s softened to room temperature before you start – this is crucial for achieving that light, fluffy texture when you cream it with the sugars. If you only have salted butter, you can use it, but reduce the added salt in the recipe by about ¼ teaspoon.
- Granulated Sugar & Light Brown Sugar: This dynamic duo gives our bars the best of both worlds. Granulated sugar contributes to a crisp edge, while light brown sugar adds moisture, chewiness, and that lovely caramel note. Using only one or the other will significantly change the texture, so I recommend sticking to the specified ratio for optimal results.
- Eggs: Large eggs, at room temperature, are what you’re looking for. Room temperature eggs emulsify better with the butter and sugar, leading to a smoother, more uniform dough. They bind everything together and add richness.
- Vanilla Extract: Pure vanilla extract is non-negotiable for me! It truly enhances all the flavors in the cookie bars. A good quality extract makes a noticeable difference. For an extra special touch, you could even try a vanilla bean paste.
- All-Purpose Flour: Simple and effective, all-purpose flour provides the structure for our bars. I always recommend measuring flour by weight (grams) if you have a kitchen scale for the most accurate results, as scooping directly from the bag can compact it, leading to too much flour and dry bars. If measuring by volume, spoon the flour into your measuring cup and then level it off.
- Baking Soda: This is our leavening agent, helping the bars rise slightly and contributing to that classic cookie bar texture. Make sure your baking soda is fresh, as older baking soda can lose its potency.
- Salt: A pinch of salt is essential to balance the sweetness and bring out the flavors of the chocolate and macadamia nuts. Don’t skip it!
- White Chocolate Chips or Chunks: The star of the show! I prefer using good quality white chocolate chips or, even better, chopping up a bar of white chocolate into chunks. This gives you beautiful pockets of melted chocolate throughout. Avoid “white melting wafers” or “candy melts,” as they have a different flavor and texture that won’t give you the same delicious result. If you’re not a fan of white chocolate, you could substitute with milk or semi-sweet chocolate chips, creating a different but equally delicious cookie bar!
- Macadamia Nuts: These buttery, creamy nuts are the perfect complement to white chocolate. I prefer to buy them whole or roughly chopped. Toasting them lightly in a dry pan for a few minutes before adding them to the dough can really enhance their flavor and add an extra layer of depth to your bars. Just be careful not to burn them! If you have a nut allergy or simply prefer a different nut, pecans or walnuts would also be delightful.
Step-by-Step Instructions
Ready to bake some utterly delicious White Chocolate Macadamia Cookie Bars? Follow these steps, and you’ll have a pan of golden, chewy goodness in no time. I promise, it’s simpler than you think!
- Preheat Oven & Prepare Pan: First things first, let’s get that oven ready. Preheat your oven to 350°F (175°C). Line a 9×13-inch baking pan with parchment paper, leaving an overhang on the sides. This overhang acts as handles, making it super easy to lift the entire slab of bars out of the pan once they’ve cooled. Lightly grease the parchment paper for extra insurance against sticking.
- Cream Butter & Sugars: In a large mixing bowl, using an electric mixer (either a stand mixer with a paddle attachment or a hand mixer), cream together the softened unsalted butter, granulated sugar, and light brown sugar. Beat on medium speed for about 2-3 minutes until the mixture is light, fluffy, and pale in color. This step incorporates air, which contributes to the texture of your bars.
- Add Eggs & Vanilla: Crack in the eggs, one at a time, beating well after each addition until just combined. Scrape down the sides of the bowl as needed. Then, beat in the vanilla extract until fully incorporated. Don’t overmix at this stage; we just want everything to come together.
- Combine Dry Ingredients: In a separate medium bowl, whisk together the all-purpose flour, baking soda, and salt. Make sure these dry ingredients are thoroughly combined to ensure even distribution throughout the dough.
- Gradually Add Dry to Wet: With the mixer on low speed, gradually add the dry ingredient mixture to the wet ingredients, mixing until just combined. Be careful not to overmix! Overmixing develops the gluten in the flour too much, which can lead to tough, dry bars. Stop mixing as soon as you no longer see streaks of dry flour.
- Fold in Mix-ins: Now for the good stuff! Gently fold in the white chocolate chips (or chunks) and the macadamia nuts using a spatula or wooden spoon. Distribute them evenly throughout the dough so every bite is packed with flavor.
- Press into Pan: Transfer the cookie dough to your prepared 9×13-inch baking pan. Use your hands or the back of a spatula to press the dough evenly into the pan, making sure it reaches all the corners. A flat, even layer will ensure uniform baking.
- Bake: Place the pan in the preheated oven and bake for 25-30 minutes. The bars are ready when the edges are lightly golden brown, and the center is set but still looks a little soft or slightly underbaked. Remember that they will continue to set as they cool. Overbaking can lead to dry, crumbly bars, so err on the side of slightly underbaked for maximum chewiness.
- Cool Completely & Cut: This is perhaps the hardest step – waiting! Let the cookie bars cool completely in the pan on a wire rack for at least 1-2 hours. Seriously, resist the urge to cut them warm! Warm bars will be soft and crumble when you try to slice them. Once fully cooled, use the parchment paper overhang to lift the entire slab out of the pan. Transfer it to a cutting board and cut into squares or rectangles of your desired size.
Tips & Suggestions
I’ve baked countless batches of these White Chocolate Macadamia Cookie Bars, and I’ve picked up a few tricks along the way to ensure they turn out perfectly every single time. Here are my top tips and suggestions to help you achieve the most delectable, chewy, and flavorful bars!
- Don’t Overmix the Dough: This is a golden rule for almost any baked good, and especially for these cookie bars. Once you add the flour, mix only until just combined. Overmixing develops the gluten in the flour, which can lead to tough, dense, and dry bars. We want tender and chewy!
- Room Temperature Ingredients are Key: Ensure your butter and eggs are at room temperature. This allows them to cream together properly, creating a smooth, emulsified base for your dough that holds more air, resulting in a lighter, more tender crumb. Cold ingredients won’t mix as effectively.
- Toast Your Macadamia Nuts: For an extra layer of flavor, lightly toast your macadamia nuts before adding them to the dough. Spread them on a baking sheet and toast in the oven at 300°F (150°C) for about 5-7 minutes, or in a dry skillet over medium-low heat for 3-5 minutes, stirring occasionally, until fragrant. Let them cool completely before adding to the dough. This brings out their natural buttery notes beautifully.
- Use Quality White Chocolate: The type of white chocolate you use truly matters. I recommend using high-quality white chocolate baking bars chopped into chunks or good quality white chocolate chips. Avoid “white baking melts” or “candy melts,” as they often contain different ingredients and won’t melt as nicely or provide the same rich flavor.
- Don’t Overbake! This is probably the most crucial tip for chewy cookie bars. The bars should be lightly golden brown around the edges, and the center should look set but might still appear slightly soft or even a tiny bit gooey. They will continue to bake and set as they cool. If you bake them until they are completely firm in the center, they will be dry and crumbly once cooled. Err on the side of underbaking for ultimate chewiness.
- Cool Completely Before Cutting: I know, it’s hard to wait when your kitchen smells incredible, but this step is non-negotiable for clean, perfect slices. Warm bars are soft and fragile and will crumble or squish when you try to cut them. Allowing them to cool completely in the pan allows them to set up properly, making for neat, professional-looking squares.
- Customize Your Mix-Ins: While white chocolate and macadamia nuts are a classic pairing, feel free to get creative! You could add a sprinkle of sea salt on top before baking to enhance the flavors, or even swirl in some caramel sauce during the last few minutes of baking for a decadent twist.
- Evenly Press the Dough: When pressing the dough into the pan, ensure it’s an even layer across the entire surface. This promotes uniform baking, so all your bars cook at the same rate and have a consistent texture.
Storage
Once you’ve baked and (patiently!) cooled your delightful White Chocolate Macadamia Cookie Bars, you’ll want to store them properly to maintain their freshness and that irresistible chewy texture. Here’s how I keep mine tasting fantastic for days:
- At Room Temperature:
- Fully Cooled: Always ensure the bars are completely cooled before storing them. Storing warm bars will create condensation, making them soggy.
- Airtight Container: Place the cooled bars in an airtight container. This prevents them from drying out and keeps them fresh.
- Layering: If you’re stacking multiple layers of bars, place a piece of parchment paper between each layer to prevent them from sticking together.
- Shelf Life: Stored at room temperature, these cookie bars will stay fresh and wonderfully chewy for up to 3-4 days. After that, they might start to lose a bit of their moisture, but they’ll still be delicious!
- Refrigeration:
- Airtight Container: If you want to extend their freshness, especially in a warmer climate, you can refrigerate them. Again, use an airtight container and layer with parchment paper.
- Texture Change: Refrigeration can make the bars a bit firmer and chewier than at room temperature.
- Shelf Life: In the refrigerator, they can last for up to a week.
- Serving Tip: I recommend letting them come back to room temperature for about 15-20 minutes before serving to enjoy their optimal soft and chewy texture.
- Freezing:
- Best for Long-Term Storage: Freezing is an excellent option if you want to make a big batch or save some for later.
- Flash Freeze (Optional but Recommended): For best results, place the cut bars in a single layer on a baking sheet and flash freeze them for about 30 minutes to an hour until firm. This prevents them from sticking together.
- Airtight Freezer Bag or Container: Once firm, transfer the bars to a freezer-safe airtight container or a heavy-duty freezer bag. Squeeze out as much air as possible if using a bag. You can still layer them with parchment paper.
- Shelf Life: When properly stored in the freezer, these cookie bars will maintain their quality for up to 2-3 months.
- Thawing: To thaw, simply remove the desired number of bars from the freezer and let them sit at room temperature for an hour or two, or overnight in the refrigerator. You can also gently warm them in the microwave for a few seconds if you crave a gooey, warm treat!
Final Thoughts
And there you have it! I truly hope you enjoyed baking these incredible White Chocolate Macadamia Cookie Bars. There’s something undeniably special about the marriage of creamy white chocolate and the buttery crunch of macadamia nuts, all baked into one perfectly chewy, golden-edged bar. Forget the fuss of individual cookies; these bars deliver all the deliciousness with half the effort, making them an absolute dream for busy bakers or anyone craving a quick yet utterly decadent treat.
I promise you, once you take a bite of these White Chocolate Macadamia Cookie Bars, with their irresistible texture and rich flavor profile, you’ll understand why they’re a must-try. They’re perfect for sharing at gatherings, an afternoon pick-me-up, or simply a sweet moment all to yourself. Go on, indulge a little – you deserve this simple slice of bliss!
Decadent White Chocolate Macadamia Cookie Bars Recipe
- Total Time: 45 minutes
- Yield: 12 servings 1x
Description
Indulge in the delightful combination of creamy white chocolate and buttery macadamia nuts with these easy-to-make cookie bars. Perfect for sharing or enjoying with a cup of coffee, these bars are a comforting treat that everyone will love.
Ingredients
- 1 cup Unsalted Butter, softened
- 3/4 cup Granulated Sugar
- 3/4 cup Light Brown Sugar
- 2 Large Eggs, at room temperature
- 2 teaspoons Pure Vanilla Extract
- 2 1/4 cups All-Purpose Flour
- 1 teaspoon Baking Soda
- 1/2 teaspoon Salt
- 1 1/2 cups White Chocolate Chips or Chunks
- 1 cup Macadamia Nuts, roughly chopped
Instructions
- Preheat your oven to 350°F (175°C) and line a 9×13-inch baking pan with parchment paper, leaving an overhang on the sides. Lightly grease the parchment paper.
- In a large mixing bowl, cream together the softened unsalted butter, granulated sugar, and light brown sugar using an electric mixer on medium speed for about 2-3 minutes until light and fluffy.
- Add the eggs one at a time, beating well after each addition, then mix in the vanilla extract until fully incorporated.
- In a separate bowl, whisk together the all-purpose flour, baking soda, and salt.
- With the mixer on low speed, gradually add the dry ingredients to the wet ingredients, mixing until just combined.
- Gently fold in the white chocolate chips and macadamia nuts using a spatula or wooden spoon.
- Transfer the cookie dough to the prepared baking pan and press it evenly into the pan.
- Bake for 25-30 minutes until the edges are lightly golden brown and the center is set but slightly soft.
- Let the cookie bars cool completely in the pan on a wire rack for at least 1-2 hours before cutting into squares or rectangles.
- Prep Time: 15 mins
- Cook Time: 30 mins
- Category: Dessert
- Method: Baking
- Cuisine: American
Nutrition
- Serving Size: 1 bar
- Calories: 250
- Sugar: 15 g
- Sodium: 150 mg
- Fat: 12 g
- Saturated Fat: 7 g
- Unsaturated Fat: 3 g
- Trans Fat: 0 g
- Carbohydrates: 30 g
- Fiber: 1 g
- Protein: 3 g
- Cholesterol: 40 mg
Keywords: Ensure your butter and eggs are at room temperature for better mixing. Toasting the macadamia nuts enhances their flavor. Avoid overmixing the dough to keep the bars tender and chewy.


Leave a Comment