
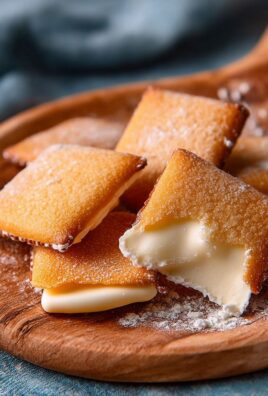
Copycat Zebra Cakes: Remember those iconic, individually wrapped Zebra Cakes from your childhood? The soft, golden sponge cake, the creamy filling, and that mesmerizing fudge stripe pattern? Well, get ready to relive those sweet memories, because we’re about to embark on a delicious adventure to recreate them right in your own kitchen! Forget settling for store-bought when you can bake a batch of these delightful treats that taste even better than the original.
While Zebra Cakes may not have a long and storied history like some classic desserts, they hold a special place in the hearts (and stomachs!) of many. Introduced by Little Debbie in 1967, they quickly became a lunchbox staple and a beloved snack for generations. Their unique appearance and satisfying flavor profile made them an instant hit.
What’s not to love? The combination of the tender cake, the sweet, fluffy creme filling, and the rich, chocolatey stripes is simply irresistible. Plus, making your own copycat Zebra Cakes allows you to control the ingredients and customize them to your liking. Whether you’re looking for a fun baking project with the kids or simply craving a taste of nostalgia, this recipe is sure to please. Get ready to impress your friends and family with these homemade goodies that are guaranteed to disappear in a flash!

Ingredients:
- For the Cakes:
- 1 ½ cups all-purpose flour
- 1 ½ teaspoons baking powder
- ½ teaspoon baking soda
- ¼ teaspoon salt
- ½ cup (1 stick) unsalted butter, softened
- ¾ cup granulated sugar
- 2 large eggs
- 1 teaspoon vanilla extract
- ¾ cup buttermilk
- For the Filling:
- ½ cup (1 stick) unsalted butter, softened
- 3 cups powdered sugar
- ¼ cup shortening
- 2 tablespoons milk
- 1 teaspoon vanilla extract
- For the White Chocolate Coating:
- 12 ounces white chocolate chips
- 1 tablespoon shortening
- For the Dark Chocolate Stripes:
- 4 ounces semi-sweet chocolate chips
- 1 teaspoon shortening
Preparing the Cakes
- Preheat and Prep: First things first, preheat your oven to 350°F (175°C). While the oven is heating up, grease and flour two 9×13 inch baking pans. I like to use baking spray with flour already in it for this, but the old-fashioned method works just as well! Make sure you get into all the corners to prevent sticking.
- Dry Ingredients: In a medium bowl, whisk together the flour, baking powder, baking soda, and salt. Whisking is key here to make sure everything is evenly distributed. Nobody wants a bite of pure baking soda! Set this bowl aside for now.
- Cream Butter and Sugar: In a large bowl (or the bowl of your stand mixer), cream together the softened butter and granulated sugar until light and fluffy. This usually takes about 3-5 minutes. You want it to be nice and airy, which will help create a tender cake.
- Add Eggs and Vanilla: Beat in the eggs one at a time, making sure each egg is fully incorporated before adding the next. Then, stir in the vanilla extract. Vanilla is a must for that classic Zebra Cake flavor!
- Alternate Wet and Dry: Gradually add the dry ingredients to the wet ingredients, alternating with the buttermilk. Begin and end with the dry ingredients. So, add about a third of the dry ingredients, then half of the buttermilk, then another third of the dry ingredients, the remaining buttermilk, and finally the last of the dry ingredients. Mix until just combined. Be careful not to overmix! Overmixing can lead to a tough cake.
- Bake: Divide the batter evenly between the prepared baking pans. Spread the batter into an even layer in each pan. Bake for 15-20 minutes, or until a toothpick inserted into the center comes out clean. Keep a close eye on them; you don’t want them to get too brown.
- Cool: Let the cakes cool in the pans for about 10 minutes before inverting them onto a wire rack to cool completely. Make sure they are completely cool before you start assembling the Zebra Cakes. Warm cake will just melt the filling and coating!
Making the Filling
- Cream Butter and Shortening: In a large bowl (or the bowl of your stand mixer), cream together the softened butter and shortening until smooth and creamy. The shortening helps stabilize the filling and gives it that classic Zebra Cake texture.
- Add Powdered Sugar: Gradually add the powdered sugar, one cup at a time, beating well after each addition. This prevents a powdered sugar cloud from erupting in your kitchen!
- Add Milk and Vanilla: Add the milk and vanilla extract and beat until the filling is light and fluffy. You may need to add a little more milk, one teaspoon at a time, to reach the desired consistency. It should be spreadable but not too runny.
Assembling the Zebra Cakes
- Cut the Cakes: Once the cakes are completely cool, use a 3-inch round cookie cutter to cut out circles from each cake. You should get about 12-15 circles from each cake, depending on how closely you can cut them. Don’t worry about the scraps! You can snack on them or use them for another dessert.
- Spread the Filling: Spread a generous amount of filling onto the flat side of half of the cake circles.
- Sandwich Together: Top each filled cake circle with another cake circle, flat side down, to create a sandwich. Gently press the cakes together to help the filling adhere.
- Chill: Place the assembled Zebra Cakes in the refrigerator for at least 30 minutes to help the filling firm up. This will make them easier to dip in the chocolate.
Coating and Striping
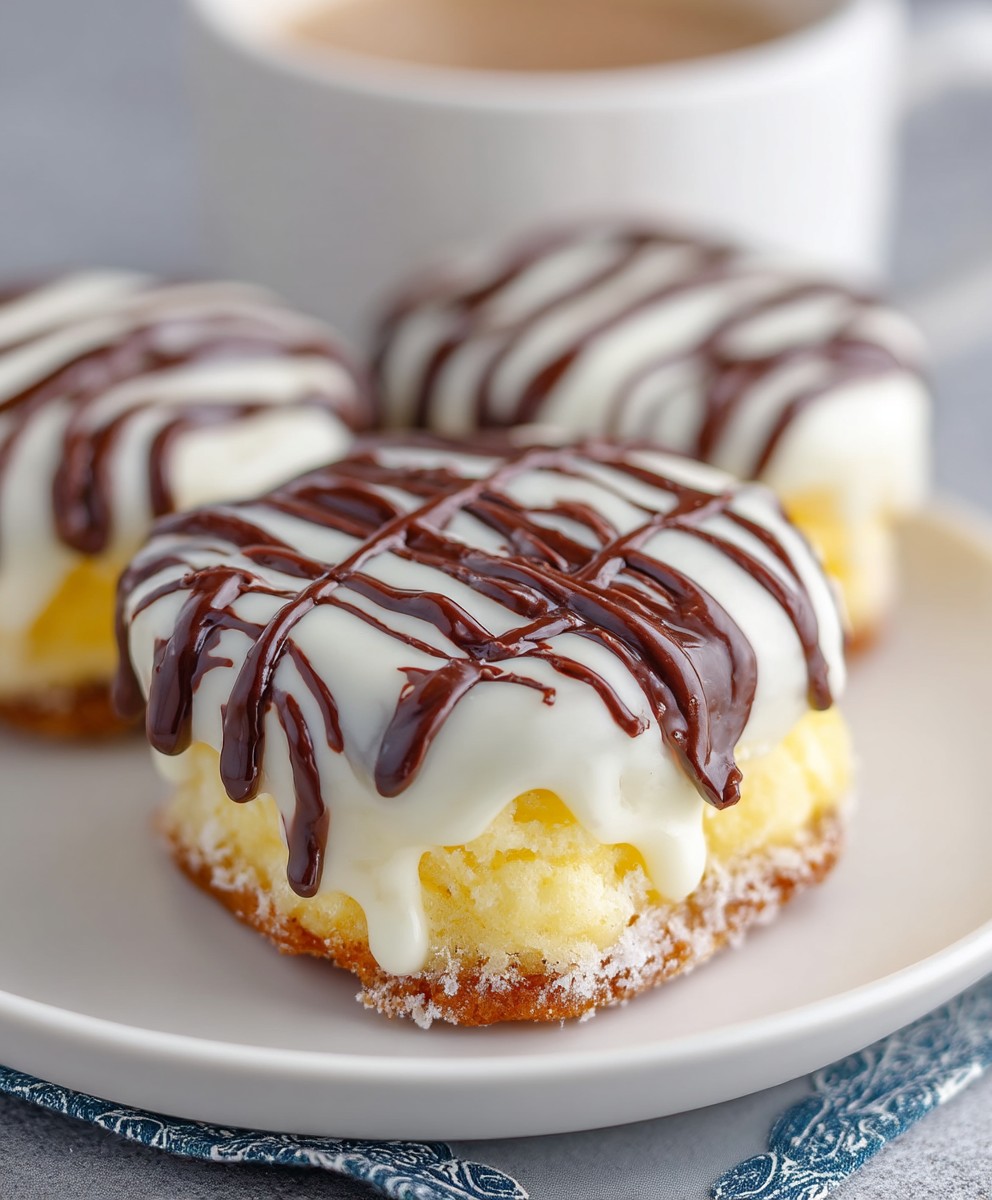
- Melt White Chocolate: In a microwave-safe bowl, combine the white chocolate chips and 1 tablespoon of shortening. Microwave in 30-second intervals, stirring after each interval, until the chocolate is completely melted and smooth. Be careful not to overheat the chocolate, or it will seize up. The shortening helps the chocolate melt smoothly and gives it a nice sheen.
- Dip in White Chocolate: Dip each Zebra Cake into the melted white chocolate, coating it completely. Place the dipped cakes on a parchment-lined baking sheet. I like to use a fork to dip them and then gently tap off any excess chocolate.
- Chill White Chocolate: Place the baking sheet with the white chocolate-coated Zebra Cakes in the refrigerator for about 15-20 minutes, or until the white chocolate is set. This will make it easier to apply the dark chocolate stripes.
- Melt Dark Chocolate: While the white chocolate is setting, melt the semi-sweet chocolate chips and 1 teaspoon of shortening in a separate microwave-safe bowl, using the same method as the white chocolate.
- Create Stripes: Transfer the melted dark chocolate to a piping bag or a zip-top bag with a small corner snipped off. Drizzle the dark chocolate over the white chocolate-coated Zebra Cakes in a zebra-like pattern. You can make the stripes as thick or thin as you like. Get creative!
- Final Chill: Return the Zebra Cakes to the refrigerator for another 10-15 minutes, or until the dark chocolate stripes are set.
Serving and Storage
- Serve: Once the chocolate is completely set, your homemade Zebra Cakes are ready to serve! They’re perfect for a snack, dessert, or even a party.
- Store: Store the Zebra Cakes in an airtight container in the refrigerator for up to 5 days. They’re best enjoyed cold!
Conclusion:
So, there you have it! My take on homemade Copycat Zebra Cakes. I truly believe this recipe is a must-try for anyone who loves a nostalgic treat with a personal touch. Forget the store-bought version – these are fresher, tastier, and you get the satisfaction of knowing exactly what went into them. The soft, moist cake, the creamy filling, and that iconic chocolate stripe? It’s a winning combination that will transport you right back to your childhood, but with a grown-up appreciation for quality ingredients and homemade goodness.
Why is this recipe a must-try? Because it’s more than just a cake; it’s an experience. It’s the joy of creating something delicious from scratch, the fun of decorating with those mesmerizing chocolate stripes, and the sheer delight of biting into a perfectly balanced sweet treat. Plus, it’s a fantastic project to do with kids! They’ll love helping with the mixing, measuring, and especially the decorating. It’s a memory-making activity that ends with a delicious reward.
But the best part? You can customize these Copycat Zebra Cakes to your heart’s content! Feeling adventurous? Try adding a hint of orange zest to the cake batter for a citrusy twist. Or, incorporate a teaspoon of espresso powder for a mocha-flavored delight. For the filling, consider using a flavored extract like vanilla bean, almond, or even peppermint for a festive holiday treat. You could even dip the finished cakes in melted white chocolate before adding the dark chocolate stripes for an extra layer of indulgence.
Serving suggestions? These cakes are perfect on their own, of course, but they also pair wonderfully with a cold glass of milk, a cup of hot coffee, or even a scoop of vanilla ice cream. Pack them in lunchboxes for a special surprise, serve them at your next party, or simply enjoy them as a well-deserved afternoon treat. They’re incredibly versatile and guaranteed to be a crowd-pleaser.
Don’t be intimidated by the thought of making these from scratch. I’ve broken down the recipe into easy-to-follow steps, and I’m confident that you’ll be able to create beautiful and delicious Copycat Zebra Cakes in your own kitchen. Remember, baking is all about experimenting and having fun, so don’t be afraid to get creative and put your own spin on things.
I’m so excited for you to try this recipe! I know you’ll love the results. Once you’ve made your own batch of these delightful treats, I would absolutely love to hear about your experience. Did you make any variations? What did your family and friends think? Share your photos and stories in the comments below! Let’s create a community of Zebra Cake enthusiasts and inspire each other with our baking adventures. Happy baking! I can’t wait to see what you create.
Copycat Zebra Cakes: The Ultimate Homemade Recipe
Moist vanilla cakes with a creamy filling, dipped in white chocolate and striped with dark chocolate. A delicious homemade copycat recipe!
Ingredients
Instructions
Recipe Notes
- Whisking the dry ingredients is key to even distribution.
- Creaming the butter and sugar until light and airy helps create a tender cake.
- Be careful not to overmix the cake batter.
- Make sure the cakes are completely cool before assembling.
- The shortening in the filling helps stabilize it and gives it that classic Zebra Cake texture.
- Microwave the chocolate in 30-second intervals to prevent burning.
- Use a fork to dip the cakes and gently tap off any excess chocolate.

Leave a Comment