
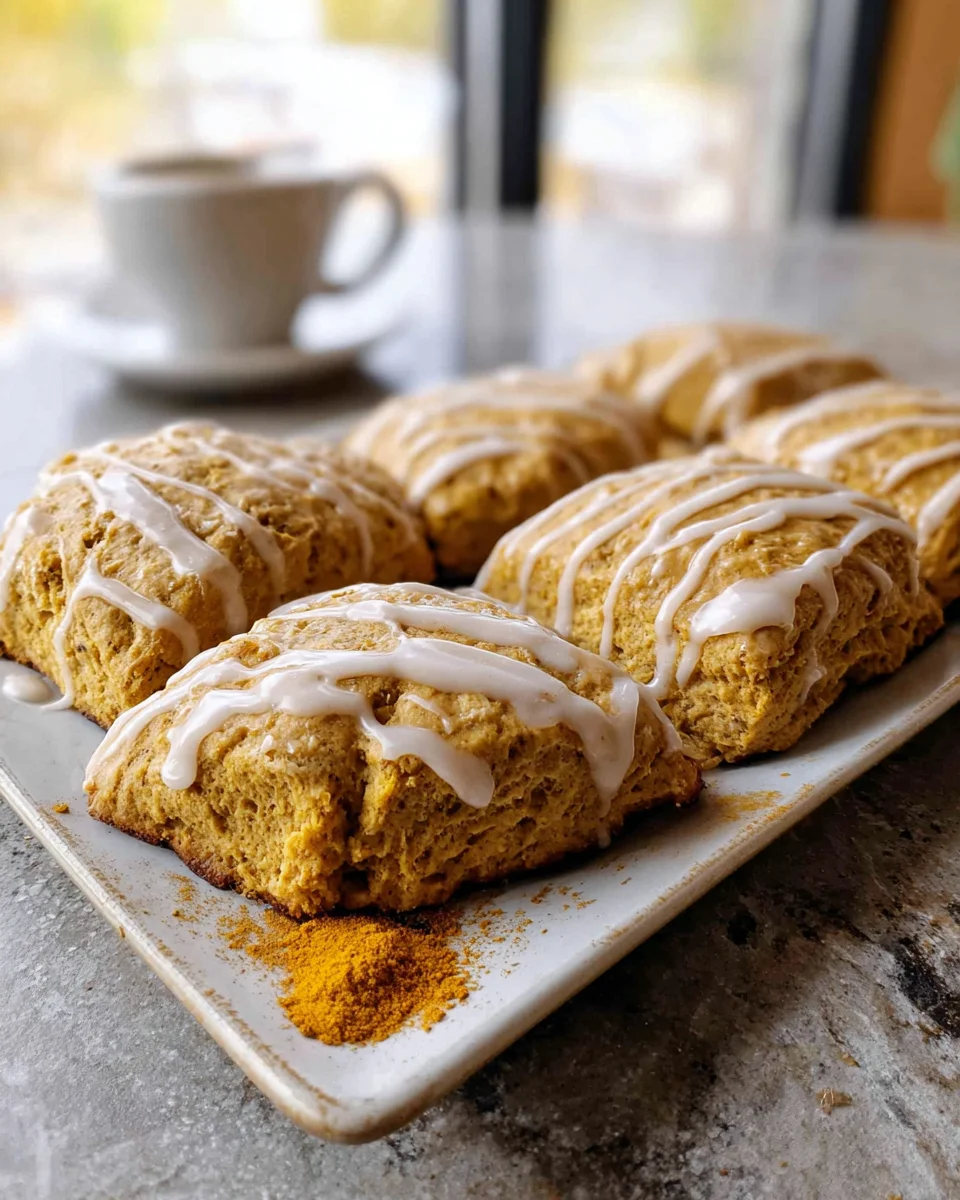
Simple Starbucks Pumpkin Scones are more than just a seasonal treat; they’re a warm, spice-filled hug on a crisp autumn morning. Have you ever found yourself dreaming of that perfect, tender scone, generously slathered with sweet cream cheese icing, all without leaving the comfort of your home? I certainly have! While scones boast a rich history rooted in British and Scottish baking traditions, their pumpkin-spiced counterparts have truly become an iconic symbol of fall, largely thanks to the beloved coffee giant that brought pumpkin spice lattes and these incredible scones into mainstream consciousness.
There’s an undeniable magic to the combination of fragrant pumpkin, warming spices like cinnamon, nutmeg, and ginger, and that delightfully crumbly yet moist texture. People adore this dish not only for its comforting flavor profile that perfectly encapsulates the essence of autumn but also for the pure joy it brings. Now, imagine recreating that very same bakery-quality experience in your own kitchen with our recipe for Simple Starbucks Pumpkin Scones. Prepare to fill your home with an aroma that signals the arrival of pumpkin season and delight your taste buds with every single bite.

Ingredients:
- For the Scones:
- 2 ½ cups (300g) all-purpose flour, plus more for dusting
- ½ cup (100g) granulated sugar
- 1 tablespoon baking powder
- ½ teaspoon baking soda
- ½ teaspoon salt
- 1 ½ teaspoons pumpkin pie spice
- ½ teaspoon ground cinnamon
- 1 cup (2 sticks / 226g) unsalted butter, very cold and cut into ½-inch cubes
- ¾ cup (180g) pumpkin puree (not pumpkin pie filling!)
- ¼ cup (60ml) heavy cream, very cold, plus extra for brushing
- 1 teaspoon vanilla extract
- For the Vanilla Glaze:
- 1 ½ cups (180g) powdered sugar, sifted
- 3-4 tablespoons milk or heavy cream
- ½ teaspoon vanilla extract
- For the Spiced Drizzle:
- ½ cup (60g) powdered sugar, sifted
- 1-2 tablespoons milk or heavy cream
- ¼ teaspoon pumpkin pie spice
Equipment You’ll Need:
- Large mixing bowl
- Medium mixing bowl
- Whisk
- Pastry blender (or two forks, or your fingertips, or a food processor)
- Rubber spatula or wooden spoon
- Measuring cups and spoons
- Bench scraper or sharp knife
- Baking sheet(s)
- Parchment paper or silicone baking mats
- Wire cooling rack
- Small bowls for glazes
- Spoon or pastry brush for applying glaze
- Zip-top bag or piping bag for drizzle (optional)
Instructions:
Oh, my friend, get ready to bring the cozy, aromatic magic of a Starbucks fall morning right into your own kitchen with these simple Starbucks pumpkin scones. I’m so excited to guide you through every step to create these tender, perfectly spiced delights. The aroma alone will make your home feel like the most inviting place on earth!
Preparing the Scone Dough:
- Preheat and Prep: Let’s start by getting our oven ready. Preheat your oven to 400°F (200°C). This ensures that when your scones go in, they start baking immediately, giving them that beautiful lift. Line a large baking sheet with parchment paper or a silicone baking mat. This will prevent sticking and make cleanup a breeze.
- Combine Dry Ingredients: In a large mixing bowl, whisk together the all-purpose flour, granulated sugar, baking powder, baking soda, salt, pumpkin pie spice, and ground cinnamon. Whisking ensures that all these dry ingredients are thoroughly combined and evenly distributed. This is crucial for consistent flavor and rise throughout your scones. You don’t want a pocket of just baking powder in one bite, do you? Make sure there are no lumps of flour.
- Cut in the Cold Butter: Now for the magic trick that makes scones wonderfully flaky! Add your very cold, cubed unsalted butter to the dry ingredients. You can use a pastry blender, two forks, or even your fingertips for this step. If using your fingers, work quickly to avoid melting the butter with the warmth of your hands. The goal here is to cut the butter into the flour mixture until it resembles coarse crumbs, with some pieces of butter still about the size of small peas. These tiny pockets of butter will create steam as they bake, resulting in those irresistible flaky layers. If your butter starts to get too warm and melt, pop the bowl into the fridge or freezer for a few minutes. If you have a food processor, you can pulse the butter into the dry ingredients for about 10-15 pulses until the mixture resembles coarse meal.
- Prepare the Wet Ingredients: In a separate medium bowl, whisk together the pumpkin puree, the very cold heavy cream, and the vanilla extract until smooth. Using cold heavy cream is just as important as using cold butter. Cold ingredients are the secret to tender, flaky scones!
- Combine Wet and Dry: Pour the wet pumpkin mixture into the dry flour and butter mixture. Use a rubber spatula or a wooden spoon to mix everything together until just combined. The key here is to mix gently and sparingly. Overmixing develops the gluten in the flour, which will lead to tough, dense scones – and we definitely don’t want that! It’s okay if there are still a few dry streaks of flour; you’ll finish combining it in the next step.
Shaping and Baking the Scones:
- Lightly Knead and Shape: Turn the dough out onto a lightly floured surface. Gather the dough together and very gently knead it just a few times, perhaps 3-4 times, until it mostly comes together into a cohesive ball. Then, pat the dough into a round or rectangular disc about 1 to 1 ½ inches thick. I usually aim for about an 8-inch round. Resist the urge to overwork the dough here; gentle handling is paramount for tender scones.
- Cut the Scones: Using a sharp knife or a bench scraper, cut the dough into 8 wedges, just like you’d slice a pie. Alternatively, you can cut it into squares if you prefer a different shape. If you’re a perfectionist like me, you can also pat the dough into a rectangle and cut it into 9 or 12 squares. Place the cut scones onto your prepared baking sheet, leaving about an inch or two of space between each one.
- Chill for Success: Now, here’s a step many skip, but I promise you it makes all the difference! Place the baking sheet with the cut scones into the refrigerator for at least 15-30 minutes. Chilling the dough before baking helps the butter firm up again, which means less spread and a taller, flakier scone. It’s a small step that yields big rewards in texture! While they are chilling, you can clean up your workspace a bit.
- Brush and Bake: Once chilled, remove the scones from the fridge. Lightly brush the tops of the scones with a little extra heavy cream. This helps them achieve a beautiful golden-brown color and a slightly crisp crust. Transfer the baking sheet to your preheated 400°F (200°C) oven.
- Baking Time: Bake for 18-22 minutes, or until the tops are golden brown and a wooden skewer or toothpick inserted into the center of a scone comes out clean (or with just a few moist crumbs). The irresistible aroma of pumpkin and spices filling your kitchen is usually a good sign they’re nearly done! When they are ready, they will also sound hollow when tapped on the bottom.
- Cool Completely: Carefully remove the baking sheet from the oven. Let the scones cool on the baking sheet for about 5 minutes before transferring them to a wire cooling rack to cool completely. It’s important that they are fully cooled before glazing, otherwise the glaze will melt right off. This is also the perfect time to start preparing your glazes!
Making the Glaze and Drizzle:
Now for the iconic Starbucks scone finish – those lovely layers of sweet glaze and spiced drizzle. This is where your simple pumpkin scones truly transform into something special.
- Prepare the Vanilla Glaze: In a small bowl, combine the sifted powdered sugar, 3 tablespoons of milk or heavy cream, and the vanilla extract. Whisk thoroughly until the glaze is smooth and free of lumps. You’re looking for a consistency that is thick enough to coat the back of a spoon but still pourable. If it’s too thick, add more milk a teaspoon at a time. If it’s too thin, add a little more sifted powdered sugar. We want a nice, opaque glaze that clings beautifully to the scones.
- Prepare the Spiced Drizzle: In another small bowl, combine the sifted powdered sugar, 1 tablespoon of milk or heavy cream, and the pumpkin pie spice. Whisk until smooth. This drizzle should be a bit thicker than your vanilla glaze so it holds its shape when drizzled. Adjust with more milk or sugar as needed. This spiced drizzle is what truly gives these scones that signature Starbucks look and flavor profile.
Assembling and Serving Your Simple Starbucks Pumpkin Scones:
The moment of truth! Get ready to transform your cooled scones into café-worthy delights.
- Glaze the Scones: Once the scones are completely cool, place them back on the wire cooling rack with a piece of parchment paper or foil underneath to catch any drips (this makes cleanup so much easier!). Spoon a generous amount of the vanilla glaze over the top of each scone, allowing it to drip down the sides slightly. You can also dip the tops of the scones directly into the bowl of glaze. Let the glaze set for about 10-15 minutes, or until it’s mostly firm to the touch. This creates that lovely, sweet base layer.
- Apply the Spiced Drizzle: For that classic Starbucks look, transfer your spiced drizzle to a small zip-top bag and snip off a tiny corner. Alternatively, you can use a spoon. Drizzle the spiced glaze over the vanilla-glazed scones in a crisscross pattern, or in any design you like! This step adds both visual appeal and an extra layer of warm, comforting spice.
- Let Set and Serve: Allow the spiced drizzle to set for another 5-10 minutes. Once both glazes are firm, your simple Starbucks pumpkin scones are ready to be devoured! I absolutely love them slightly warm with a cup of coffee or tea.
- Storage: Store any leftover scones in an airtight container at room temperature for up to 3 days. While they are best enjoyed fresh, they can be gently reheated in the microwave for a few seconds to bring back some of that tender texture. Trust me, these won’t last long in your house! Enjoy every single bite of these homemade pumpkin spice wonders. They are truly a taste of autumn bliss!
Conclusion:
And there you have it, my friends! We’ve reached the sweet, satisfying end of our culinary journey together, and I truly hope you’re feeling inspired and excited to roll up your sleeves. What we’ve explored is more than just a recipe; it’s an invitation to bring the comforting, aromatic essence of autumn right into your own kitchen, any time you please. I’m genuinely confident that once you experience the magic of baking these yourself, you’ll understand precisely why this particular recipe is an absolute must-try for anyone who loves a delightful, seasonal treat. The aroma alone, as these golden beauties bake, is enough to warm your soul and make your entire home feel incredibly inviting. Imagine the satisfaction of pulling a tray of freshly baked, perfectly spiced scones from your oven, knowing you created such a wonderful confection from scratch.
The beauty of this recipe lies in its remarkable balance. It perfectly captures that cozy, comforting pumpkin flavor without being overly sweet, allowing the warm spices like cinnamon, nutmeg, and ginger to truly shine through. Each bite offers a tender, slightly crumbly texture that just melts in your mouth, a testament to the simple yet effective techniques we’ve discussed. Plus, let’s be honest, who doesn’t love the idea of recreating a beloved coffee shop favorite right at home? You get all the goodness, all the flavor, and all the charm, often at a fraction of the cost, and with the added satisfaction of having made it yourself. This isn’t just baking; it’s an act of self-care, a way to create little moments of joy for yourself and your loved ones. Truly, the experience of savoring a warm scone, still radiating with the heat of the oven, is unparalleled. It’s an instant mood lifter, a perfect pick-me-up on a chilly morning, or a delightful accompaniment to an afternoon reading session.
Elevate Your Scone Experience
Now, while these scones are utterly perfect straight out of the oven, perhaps with just a simple cup of coffee or your favorite herbal tea, there are so many wonderful ways to enjoy them or even put your own spin on things. For a truly decadent breakfast or brunch, I love serving them with an extra dollop of lightly sweetened whipped cream or even a spoonful of vanilla bean ice cream if I’m feeling particularly indulgent – don’t knock it ’til you’ve tried it for dessert! A drizzle of maple syrup or a thin ribbon of caramel sauce over the top can also add another layer of sweetness and sophistication, especially if you’re serving them to guests.
If you’re feeling adventurous and want to try a slight variation, consider folding in a handful of mini chocolate chips or chopped pecans into the dough before baking. These additions can introduce a delightful textural contrast and an extra burst of flavor. For a different glaze experience, you could swap out some of the pumpkin puree in the original glaze for a little cream cheese, creating a tangy cream cheese frosting that complements the pumpkin beautifully. And here’s a pro tip for future baking: you can prepare the scone dough ahead of time, form them, and freeze them unbaked. Then, simply pop them into the oven straight from the freezer whenever a scone craving strikes, adding a few extra minutes to the baking time. This makes spontaneous scone moments incredibly easy and convenient, allowing you to have freshly baked treats whenever you desire.
Your Turn to Bake!
So, what are you waiting for? I wholeheartedly encourage you to dive in and bake a batch of these glorious Simple Starbucks Pumpkin Scones. Seriously, you won’t regret it. The process is incredibly rewarding, and the end result is a truly spectacular treat that embodies everything wonderful about the season. Imagine the smiles you’ll bring to faces, or the quiet moments of bliss you’ll create for yourself. Once you’ve whipped up your own batch, please don’t keep it a secret! I would absolutely love to hear about your baking experience. Share your thoughts, your photos, and any creative variations you came up with. Your feedback and creativity inspire me and our entire baking community. Happy baking, and enjoy every single delicious bite!
Simple Starbucks Pumpkin Scones
Recreate the iconic Starbucks Pumpkin Scones at home with this easy recipe. Enjoy tender, spice-filled scones with a sweet vanilla glaze and a warming spiced drizzle, bringing the cozy magic of fall to your kitchen.
Ingredients
Instructions
Important Information
Nutrition Facts (Per Serving)
It is important to consider this information as approximate and not to use it as definitive health advice.
Allergy Information
Please check ingredients for potential allergens and consult a health professional if in doubt.

Leave a Comment