
Chicken Tempura: Crispy, light, and utterly irresistible! Have you ever craved a dish that delivers both satisfying crunch and delicate flavor in every single bite? Then look no further. This isn’t just fried chicken; it’s an experience, a culinary journey to the heart of Japanese cuisine.
Tempura, while often associated with Japan, actually has its roots in Portuguese cuisine. Introduced by missionaries in the 16th century, the Japanese refined the technique, transforming it into the art form we know and love today. They elevated the simple act of frying into a delicate dance between batter and oil, resulting in a dish that’s both visually stunning and incredibly delicious.
What makes Chicken Tempura so universally appealing? It’s the perfect harmony of textures: the airy, almost ethereal batter gives way to succulent, juicy chicken. The light, non-greasy coating allows the natural flavors of the chicken to shine through, enhanced by a simple yet flavorful dipping sauce. It’s quick to prepare, making it a fantastic weeknight meal, yet elegant enough to serve at a dinner party. Whether you’re a seasoned chef or a kitchen novice, mastering this recipe will undoubtedly impress your family and friends. Get ready to create some culinary magic!

Ingredients:
- 1 pound boneless, skinless chicken breasts, cut into 1-inch pieces
- 1 cup all-purpose flour, plus more for dusting
- 1/2 cup cornstarch
- 1 teaspoon baking powder
- 1/2 teaspoon salt
- 1/4 teaspoon black pepper
- 1 cup ice water
- 1 large egg, lightly beaten
- Vegetable oil, for frying (about 4-6 cups)
- Dipping sauce of your choice (soy sauce, tempura sauce, sweet chili sauce, etc.)
- Optional garnishes: green onions, sesame seeds, grated daikon radish
Preparing the Chicken:
- First, let’s get our chicken ready. Pat the chicken pieces dry with paper towels. This is crucial because excess moisture will prevent the batter from adhering properly and can cause the oil to splatter dangerously.
- Lightly dust the chicken pieces with flour. This creates a slightly tacky surface that helps the tempura batter stick. Don’t overdo it; a light dusting is all you need. Shake off any excess flour.
- Set the dusted chicken aside while you prepare the tempura batter.
Making the Tempura Batter:
- Now, for the star of the show – the tempura batter! In a large bowl, whisk together the 1 cup of all-purpose flour, cornstarch, baking powder, salt, and pepper. The cornstarch is key for that light and crispy texture we’re after. The baking powder helps create air bubbles, making the batter even lighter.
- In a separate bowl, whisk together the ice water and the lightly beaten egg. The ice water is absolutely essential! It keeps the gluten development in the flour to a minimum, resulting in a delicate and crispy tempura. The egg adds a bit of richness and helps bind the batter.
- Here’s the trick: gently pour the ice water and egg mixture into the dry ingredients. Use chopsticks or a fork to lightly combine the wet and dry ingredients. Do not overmix! A few lumps are perfectly fine. Overmixing will develop the gluten in the flour, leading to a tough and chewy tempura – exactly what we want to avoid. The batter should be thin and slightly lumpy.
- If the batter seems too thick, add a tablespoon or two more of ice water until it reaches the desired consistency. Remember, it should be thin enough to lightly coat the chicken.
- Keep the batter cold! Place the bowl of batter in a larger bowl filled with ice water. This will help maintain the cold temperature and prevent the gluten from developing.
Frying the Chicken Tempura:
- Time to fry! Pour the vegetable oil into a large, deep pot or Dutch oven. You’ll need enough oil to fully submerge the chicken pieces.
- Heat the oil over medium-high heat to 350-375°F (175-190°C). Use a deep-fry thermometer to monitor the temperature. Maintaining the correct oil temperature is crucial for achieving that perfect golden-brown and crispy tempura. If the oil is too cold, the tempura will be greasy. If it’s too hot, the tempura will burn before the chicken is cooked through.
- While the oil is heating, prepare a wire rack lined with paper towels. This is where you’ll place the cooked tempura to drain excess oil.
- Once the oil is hot, carefully dip each piece of chicken into the tempura batter, ensuring it’s fully coated. Let any excess batter drip off before gently placing the chicken into the hot oil.
- Fry the chicken in batches, being careful not to overcrowd the pot. Overcrowding will lower the oil temperature and result in soggy tempura. Fry for 2-3 minutes per side, or until the chicken is cooked through and the tempura is golden brown and crispy.
- Use a slotted spoon or spider to remove the cooked tempura from the oil and place it on the prepared wire rack to drain.
- Repeat the process with the remaining chicken and batter, making sure to maintain the oil temperature. You may need to adjust the heat as you go.
- If the batter starts to get too thick or warm, add a few ice cubes to the bowl to cool it down and thin it out.
Serving and Enjoying:
- Serve the chicken tempura immediately while it’s hot and crispy.
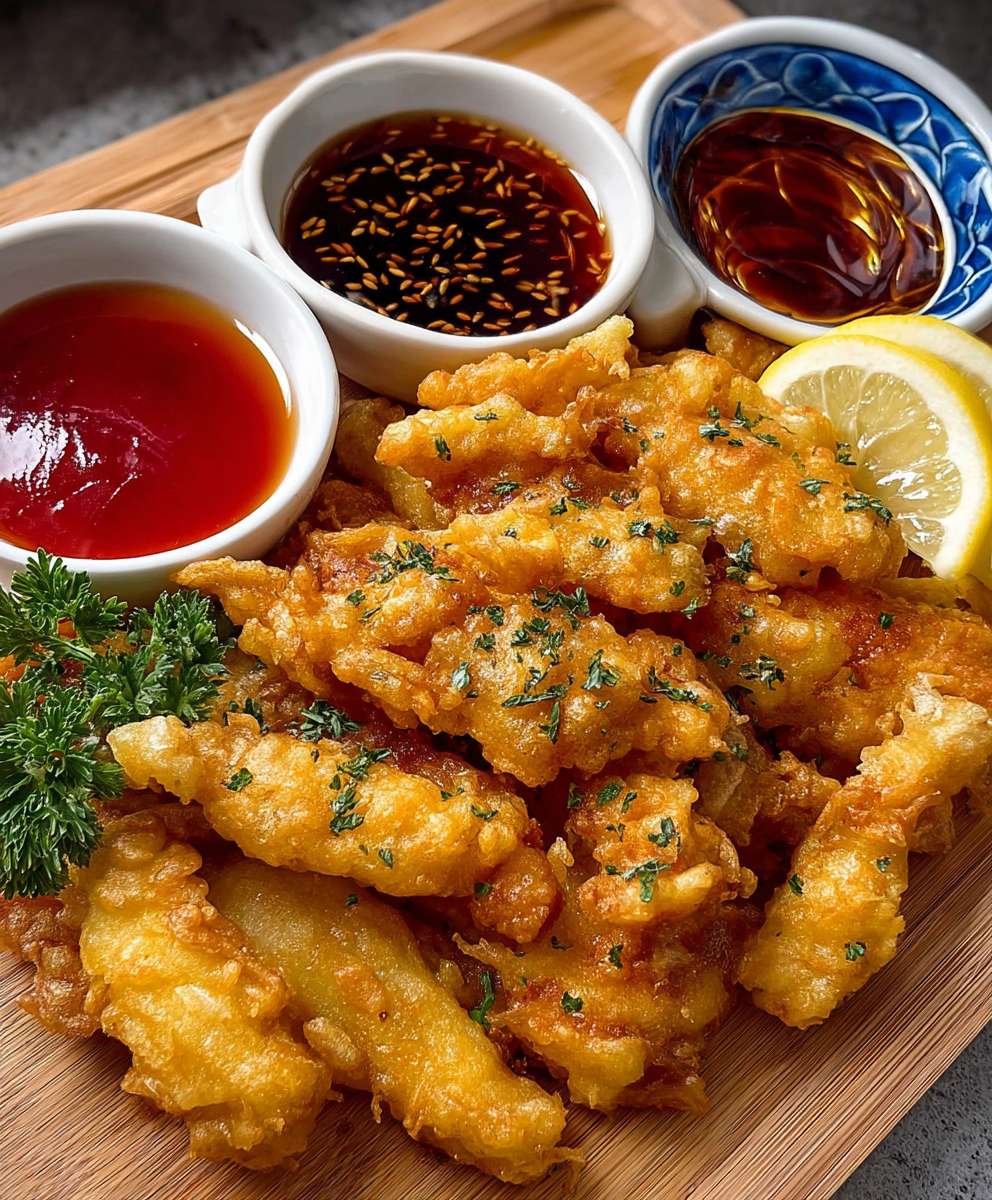
- Offer a variety of dipping sauces, such as soy sauce, tempura sauce (tentsuyu), or sweet chili sauce.
- Garnish with green onions, sesame seeds, or grated daikon radish for added flavor and visual appeal.
- Enjoy your homemade chicken tempura! It’s best enjoyed fresh, as the tempura will lose its crispness over time.
Tips for Perfect Chicken Tempura:
- Use ice-cold water: This is the most important tip for achieving light and crispy tempura.
- Don’t overmix the batter: A few lumps are perfectly fine. Overmixing will develop the gluten and result in tough tempura.
- Maintain the oil temperature: Use a deep-fry thermometer to ensure the oil is at the correct temperature.
- Fry in batches: Don’t overcrowd the pot, as this will lower the oil temperature and result in soggy tempura.
- Serve immediately: Tempura is best enjoyed fresh, as it will lose its crispness over time.
- Experiment with different dipping sauces: Find your favorite combination!
- Consider using sparkling water: Some people swear by using sparkling water instead of regular ice water for an even lighter and crispier tempura. The carbonation helps create air bubbles in the batter.
- Don’t be afraid to adjust the batter: If the batter is too thick, add a little more ice water. If it’s too thin, add a little more flour.
- Keep the batter cold: Placing the batter bowl in a larger bowl filled with ice water helps maintain the cold temperature.
Variations:
- Vegetable Tempura: You can use this same recipe to make vegetable tempura. Try dipping vegetables like broccoli florets, bell pepper strips, zucchini slices, onion rings, or sweet potato slices in the batter and frying them.
- Shrimp Tempura: Substitute the chicken with peeled and deveined shrimp. Make sure to pat the shrimp dry before dipping them in the batter.
- Spicy Tempura: Add a pinch of cayenne pepper or a dash of hot sauce to the batter for a spicy kick.
- Sweet Tempura: For a dessert tempura, try dipping slices of apple, banana, or pineapple in the batter and frying them. Serve with a dusting of powdered sugar and a scoop of ice cream.
Troubleshooting:
- Tempura is not crispy: This is usually caused by using warm water, overmixing the batter, or frying at too low of a temperature.
- Tempura is greasy: This is usually caused by frying at too low of a temperature. The oil is not hot enough to properly cook the tempura, so it absorbs more oil.
- Tempura is burning: This is usually caused by frying at too high of a temperature.
- Batter is too thick: Add a little more ice water to thin it out.
- Batter is too thin: Add a little more flour to thicken it up.
Storage Instructions:
While chicken tempura is best enjoyed fresh, you can store leftovers in an airtight container in the refrigerator for up to 24 hours. However, keep in mind that the tempura will lose its crispness over time. To reheat, you can bake the tempura in a preheated oven at 350°F (175°C) for about 5-10 minutes, or until heated through. You can also try reheating it in an air fryer for a few minutes to help restore some of the crispness. Microwaving is not recommended, as it will make the tempura soggy.
Nutritional Information (approximate, per serving):
Please note that the nutritional information is an estimate and can vary depending on the specific ingredients used and portion sizes.
- Calories: 350-450
- Fat: 20-30g
- Saturated Fat: 5-7g
- Cholesterol: 80-100mg
- Sodium: 300-500mg
- Carbohydrates: 20-30g
- Fiber
Conclusion:
And there you have it! This Chicken Tempura recipe is truly a must-try, and I’m not just saying that. The combination of the light, crispy batter and the tender, juicy chicken is simply irresistible. It’s a dish that’s both satisfying and surprisingly easy to make at home, once you get the hang of it. Forget ordering takeout; you can create restaurant-quality tempura right in your own kitchen!
What makes this recipe so special? It’s all about the technique. The ice-cold batter, the gentle mixing, and the hot oil are the keys to achieving that signature airy, delicate crust that everyone loves. Plus, using chicken thighs ensures that the meat stays incredibly moist and flavorful, even after frying. Trust me, once you’ve tasted this homemade version, you’ll never go back to the pre-made stuff.
But the fun doesn’t stop there! This Chicken Tempura is incredibly versatile. Serve it as a main course with a side of steamed rice and a vibrant dipping sauce, like tentsuyu (a mixture of dashi, soy sauce, and mirin) or even just a simple soy sauce with grated ginger. For a lighter meal, try adding it to a salad with a sesame ginger dressing. It’s also fantastic as part of a bento box or as an appetizer at your next gathering.
Looking for variations? Feel free to experiment with different dipping sauces. A spicy mayo or a sweet chili sauce would be delicious. You could also try adding a pinch of cayenne pepper to the batter for a little extra kick. And if you’re feeling adventurous, why not try tempura-ing other vegetables alongside the chicken? Broccoli, sweet potatoes, and green beans are all excellent choices.
Serving Suggestions:
* Classic Tempura Set: Serve with steamed rice, miso soup, and a side of pickled vegetables.
* Tempura Donburi: Place the tempura on top of a bowl of rice and drizzle with tentsuyu sauce.
* Tempura Udon: Add the tempura to a bowl of hot udon noodle soup.
* Tempura Salad: Toss the tempura with mixed greens, cherry tomatoes, and a sesame ginger dressing.
* Tempura Tacos: Use the tempura as a filling for tacos with shredded cabbage, avocado, and a spicy mayo.I truly believe that this recipe will become a new favorite in your household. It’s a crowd-pleaser that’s perfect for any occasion, from a casual weeknight dinner to a special celebration. So, gather your ingredients, put on your apron, and get ready to create some culinary magic!
I’m so excited for you to try this recipe and experience the joy of homemade Chicken Tempura. Once you’ve given it a go, I would absolutely love to hear about your experience. Did you make any variations? What dipping sauce did you use? What did your family and friends think? Share your photos and stories in the comments below! Your feedback is invaluable, and it helps me to continue creating recipes that you’ll love. Happy cooking!
Chicken Tempura: The Crispiest Recipe & Expert Tips
Crispy, golden-brown chicken tempura with a light, airy batter. Perfect for dipping!
By: LilaCategory: AppetizerDifficulty: EasyCuisine: AmericanYield: 4 servingsDietary: VegetarianIngredients
Instructions
Recipe Notes
- Use ice-cold water for the best results.
- Don’t overmix the batter.
- Maintain the correct oil temperature.
- Fry in batches.
- Serve immediately.
- Experiment with different dipping sauces.
- Consider using sparkling water.
- Don’t be afraid to adjust the batter.
- Keep the batter cold.
Frequently Asked Questions
→ How do I ensure the bread stays moist?Use fresh, ripe ingredients and avoid overmixing the batter. Store in an airtight container.→ Can I substitute ingredients?Yes, you can substitute similar ingredients while maintaining the basic ratios for best results.→ How long does this bread keep?Store tightly wrapped at room temperature for 2-3 days, or refrigerate for up to a week.→ What if I don't have all the spices?You can adjust spices to taste or substitute with similar warming spices.→ Can I freeze this bread?Yes, wrap individual slices and freeze for up to 3 months. Thaw at room temperature before serving.


Leave a Comment