
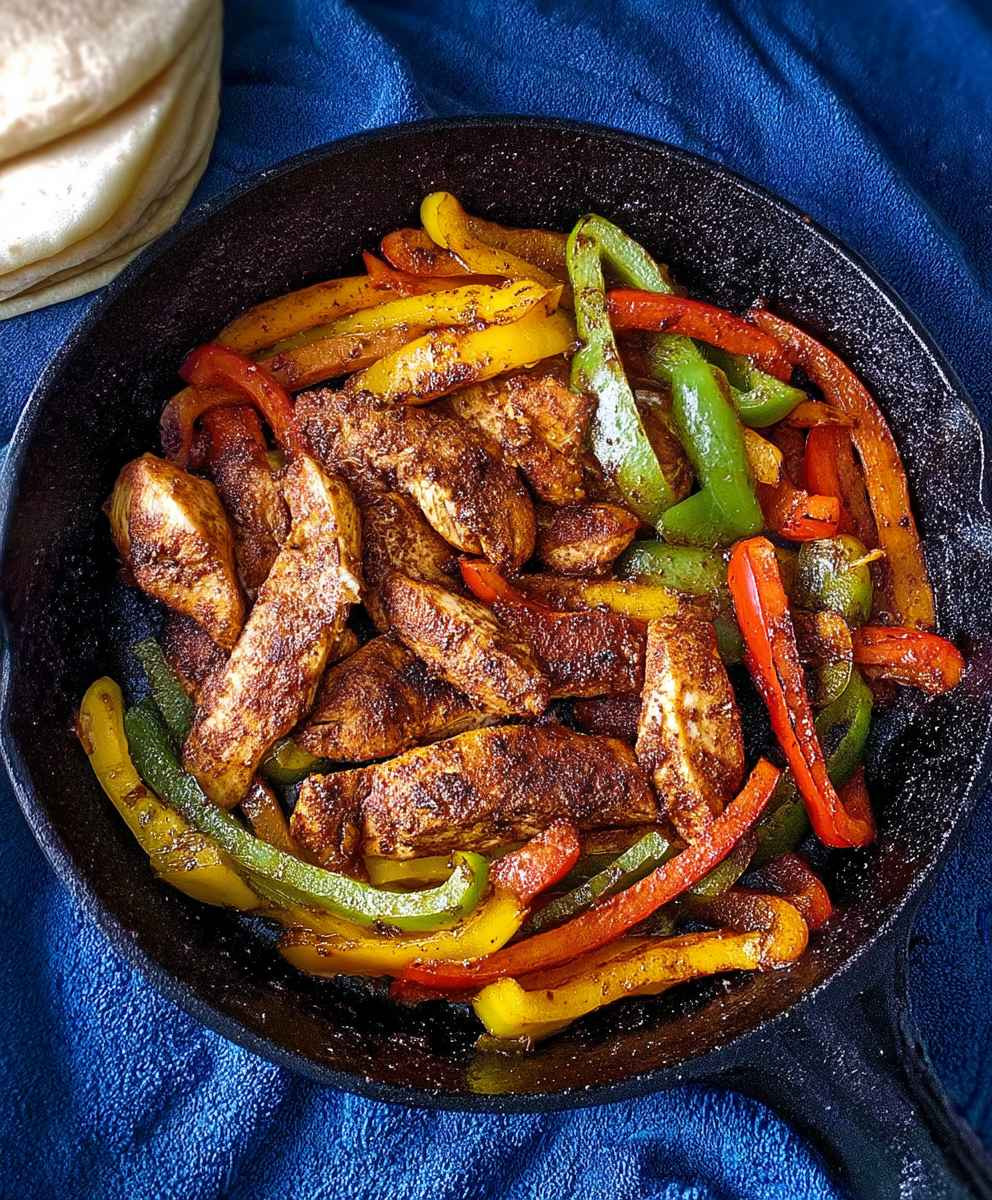
Chicken Fajitas: sizzling strips of marinated chicken, vibrant bell peppers, and onions, all served with warm tortillas and your favorite toppings. Does that sound like the perfect weeknight meal? I think so too! This isn’t just a recipe; it’s an experience, a fiesta on a plate that’s ready in under 30 minutes.
The history of fajitas is deeply rooted in the Tex-Mex culinary tradition. Originating in the early 20th century along the Texas-Mexico border, “fajita” (meaning “little skirt” in Spanish) originally referred to the skirt steak, a flavorful cut of beef grilled by Mexican cowboys, or “vaqueros.” Over time, the dish evolved, incorporating other meats like chicken and the now-iconic presentation on a sizzling platter.
What makes Chicken Fajitas so universally loved? It’s the combination of flavors and textures, the satisfying sizzle, and the interactive element of building your own perfect bite. The tender, juicy chicken, infused with smoky spices, pairs beautifully with the sweetness of the peppers and onions. Plus, the customizable nature of fajitas means everyone can add their favorite toppings, from creamy guacamole and sour cream to spicy salsa and shredded cheese. It’s a guaranteed crowd-pleaser that’s both delicious and fun to eat!

Ingredients:
- For the Chicken:
- 2 lbs boneless, skinless chicken breasts, cut into thin strips
- 2 tablespoons olive oil
- 1 large onion, thinly sliced
- 2 bell peppers (any color, or a mix), thinly sliced
- 2 cloves garlic, minced
- 1 packet (1 ounce) fajita seasoning
- 1 teaspoon chili powder
- 1/2 teaspoon cumin
- 1/4 teaspoon smoked paprika
- Salt and pepper to taste
- For the Tortillas:
- 12 flour tortillas (6-8 inch size)
- For the Toppings (optional):
- Sour cream or Greek yogurt
- Guacamole or sliced avocado
- Salsa
- Shredded cheese (cheddar, Monterey Jack, or a Mexican blend)
- Chopped cilantro
- Lime wedges
- Pickled jalapeños
Preparing the Chicken and Vegetables:
- Prepare the Chicken: Start by slicing your chicken breasts into thin strips. This helps them cook quickly and evenly. I find it easiest to partially freeze the chicken for about 30 minutes before slicing; it makes it much easier to handle. Place the sliced chicken in a large bowl.
- Season the Chicken: In a small bowl, combine the fajita seasoning, chili powder, cumin, smoked paprika, salt, and pepper. Mix well. Pour this seasoning mixture over the chicken strips and toss to coat evenly. Make sure every piece of chicken is nicely coated with the spices. This is where all the flavor comes from!
- Sauté the Vegetables: Heat the olive oil in a large skillet or cast-iron pan over medium-high heat. Once the oil is shimmering, add the sliced onions and bell peppers. Cook, stirring occasionally, until the vegetables are tender-crisp and slightly softened, about 5-7 minutes. You want them to have a little bit of char for that authentic fajita flavor.
- Add Garlic and Chicken: Add the minced garlic to the skillet and cook for about 30 seconds, until fragrant. Be careful not to burn the garlic! Then, add the seasoned chicken strips to the skillet with the vegetables.
- Cook the Chicken: Cook the chicken, stirring frequently, until it is cooked through and no longer pink inside. This usually takes about 5-7 minutes, depending on the thickness of your chicken strips and the heat of your pan. Make sure the internal temperature reaches 165°F (74°C) for safety.
- Combine and Simmer: Once the chicken is cooked, stir everything together well, ensuring the chicken and vegetables are evenly distributed. Reduce the heat to low and let it simmer for a few minutes to allow the flavors to meld together. This step is optional, but I think it really enhances the overall taste.
Warming the Tortillas:
- Choose Your Method: There are several ways to warm your tortillas. My favorite is to use a dry skillet or griddle. You can also warm them in the microwave or oven.
- Skillet/Griddle Method: Heat a dry skillet or griddle over medium heat. Place one tortilla at a time in the skillet and cook for about 20-30 seconds per side, until warmed through and slightly pliable. You might see some small bubbles forming, which is a good sign.
- Microwave Method: Wrap a stack of tortillas in a damp paper towel and microwave for about 30-60 seconds, or until warmed through. Be careful not to overheat them, as they can become tough.
- Oven Method: Wrap a stack of tortillas in foil and bake in a preheated oven at 350°F (175°C) for about 10-15 minutes, or until warmed through.
- Keep Warm: As you warm the tortillas, keep them wrapped in a clean kitchen towel or tortilla warmer to prevent them from drying out.
Assembling the Fajitas:
- Set Up Your Station: Arrange all your toppings in bowls or containers so everyone can easily customize their fajitas. This includes the sour cream, guacamole, salsa, shredded cheese, cilantro, lime wedges, and pickled jalapeños.
- Fill the Tortillas: Place a warmed tortilla on a plate. Spoon a generous amount of the chicken and vegetable mixture into the center of the tortilla. Don’t overfill it, or it will be difficult to roll up.
- Add Toppings: Add your desired toppings to the fajita. I like to start with a dollop of sour cream, followed by guacamole, salsa, and a sprinkle of shredded cheese and cilantro.
- Roll Up and Enjoy: Fold in the sides of the tortilla and then roll it up tightly from the bottom. Serve immediately with a lime wedge for squeezing over the top.
- Repeat: Repeat steps 2-4 for each fajita until all the chicken and vegetables are used up.
Tips and Variations:
- Marinating the Chicken: For even more flavor, you can marinate the chicken for at least 30 minutes, or even overnight, before cooking. A simple marinade of lime juice, olive oil, garlic, and fajita seasoning works wonders.
- Adding More Vegetables: Feel free to add other vegetables to your fajitas, such as mushrooms, zucchini, or corn.
- Spice Level: Adjust the amount of chili powder and smoked paprika to control the spice level. If you like it really spicy, add a pinch of cayenne pepper.
- Using Different Protein: You can easily substitute the chicken with steak, shrimp, or tofu. Just adjust the cooking time accordingly.
- Serving Suggestions: Serve your fajitas with a side of rice and beans for a complete meal.
- Make Ahead: The chicken and vegetable mixture can be made ahead of time and stored in the refrigerator for up to 3 days. Just reheat it before serving.
- Freezing: Cooked chicken and vegetable mixture can be frozen for up to 2 months. Thaw overnight in the refrigerator before reheating.
Enjoy your homemade Chicken Fajitas! They are perfect for a weeknight dinner or a fun weekend gathering.
Conclusion:
So there you have it! These Chicken Fajitas are more than just a meal; they’re an experience. From the sizzling sound of the chicken hitting the hot pan to the vibrant colors of the peppers and onions, and finally, the explosion of flavor in every bite, this recipe is a guaranteed crowd-pleaser. I truly believe this is a must-try recipe for anyone looking for a quick, easy, and incredibly delicious weeknight dinner.
Why are these Chicken Fajitas a must-try? Because they’re incredibly versatile! You can easily adapt them to your own taste preferences. Not a fan of bell peppers? Swap them out for zucchini or mushrooms. Want to add a little heat? Throw in a jalapeño or two. The possibilities are endless! Plus, the entire dish comes together in under 30 minutes, making it perfect for those busy evenings when you don’t have a lot of time to spend in the kitchen. And let’s be honest, who can resist the allure of a sizzling platter of fajitas?
Serving Suggestions and Variations:
Beyond the basic recipe, there are so many ways to customize your Chicken Fajitas. For a classic presentation, serve them with warm flour tortillas, sour cream, guacamole, salsa, and shredded cheese. But don’t stop there! Consider these variations:
* Spice it up: Add a pinch of cayenne pepper or a dash of hot sauce to the chicken marinade for an extra kick.
* Go vegetarian: Substitute the chicken with portobello mushrooms or black beans for a delicious vegetarian option.
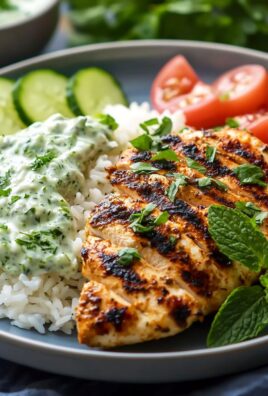
* Make it a bowl: Skip the tortillas altogether and serve the fajita mixture over rice or quinoa for a healthy and satisfying bowl.
* Add some fruit: A mango salsa or a pineapple salsa adds a touch of sweetness and acidity that complements the savory flavors perfectly.
* Creamy Cilantro-Lime Sauce: Whisk together sour cream, lime juice, cilantro, and a pinch of salt for a refreshing and tangy sauce.
* Grilled Corn Salsa: Grill corn on the cob until slightly charred, then cut the kernels off and mix with diced red onion, jalapeño, cilantro, and lime juice.
I also love to make a big batch of these Chicken Fajitas on the weekend and use the leftovers for lunches throughout the week. They’re great in salads, wraps, or even as a topping for nachos.
I’ve poured my heart into perfecting this recipe, and I’m confident that you’ll love it as much as I do. It’s a simple, straightforward recipe that delivers big on flavor. It’s the kind of meal that brings people together, encourages conversation, and leaves everyone feeling satisfied.
Now, it’s your turn! I encourage you to give these Chicken Fajitas a try. Don’t be afraid to experiment with different variations and make them your own. And most importantly, have fun in the kitchen!
Once you’ve made them, I’d love to hear about your experience. Did you make any modifications? What were your favorite toppings? Share your photos and stories in the comments below. I can’t wait to see what you create! Happy cooking!
Chicken Fajitas: The Ultimate Guide to Making Perfect Fajitas
Flavorful and easy chicken fajitas packed with tender chicken, colorful bell peppers, and onions, all seasoned with a delicious blend of spices. Perfect for a quick weeknight dinner or a fun gathering!
Ingredients
Instructions
Recipe Notes
- Marinating the Chicken: For even more flavor, marinate the chicken for at least 30 minutes, or even overnight, before cooking. A simple marinade of lime juice, olive oil, garlic, and fajita seasoning works wonders.
- Adding More Vegetables: Feel free to add other vegetables to your fajitas, such as mushrooms, zucchini, or corn.
- Spice Level: Adjust the amount of chili powder and smoked paprika to control the spice level. If you like it really spicy, add a pinch of cayenne pepper.
- Using Different Protein: You can easily substitute the chicken with steak, shrimp, or tofu. Just adjust the cooking time accordingly.
- Serving Suggestions: Serve your fajitas with a side of rice and beans for a complete meal.
- Make Ahead: The chicken and vegetable mixture can be made ahead of time and stored in the refrigerator for up to 3 days. Just reheat it before serving.
- Freezing: Cooked chicken and vegetable mixture can be frozen for up to 2 months. Thaw overnight in the refrigerator before reheating.


Leave a Comment