
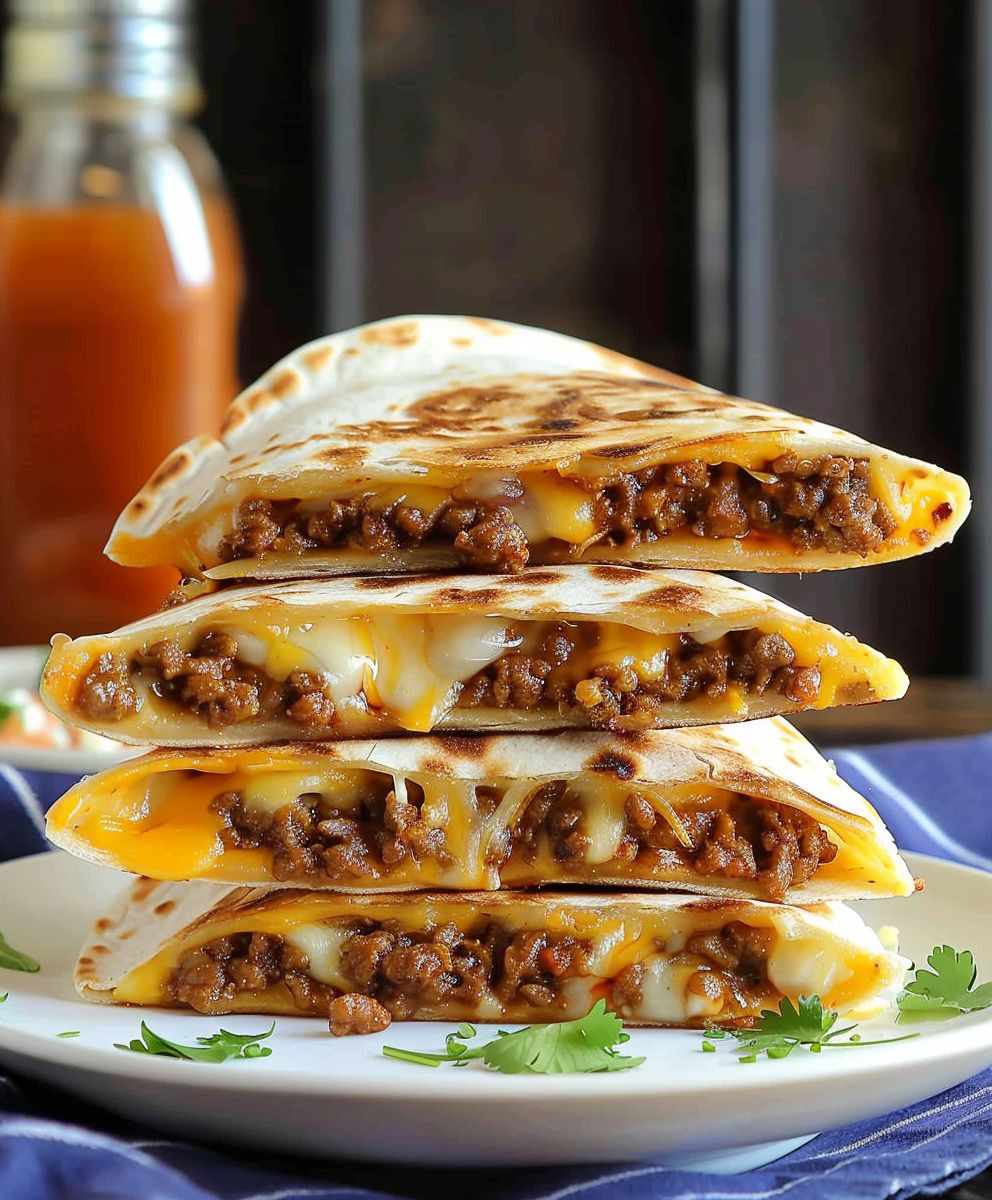
Cheesy Ground Beef Quesadillas: Prepare to embark on a culinary adventure that’s as quick and satisfying as it is delicious! Imagine sinking your teeth into a warm, golden tortilla, bursting with savory, seasoned ground beef and rivers of melted, gooey cheese. Is your mouth watering yet? Mine certainly is! This isn’t just a recipe; it’s a passport to a weeknight dinner that everyone in the family will adore.
The quesadilla, a cornerstone of Mexican cuisine, has a history as rich and layered as its fillings. Originating in Southern Mexico, the humble quesadilla has evolved from a simple corn tortilla filled with cheese to the globally recognized and endlessly customizable dish we know and love today. The beauty of the quesadilla lies in its versatility. While traditionally made with cheese, the addition of ground beef elevates it to a hearty and complete meal.
What makes cheesy ground beef quesadillas so irresistible? It’s the perfect combination of textures – the crispy tortilla, the tender beef, and the melty cheese – all harmonizing in a symphony of flavor. Plus, they’re incredibly convenient! Whether you’re a seasoned chef or a kitchen novice, this recipe is foolproof and ready in minutes. So, ditch the takeout menu and let’s create some magic in the kitchen with these amazing quesadillas!

Ingredients:
- 1 pound ground beef
- 1 medium onion, chopped
- 1 green bell pepper, chopped
- 1 (15 ounce) can black beans, rinsed and drained
- 1 (15 ounce) can corn, drained
- 1 (1 ounce) packet taco seasoning
- 1/2 cup water
- 1 tablespoon olive oil
- 1 teaspoon garlic powder
- 1/2 teaspoon cumin
- 1/4 teaspoon chili powder
- Salt and pepper to taste
- 12 large flour tortillas
- 4 cups shredded cheddar cheese
- Optional toppings: sour cream, salsa, guacamole, chopped cilantro
Preparing the Ground Beef Filling
Okay, let’s get started with the heart of our quesadillas – the savory ground beef filling! This is where all the flavor comes from, so we’ll take our time and build it up layer by layer. Trust me, it’s worth the effort!
- Brown the Ground Beef: In a large skillet over medium-high heat, add the olive oil. Once the oil is shimmering, add the ground beef. Break it up with a spoon and cook until it’s browned all over. Make sure to drain off any excess grease. Nobody wants greasy quesadillas!
- Sauté the Vegetables: Add the chopped onion and green bell pepper to the skillet with the browned ground beef. Cook, stirring occasionally, until the vegetables are softened and the onion is translucent, about 5-7 minutes. This step is crucial for adding sweetness and depth of flavor to the filling. Don’t rush it!
- Add the Beans and Corn: Now, stir in the rinsed and drained black beans and corn. These add texture and a touch of sweetness that complements the savory beef perfectly. Mix everything well to combine.
- Season Generously: This is where the magic happens! Sprinkle in the taco seasoning, garlic powder, cumin, and chili powder. Pour in the water and stir everything together. Bring the mixture to a simmer, then reduce the heat to low and let it simmer for about 10-15 minutes, or until the sauce has thickened slightly. This allows all the flavors to meld together beautifully.
- Taste and Adjust: Give the filling a taste and season with salt and pepper to your liking. Remember, you can always add more seasoning, but you can’t take it away! So, start with a little and adjust as needed.
Assembling the Quesadillas
Now that our delicious filling is ready, it’s time to assemble the quesadillas. This is the fun part! Get your tortillas and cheese ready, and let’s get started.
- Lay Out the Tortillas: Place a tortilla on a clean, flat surface. I like to work on a cutting board for easy cleanup.
- Add Cheese: Sprinkle about 1/2 cup of shredded cheddar cheese evenly over half of the tortilla. Make sure to leave a little space around the edge so the cheese doesn’t melt out when cooking.
- Spoon on the Filling: Spoon about 1/2 cup of the ground beef filling over the cheese. Spread it out evenly so that every bite is packed with flavor. Don’t overfill the tortilla, or it will be difficult to fold and cook.
- Top with More Cheese: Sprinkle another 1/4 cup of shredded cheddar cheese over the filling. This will help to hold everything together and create that gooey, cheesy goodness we all crave.
- Fold the Tortilla: Carefully fold the other half of the tortilla over the filling to create a half-moon shape. Press down gently to seal the edges.
- Repeat: Repeat steps 1-5 with the remaining tortillas, cheese, and filling.
Cooking the Quesadillas
Alright, we’re almost there! Now it’s time to cook these cheesy masterpieces. There are a few different ways you can cook quesadillas, but I prefer using a skillet for that perfect golden-brown crust.
- Heat the Skillet: Heat a large skillet or griddle over medium heat. You can lightly grease the skillet with cooking spray or a small amount of butter or oil. This will help prevent the quesadillas from sticking and give them a nice golden color.
- Cook the Quesadillas: Carefully place one or two quesadillas in the hot skillet. Don’t overcrowd the skillet, or the quesadillas won’t cook evenly.
- Cook Until Golden Brown: Cook for about 3-4 minutes per side, or until the tortilla is golden brown and the cheese is melted and gooey. Use a spatula to flip the quesadillas carefully.
- Press Down (Optional): If you want to ensure the cheese is fully melted and the quesadilla is nicely pressed, you can use a spatula to gently press down on the quesadilla while it’s cooking.
- Remove and Repeat: Remove the cooked quesadillas from the skillet and place them on a cutting board. Repeat steps 2-4 with the remaining quesadillas.
Serving and Enjoying
Congratulations, you’ve made delicious cheesy ground beef quesadillas! Now it’s time to serve them up and enjoy the fruits of your labor.
- Cut into Wedges: Use a sharp knife or pizza cutter to cut each quesadilla into wedges. I usually cut them into thirds or fourths, depending on the size of the quesadilla.
- Serve Immediately: Serve the quesadillas immediately while they’re hot and the cheese is melted and gooey.
- Add Toppings (Optional): Offer a variety of toppings for your guests to choose from, such as sour cream, salsa, guacamole, and chopped cilantro. These toppings add extra flavor and texture to the quesadillas.
- Enjoy! Dig in and enjoy your delicious homemade cheesy ground beef quesadillas! They’re perfect for a quick and easy weeknight meal, a party appetizer, or a fun snack.
Tips and Variations:
- Spice it up: Add a pinch of cayenne pepper or a dash of hot sauce to the ground beef filling for a spicier kick.
- Add more vegetables: Feel free to add other vegetables to the filling, such as diced tomatoes, jalapeños, or bell peppers of different colors.
- Use different cheeses: Experiment with different types of cheese, such as Monterey Jack, pepper jack, or a Mexican cheese blend.
- Make it vegetarian: Omit the ground beef and add more beans, corn, and vegetables for a vegetarian version.
- Grill the quesadillas: For a smoky flavor, grill the quesadillas over medium heat until golden brown and the cheese is melted.
- Bake the quesadillas: Preheat your oven to 350°F (175°C). Place the assembled quesadillas on a baking sheet and bake for 10-15 minutes, or until the cheese is melted and the tortillas are lightly browned.
Storage Instructions:
If you have any leftover quesadillas, you can store them in the refrigerator for up to 3 days. To reheat, you can microwave them, bake them in the oven, or cook them in a skillet until heated through.
Freezing Instructions:
You can also freeze the assembled quesadillas for longer storage. Wrap each quesadilla individually in plastic wrap and then place them in a freezer bag. They can be stored in the freezer for up to 2 months. To reheat, thaw the quesadillas in the refrigerator overnight and then cook them in a skillet or bake them in the oven until heated through.
Conclusion:
Okay, friends, let’s be honest: you’re probably already halfway to the kitchen after reading about these Cheesy Ground Beef Quesadillas. And you absolutely should be! This isn’t just another weeknight dinner; it’s a flavor explosion wrapped in a warm, comforting tortilla. The savory ground beef, the gooey, melty cheese, the hint of spice – it all comes together in perfect harmony. Trust me, once you take that first bite, you’ll understand why I’m so excited about this recipe.
What makes these quesadillas a must-try? It’s the simplicity, the speed, and the sheer deliciousness. We’re talking about a meal that’s ready in under 30 minutes, perfect for those busy evenings when you’re craving something satisfying but don’t want to spend hours in the kitchen. Plus, it’s incredibly versatile! You can easily customize the fillings to suit your taste. Not a fan of ground beef? Try shredded chicken or seasoned black beans. Want to kick up the heat? Add a pinch of cayenne pepper or a drizzle of your favorite hot sauce. The possibilities are endless!
Beyond the basic recipe, there are so many ways to elevate your Cheesy Ground Beef Quesadillas experience. For a truly decadent treat, try adding some caramelized onions and sautéed mushrooms to the filling. Or, for a lighter option, incorporate some chopped bell peppers and corn. Serving them is just as fun! I personally love to serve mine with a dollop of sour cream, a sprinkle of fresh cilantro, and a side of homemade guacamole. You could also offer a variety of dipping sauces, like salsa, queso, or even a creamy avocado ranch. And don’t forget the sides! A simple salad or some Mexican rice would be the perfect complement to these cheesy delights.
Here are a few more serving suggestions to get your creative juices flowing:
- Quesadilla Pizza: Cut the quesadillas into wedges and serve them as a fun and interactive appetizer.
- Quesadilla Bar: Set up a quesadilla bar with a variety of fillings and toppings, allowing everyone to create their own personalized masterpiece.
- Breakfast Quesadillas: Scramble some eggs and add them to the filling for a hearty and satisfying breakfast.
- Grilled Quesadillas: For an extra smoky flavor, grill the quesadillas instead of cooking them in a skillet.
I’m genuinely excited for you to try this recipe and make it your own. I know you’ll love the combination of flavors and the ease of preparation. So, go ahead, gather your ingredients, and get ready to create some seriously delicious Cheesy Ground Beef Quesadillas. And most importantly, don’t forget to share your experience! I’d love to hear what variations you tried, what dipping sauces you loved, and what your family thought. Tag me in your photos on social media – I can’t wait to see your creations! Happy cooking!
Cheesy Ground Beef Quesadillas: The Ultimate Recipe Guide
Quick and easy cheesy ground beef quesadillas, perfect for a weeknight meal or party appetizer! Filled with savory ground beef, beans, corn, and plenty of melted cheddar cheese.
Ingredients
Instructions
Recipe Notes
- Spice it up: Add a pinch of cayenne pepper or a dash of hot sauce to the ground beef filling for a spicier kick.
- Add more vegetables: Feel free to add other vegetables to the filling, such as diced tomatoes, jalapeños, or bell peppers of different colors.
- Use different cheeses: Experiment with different types of cheese, such as Monterey Jack, pepper jack, or a Mexican cheese blend.
- Make it vegetarian: Omit the ground beef and add more beans, corn, and vegetables for a vegetarian version.
- Grill the quesadillas: For a smoky flavor, grill the quesadillas over medium heat until golden brown and the cheese is melted.
- Bake the quesadillas: Preheat your oven to 350°F (175°C). Place the assembled quesadillas on a baking sheet and bake for 10-15 minutes, or until the cheese is melted and the tortillas are lightly browned.
- Storage Instructions: If you have any leftover quesadillas, you can store them in the refrigerator for up to 3 days. To reheat, you can microwave them, bake them in the oven, or cook them in a skillet until heated through.
- Freezing Instructions: You can also freeze the assembled quesadillas for longer storage. Wrap each quesadilla individually in plastic wrap and then place them in a freezer bag. They can be stored in the freezer for up to 2 months. To reheat, thaw the quesadillas in the refrigerator overnight and then cook them in a skillet or bake them in the oven until heated through.


Leave a Comment