
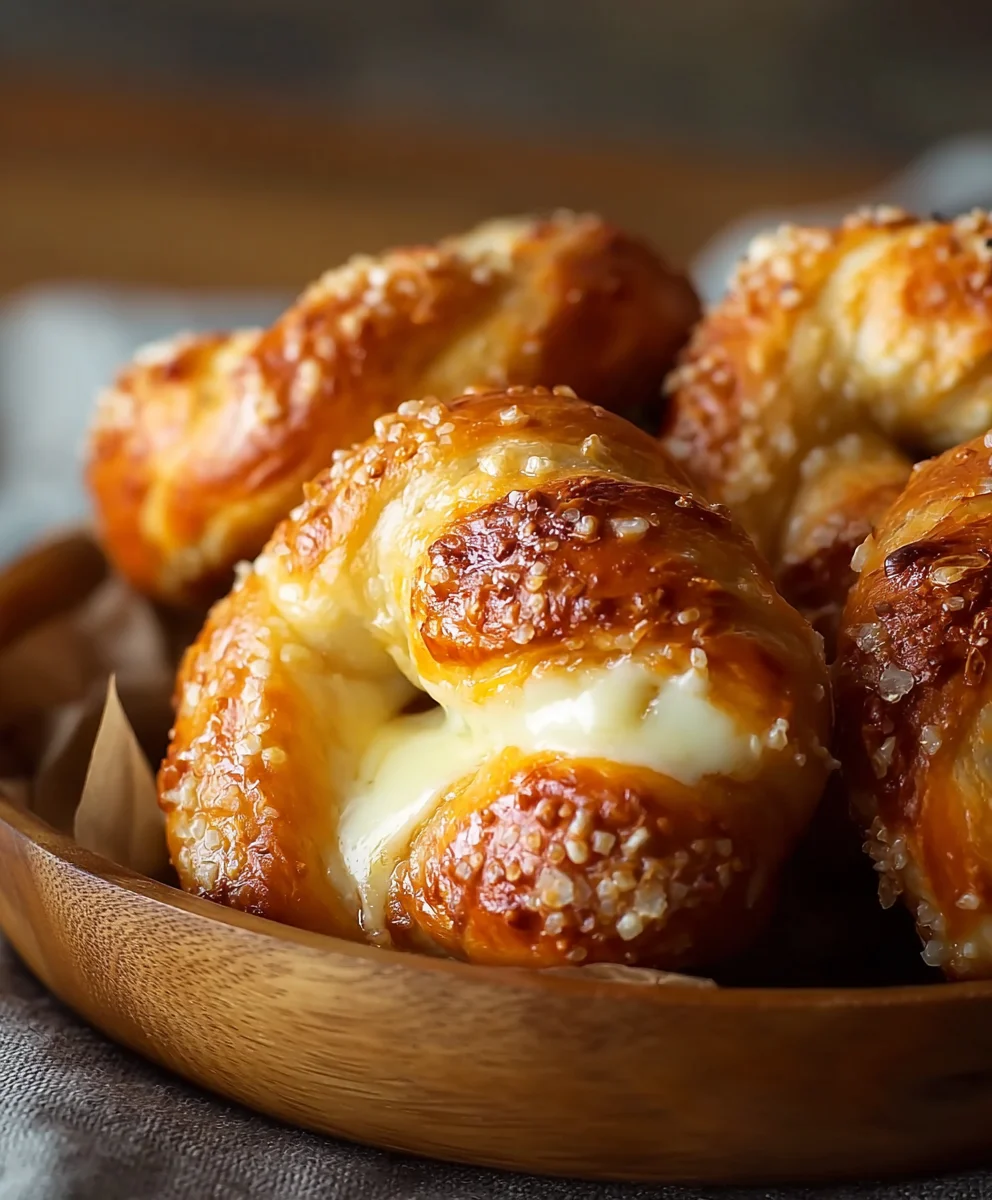
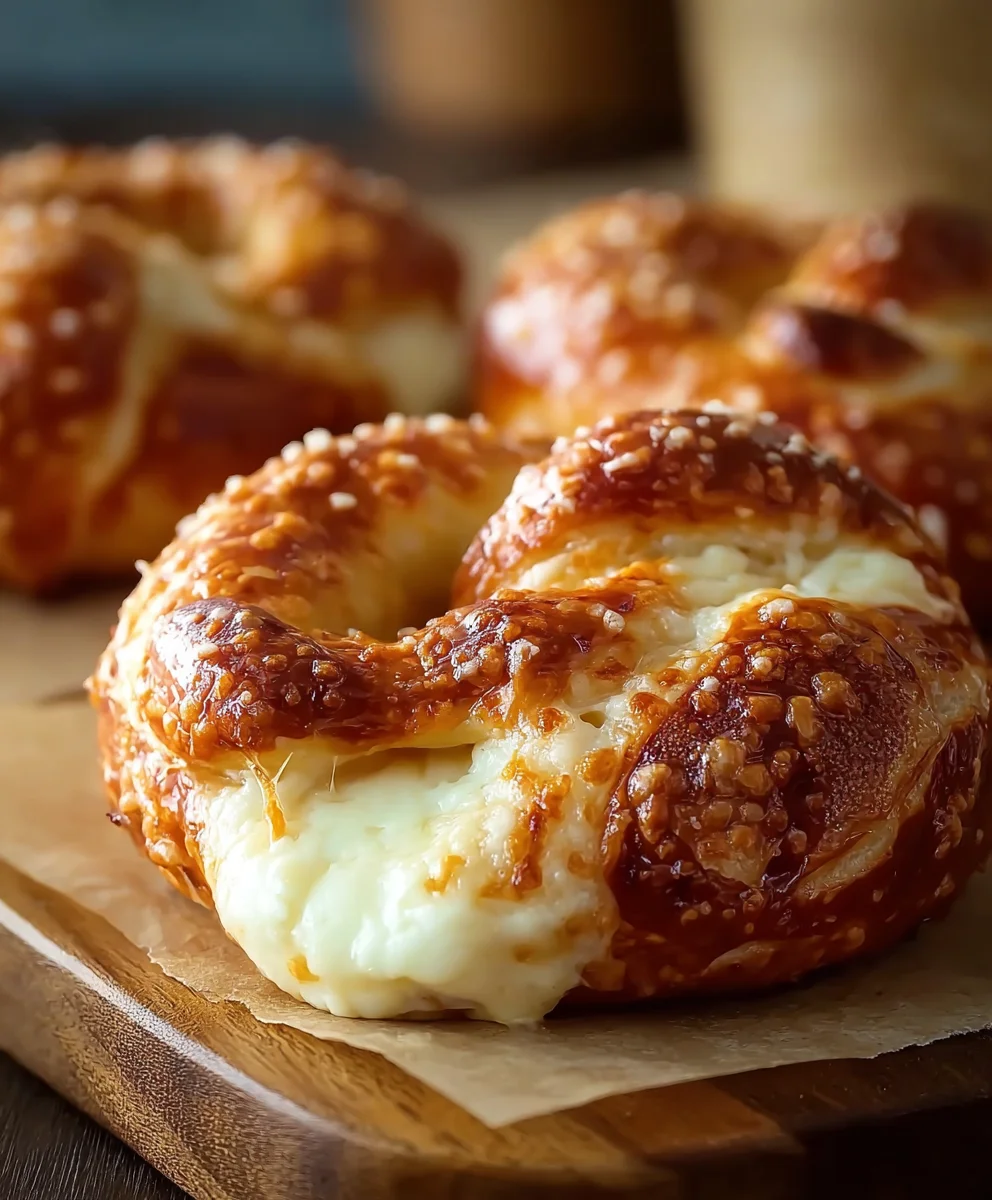
Cheese Stuffed Pretzels An Amazing Ultimate Recipe is more than just a dish; it’s an experience waiting to unfold in your kitchen. Imagine sinking your teeth into a perfectly golden-brown, soft pretzel, only to discover a warm, gooey, molten cheese center bursting with flavor. Forget those dry, supermarket varieties – this is about crafting a snack that will elevate your next gathering, game night, or simply provide the ultimate comfort food indulgence.
The pretzel itself boasts a fascinating lineage, with origins stretching back to European monasteries, where they were often shaped to resemble arms crossed in prayer. From these humble beginnings, pretzels have evolved into a beloved global phenomenon, adored for their unique chewy texture and signature salty crust. But we’re taking that classic comfort and giving it an irresistible upgrade, making it truly your own.
What makes these cheese stuffed pretzels so incredibly special? It’s the delightful contrast: the slightly crisp exterior giving way to a wonderfully soft, bready interior, all beautifully complemented by the savory explosion of melting cheese within. People adore this dish not only for its incredible taste and satisfying texture but also for the pure joy it brings. It’s a dish that encourages sharing, sparking conversations and smiles. Get ready to transform your understanding of a simple pretzel with this truly amazing ultimate recipe that promises homemade deliciousness and an unforgettable bite every time.

Ingredients:
-
For the Pretzel Dough:
- Warm Water: 1 ½ cups (about 105-115°F / 40-46°C). It’s crucial for activating the yeast, so grab a thermometer!
- Active Dry Yeast: 2 ¼ teaspoons (one standard packet). Make sure it’s fresh!
- Granulated Sugar: 1 teaspoon. A little food for our yeast, it helps wake it up.
- All-Purpose Flour: 4 ½ – 5 cups, plus extra for dusting. I always start with 4 ½ and add more as needed.
- Kosher Salt: 2 teaspoons. Essential for flavor balance in the dough.
- Unsalted Butter: 2 tablespoons, melted and slightly cooled. This adds richness and tenderness.
-
For the Irresistible Cheese Filling:
- Sharp Cheddar Cheese: 1 cup, freshly shredded. Sharpness really stands out!
- Mozzarella Cheese: 1 cup, freshly shredded. For that amazing, gooey stretch.
- Cream Cheese: 4 ounces (half a standard block), softened at room temperature. This makes the filling extra creamy and manageable.
- Garlic Powder: ½ teaspoon. A touch of savory goodness.
- Onion Powder: ½ teaspoon. Complements the garlic beautifully.
- Black Pepper: ¼ teaspoon, freshly ground. Adds a subtle kick.
- Pinch of Kosher Salt: To enhance all those lovely cheese flavors.
-
For the Traditional Pretzel Water Bath:
- Water: 8 cups (2 quarts).
- Baking Soda: ½ cup. This is what gives pretzels their signature dark, chewy crust.
-
For the Topping and Finish:
- Large Egg: 1, beaten with 1 tablespoon of water (egg wash). For that beautiful golden sheen.
- Pretzel Salt or Coarse Sea Salt: For sprinkling, to get that authentic pretzel texture and taste.
- Melted Butter: 2 tablespoons, for brushing on after baking (optional, but highly recommended for extra richness).
Dough Preparation: The Foundation of Our Amazing Cheese Stuffed Pretzels
Creating the perfect dough is the first and most critical step in crafting an amazing ultimate recipe for Cheese Stuffed Pretzels. Don’t rush this part; patience will be rewarded with a wonderfully pliable and flavorful foundation.
-
Activating the Yeast: Giving Our Dough Life
In a large mixing bowl (or the bowl of a stand mixer), combine your 1 ½ cups of warm water, 1 teaspoon of granulated sugar, and 2 ¼ teaspoons of active dry yeast. The water temperature is key here: too hot, and you’ll kill the yeast; too cold, and it won’t activate. Aim for that comfortable bathwater temperature of 105-115°F (40-46°C). Give it a gentle stir and then let it sit undisturbed for about 5-10 minutes. You’ll know your yeast is alive and well when it becomes foamy and bubbly on the surface. If it doesn’t foam, your yeast might be old, or your water temperature was off, and it’s best to start this step over. This initial proofing ensures our pretzels will be light and airy inside.
-
Mixing the Dough: Bringing It All Together
Once your yeast is active, it’s time to build the dough. To the foamy yeast mixture, add your 2 teaspoons of kosher salt and 2 tablespoons of melted and slightly cooled unsalted butter. Give it another quick stir. Now, gradually add your all-purpose flour, starting with about 3 cups. Mix with a wooden spoon or the dough hook attachment of your stand mixer on low speed until a shaggy dough forms. I always add the flour a cup at a time, allowing each addition to incorporate before adding more. This helps prevent over-flouring the dough too early.
-
Kneading to Perfection: Developing Gluten for Chewiness
Once the dough comes together, turn it out onto a lightly floured surface. Begin to knead the dough. If you’re using a stand mixer, increase the speed to medium-low and let the dough hook do the work. Knead for about 8-10 minutes. If kneading by hand, push the dough away from you with the heel of your hand, fold it back over, turn it a quarter turn, and repeat. Continue to add the remaining flour, a tablespoon at a time, only if the dough is excessively sticky. The goal is to achieve a smooth, elastic dough that is still slightly tacky but no longer sticks to your hands or the bowl. When you press it with your finger, it should spring back slowly. Proper kneading is crucial for the pretzel’s texture – it develops the gluten, which gives pretzels their signature chewiness.
-
First Rise: Building Flavor and Volume
Lightly grease a large bowl with a little oil or cooking spray. Place your kneaded dough into the bowl, turning it once to coat the top. Cover the bowl tightly with plastic wrap or a clean kitchen towel. Let the dough rise in a warm, draft-free place for 60-90 minutes, or until it has doubled in size. A slightly warm oven (turned off, with just the light on) is an ideal spot for this. This first rise allows the yeast to ferment, developing deeper flavors in our dough, which is essential for these ultimate Cheese Stuffed Pretzels. Don’t skip this critical step for flavor development!
Preparing the Irresistible Cheese Filling: The Heart of Our Pretzels
While your dough is happily rising, let’s turn our attention to the star of the show: the cheese filling! This blend will provide an explosion of flavor and a wonderfully gooey texture when baked into your pretzels.
-
Mixing the Cheeses: A Harmonious Blend
In a medium-sized bowl, combine your 1 cup of freshly shredded sharp cheddar cheese, 1 cup of freshly shredded mozzarella cheese, and 4 ounces of softened cream cheese. Make sure your cream cheese is at room temperature; this will make it much easier to blend smoothly with the other cheeses, preventing lumps.
-
Seasoning for Punch: Elevating the Flavor Profile
To the cheese mixture, add ½ teaspoon of garlic powder, ½ teaspoon of onion powder, ¼ teaspoon of freshly ground black pepper, and a small pinch of kosher salt. Using a fork or your clean hands, mix all the ingredients thoroughly until they are well combined and the cream cheese is evenly distributed. You want a cohesive mixture that will hold its shape when you’re stuffing the pretzels. Taste a tiny bit and adjust seasonings if you wish, but remember the pretzel salt will add more saltiness later. Set this aside; it’s ready to bring an amazing cheesy surprise to our pretzels!
Shaping and Stuffing: Crafting Your Ultimate Cheese Stuffed Pretzels
This is where our amazing Cheese Stuffed Pretzels truly begin to take form. It requires a bit of finesse, but the result – a perfectly sealed, cheesy center – is absolutely worth the effort. Get ready to transform your dough into beautiful, cheesy delights!
-
Dividing the Dough: Setting the Stage
Once your dough has doubled in size, gently punch it down to release the air. Turn the dough out onto a lightly floured surface. Using a sharp knife or a bench scraper, divide the dough into 10-12 equal pieces. For truly uniform pretzels, I sometimes use a kitchen scale to ensure each piece weighs roughly the same (around 3-4 ounces each). Roll each piece into a small, tight ball and cover them with a clean kitchen towel to prevent them from drying out while you work.
-
Rolling and Flattening: Creating the Canvas
Take one ball of dough and, on your lightly floured surface, roll it out into a rectangle about 6-8 inches long and 4-5 inches wide. You want it relatively thin, about ¼ inch thick, but not so thin that it tears when you stretch it. The goal is to create enough surface area for a good amount of filling.
-
Filling and Sealing: Encapsulating the Gooey Goodness
Spoon about 1 ½ to 2 tablespoons of your prepared cheese filling down the center of the rolled-out dough rectangle, leaving about ½ inch of space on all sides. Be careful not to overfill, or it might burst during baking. Now, gently fold one long edge of the dough over the filling to meet the other long edge. Pinch the seam very firmly to seal the cheese inside. Then, pinch the short ends closed as well, ensuring the cheese is completely encased. You should now have a cheese-filled log of dough. A tight seal is paramount here to prevent any cheesy escapes during the water bath and baking! Roll the log gently on your surface a few times to further seal and lengthen it to about 18-20 inches, trying to keep the thickness even throughout.
-
The Classic Pretzel Twist: Artful Shaping
To form the classic pretzel shape, pick up one end of your dough rope in each hand. Cross the ends over each other to form an “X” shape. Then, twist them once more, bringing the ends down towards the bottom of the pretzel. Press the ends firmly onto the bottom curve of the pretzel to secure them. You want them to stick well so they don’t unravel. Gently transfer your formed pretzels to a parchment-lined baking sheet. Leave a little space between each pretzel. Repeat this process with the remaining dough and filling. Once all your pretzels are shaped, cover them loosely with plastic wrap and let them rest for about 10-15 minutes. This brief rest helps them hold their shape and slightly relaxes the gluten before their critical bath.
The Lye (or Baking Soda) Bath: Achieving that Signature Pretzel Crust
This is the secret step that gives pretzels their distinctive dark brown, shiny, and chewy crust. While traditional pretzels use a lye bath (sodium hydroxide), we’re opting for a safer, equally effective baking soda bath. This bath is essential for an authentic pretzel experience with your ultimate Cheese Stuffed Pretzels.
-
Preparing the Bath: Heat Things Up
While your shaped pretzels are resting, preheat your oven to 450°F (230°C). Line two large baking sheets with parchment paper and lightly spray them with non-stick cooking spray (even with parchment, a little spray helps prevent sticking after the bath). In a large, wide pot (I use a Dutch oven), bring 8 cups (2 quarts) of water to a rolling boil. Once boiling, carefully and slowly add the ½ cup of baking soda. Be cautious, as the mixture will foam up significantly! Reduce the heat to a simmer, just enough to keep the water hot but not furiously boiling.
-
The Quick Dip: Transforming the Dough
Using a large slotted spatula or a spider strainer, carefully lower one or two pretzels into the simmering baking soda bath. Do not overcrowd the pot. Let each pretzel simmer for about 20-30 seconds per side, gently flipping them halfway through. You’ll notice them start to puff up slightly and take on a slightly slicker, more opaque appearance. Do not leave them in for too long, as this can make them taste soapy. Carefully remove the pretzels from the bath, allowing any excess liquid to drip off, and transfer them back to your prepared baking sheets. The baking soda bath is absolutely critical for achieving that beautiful, dark brown crust and classic pretzel flavor.
Baking Your Golden-Brown Delights
With the bath completed, it’s time to send your Cheese Stuffed Pretzels into the oven to achieve that glorious golden-brown color and gooey cheesy center. This is where the magic truly happens!
-
Preheating and Prep: Readying for the Oven
Ensure your oven is fully preheated to 450°F (230°C). In a small bowl, whisk together your large egg with 1 tablespoon of water to create an egg wash. This egg wash is what will give our pretzels that beautiful, shiny, deep brown finish. Once your pretzels are on the baking sheets, brush the tops and sides of each pretzel generously with the egg wash. This not only aids in browning but also helps the pretzel salt adhere.
-
Adding Toppings: The Finishing Touch Before Baking
Immediately after brushing with the egg wash, sprinkle a generous amount of pretzel salt or coarse sea salt over the top of each pretzel. Don’t be shy here; the salt is part of the classic pretzel experience. If you’re not a fan of too much salt, you can, of course, adjust the amount to your preference. Now, using a sharp knife, make a small, shallow cut or two on the thickest part of each pretzel (often on the bottom loop). This helps the pretzel expand evenly and prevents the cheese from bursting through uncontrolled spots.
-
Baking Time and Temperature: Achieving Perfection
Carefully transfer your baking sheets to the preheated oven. Bake for 12-15 minutes, or until the pretzels are a deep, rich golden brown. Baking times can vary depending on your oven, so keep an eye on them after the 10-minute mark. You want them well-browned for that authentic pretzel crust. The cheese inside will be wonderfully melted and bubbly. Rotate the baking sheets halfway through baking for even browning. When they emerge from the oven, they will look absolutely glorious and smell incredible – a true ultimate recipe success!
Serving and Enjoying Your Homemade Cheese Stuffed Pretzels
Congratulations! You’ve successfully created an amazing ultimate recipe for Cheese Stuffed Pretzels. Now for the best part: enjoying your culinary masterpiece!
-
Cooling (If You Can Wait!): A Moment of Patience
Once baked, transfer the pretzels to a wire rack to cool for at least 5-10 minutes. This allows the cheese filling to set slightly, preventing it from oozing out excessively when you take that first glorious bite. While they’re still warm, if you desire an extra layer of richness, brush them with 2 tablespoons of melted butter. This step is optional, but I find it adds a lovely sheen and another dimension of flavor that elevates these to truly amazing Cheese Stuffed Pretzels.
-
Serving Suggestions: The Perfect Accompaniments
These Cheese Stuffed Pretzels are fantastic on their own, fresh from the oven, where the cheese is perfectly gooey. However, if you want to elevate the experience even further, here are a few ideas:
- Mustard Dip: A classic pairing! Try a spicy brown mustard, honey mustard, or a grainy Dijon.
- Marinara Sauce: For a pizza-like twist, especially with the mozzarella inside.
- Ranch Dressing: A creamy, cool dip provides a nice contrast to the warm, salty pretzel.
- Beer Cheese Dip: If you’re feeling extra indulgent, a warm beer cheese dip complements these pretzels perfectly.
These pretzels are best enjoyed warm on the day they are made, when the cheese is at its peak gooeyness. Leftovers can be stored in an airtight container at room temperature for a day or two and reheated gently in the oven or microwave, but nothing beats that fresh-baked experience. Get ready to impress yourself and anyone lucky enough to try this amazing ultimate recipe for Cheese Stuffed Pretzels!
Conclusion:
If there’s one thing I want you to take away from this culinary journey, it’s that the humble pretzel, when perfectly paired with a molten, savory cheese filling, transforms into an absolutely unforgettable experience. We’re not just talking about a snack here; we’re talking about a moment of pure, unadulterated comfort and joy. I truly believe that once you pull these golden, chewy beauties from your oven, their aroma filling every corner of your home, you’ll understand why I’m so passionate about this creation. The satisfaction of biting into that perfectly crisp exterior, followed by the pillowy, soft interior, and then hitting that glorious, gooey, perfectly seasoned cheese core… it’s a revelation. This recipe isn’t just about making pretzels; it’s about crafting an edible masterpiece that will undoubtedly impress anyone fortunate enough to try it. The combination of textures – the slight chewiness of the crust, the tender crumb within, and the luxurious, stretchy cheese – is simply divine. It’s a sensory feast that elevates a simple snack into something truly extraordinary.
Elevate Your Snacking Experience
This recipe truly represents the pinnacle of savory baking, offering a delightful balance of saltiness and a rich, creamy cheese flavor that is incredibly addictive. It’s perfect for so many occasions, or even for no occasion at all, other than the desire for something truly delicious. For your next game day gathering, these are an absolute touchdown! Imagine your guests’ faces lighting up as they reach for these warm, irresistible treats. They make a fantastic appetizer for dinner parties, a sophisticated yet comforting addition to a brunch spread, or simply the ultimate after-school snack for the kids (and adults, let’s be honest!). I love serving them alongside a trio of dipping sauces: a tangy whole grain mustard, a rich, robust marinara, and perhaps even a homemade beer cheese dip to really amplify the experience. Don’t be afraid to get creative here! A little dish of spicy sriracha mayo or a sweet and sour honey mustard can also offer delightful contrasts, allowing your guests to customize their flavor adventure. These pretzels also pair wonderfully with a crisp, cold craft beer or a glass of your favorite chilled cider, making them an ideal accompaniment for a relaxed evening in.
Unleash Your Inner Chef with Creative Variations
One of the most exciting aspects of this recipe is its incredible versatility. While the core “Cheese Stuffed Pretzels An Amazing Ultimate Recipe” stands strong on its own, it’s also an excellent canvas for your culinary imagination. Feel free to experiment with different types of cheese or cheese blends. A sharp cheddar can provide a more assertive flavor, while a mix of mozzarella and provolone will give you an even stretchier, milder melt. For a touch of heat, try adding finely diced jalapeños to your cheese filling, or a pinch of red pepper flakes. Bacon bits, crumbled sausage, or even thinly sliced pepperoni can transform these into a more substantial, meal-worthy treat. Don’t forget the outside too! Beyond the classic coarse salt, consider an “everything bagel” seasoning mix for an extra layer of savory complexity, or toasted sesame seeds for a nutty crunch. For those with a sweet tooth, why not venture into a dessert pretzel? Skip the coarse salt, brush with butter after baking, and dust generously with cinnamon sugar, perhaps stuffing them with cream cheese or a fruit preserve for a truly indulgent twist. The possibilities are genuinely endless, and each variation promises a new delightful discovery. This adaptability is what makes this particular recipe so much more than just a guideline; it’s a foundation for endless deliciousness.
I genuinely hope you feel inspired to roll up your sleeves and give this recipe a try. Don’t be intimidated by the yeast or the shaping; I promise you, the process is incredibly rewarding, and the end result is absolutely worth every moment. There’s a unique satisfaction that comes from creating something so delicious from scratch, especially something that brings so much joy to those who taste it. This isn’t just baking; it’s creating edible happiness. I’ve poured my heart into perfecting this method, and I truly believe it will become a staple in your kitchen. So, gather your ingredients, set aside some time, and prepare to embark on a truly delicious adventure. Once you’ve experienced the magic of these homemade, cheese-filled wonders, I would absolutely love to hear about it! Please don’t hesitate to share your experiences, your successes, and any creative variations you come up with. Tag me, share your photos, and let’s celebrate the incredible satisfaction of making something truly amazing together. Happy baking!
Cheese Stuffed Pretzels: Ultimate Flavor & Easy Recipe!
Craft amazing homemade cheese stuffed pretzels with a golden-brown, soft exterior and a warm, gooey, molten cheese center. This ultimate recipe is perfect for gatherings, game nights, or as an irresistible comfort food indulgence, promising an unforgettable bite every time.
Ingredients
-
1 ½ cups Warm Water (105-115°F)
-
2 ¼ tsp Active Dry Yeast
-
1 tsp Granulated Sugar
-
4 ½ – 5 cups All-Purpose Flour
-
2 tsp Kosher Salt
-
2 tbsp Unsalted Butter (melted)
-
1 cup Sharp Cheddar Cheese (shredded)
-
1 cup Mozzarella Cheese (shredded)
-
4 oz Cream Cheese (softened)
-
½ tsp Garlic Powder
-
½ tsp Onion Powder
-
¼ tsp Black Pepper
-
Pinch of Kosher Salt
-
8 cups Water (for bath)
-
½ cup Baking Soda
-
1 Large Egg (beaten with 1 tbsp water)
-
Pretzel Salt or Coarse Sea Salt
-
2 tbsp Melted Butter (optional, for brushing)
Instructions
-
Step 1
In a large bowl, combine 1 ½ cups warm water (105-115°F), 1 tsp sugar, and 2 ¼ tsp yeast. Let sit 5-10 min until foamy. -
Step 2
Add 2 tsp kosher salt and 2 tbsp melted butter to yeast mixture. Gradually add 4 ½ – 5 cups flour, mixing until shaggy dough forms. Knead for 8-10 min until smooth, elastic, and slightly tacky. -
Step 3
Lightly grease a bowl, place dough, cover, and let rise in a warm, draft-free place for 60-90 min until doubled. -
Step 4
In a medium bowl, combine 1 cup shredded sharp cheddar, 1 cup shredded mozzarella, 4 oz softened cream cheese, ½ tsp garlic powder, ½ tsp onion powder, ¼ tsp black pepper, and a pinch of kosher salt. Mix thoroughly. -
Step 5
Punch down risen dough, divide into 10-12 equal pieces (3-4 oz each). Roll each piece into a 6-8 inch long, 4-5 inch wide rectangle (approx. ¼ inch thick). -
Step 6
Spoon 1 ½ – 2 tbsp cheese filling down the center. Fold one long edge of dough over filling to meet the other, pinching firmly to seal all edges, forming a log. Gently roll log to about 18-20 inches, maintaining even thickness. -
Step 7
Cross ends of the dough log to form an ‘X’, twist once, and bring ends down to press firmly onto the bottom curve of the pretzel. Transfer to parchment-lined baking sheets. Repeat for remaining dough. Cover and let rest 10-15 min. -
Step 8
Preheat oven to 450°F (230°C). Line two baking sheets with parchment. In a large pot, bring 8 cups water to a rolling boil. Carefully add ½ cup baking soda (it will foam). Reduce heat to a simmer. -
Step 9
Using a slotted spatula, lower 1-2 pretzels into simmering bath. Simmer 20-30 seconds per side, flipping once. Remove, drain excess liquid, and place on prepared baking sheets. -
Step 10
Whisk 1 egg with 1 tbsp water for egg wash. Brush generously over pretzels. Sprinkle with pretzel or coarse sea salt. Make 1-2 shallow cuts on the thickest part of each pretzel. -
Step 11
Bake in preheated oven for 12-15 min, or until deep golden brown, rotating halfway through. -
Step 12
Transfer pretzels to a wire rack to cool 5-10 min. (Optional: Brush with 2 tbsp melted butter while warm). Serve warm with mustard, marinara, or ranch dip. Best enjoyed fresh.
Important Information
Nutrition Facts (Per Serving)
It is important to consider this information as approximate and not to use it as definitive health advice.
Allergy Information
Please check ingredients for potential allergens and consult a health professional if in doubt.


Leave a Comment