
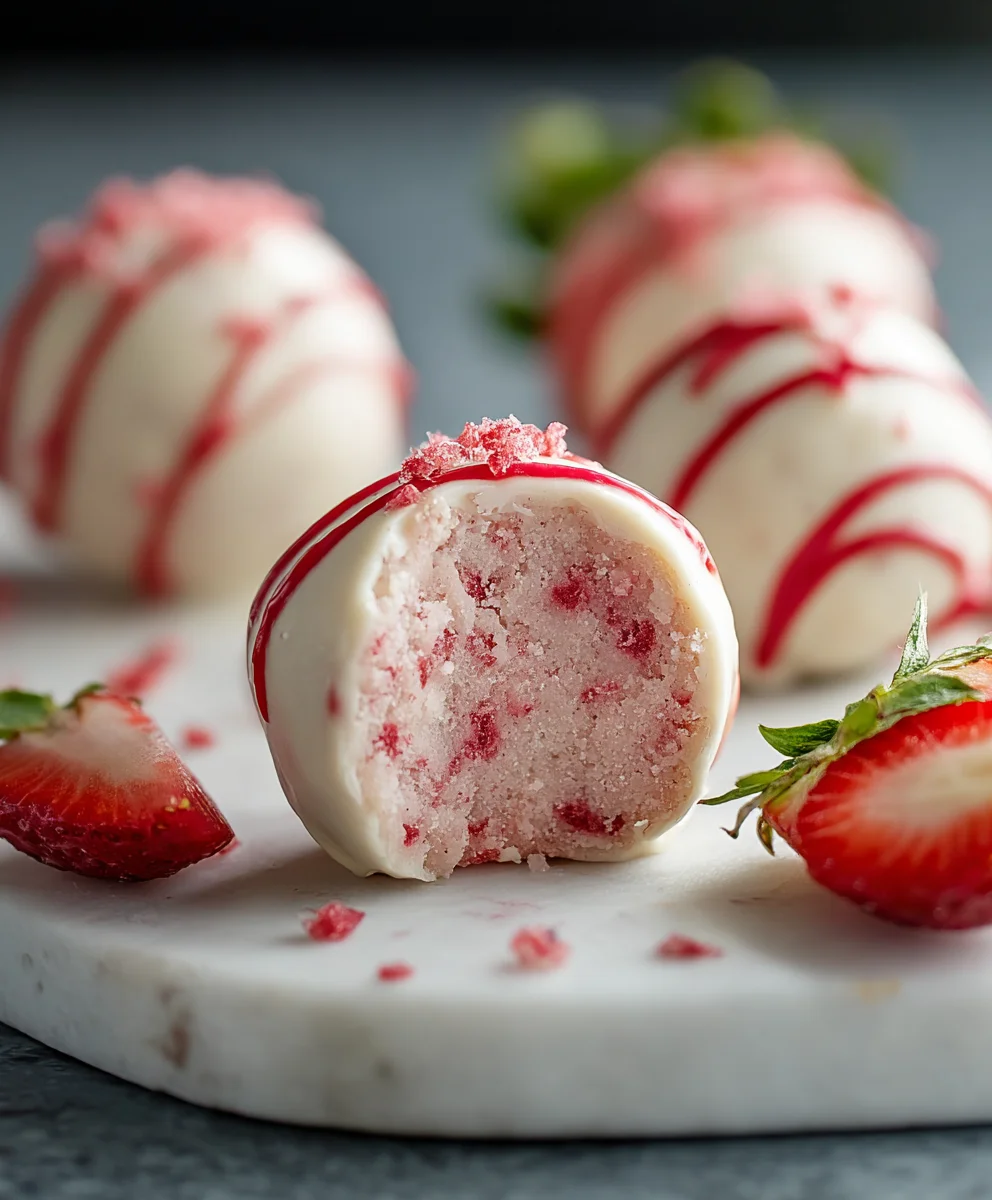
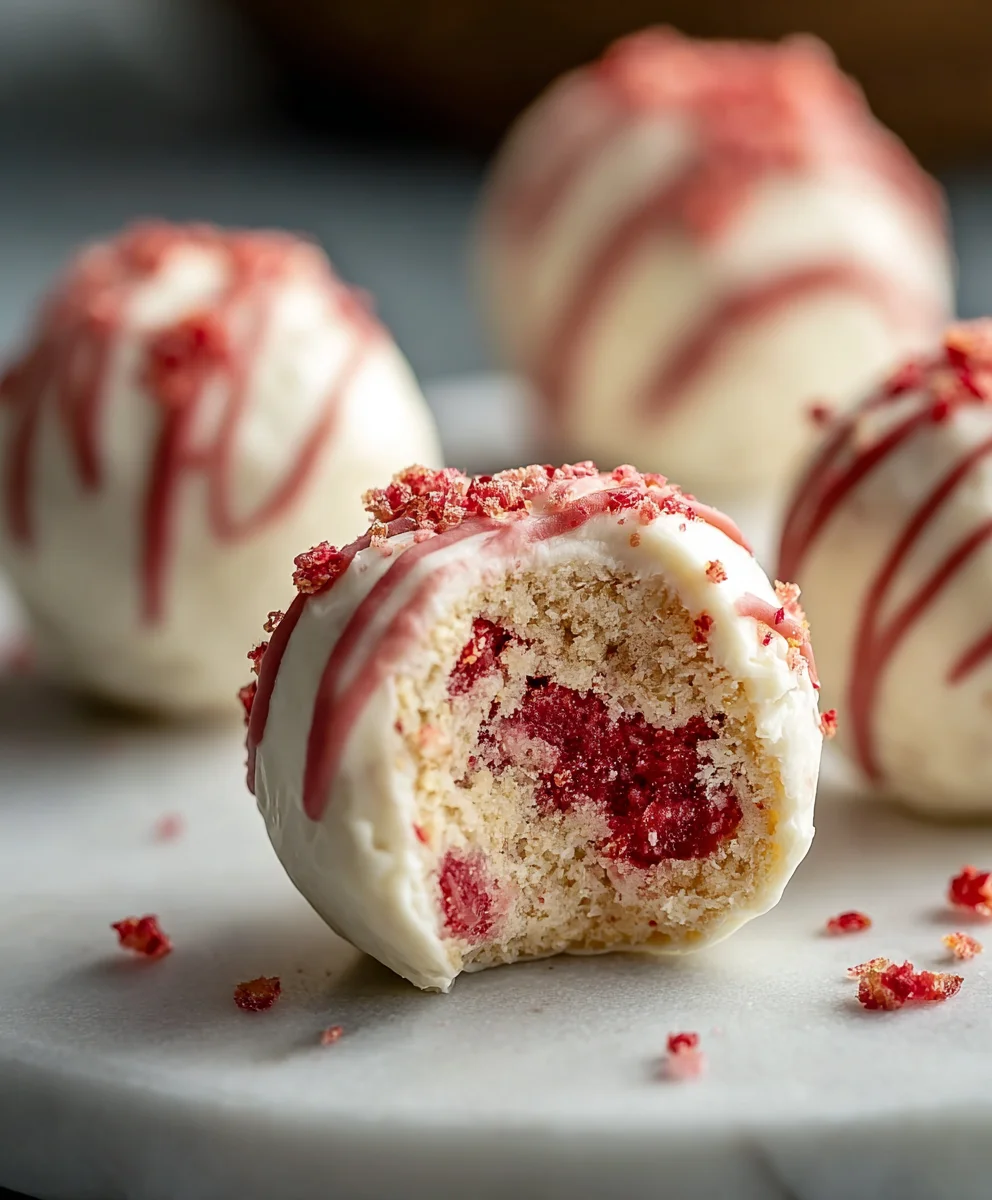
Delicious Strawberry Cheesecake Protein Balls are here to revolutionize your snack game! I am absolutely thrilled to share a recipe that perfectly marries the luscious, creamy taste of a classic strawberry cheesecake with the convenience and powerful nutritional punch of a protein-packed bite. Imagine indulging in a rich, fruity dessert experience without the guilt or the extensive baking time – that’s precisely what these delightful treats offer. They aren’t just another healthy snack; they are a vibrant celebration of flavor, meticulously designed to satisfy your sweet cravings while fueling your body with essential protein. In our increasingly busy modern lives, the demand for quick, wholesome options has never been higher, and protein balls have emerged as a highly popular, go-to solution for many health-conscious individuals seeking energy on the go. What makes these particular treats so incredibly special is their uncanny ability to capture that unmistakable tangy-sweet cheesecake essence, beautifully infused with fresh strawberry notes, all rolled into a convenient, no-bake ball. People adore them for their incredible texture, the burst of familiar yet fresh flavor, and the sheer ease with which they can be prepared and enjoyed. Whether you need a satisfying post-workout refuel, a delicious mid-afternoon pick-me-up, or a truly guilt-free dessert, these Delicious Strawberry Cheesecake Protein Balls are an absolute winner that you’ll want to make again and again. Get ready to fall head over heels for your new favorite healthy indulgence!

Ingredients:
- 1 cup (approx. 90-100g) Vanilla Protein Powder: I always reach for a high-quality vanilla whey or casein protein powder for these Delicious Strawberry Cheesecake Protein Balls. If you’re opting for a plant-based protein, be mindful that it might absorb liquid differently, so you might need to adjust the amount of milk slightly. The vanilla flavor forms a beautiful base for our cheesecake profile.
- 4 oz (113g) Light Cream Cheese, softened: Make sure your cream cheese is at room temperature. This is crucial for a smooth, lump-free mixture. I find light cream cheese works perfectly here, providing that signature tang without adding too much extra fat, but full-fat will also give you an incredibly rich result if that’s what you prefer.
- 1/2 cup (approx. 15-20g) Freeze-Dried Strawberries: These are the star of our strawberry flavor! I love using freeze-dried because they offer an intense strawberry punch without adding any unwanted moisture that fresh berries would. You’ll want to crush these into a fine powder.
- 1/4 cup (28g) Coconut Flour or Oat Flour: This acts as a binder and helps achieve the perfect consistency. Coconut flour is very absorbent, so a little goes a long way. If using oat flour, you might need a touch more as it’s less absorbent. It helps to firm up the mixture and makes the protein balls easy to handle.
- 2-4 tablespoons Unsweetened Almond Milk (or milk of choice): I always start with 2 tablespoons and add more incrementally until I reach the desired dough-like consistency. The amount needed can vary based on your protein powder and humidity.
- 2-3 tablespoons Granulated Erythritol, Stevia, or Sweetener of Choice: Adjust this to your personal sweetness preference. I often start with 2 tablespoons and taste the mixture before adding more. If you prefer a natural liquid sweetener like maple syrup or honey, you can use that, but be aware it might slightly alter the consistency, requiring a bit more flour.
- 1 teaspoon Vanilla Extract: A good quality vanilla extract really enhances the “cheesecake” flavor profile and complements the strawberry beautifully.
- Pinch of Salt: Just a tiny pinch, I promise, it truly helps to balance the sweetness and bring out all the other flavors. Don’t skip it!
- Optional Coatings (choose one or combine):
- 2 tablespoons additional Freeze-Dried Strawberry Powder: For an extra vibrant pink hue and intense strawberry flavor on the outside.
- 1/4 cup Shredded Unsweetened Coconut: A classic coating that adds great texture and a subtle tropical note.
- 1/4 cup Crushed Graham Cracker Crumbs: For that authentic “cheesecake crust” experience.
- 2 oz (56g) White Chocolate (sugar-free optional), melted: For a decadent drizzle or full coating.
Preparing Your Workspace and Ingredients
- Gather and Soften: First things first, I always make sure all my ingredients are laid out and ready to go. The most important prep step for this recipe is ensuring your cream cheese is wonderfully soft and at room temperature. I usually take it out of the fridge at least 30-60 minutes before I plan to start. If I’m in a hurry, a quick 10-15 second zap in the microwave (without the foil wrapper, of course!) can help, but be careful not to melt it. A softened cream cheese guarantees a smooth, uniform mixture, free of any pesky lumps, which is essential for a truly “Delicious Strawberry Cheesecake Protein Ball”.
- Powder the Strawberries: Next, let’s get those freeze-dried strawberries ready. I typically place my 1/2 cup of freeze-dried strawberries into a small food processor or a coffee grinder. Alternatively, you can place them in a zip-top bag and crush them with a rolling pin or the bottom of a heavy glass. You’re aiming for a fine powder, almost like dust. This ensures the strawberry flavor is evenly distributed and the texture of your protein balls remains smooth. I always reserve an additional 2 tablespoons of this powder for an optional coating later, for that extra pop of color and flavor.
- Measure Accurately: For baking and no-bake recipes like this, accuracy is key, especially with ingredients like protein powder and coconut flour. I use measuring cups and spoons that are leveled off to ensure I’m getting the right proportions. This helps in achieving the perfect dough consistency without too much guesswork later on. Trust me, it makes the whole process so much smoother!
Crafting the Protein Ball Base
- Cream the Cream Cheese: In a medium mixing bowl, I start by adding the softened cream cheese. Using either a hand mixer on medium speed or a sturdy spoon, I beat the cream cheese until it’s light, fluffy, and completely smooth. This step aerates the cream cheese slightly and makes it easier to incorporate the other ingredients, setting the stage for a wonderful, creamy texture in our protein balls.
- Sweeten and Flavor: Now, I add the granulated erythritol (or your chosen sweetener) and the vanilla extract to the creamed cheese. Along with a small pinch of salt, these ingredients really build that classic cheesecake flavor. I continue to mix until everything is well combined and the sweetener has dissolved into the cream cheese, which usually takes another minute or so. You’ll notice the mixture becoming even smoother and wonderfully fragrant.
- Introduce Dry Ingredients: It’s time to bring in our protein powder and coconut flour (or oat flour). I add these dry ingredients to the cream cheese mixture. This is where the magic starts to happen! Initially, the mixture might look a bit crumbly, almost like wet sand. Don’t worry, that’s completely normal at this stage.
- Begin Mixing the Dough: I typically use a sturdy spoon or a rubber spatula to start folding the dry ingredients into the wet. The goal here is to gently combine everything. You’ll notice it’s a relatively thick mixture. As you mix, try to scrape down the sides of the bowl to ensure no dry pockets are left behind.
Adding the Strawberry Cheesecake Flavor
- Incorporate Strawberry Powder: Now, I gently fold in the finely crushed freeze-dried strawberry powder that we prepared earlier. As you mix, you’ll see the color of the dough transform into a beautiful, natural pink hue, and you’ll immediately catch the delightful aroma of fresh strawberries. I continue mixing until the strawberry powder is evenly distributed throughout the dough.
- Achieving the Perfect Consistency: This is a crucial step! The mixture should be thick and pliable, similar to cookie dough that’s just a little too firm to roll easily. If your mixture still seems too crumbly and isn’t coming together, I add the unsweetened almond milk, one tablespoon at a time. I mix well after each addition. The key is to add just enough liquid for the dough to come together without becoming sticky or overly wet. My aim is a consistency that can be easily rolled into a ball without crumbling apart or sticking excessively to my hands. The type of protein powder can significantly affect how much liquid is needed, so trust your judgment here. A good test is to try pinching a small amount of dough between your fingers – it should hold together well.
-
Adjusting for Texture (Troubleshooting):
- If too dry: If after adding the initial 2 tablespoons of milk, your dough is still too crumbly and won’t hold together, add another tablespoon of milk, mix thoroughly, and check again. Repeat with half-tablespoon increments until it reaches a rollable consistency. Remember, patience is a virtue here!
- If too wet/sticky: If you’ve accidentally added too much milk, or your protein powder simply absorbs less liquid, resulting in a sticky dough, don’t fret! I simply add another half-tablespoon to a full tablespoon of either protein powder or coconut flour. Mix it in thoroughly and let it sit for a minute or two to allow the added flour to absorb any excess moisture. This adjustment will help you achieve that perfect, non-sticky rolling consistency for your Delicious Strawberry Cheesecake Protein Balls.
- Taste Test and Adjust Sweetness: At this point, I always take a tiny bit of the dough and give it a quick taste. If you feel it needs more sweetness, now is the time to add a bit more of your granulated sweetener. Mix it in completely. Remember, the flavors will meld and intensify slightly after chilling, so it’s okay if it’s just right now.
Forming and Chilling Your Delicious Protein Balls
- Prepare for Rolling: I usually line a baking sheet or a large plate with parchment paper. This prevents the balls from sticking and makes for easy transfer to the fridge. Having everything ready before I start rolling makes the process much smoother.
- Portioning the Dough: Using a small cookie scoop (about 1-1.5 tablespoon size) or just a regular tablespoon, I scoop out portions of the dough. This helps to ensure that all my protein balls are roughly the same size, which is nice for presentation and consistent serving sizes.
- Rolling the Balls: I then gently roll each portion between my palms to form smooth, round balls. If the dough feels a little sticky, I sometimes lightly moisten my hands with a tiny bit of water or lightly dust them with a little extra protein powder or coconut flour. This makes rolling much easier and prevents the dough from clinging to my skin. I aim for about 18-20 protein balls from this recipe, but the exact number will depend on the size you choose.
- The Chill Factor: Once all the balls are formed, I place them on the prepared baking sheet. Now comes a crucial step: chilling! I transfer the entire sheet to the refrigerator and let the protein balls chill for at least 30 minutes. This chilling time is non-negotiable for the best texture. It allows the cream cheese to firm up and the flavors to fully meld, resulting in a much more satisfying bite. The protein balls will be much firmer and hold their shape better after this rest period.
Optional Coatings and Finishing Touches
- Prepare Your Coatings (if using): While the protein balls are chilling, I prepare my chosen coatings. If I’m using additional freeze-dried strawberry powder, I simply pour it into a shallow dish. For shredded coconut or crushed graham crackers, I do the same. If I’m going for a white chocolate drizzle or full coating, I gently melt the white chocolate in a microwave-safe bowl in 20-second intervals, stirring well after each, until smooth and fluid. Be careful not to overheat it, as white chocolate can seize easily.
-
Coat the Chilled Balls: Once the protein balls are nicely chilled and firm, I take them out of the fridge. I then gently roll each ball in my chosen coating.
- For Strawberry Powder/Coconut/Graham Cracker Crumbs: I place a few balls at a time into the shallow dish of coating and gently roll them around until they are evenly covered. I then lightly tap off any excess. This gives them a beautiful finished look and adds an extra layer of flavor and texture.
- For White Chocolate: If I’m doing a full white chocolate coating, I dip each ball into the melted chocolate, letting any excess drip off, and then place it back on the parchment-lined baking sheet to set. For a drizzle, I can either use a spoon to artisticly drizzle the chocolate over the balls or transfer the melted chocolate to a small piping bag (or a zip-top bag with the corner snipped off) for more control.
This coating step truly elevates these Delicious Strawberry Cheesecake Protein Balls from good to absolutely irresistible!
- Final Chill: After coating (especially if using white chocolate), I usually place the protein balls back into the refrigerator for another 10-15 minutes to allow the coatings to fully set. This ensures they are perfectly firm and ready for enjoyment.
Storage and Enjoyment Tips
- Storing Your Delicious Creations: These protein balls are best stored in an airtight container in the refrigerator. I find they maintain their freshness and delightful texture for up to one week. However, they rarely last that long in my house! If you’ve used any fresh fruit as a garnish (which I don’t recommend inside the ball due to moisture, but maybe a tiny piece on top), consume those very quickly.
- Freezing for Future Snacking: For longer storage, these protein balls freeze beautifully! I simply place the finished, chilled balls in a single layer on a parchment-lined baking sheet and freeze them for about an hour until solid. Once frozen solid, I transfer them to a freezer-safe zip-top bag or an airtight container, separating layers with parchment paper to prevent sticking. They can be stored in the freezer for up to 1-2 months. When you’re ready for a treat, just pop one out and let it thaw in the refrigerator for 15-30 minutes, or enjoy it straight from the freezer for a firmer, almost ice cream-like bite. This makes meal prep and healthy snacking incredibly convenient!
- Enjoyment Moments: I love having one of these as a post-workout refuel, a quick breakfast bite on the go, or a satisfying guilt-free dessert. They’re also fantastic for packing in lunchboxes or bringing to a gathering – everyone always raves about them, and they’re always surprised to hear they’re packed with protein! The combination of the creamy cheesecake texture and the vibrant strawberry flavor is simply divine.
Conclusion:
Well, my friends, we’ve reached the sweet finale of our culinary journey, and I genuinely hope you’re feeling inspired to whip up a batch of these extraordinary treats! If there’s one recipe I could implore you to try this week, it would be this one. Why, you ask? Because these aren’t just any snack; they are a revelation, a perfect symphony of health and indulgence, seamlessly blending the creamy, tangy notes of cheesecake with the fresh, vibrant burst of strawberries, all packed into a convenient, protein-rich bite. I poured my heart into perfecting this recipe, ensuring it delivers on taste, texture, and nutritional value.
Why These Are Your New Go-To Snack:
What truly makes this recipe a must-try is its ability to transform your perception of healthy eating. Forget bland, chalky protein bars; these are anything but! They offer a delightful contrast of textures – a tender, melt-in-your-mouth interior, often with a slight chewiness from the oats, and a potentially delightful coating that adds another layer of sensory pleasure. They are incredibly easy to make, requiring no baking and minimal cleanup, which means you can have a batch ready to fuel your week in less time than it takes to decide what to watch on Netflix. Imagine having a wholesome, guilt-free snack always at your fingertips, ready to curb those afternoon sugar cravings, power you through a busy day, or provide a much-needed energy boost post-workout. This recipe empowers you to take control of your snacking habits without sacrificing flavor or enjoyment. The Delicious Strawberry Cheesecake Protein Balls are not just a snack; they’re a lifestyle upgrade!
Creative Ways to Enjoy Your Protein Balls:
The versatility of these protein balls is truly one of their greatest strengths. While they are phenomenal on their own, don’t hesitate to get creative with how you incorporate them into your day. I love grabbing a couple as a quick, satisfying breakfast on the go when mornings are hectic. They’re an ideal post-workout refuel, providing essential protein for muscle recovery while satisfying any sweet cravings without the guilt. For an elegant, yet healthy, dessert option, arrange them artfully on a small platter, perhaps alongside a few fresh strawberries or a dollop of Greek yogurt. They also make fantastic additions to packed lunches for work or school, ensuring you have a nutritious option that won’t leave you feeling sluggish. Consider crumbling one over your morning oatmeal or yogurt parfait for an added boost of flavor and protein – it’s like having a mini strawberry cheesecake experience right in your bowl!
Endless Customization for Every Palate:
Part of the joy of home cooking is making a recipe truly your own, and this one lends itself beautifully to customization. Feel free to experiment with different protein powder flavors – a vanilla or even a subtle berry protein powder would work wonderfully, enhancing the existing flavors. If you’re a fan of extra texture, consider folding in a tablespoon or two of chia seeds, ground flaxseed, or finely chopped nuts like almonds or cashews. For a different fruit twist, frozen raspberries or blueberries could be substituted for strawberries, though you might need to adjust the liquid slightly. As for coatings, the possibilities are endless! Beyond shredded coconut, try rolling them in cocoa powder for a chocolatey kick, crushed freeze-dried strawberries for an intense berry flavor and beautiful color, or even a dusting of powdered erythritol if you like extra sweetness. If you’re looking for a richer, more indulgent variation, you could even melt a small amount of sugar-free white chocolate and drizzle it over the finished balls before chilling. For those with dietary restrictions, many plant-based cream cheeses and protein powders are available, making these easily adaptable to vegan or dairy-free preferences. Just ensure your protein powder is one you enjoy the taste of, as it plays a starring role!
Your Culinary Adventure Awaits!
I truly believe that once you try this recipe, it will become a cherished staple in your kitchen. It’s incredibly rewarding to create something so delicious and nourishing with your own hands. So, take the leap, gather your ingredients, and dedicate a small amount of time to treat yourself to something truly special. Don’t just read about these amazing treats—experience them! I encourage you to make a batch today and savor the delightful combination of flavors and the satisfaction of a wholesome, homemade snack. And please, please, please, don’t keep your success a secret! I love hearing from you all. Share your creations, your brilliant modifications, and your serving suggestions with me. Your feedback and creativity inspire not just me, but our entire community of food lovers. I genuinely can’t wait to hear how your Delicious Strawberry Cheesecake Protein Balls turn out! Happy rolling!
Delicious Strawberry Cheesecake Protein Balls
Revolutionize your snack game with these Delicious Strawberry Cheesecake Protein Balls! Enjoy the luscious, creamy taste of cheesecake with fresh strawberry notes in a convenient, no-bake, protein-packed bite. Perfect for a post-workout refuel, quick pick-me-up, or guilt-free dessert.
Ingredients
-
1 cup rolled oats
-
1 scoop vanilla protein powder
-
1/2 cup almond butter
-
1 cup fresh strawberries, chopped
-
4 oz cream cheese, softened
-
2 tbsp honey or maple syrup
-
1/4 cup unsweetened coconut flakes (optional)
Instructions
-
Step 1
In a medium bowl, combine softened cream cheese, almond butter, and honey or maple syrup. Mix until completely smooth. -
Step 2
Add rolled oats, vanilla protein powder, and chopped fresh strawberries to the mixture. Stir well until a thick, uniform dough forms. If too dry, add a touch more honey/almond butter; if too wet, add a little more oats/protein powder. -
Step 3
Scoop out portions (approx. 1-1.5 tbsp each) and roll them between your palms to form 18-20 smooth balls. -
Step 4
(Optional) Roll each protein ball in unsweetened coconut flakes for an extra coating and texture. -
Step 5
Place the formed balls on a parchment-lined baking sheet or plate. Chill in the refrigerator for at least 45 minutes to allow them to firm up and flavors to meld. -
Step 6
Store leftover protein balls in an airtight container in the refrigerator for up to 1 week. For longer storage, freeze for up to 1-2 months and thaw as needed.
Important Information
Nutrition Facts (Per Serving)
It is important to consider this information as approximate and not to use it as definitive health advice.
Allergy Information
Please check ingredients for potential allergens and consult a health professional if in doubt.


Leave a Comment