
Homemade English Muffins Easy (quick Rise Method)
Oh, the pure joy of a warm, freshly toasted English muffin! For years, I thought making English muffins from scratch was an arduous, all-day affair reserved for professional bakers. But let me tell you, I was wonderfully wrong! With my Homemade English Muffins Easy (quick Rise Method) recipe, you’re about to discover a game-changer that will transform your breakfast routine forever.
What makes this recipe so incredibly special? It’s all in the “easy” and “quick rise method” parts of the title. We’re skipping the long, drawn-out proofing times without sacrificing any of that quintessential English muffin goodness. This means you can whip up a batch of these glorious griddle cakes in a fraction of the time you’d expect, making homemade achievable even on a busy weekend morning.
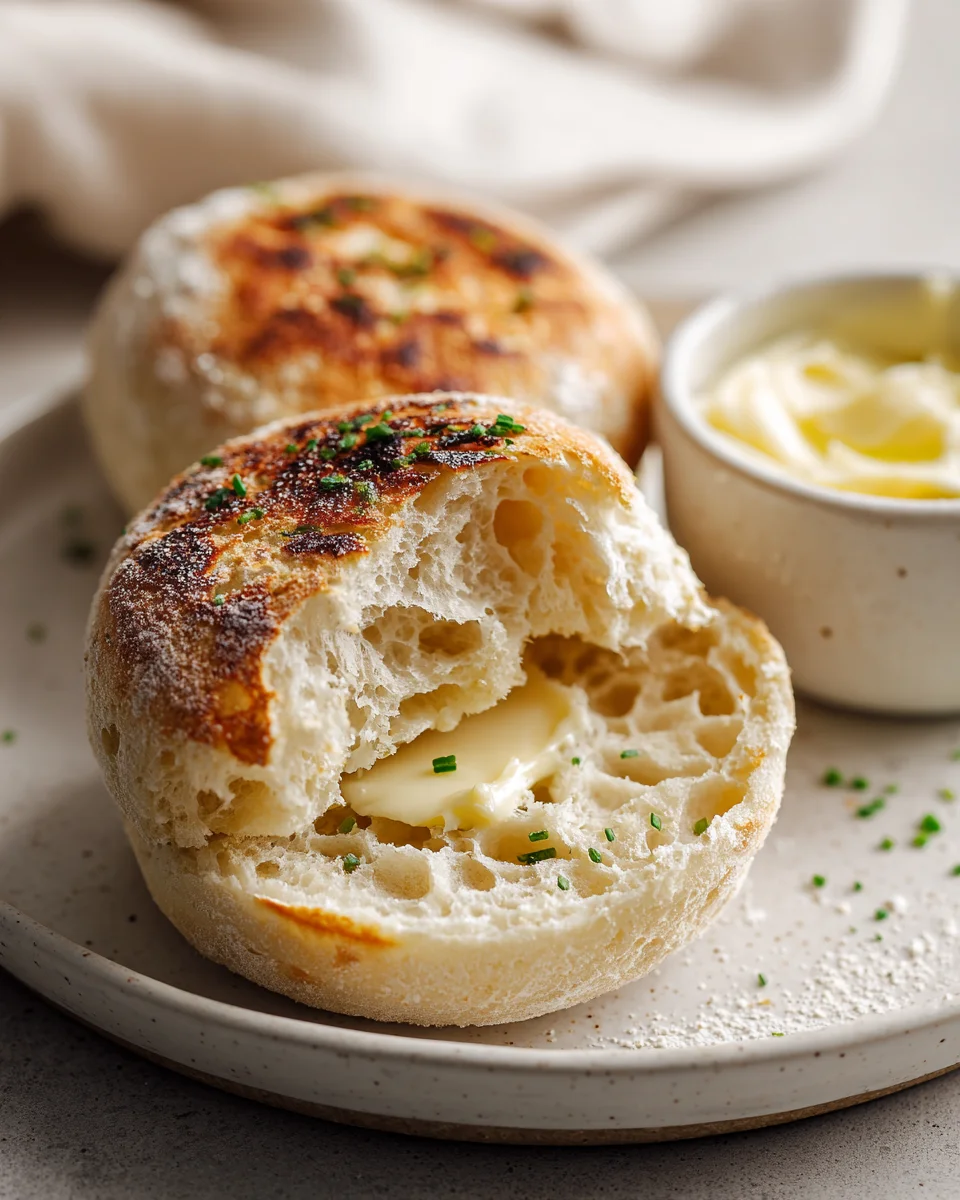
You are going to absolutely adore these. Imagine splitting a warm, golden-brown muffin, revealing those perfect, craggy nooks and crannies just begging to be filled with melting butter, your favorite jam, or even piled high with a fried egg and beef bacon for an ultimate breakfast sandwich. This recipe delivers that chewy, satisfying texture and distinct flavor you crave, all thanks to a simple yeast dough cooked on a griddle or in a skillet. The taste of a truly homemade English muffin, fresh off the griddle, is simply incomparable to anything you’ll buy at the store. Get ready to impress yourself and everyone at your table!

Ingredient Notes
Making homemade English muffins might sound daunting, but trust me, with my quick rise method, it’s surprisingly easy and incredibly rewarding! The secret to their delightful texture and those famous nooks and crannies lies in a few key ingredients and how we handle them. Here’s a rundown of what you’ll need and some handy substitutions.
- All-Purpose Flour: This is the backbone of our muffins. I typically use unbleached all-purpose flour for a slightly chewier texture, but regular all-purpose works perfectly too. While bread flour can give a chewier muffin, it can also make the dough a bit tougher to work with for beginners. Stick to all-purpose for an easy, forgiving dough.
- Instant Yeast (Rapid Rise Yeast): This is the star of our “quick rise” method! Unlike active dry yeast, instant yeast can be mixed directly with your dry ingredients and doesn’t require proofing in warm water first. It also works faster, significantly cutting down on your rising time. Make sure your yeast is fresh – old yeast will result in dense, heavy muffins. If you only have active dry yeast, you’ll need to proof it in the warm milk (see below) for about 5-10 minutes until foamy before adding it to the dry ingredients, and be prepared for slightly longer rise times.
- Warm Milk: Milk adds richness and helps create a tender crumb. Whole milk yields the best results, but 2% or even non-dairy alternatives like almond or soy milk work well. The key is to warm it to the right temperature – ideally between 105-115°F (40-46°C). This is warm enough to activate the instant yeast quickly without killing it. If it’s too hot, goodbye yeast! If it’s too cold, your dough won’t rise efficiently.
- Granulated Sugar: A small amount of sugar doesn’t just add a touch of sweetness, it also feeds the yeast, helping it activate and produce that wonderful airy texture. You can reduce it slightly if you prefer, but don’t omit it entirely. Honey or maple syrup could technically be used as a substitute, but I recommend sticking to granulated sugar for consistency in this recipe.
- Salt: Essential for flavor! It balances the sweetness and strengthens the gluten structure of the dough, contributing to that characteristic chew. Don’t skip it.
- Melted Butter: Butter enriches the dough, adding flavor and tenderness. Unsalted butter is my go-to so I can control the salt content. If you only have salted butter, reduce the added salt by about ¼ teaspoon. For a dairy-free option, you can use a neutral-flavored oil (like vegetable or canola) or a plant-based butter alternative.
- Cornmeal or Semolina: This isn’t mixed into the dough itself, but it’s absolutely crucial for dusting your English muffins before cooking. It prevents sticking and gives them that iconic slightly gritty texture on the outside, which is part of their charm. Don’t skip this step!
Step-by-Step Instructions
Get ready to impress yourself with these homemade English muffins! This quick rise method makes the process straightforward and enjoyable.
- Warm the Milk: In a microwave-safe bowl or a small saucepan, gently warm the milk until it reaches between 105-115°F (40-46°C). It should feel warm to the touch but not hot. Stir in the granulated sugar and melted butter until dissolved. Set aside.
- Combine Dry Ingredients: In a large mixing bowl, whisk together the all-purpose flour, instant yeast, and salt. Make sure they are well combined.
- Mix the Dough: Pour the warm milk mixture into the dry ingredients. Using a sturdy spoon or a stand mixer with a dough hook attachment, mix until a shaggy, somewhat sticky dough forms. If using a stand mixer, mix on low speed for about 5-7 minutes. If mixing by hand, you’ll need to knead it gently on a lightly floured surface for about 7-10 minutes. The dough will be soft and a bit sticky, but it should pull away from the sides of the bowl. Resist the urge to add too much extra flour, as this will make your muffins dense.
- First Rise (The Quick Part!): Lightly grease your mixing bowl with a little oil. Transfer the dough to the bowl, turning it once to coat. Cover the bowl tightly with plastic wrap or a clean kitchen towel. Place it in a warm spot (like a slightly warm oven that’s been turned off, or near a sunny window) for about 45-60 minutes, or until the dough has nearly doubled in size. Because we’re using quick-rise yeast, this will be much faster than traditional methods!
- Shape the Muffins: Once risen, gently punch down the dough to release the air. Lightly flour your work surface. Turn the dough out and gently roll it into a rectangle about ½ inch thick. You can also pat it into shape. Using a 3-inch round cutter (or the rim of a drinking glass), cut out your English muffins. Gather the scraps, gently re-knead them once or twice, and cut out more muffins. You should get about 10-12 muffins.
- Prepare for Second Rise: Sprinkle a generous amount of cornmeal or semolina onto a baking sheet or a clean surface. Carefully transfer the cut muffins to the prepared surface, leaving some space between each. Sprinkle the tops with more cornmeal/semolina.
- Second Rise: Cover the muffins loosely with plastic wrap or a clean kitchen towel. Let them rise in a warm spot for another 20-30 minutes, or until they look noticeably puffy.
- Cook on the Griddle: Heat a large non-stick griddle or heavy-bottomed skillet over medium-low heat. You want it warm enough to cook through without burning the outside, so low and slow is key. Don’t add any oil or butter to the griddle itself.
- Griddle the Muffins: Carefully place 3-4 muffins on the warm griddle, making sure not to overcrowd them. Cook for 5-7 minutes per side, until they are golden brown and cooked through in the center. The sides of the muffins should also feel firm and spring back when gently pressed. If they are browning too quickly, lower the heat.
- Cool: Transfer the cooked English muffins to a wire rack to cool completely. This helps prevent them from getting soggy.
Tips & Suggestions
Achieving bakery-worthy English muffins at home with this quick rise method is totally within reach! Here are my best tips to ensure your success and those coveted nooks and crannies:
- Don’t Over-Flour: English muffin dough is meant to be a bit sticky. Adding too much flour during mixing or kneading will result in dense, dry muffins. Embrace the stickiness; a light dusting on your hands and work surface is usually enough.
- Perfect Temperature for Yeast: For the quick rise method, consistency is key with your liquid temperature. Aim for that 105-115°F (40-46°C) range for the milk. Too cold, and the yeast is sluggish; too hot, and you’ll kill it, resulting in no rise. A kitchen thermometer is your best friend here!
- The Griddle is Your Oven: Remember, English muffins are cooked on a griddle, not baked in an oven. The low, consistent heat allows them to cook through slowly, developing those internal air pockets (nooks and crannies) without burning the exterior. My trick is to start with medium-low heat and adjust as needed. If they’re browning too fast, reduce the heat.
- Cornmeal is Non-Negotiable: That signature gritty texture and non-stick quality come from the cornmeal (or semolina) generously dusted on both sides of the muffins. Don’t skip this step! It also helps prevent sticking to the griddle.
- Gentle Handling is Key: Once your dough has risen and you’re shaping your muffins, handle the dough gently. You want to preserve as much of that lovely trapped air as possible. When cutting, try to do it with a decisive downward motion rather than twisting, which can seal the edges.
- The “Fork-Split” Rule: Never cut an English muffin with a knife before toasting! To get those beautiful nooks and crannies, you absolutely must split them open with a fork. Gently poke around the perimeter with a fork, then pull the two halves apart. This creates a wonderfully craggy surface perfect for soaking up butter and jam.
- Embrace Imperfection: Your first batch might not be perfectly round or evenly cooked, and that’s okay! Homemade is about flavor and satisfaction, and practice makes perfect. Each batch gets easier, and you’ll soon develop a feel for the dough and your griddle.
Storage
You’ve gone to the effort of making these amazing homemade English muffins, so let’s make sure you store them properly to enjoy every last bite!
- Room Temperature: Once completely cooled, homemade English muffins can be stored in an airtight container or a resealable plastic bag at room temperature for up to 2-3 days. Make sure they are fully cool before storing, otherwise, condensation will build up and make them soggy.
- Refrigeration: If you won’t be eating them within a few days, you can store them in the refrigerator for up to a week. However, they tend to dry out a bit quicker in the fridge, so I usually prefer freezing for longer storage.
- Freezing for Longer Storage: This is my preferred method for keeping a stash of homemade English muffins on hand. Once completely cooled, place them in a single layer on a baking sheet and freeze for about an hour until firm. This prevents them from sticking together. Then, transfer the frozen muffins to a freezer-safe bag or airtight container. They will keep well in the freezer for up to 2-3 months.
- Reheating:
- From Room Temperature/Fridge: Split the muffin with a fork and toast it in a toaster or under the broiler until golden brown and heated through.
- From Frozen: No need to thaw! Simply split the frozen muffin with a fork and pop it directly into your toaster on a medium-high setting, or toast until warmed through and lightly browned. You might need a slightly longer toasting time than thawed muffins.
Final Thoughts
There’s truly nothing quite like the satisfaction of creating something wonderful from scratch, especially when it’s as delightfully simple and rewarding as our Homemade English Muffins Easy (quick Rise Method). I truly believe this recipe is a game-changer for anyone who loves English muffins but has been hesitant to try making them at home.
The “quick rise method” truly makes all the difference, cutting down on the waiting time without compromising on that signature airy texture and those perfect nooks and crannies we all adore. You’ll be amazed at how effortlessly these come together, allowing you to enjoy fresh, warm English muffins straight from your kitchen in no time.
So, go ahead and give Homemade English Muffins Easy (quick Rise Method) a try. I promise, once you experience the joy of slicing into a perfectly toasted homemade muffin, perhaps topped with your favorite jam or a savory beef patty, you’ll never look back. It’s an incredibly rewarding and utterly delicious experience that will brighten any breakfast or brunch!

Best Homemade English Muffins: Easy Quick Rise Recipe
- Total Time: 45 minutes
- Yield: 10-12 muffins 1x
Description
Discover the joy of making warm, freshly toasted English muffins at home with this easy quick rise recipe. Enjoy the delightful texture and flavor that will transform your breakfast routine!
Ingredients
- 4 cups all-purpose flour
- 2 1/4 teaspoons instant yeast (rapid rise yeast)
- 1 teaspoon salt
- 1 1/2 cups warm milk (between 105-115°F or 40-46°C)
- 2 tablespoons granulated sugar
- 2 tablespoons melted butter
- Cornmeal or semolina for dusting
Instructions
- In a microwave-safe bowl or a small saucepan, gently warm the milk until it reaches between 105-115°F (40-46°C). Stir in the granulated sugar and melted butter until dissolved. Set aside.
- In a large mixing bowl, whisk together the all-purpose flour, instant yeast, and salt until well combined.
- Pour the warm milk mixture into the dry ingredients. Using a sturdy spoon or a stand mixer with a dough hook attachment, mix until a shaggy, somewhat sticky dough forms. If using a stand mixer, mix on low speed for about 5-7 minutes. If mixing by hand, knead gently on a lightly floured surface for about 7-10 minutes until the dough is soft and slightly sticky.
- Lightly grease your mixing bowl with a little oil. Transfer the dough to the bowl, turning it once to coat. Cover the bowl tightly with plastic wrap or a clean kitchen towel. Place it in a warm spot for about 45-60 minutes, or until the dough has nearly doubled in size.
- Once risen, gently punch down the dough to release the air. Lightly flour your work surface. Turn the dough out and gently roll it into a rectangle about ½ inch thick. Using a 3-inch round cutter, cut out your English muffins. Gather the scraps, gently re-knead them once or twice, and cut out more muffins.
- Sprinkle a generous amount of cornmeal or semolina onto a baking sheet or a clean surface. Carefully transfer the cut muffins to the prepared surface, leaving some space between each. Sprinkle the tops with more cornmeal/semolina.
- Cover the muffins loosely with plastic wrap or a clean kitchen towel. Let them rise in a warm spot for another 20-30 minutes, or until they look noticeably puffy.
- Heat a large non-stick griddle or heavy-bottomed skillet over medium-low heat. Don't add any oil or butter to the griddle.
- Carefully place 3-4 muffins on the warm griddle, making sure not to overcrowd them. Cook for 5-7 minutes per side, until they are golden brown and cooked through in the center. The sides of the muffins should feel firm and spring back when gently pressed.
- Transfer the cooked English muffins to a wire rack to cool completely.
- Prep Time: 15 mins
- Cook Time: 30 mins
- Category: Breakfast
- Method: Griddling
- Cuisine: American
Nutrition
- Serving Size: 1 muffin
- Calories: 150
- Sugar: 2 g
- Sodium: 200 mg
- Fat: 3 g
- Saturated Fat: 1 g
- Unsaturated Fat: 2 g
- Trans Fat: 0 g
- Carbohydrates: 28 g
- Fiber: 1 g
- Protein: 5 g
- Cholesterol: 10 mg
Keywords: Don't over-flour the dough, as it should be a bit sticky. Ensure the milk is at the right temperature for yeast activation, and remember to dust with cornmeal or semolina to prevent sticking.


Leave a Comment