
This might sound like a secret code, but I assure you, what it represents is nothing short of a culinary revelation! Have you ever encountered a dish that surprises you at every turn, where familiar flavors dance with unexpected textures, leaving you utterly delighted? That, my friends, is the magic behind this truly unique creation. It’s the kind of recipe that sparks conversation and curiosity even before the first bite, promising an adventure for your taste buds.
While its name suggests a modern, digitally inspired origin, the essence of this dish gracefully unites tradition with innovation. Many enthusiasts believe it earned its distinctive reputation not only for its flawless visual presentation—making it an instant sensation across social platforms—but also for its perfectly balanced composition, a true masterpiece of culinary craftsmanship. It stands as a modern classic in the making, celebrated for its ability to elevate everyday ingredients into something truly extraordinary.
I’ve witnessed countless smiles and heard delighted exclamations from those experiencing this dish for the first time. People simply adore its incredible depth of flavor, the satisfying interplay of rich and subtle notes, and the captivating contrast of tender and crisp elements. It offers the ultimate comfort food experience while simultaneously introducing exciting new dimensions, making it both approachable and incredibly sophisticated. It’s not just a meal; it’s an event, perfect for a cozy weeknight or an impressive gathering.

Ingredients:
-
For the Pan-Seared Scallops:
- 1.5 lbs large sea scallops, about 16-20 count, preferably dry-packed. Make sure they are thoroughly patted dry; this is absolutely crucial for a good sear!
- 2 tablespoons olive oil, or a high smoke point oil like grapeseed, for searing.
- 1 tablespoon unsalted butter, for finishing the scallops and adding a rich flavor.
- 1 clove garlic, finely minced, for infusing the butter.
- 1 sprig fresh thyme, or a pinch of dried thyme, for aromatic notes.
- Salt and freshly ground black pepper, to taste. I like using a good quality sea salt here.
- A squeeze of fresh lemon juice, right at the end, to brighten everything up.
-
For the Lemon-Herb Risotto:
- 6 cups good quality chicken or vegetable broth, preferably low sodium, warmed in a separate saucepan. Keeping it warm is key!
- 3 tablespoons unsalted butter, divided. We’ll use this for sautéing and finishing.
- 1 tablespoon olive oil, for starting our sauté.
- 1 medium yellow onion, finely diced. We want it almost transparent.
- 2 cloves garlic, minced. A little more garlic never hurts!
- 1.5 cups Arborio rice, or another suitable short-grain rice like Carnaroli. Do not rinse the rice; we need that starch!
- 1/2 cup dry white wine, such as Pinot Grigio or Sauvignon Blanc. This adds a lovely acidity and depth.
- 1/2 cup freshly grated Parmesan cheese, plus more for serving. Make sure it’s good quality.
- Zest of 1 whole lemon, and the juice of half a lemon. This is where our bright, zesty flavor comes from.
- 2 tablespoons fresh parsley, finely chopped.
- 1 tablespoon fresh chives, finely chopped.
- Salt and freshly ground black pepper, to taste. Remember the broth is already salted.
-
For the Roasted Asparagus:
- 1 bunch (about 1 lb) fresh asparagus spears, trimmed. Snap off the woody ends – they’ll naturally break where they’re tender.
- 1 tablespoon olive oil, for tossing.
- 1/2 teaspoon salt, or to taste.
- 1/4 teaspoon freshly ground black pepper, or to taste.
- A dash of garlic powder, optional, but I think it enhances the flavor beautifully.
Preparing Your Mis En Place and Roasting the Asparagus:
- Begin by getting organized: This dish has a few components that come together relatively quickly once you start cooking, so having everything prepped and within arm’s reach is essential. This is what we call “mis en place” in the culinary world, and it truly makes all the difference. Finely dice your onion and mince your garlic for the risotto. Measure out your rice and wine. Grate your Parmesan cheese and zest your lemon. Chop your fresh herbs. For the scallops, mince that single clove of garlic and get your lemon ready for squeezing. Trim the woody ends off your asparagus spears. This preparation might seem tedious, but I promise it will make the cooking process much more enjoyable and stress-free.
- Warm the broth: In a medium saucepan, gently heat your 6 cups of chicken or vegetable broth over low heat. You want it to be consistently warm, almost simmering, throughout the risotto cooking process. Adding cold broth to hot rice will cool everything down and disrupt the cooking, leading to a less creamy texture. Keep a ladle nearby for easy pouring.
- Prepare the asparagus for roasting: Preheat your oven to 400°F (200°C). On a baking sheet, toss the trimmed asparagus spears with 1 tablespoon of olive oil, ½ teaspoon of salt, ¼ teaspoon of black pepper, and if you’re using it, a dash of garlic powder. Ensure the asparagus is evenly coated. I like to spread them out in a single layer so they roast rather than steam.
- Roast the asparagus: Place the baking sheet in the preheated oven and roast for 10-15 minutes, depending on the thickness of your spears and your desired tenderness. I prefer mine with a slight snap, so I usually aim for the shorter end of that range. Once they’re a vibrant green and just tender, remove them from the oven. Set them aside; they will be one of the final components for plating.
Crafting the Luxurious Lemon-Herb Risotto:
This is where the magic really happens. Risotto requires a bit of patience and attention, but the creamy, comforting result is so worth it.
- Sauté the aromatics: In a large, heavy-bottomed pot or Dutch oven, melt 2 tablespoons of unsalted butter with 1 tablespoon of olive oil over medium heat. Once the butter is melted and slightly shimmering, add the finely diced yellow onion. Cook, stirring occasionally, for about 5-7 minutes, until the onion becomes translucent and very soft. You don’t want any browning here; we’re just coaxing out its sweetness.
- Add the garlic: Stir in the 2 cloves of minced garlic and cook for another minute until fragrant. Be careful not to burn the garlic, as it can turn bitter very quickly. Its aromatic presence is crucial for the depth of flavor in our risotto.
- Toast the rice: Now, add the 1.5 cups of Arborio rice to the pot. Stir the rice continuously for 2-3 minutes. You’ll notice the edges of the rice grains becoming translucent, but the center should remain opaque. This toasting process, called “tostatura,” is important as it helps to seal the grain, allowing it to absorb liquid slowly and cook evenly without becoming mushy. This step is a game-changer for texture.
- Deglaze with wine: Pour in the ½ cup of dry white wine. Stir constantly, allowing the wine to be fully absorbed by the rice. This usually takes about 2-3 minutes. As the wine evaporates, it leaves behind a wonderful acidity that balances the richness of the finished dish. You should be able to smell the alcohol cooking off.
- Begin adding broth, ladle by ladle: Once the wine has been absorbed, start adding the warm chicken or vegetable broth, one ladleful (about ½ to ¾ cup) at a time. Stir continuously until each ladleful of broth is almost completely absorbed by the rice before adding the next. This constant stirring is vital; it agitates the rice grains, releasing their starches, which is what creates that signature creamy texture of risotto. Don’t rush this process. It’s a meditative culinary experience!
- Continue stirring and adding broth: This process will take approximately 18-25 minutes. Keep stirring, keep adding broth, and keep tasting. You’re looking for the rice to be “al dente” – cooked through but still with a slight bite in the center, not mushy. It should be creamy but not soupy. You might not use all 6 cups of broth, or you might need a little more; just go by the rice’s texture and consistency.
- Finish the risotto: Once the rice has reached the perfect al dente stage and the risotto is wonderfully creamy, remove the pot from the heat. Stir in the remaining 1 tablespoon of unsalted butter, the ½ cup of freshly grated Parmesan cheese, the zest of one lemon, and the juice of half a lemon. This step is called “mantecatura,” and it’s essential for achieving that glossy, luscious finish.
- Add fresh herbs and season: Stir in the 2 tablespoons of fresh parsley and 1 tablespoon of fresh chives. Taste the risotto and season with salt and freshly ground black pepper as needed. Remember the broth and Parmesan are already salty, so season carefully. Give it one final, gentle stir. The risotto should be flowing slightly, not a solid mass. If it’s too thick, add a tiny splash more warm broth until it reaches your desired consistency.
Perfectly Pan-Seared Scallops:
Achieving a beautiful, golden-brown crust on scallops is all about heat and dryness. Let’s make those scallops sing!
- Prepare the scallops: Pat your scallops absolutely, thoroughly dry with paper towels. I can’t stress this enough! Moisture is the enemy of a good sear. If they’re wet, they’ll steam instead of sear. Season both sides generously with salt and freshly ground black pepper.
- Heat the pan: In a large, heavy-bottomed skillet (cast iron or stainless steel works best), heat 2 tablespoons of olive oil over medium-high heat until it’s shimmering and almost smoking. You want a very hot pan to get that perfect crust.
- Sear the scallops: Carefully place the scallops in the hot pan, ensuring they are in a single layer and not overcrowding the pan. If your pan isn’t large enough, sear them in batches. Overcrowding will lower the pan’s temperature and lead to steaming. Let them cook undisturbed for 2-3 minutes. Do not move them! This allows a beautiful crust to form.
- Flip and finish: After 2-3 minutes, use tongs to flip each scallop. You should see a gorgeous golden-brown crust. Add the 1 tablespoon of unsalted butter, the minced garlic, and the fresh thyme sprig to the pan. Let the butter melt and baste the scallops with the fragrant butter mixture as they cook for another 1-2 minutes on the second side. The scallops are done when they are opaque throughout and have a firm yet tender texture. Be careful not to overcook them, or they will become rubbery.
- A final touch: Remove the scallops from the pan and give them a quick squeeze of fresh lemon juice. The acidity really brightens the rich flavor of the scallops.
Assembling and Serving Your Culinary Masterpiece:
Now for the grand finale – bringing all these delicious components together on the plate!
- Plate the risotto: Spoon a generous portion of the creamy lemon-herb risotto onto the center of each serving plate. I like to spread it out slightly to create a nice base for the scallops and asparagus. The aroma alone should be making your mouth water!
- Arrange the scallops: Carefully place 3-4 perfectly seared scallops on top of or alongside the risotto. I often nestle them slightly into the risotto so they stand up beautifully, showcasing that golden crust.
- Add the asparagus: Arrange a few spears of the roasted asparagus next to the scallops or fanned out on the side of the plate. Their vibrant green color adds a lovely contrast to the creamy risotto and golden scallops.
- Garnish and serve: For a final flourish, sprinkle a little extra freshly grated Parmesan cheese over the risotto, if desired. A small sprig of fresh parsley or a few chives can also be added for a pop of color and freshness. Serve immediately, while everything is still warm and at its peak. This dish is truly a symphony of flavors and textures, perfect for a special occasion or when you simply want to treat yourself to something extraordinary. Enjoy every single bite of your meticulously prepared meal!
Conclusion:
And so, we arrive at the culmination of our culinary journey with this truly exceptional recipe. Why is this dish an absolute must-try? It’s more than just a meal; it’s an experience – a perfect blend of comfort and elegance that effortlessly elevates any occasion, be it a casual weeknight dinner or a special gathering with loved ones. I truly believe this recipe stands out because it delivers on so many fronts: incredible flavor, satisfying textures, and a surprising ease of preparation that belies its sophisticated outcome. We’ve all had those recipes that promise much but deliver little, or those that are so complicated they sap the joy out of cooking. This isn’t one of them. This recipe is meticulously designed to be approachable, yet it consistently yields results that taste like they came straight from a gourmet kitchen. It’s the kind of dish that garners compliments and requests for seconds, and even more importantly, for the recipe itself. It’s hearty without being heavy, flavorful without being overwhelming, and versatile enough to suit various palates. The aroma alone as it cooks is enough to get anyone excited for dinner, creating a truly inviting and cozy atmosphere in your home. It’s a guaranteed crowd-pleaser, a recipe you’ll return to again and again because it simply works, every single time. The pure joy of cooking, when it comes to preparing and savoring this particular dish, is truly palpable.
Elevate Your Meal: Serving Suggestions and Creative Variations
Now, let’s talk about how you can make this recipe uniquely yours, or how you can present it to truly shine at your table. While it is absolutely fantastic on its own, here are some ideas to inspire you:
Thoughtful Serving Suggestions:
For a complete and well-rounded meal, I absolutely love serving this dish with a vibrant, fresh side salad. Tossed in a light vinaigrette, the crispness of the greens provides a wonderful contrast to the rich and savory flavors of the main course. Another excellent accompaniment is a warm, crusty artisanal bread, perfect for soaking up every last drop of the delicious juices left on the plate – trust me, you won’t want to leave any behind! If you’re leaning towards something heartier, a simple grain like fluffy quinoa or a fragrant wild rice pilaf can be an excellent foundation, allowing the main recipe’s intricate flavors to truly pop. For a more indulgent and visually appealing touch, consider a small dollop of cool crème fraîche or a generous sprinkle of freshly chopped delicate herbs, such as chives or dill, right before serving. These additions provide both a burst of freshness and an enhanced aesthetic.
Unleash Your Creativity: Exciting Variations:
This recipe is incredibly forgiving and wonderfully open to your creative whims. Please, don’t be afraid to experiment and make it your own!
- Protein Power-Up: While I adore the core elements of this dish, you could easily introduce different proteins. Sautéed strips of tender chicken, succulent shrimp, or even hearty chickpeas could be gently folded in during the final stages of cooking for an added layer of texture, flavor, and nutritional value.
- Veggie Boost: Feel completely free to load it up with extra vegetables. Fresh spinach, earthy kale, colorful bell peppers, or even sweet roasted butternut squash could be fantastic and healthy additions, contributing more color, essential nutrients, and subtle layers of sweetness. Just be sure to adjust cooking times slightly to ensure everything is perfectly tender.
- Spice it Up: For those who truly love a bit of heat, a generous pinch of red pepper flakes or a dash of your favorite smoky hot sauce can add an exciting and fiery kick. Alternatively, a hint of smoked paprika can introduce a wonderful depth and warmth without the intense spice, creating a different kind of comforting flavor profile.
- Cheese Please: If you’re a cheese lover (and let’s be honest, who isn’t?), consider a sprinkle of a different hard cheese like nutty Gruyere or creamy Fontina for an even richer, more complex flavor profile. A thoughtfully chosen blend of complementary cheeses can also add incredible depth and character.
- Herbal Infusion: Beyond the fresh parsley I typically recommend, consider incorporating aromatic fresh thyme, fragrant rosemary, or even a touch of marjoram to switch up the aromatic profile entirely. Each herb brings its own unique and delightful character to the dish.
The true beauty and enduring appeal of this recipe lies in its remarkable adaptability, allowing you to easily tailor it to your family’s specific preferences or whatever wonderful ingredients you happen to have on hand in your pantry and refrigerator.
Your Turn to Shine: Try it and Share!
Now, it’s truly your turn! I genuinely hope you feel inspired to dive into your kitchen and give this incredible recipe a try. There’s something profoundly satisfying and deeply rewarding about creating a delicious meal from scratch, and I promise you, the effort will be incredibly rewarding. Imagine the genuine smiles around your dinner table, the appreciative murmurs and satisfied sighs with every single bite. This dish consistently delivers on both exquisite taste and captivating visual appeal. The rich, vibrant colors and inviting, appealing textures are simply irresistible, bringing to mind the kind of culinary artistry one might expect from a perfectly curated image, perhaps even ?tp_image_id=57754. It’s a dish that truly looks as good as it tastes, a feast for both the eyes and the palate.
I am so incredibly excited for you to experience the magic of this meal firsthand. Once you’ve made it, I would absolutely love to hear all about your experience! Did you stick faithfully to the recipe, or did you venture boldly into some of the creative variations I suggested? What were your favorite parts of the cooking process or the final taste? Did you make any amazing culinary discoveries of your own that you’d like to share? Please, don’t hesitate to share your honest thoughts, your personal cooking journey, and even proud photos of your glorious creations. Your valuable feedback, heartwarming stories, and stunning pictures are what truly inspire me and help this wonderful culinary community grow and thrive. Happy cooking, my dear friends, and I absolutely can’t wait to see what delicious masterpieces you create!
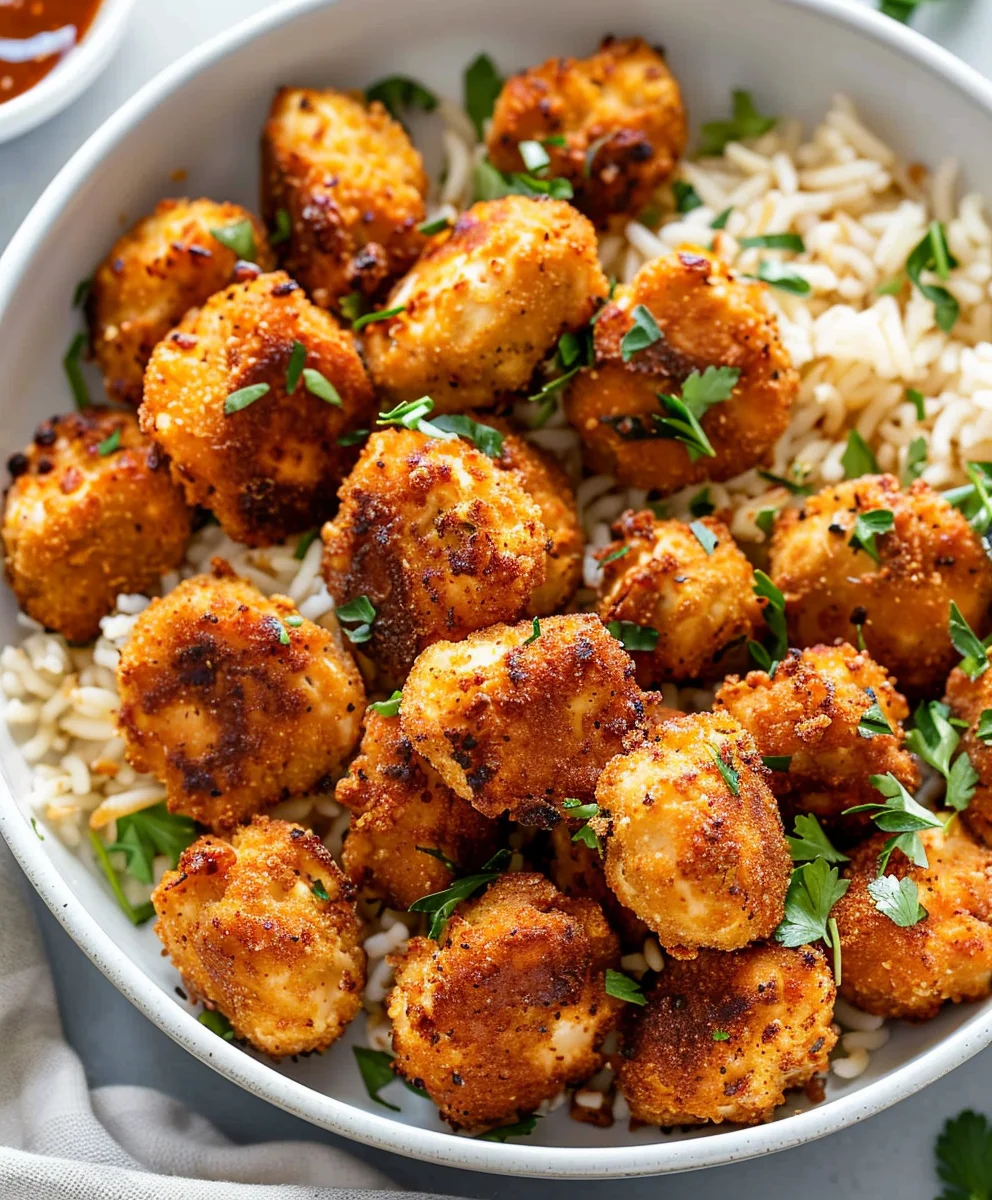
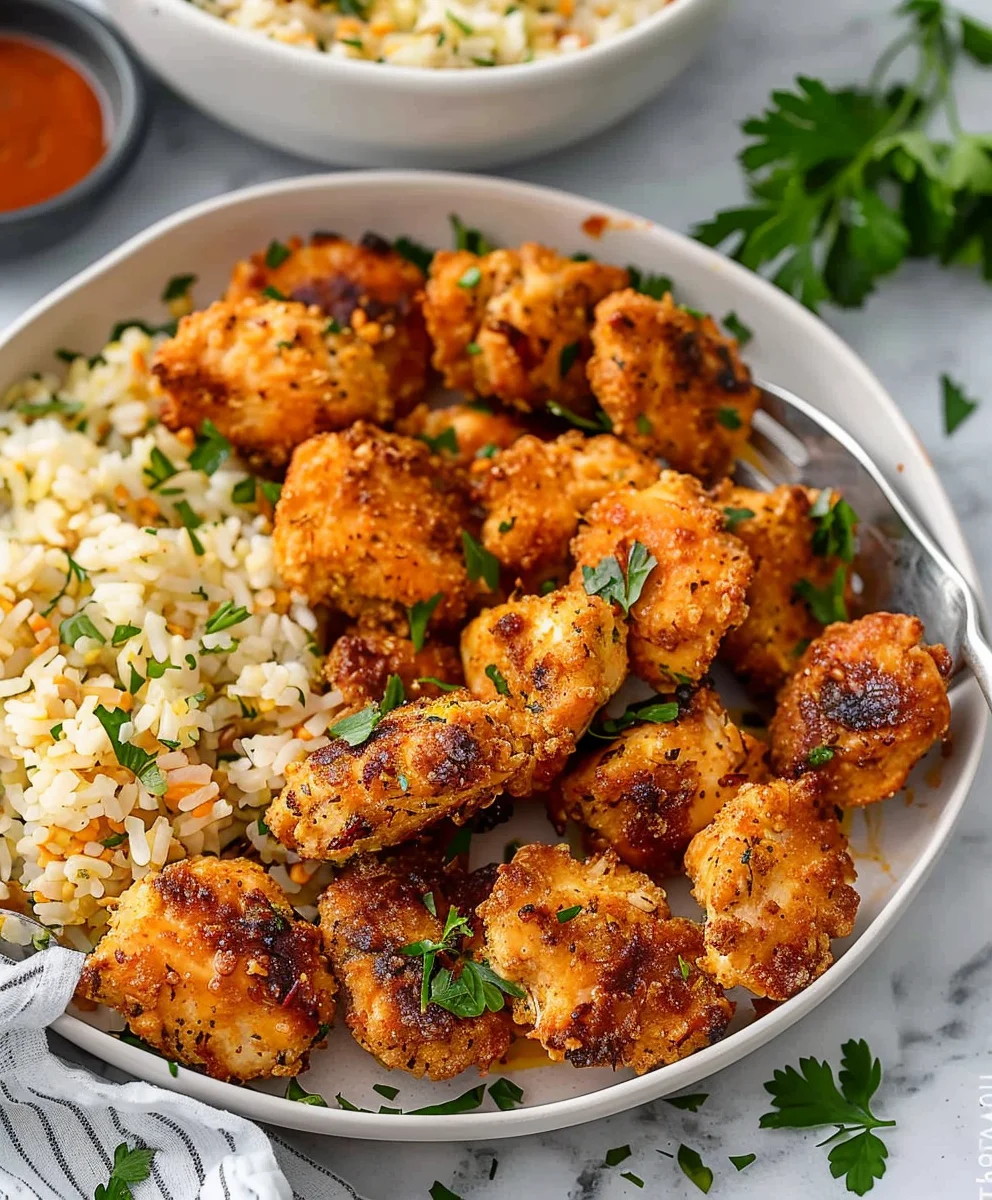
Healthy Air Fryer Chicken Bites
A surprisingly simple yet flavorful chicken dish, seasoned with taco spices for a delightful culinary experience. This unique creation transforms everyday ingredients into something extraordinary, perfect for a quick weeknight meal or an impressive yet approachable gathering. It’s revered for its balanced composition and incredible depth of flavor.
Ingredients
-
1 lb boneless chicken breast
-
1-2 tbsp extra virgin olive oil
-
1-2 tbsp taco seasoning
-
1/4 tsp kosher salt (if needed)
Instructions
- Step 1
Pat the boneless chicken breast thoroughly dry with paper towels. Rub the chicken with 1-2 tablespoons of extra virgin olive oil, then generously season on all sides with 1-2 tablespoons of taco seasoning and 1/4 teaspoon of kosher salt (if needed). - Step 2
{‘@type’: ‘HowToStep’, ‘name’: ‘Cook Chicken (Pan-Sear or Bake)’, ‘text’: ‘Choose your preferred cooking method:\n * Pan-Sear: Heat a large skillet over medium-high heat. Cook the seasoned chicken for 6-8 minutes per side, or until a beautiful golden crust forms and the internal temperature reaches 165°F (74°C).\n * Bake: Preheat your oven to 400°F (200°C). Place the seasoned chicken on a baking sheet and bake for 20-25 minutes, or until the internal temperature reaches 165°F (74°C).’, ‘supply’: [‘1-2 tbsp extra virgin olive oil’, ‘1-2 tbsp taco seasoning’, ‘1/4 tsp kosher salt’]} - Step 3
Once cooked, remove the chicken from the heat and let it rest for 5 minutes before slicing and serving. This crucial step helps the juices redistribute, ensuring a tender and flavorful result. Serve immediately as part of a meal.
Important Information
Nutrition Facts (Per Serving)
It is important to consider this information as approximate and not to use it as definitive health advice.
Allergy Information
Please check ingredients for potential allergens and consult a health professional if in doubt.

Leave a Comment