
Ingredient Chocolate Mousse (light & Creamy Dessert)
Hello there, fellow dessert lovers! Get ready to discover a truly magical treat that’s about to become your new go-to. My Ingredient Chocolate Mousse (light & Creamy Dessert) is here to redefine your understanding of easy elegance.
What makes this particular chocolate mousse so special, you ask? It’s all in how simple, carefully chosen ingredients come together to create an absolutely divine experience. I’ve perfected a method that ensures every spoonful is incredibly light, wonderfully airy, and sumptuously creamy, yet bursting with deep, rich chocolate flavor. This isn’t just any chocolate mousse; it’s a delicate dance of textures and tastes that melts in your mouth, leaving you craving just one more bite.
You are going to absolutely adore this recipe because it proves that you don’t need a pantry full of obscure items or hours in the kitchen to create something truly spectacular. Whether you’re looking for an impressive finale to a dinner party or simply craving a sophisticated yet comforting sweet treat for yourself, this mousse delivers. It’s remarkably easy to prepare, forgiving for even novice bakers, and consistently yields a dessert that tastes like it came straight from a gourmet patisserie, but without any of the fuss. Prepare to fall head over heels for its ethereal texture and intense chocolate satisfaction!

Ingredient Notes
Crafting my Ingredient Chocolate Mousse, a true light and creamy dessert, really comes down to the quality of a few core components. I’ve found that when you keep an ingredient list short, each item has to pull its weight, and then some! Here’s what I consider essential for achieving that delightful balance of rich chocolate flavor and airy texture, along with a few thoughts on substitutions.
- High-Quality Dark Chocolate: This is the absolute star of my mousse. I always reach for a good quality dark chocolate, typically in the 60-70% cacao range. It provides a deep, complex chocolate flavor without being overly bitter, and it’s essential for achieving the right consistency as it sets. Using a higher percentage can make the mousse a bit firmer and more intense, while a lower percentage (like semi-sweet) will result in a sweeter, slightly softer mousse. I highly recommend using a bar chocolate that you chop yourself rather than chocolate chips, as chips often contain stabilizers that can affect the melting and setting properties. There’s really no direct substitute here; the chocolate is the dessert!
- Heavy Whipping Cream: The secret to the “light and creamy” texture lies mostly in this magnificent ingredient. I use full-fat heavy whipping cream, ideally with at least 36% milk fat. When whipped, it incorporates air, transforming into a cloud-like base that lightens the dense melted chocolate. Make sure your cream is very cold; this is critical for it to whip up properly and hold its volume. I don’t recommend using half-and-half or milk, as they simply won’t whip to the required consistency and your mousse will turn out too thin. Light cream might work for a slightly less rich version, but you’ll sacrifice some of that luxurious creaminess.
- Powdered Sugar (Confectioners’ Sugar): I like to add a touch of powdered sugar to my whipped cream. It sweetens the cream ever so slightly and helps stabilize it, preventing it from weeping. Because it’s so fine, it dissolves instantly, leaving no gritty texture. Granulated sugar can be used in a pinch, but it might take a bit longer to dissolve and could make the cream slightly less smooth. Adjust the amount to your preference; if your chocolate is very dark, you might want a little more.
- Pure Vanilla Extract: A splash of vanilla extract really brightens and enhances the chocolate flavor without overpowering it. I always opt for pure vanilla extract over imitation for the best taste. While it’s a small addition, it makes a surprising difference in rounding out the overall profile of this simple dessert. If you want to experiment, you could try a non-alcohol alternative like vanilla bean paste for a more intense vanilla experience, or even a hint of espresso powder to deepen the chocolate notes without adding a coffee flavor.
- Pinch of Salt: Just a tiny pinch! Salt is a flavor enhancer, and it truly makes the chocolate taste more “chocolatey.” It balances the sweetness and brings out the depth of the dark chocolate. Don’t skip it; you won’t taste it directly, but you’ll notice its absence if it’s not there.
Step-by-Step Instructions
Making my Ingredient Chocolate Mousse is incredibly straightforward, focusing on careful technique to achieve that perfect light and creamy consistency. Here’s how I bring this simple yet elegant dessert to life:
- Prepare Your Chocolate: First things first, I chop my high-quality dark chocolate into very small, uniform pieces. This ensures it melts evenly and quickly. Then, I place the chopped chocolate in a medium-sized heatproof bowl.
- Melt the Chocolate: I like to melt the chocolate using a double boiler method (bain-marie). I set the bowl of chocolate over a saucepan containing about an inch or two of simmering water, making sure the bottom of the chocolate bowl doesn’t touch the water. The steam will gently melt the chocolate. I stir occasionally with a rubber spatula until the chocolate is completely smooth and glossy, with no lumps remaining. Alternatively, you can use a microwave: heat in 30-second intervals, stirring well after each, until smooth. Be careful not to overheat the chocolate, as it can seize. Once melted, I remove the bowl from the heat and let the chocolate cool down slightly. It should still be warm and fluid, but not hot to the touch. This cooling step is crucial so it doesn’t melt the whipped cream later.
- Whip the Cream: While the chocolate cools, I prepare my whipped cream. I pour the very cold heavy whipping cream into a large, chilled mixing bowl. Using an electric mixer (either a hand mixer or a stand mixer with a whisk attachment), I start beating the cream on medium speed. As it begins to thicken, I add the powdered sugar (if using) and the vanilla extract (or non-alcohol alternative) and the pinch of salt. I continue beating on medium-high speed until the cream forms soft to medium peaks. This means when I lift the whisk, the cream holds its shape but the tip gently curls over. Be careful not to over-whip the cream, or it will become grainy and lose its light texture.
- Fold in the Chocolate: Now for the magic! I take about one-third of my whipped cream and gently fold it into the slightly cooled melted chocolate. I use a rubber spatula and a gentle, circular motion, scraping down the sides of the bowl, until it’s just combined. This step lightens the chocolate mixture and makes it easier to incorporate the rest of the cream without deflating it.
- Combine Everything: Once the first portion of cream is mixed in, I add the remaining whipped cream to the chocolate mixture. I continue folding gently, being very careful not to overmix. The goal is to combine the two mixtures until no streaks of white cream remain, but to retain as much air as possible. The mixture should be uniform in color, light, and airy.
- Portion and Chill: I spoon or pipe the mousse into individual serving glasses, ramekins, or a larger serving bowl. I try to make sure each portion is beautiful and airy. Then, I cover the mousses lightly with plastic wrap and refrigerate them for at least 2-4 hours, or ideally overnight, until they are firmly set. Chilling is essential for the mousse to develop its characteristic texture and flavor.
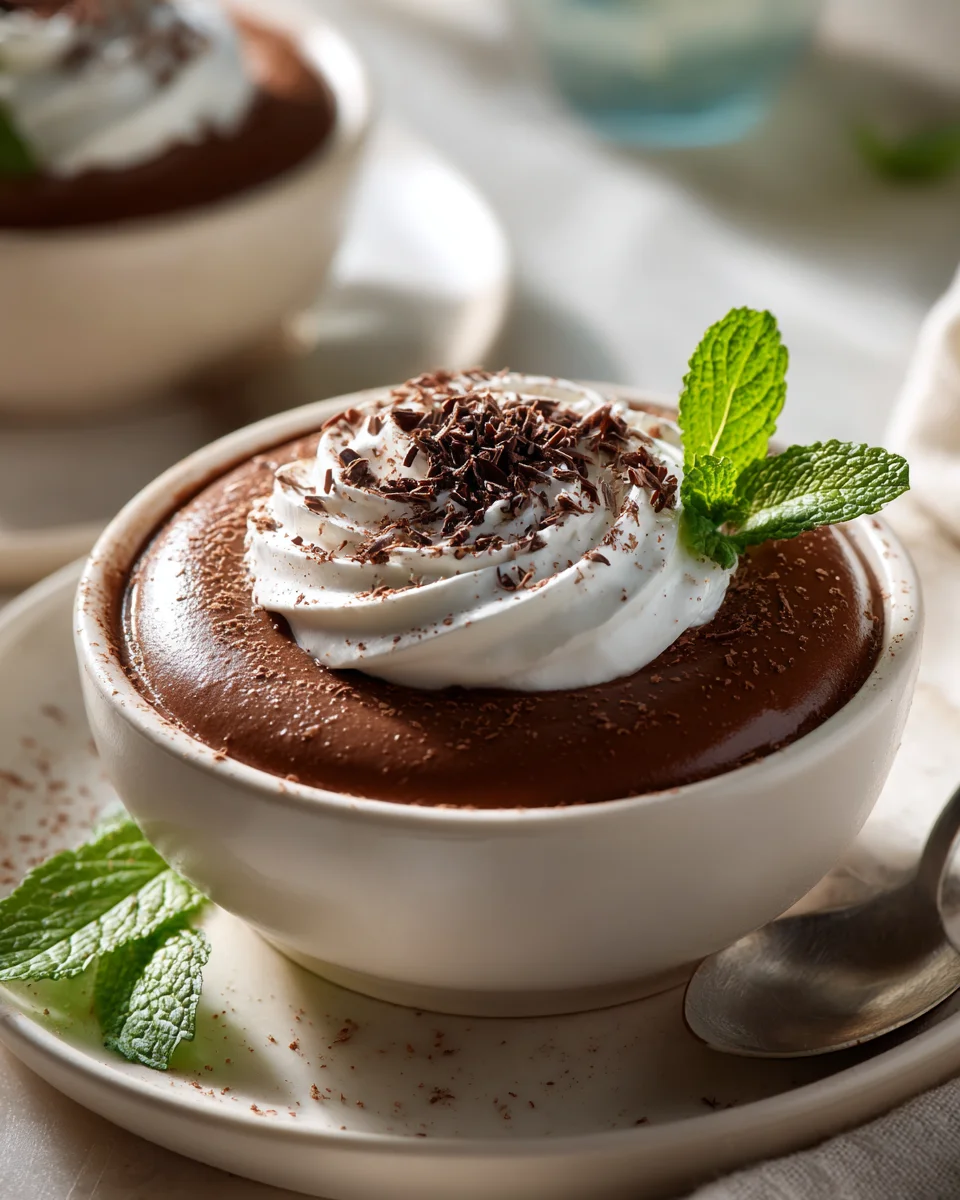
- Serve: Once thoroughly chilled and set, I serve my Ingredient Chocolate Mousse! I often garnish it simply with a dusting of cocoa powder, a few chocolate shavings, or fresh berries to complement the rich chocolate.
Tips & Suggestions
Achieving a truly light and creamy dessert like my Ingredient Chocolate Mousse isn’t just about the steps; it’s also about a few insider tips and understanding the nuances. Here are my favorite suggestions to help you perfect this simple indulgence:
- Quality of Ingredients is Paramount: As the name suggests, this mousse relies heavily on its core ingredients. Invest in the best quality dark chocolate you can afford. A superior chocolate will yield a far superior flavor profile. Similarly, use full-fat heavy whipping cream that is fresh. My rule of thumb is: if the ingredients are stellar, the final product will reflect that.
- Temperature Control is Key: Pay close attention to the temperature of both your melted chocolate and your heavy cream. Your heavy cream must be very cold to whip properly and hold its volume. I often chill my mixing bowl and whisk attachment in the freezer for 10-15 minutes before whipping the cream. Conversely, your melted chocolate needs to cool down sufficiently before you fold it into the whipped cream. If the chocolate is too hot, it will melt the delicate air bubbles in the cream, resulting in a runny, dense mousse. It should be warm enough to be liquid but cool enough that it doesn’t feel hot to the touch—think body temperature.
- Don’t Over-Whip the Cream: This is a common pitfall. You want your cream to reach soft to medium peaks. If you over-whip it, it will become stiff, grainy, and eventually turn into butter. Over-whipped cream won’t fold as smoothly into the chocolate and can make the mousse heavy instead of light and airy. Stop just as it holds its shape.
- Master the Folding Technique: Folding is crucial for incorporating the chocolate into the whipped cream without deflating the precious air you’ve just whipped in. Use a large rubber spatula and work gently. Cut down through the center of the mixture, sweep across the bottom of the bowl, and then fold it over the top. Rotate the bowl as you go. Be patient and take your time; a few gentle folds are better than aggressive stirring.
- Chill Thoroughly: Resist the urge to dive in too soon! The mousse needs ample time in the refrigerator to set up properly, allowing the chocolate to firm up and the flavors to meld. A minimum of 2-4 hours is essential, but I find that chilling it overnight yields the best texture and taste.
- Presentation Matters: While the mousse itself is simple, presenting it beautifully elevates the experience. Serve in elegant individual glasses, small ramekins, or even teacups. Garnish simply with a dusting of cocoa powder, a few delicate chocolate shavings, a sprig of fresh mint, or some fresh berries like raspberries or strawberries. These small touches make it feel truly special.
- Flavor Variations (Non-Alcoholic): While I love the classic, you can easily tweak the flavor profile. Instead of vanilla, try a few drops of non-alcohol peppermint extract for a mint chocolate mousse, or a hint of orange zest (ensuring it’s well mixed) for a citrusy twist. A tiny pinch of instant espresso powder dissolved in the melted chocolate can also deepen the chocolate flavor without making it taste like coffee.
Storage
Once you’ve made my light and creamy Ingredient Chocolate Mousse, proper storage ensures it stays delightful for as long as possible. Here’s what I recommend:
- Refrigeration is Essential: Chocolate mousse, due to its dairy content and delicate structure, absolutely needs to be stored in the refrigerator. Never leave it out at room temperature for an extended period, especially in warm climates.
- Airtight Container: Whether you’ve portioned your mousse into individual servings or kept it in a larger bowl, it’s crucial to cover it tightly. If using individual glasses or ramekins, I like to cover each one snugly with plastic wrap, ensuring the wrap touches the surface of the mousse as much as possible to prevent a skin from forming and to keep out any refrigerator odors. If storing in a larger bowl, transfer it to an airtight container or cover the bowl tightly with plastic wrap.
- How Long Does it Last?: When stored properly in the refrigerator, my Ingredient Chocolate Mousse will keep beautifully for up to 3-4 days. After this time, while it might still be safe to eat, the texture can start to degrade, becoming less airy and sometimes a bit watery.
- Freezing (Not Recommended): I generally do not recommend freezing this particular type of chocolate mousse. The delicate light and creamy texture, which is a hallmark of this recipe, tends to suffer significantly upon thawing. The air bubbles can collapse, and the mousse can become icy, grainy, and watery. It just won’t have that same wonderful melt-in-your-mouth quality that makes it so special.
- Serving After Storage: When you’re ready to serve your chilled mousse, you can take it directly from the refrigerator. If you’ve covered it with plastic wrap touching the surface, gently peel it off. If desired, you can add fresh garnishes just before serving.
Final Thoughts
Well, there you have it! I truly hope you’re as excited as I am about creating this incredible dessert. There’s just something utterly magical about a treat that delivers on all fronts – luxurious taste, ethereal texture, and surprising ease of preparation.
This Ingredient Chocolate Mousse (light & Creamy Dessert) truly is a masterpiece in its simplicity, which is precisely why I believe it’s an absolute must-try. It’s not just any chocolate mousse; it’s a revelation of lightness that never compromises on that profound, rich chocolate flavor we all adore. The way it melts in your mouth, leaving behind that wonderfully creamy, delicate sensation, is pure bliss. It’s the perfect elegant ending to a meal, or a delightful treat for any moment you crave something special.
So go on, gather your ingredients, and whip up this delightful dessert. I promise, your taste buds (and anyone you share it with!) will thank you for indulging in every single light and creamy spoonful. Enjoy!

Indulge in Light & Creamy Chocolate Mousse Dessert
- Total Time: 45 minutes
- Yield: 4 servings
Description
This light and creamy chocolate mousse is a delightful treat that combines rich chocolate flavor with an airy texture. Perfect for any occasion, it’s easy to prepare and will impress your guests.
Ingredients
- High-Quality Dark Chocolate (60-70% cacao)
- Heavy Whipping Cream (at least 36% milk fat)
- Powdered Sugar (Confectioners' Sugar)
- Pure Vanilla Extract
- Pinch of Salt
Instructions
- Prepare Your Chocolate: Chop the high-quality dark chocolate into very small, uniform pieces and place it in a medium-sized heatproof bowl.
- Melt the Chocolate: Use a double boiler method to melt the chocolate, stirring occasionally until smooth. Alternatively, use a microwave in 30-second intervals until melted. Let it cool slightly.
- Whip the Cream: Pour the very cold heavy whipping cream into a large, chilled mixing bowl. Beat on medium speed, adding powdered sugar, vanilla extract, and a pinch of salt until soft to medium peaks form.
- Fold in the Chocolate: Take about one-third of the whipped cream and gently fold it into the slightly cooled melted chocolate until just combined.
- Combine Everything: Add the remaining whipped cream to the chocolate mixture and fold gently until no streaks of white cream remain.
- Portion and Chill: Spoon or pipe the mousse into serving glasses or bowls, cover lightly with plastic wrap, and refrigerate for at least 2-4 hours or overnight until set.
- Serve: Once chilled and set, serve the mousse garnished with cocoa powder, chocolate shavings, or fresh berries.
- Prep Time: 15 mins
- Cook Time: 30 mins
- Category: Dessert
- Method: Chilling
- Cuisine: French
Nutrition
- Serving Size: 1 bowl
- Calories: 350
- Sugar: 20 g
- Sodium: 50 mg
- Fat: 25 g
- Saturated Fat: 15 g
- Unsaturated Fat: 5 g
- Trans Fat: 0 g
- Carbohydrates: 30 g
- Fiber: 3 g
- Protein: 5 g
- Cholesterol: 80 mg
Keywords: Use high-quality ingredients for the best flavor. Ensure the heavy cream is very cold for proper whipping, and be careful not to over-whip the cream to maintain its light texture.


Leave a Comment