
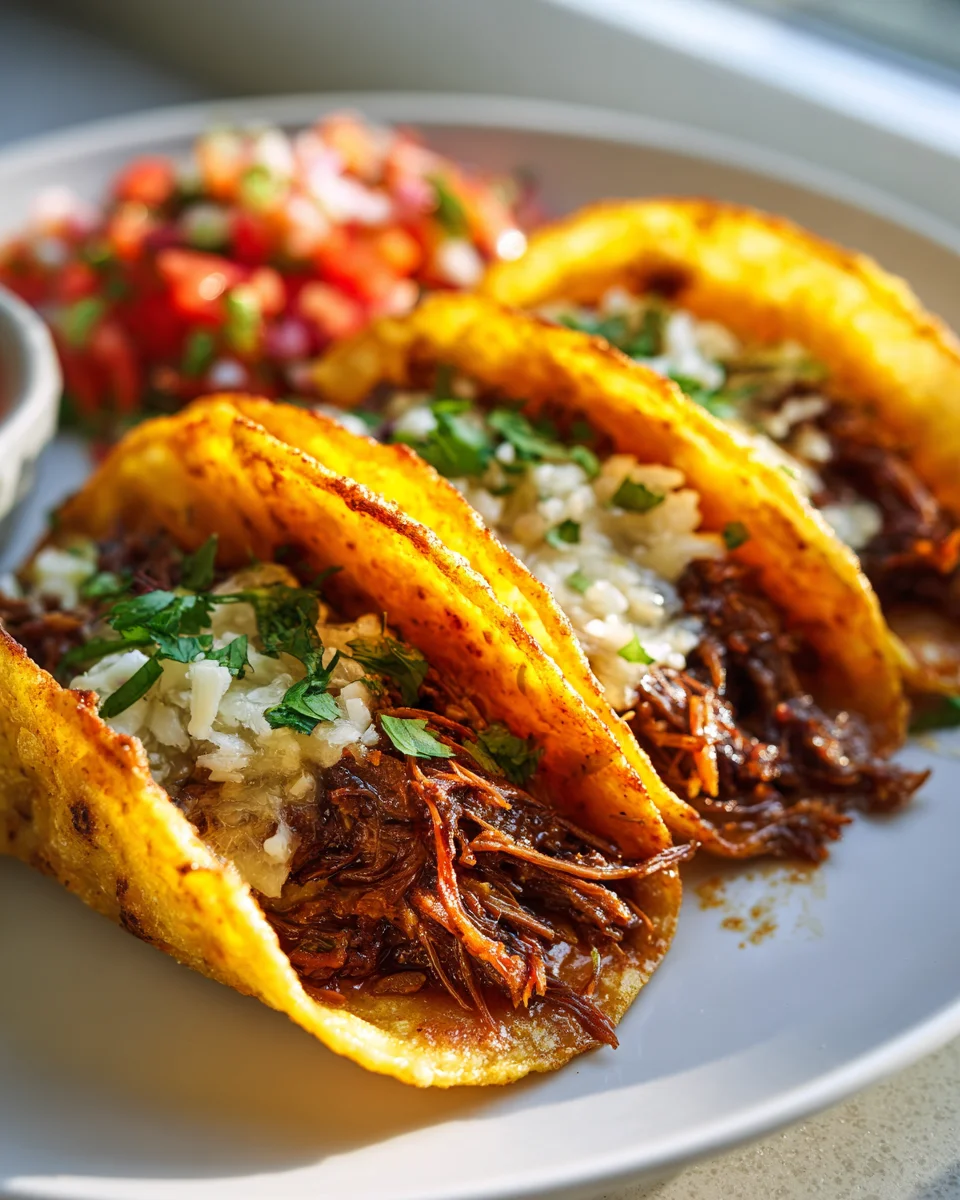
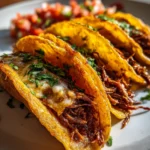
My Fave Birria Tacos
Oh boy, get ready for a flavor explosion! These aren’t just any tacos; these are My Fave Birria Tacos, and I am absolutely convinced they’ll become your favorite too. What makes this recipe so incredibly special, you ask? Well, it’s all about the unbelievably tender, fall-apart beef, slow-cooked to perfection in a rich, deeply savory, and subtly spicy broth. We’re talking layers upon layers of complex flavors that simmer together to create something truly magical without a drop of alcohol.
You are going to absolutely adore these birria tacos because they deliver that authentic, crave-worthy experience right in your own kitchen. Imagine: succulent, shreddable beef nestled in warm, crispy-edged tortillas (because we’re dipping them in that glorious consommé before they hit the pan, of course!), often melted with gooey cheese, and served with a side of that incredible, aromatic dipping broth. Every bite is an adventure, a perfect blend of texture and taste that will have you coming back for more. This isn’t just a meal; it’s an event, a celebration of flavor that’s surprisingly approachable to make. Trust me, once you try these, you’ll understand why they’re my absolute favorite!

Ingredient Notes
Oh, these Birria Tacos! They’re truly my absolute favorite, and getting the right ingredients makes all the difference for that rich, savory experience. When I set out to make these, I always think about what makes them sing. Here’s a breakdown of the key players:
- The Beef: For my birria, I swear by a good chuck roast. It has incredible marbling that renders down beautifully, becoming incredibly tender and flavorful during the long braise. I often combine it with a bit of bone-in short rib for extra richness and gelatin, but a boneless chuck roast alone will still yield amazing results.
- Dried Chiles: This is where the magic really happens for that signature deep red color and complex flavor. I always use a mix of dried guajillo, ancho, and chile de arbol.
- Guajillo: Offers a fruity, mild-to-medium heat.
- Ancho: Provides a rich, smoky, almost raisin-like sweetness with minimal heat.
- Chile de Arbol: These are the spicy ones! Use to your heat preference – I usually add just a few for a nice kick without overwhelming the other flavors.
If you can’t find all three, prioritize guajillo and ancho, then use a pinch of cayenne pepper if you need some heat in a pinch, but the dried chiles truly give the best flavor.
- Aromatics & Spices: Don’t underestimate the power of fresh onion, garlic, and tomato paste. These form the aromatic base for the rich sauce. For spices, I rely on cumin, Mexican oregano, bay leaves, and a few whole cloves. A little pinch of cinnamon can also add a wonderful warmth.
- Braising Liquid (Non-Alcoholic): To create that deep, umami-rich consommé without alcohol, I use a high-quality beef broth as the primary liquid. A splash of apple cider vinegar also adds a bright tang and helps tenderize the meat, mimicking some of the acidity alcohol would provide. You can also experiment with non-alcoholic dark beer alternatives if you enjoy that depth.
- Tortillas: You absolutely need good quality corn tortillas for these tacos. They hold up best to dipping in the consommé and frying, developing that fantastic texture.
- Cheese: For that perfect melty pull, I typically use Oaxaca cheese, which shreds beautifully and melts like a dream. Monterey Jack or a good Mexican blend (like a quesadilla blend) also work wonderfully.
- Toppings: Keep it classic! Freshly chopped white onion, cilantro, and plenty of lime wedges are essential for cutting through the richness.
Step-by-Step Instructions
Ready to make my favorite Birria Tacos? This process might seem like a few steps, but it’s incredibly rewarding, and trust me, every bit of effort is worth it for that incredible flavor!
- Prep the Beef: Start by patting your chuck roast (and short ribs, if using) dry with paper towels. Cut it into large 2-3 inch chunks. Season generously all over with salt and freshly ground black pepper. In a large Dutch oven or heavy-bottomed pot, heat a couple of tablespoons of vegetable oil over medium-high heat. Sear the beef in batches until deeply browned on all sides. This browning step is crucial for developing deep flavor! Remove the beef from the pot and set aside.
- Prepare the Chiles: While the beef is searing, remove the stems and seeds from your dried guajillo, ancho, and arbol chiles. (Wear gloves if your skin is sensitive to spicy chiles!) Place the deseeded chiles in a bowl and cover them with boiling water. Let them rehydrate for about 15-20 minutes until softened.
- Make the Chile Sauce: While the chiles are soaking, add a little more oil to your pot if needed, then sauté a chopped onion until softened. Add several cloves of minced garlic and a tablespoon of tomato paste, cooking for another minute until fragrant. Drain the softened chiles, reserving a little of the soaking liquid. Transfer the chiles, sautéed onion and garlic, tomato paste, beef broth, apple cider vinegar, cumin, Mexican oregano, bay leaves, and cloves to a blender. Blend until completely smooth. If the sauce is too thick, add a little of the reserved chile soaking liquid until you get a pourable consistency. Season the sauce with salt to taste.
- Braise the Birria: Return the seared beef to the Dutch oven. Pour the blended chile sauce over the beef. Add enough additional beef broth to just cover the meat if needed. Bring the mixture to a simmer, then reduce the heat to low, cover the pot, and braise for 3-4 hours, or until the beef is fork-tender and easily pulls apart. (Alternatively, you can cook this in a slow cooker on low for 6-8 hours, or in an Instant Pot on high pressure for 60-70 minutes with a natural release.)
- Shred the Beef & Strain Consommé: Once the beef is tender, carefully remove it from the pot and shred it using two forks. It should fall apart easily. Set the shredded beef aside. Now, for the magical consommé! Strain the braising liquid through a fine-mesh sieve into a separate bowl or container, pressing on the solids to extract all the liquid. This removes any chile skins or spice fragments, leaving you with a silky-smooth, incredibly flavorful dipping broth. Skim off any excess fat from the top (you can reserve some for frying the tortillas if desired).
- Assemble the Tacos: Heat a large griddle or non-stick pan over medium heat. Dip a corn tortilla into the birria consommé, ensuring both sides are coated in that rich, red broth. Place the dipped tortilla on the hot griddle. Sprinkle generously with your chosen cheese (Oaxaca or Monterey Jack are perfect) and a good helping of the shredded birria meat. Cook for a couple of minutes until the cheese starts to melt. Fold the tortilla in half to create your taco, pressing down gently. Continue to cook, flipping occasionally, until both sides are crispy and golden brown. Repeat with the remaining tortillas and filling.
- Serve It Up: Arrange your crispy Birria Tacos on a platter. Serve them immediately with small bowls of the warm, strained consommé for dipping, alongside bowls of chopped white onion, fresh cilantro, and lime wedges. Get ready for a flavor explosion!
Tips & Suggestions
Making Birria Tacos is a culinary adventure, and I’ve picked up a few tricks over the years to make them truly spectacular. Here are my top tips and suggestions to elevate your “My Fave Birria Tacos” experience:
- Don’t Rush the Sear: Seriously, that initial browning of the beef is non-negotiable. It creates deep, complex flavors through the Maillard reaction that you just can’t get otherwise. Take your time and make sure each piece is beautifully caramelized.
- Taste the Consommé: Before you serve, always taste your consommé. It should be rich, savory, and perfectly seasoned. If it needs more salt, add it. If it feels a little flat, a tiny splash more of apple cider vinegar or even a pinch of sugar can balance it out.
- The Tortilla Dip is Key: This is what gives birria tacos their iconic flavor and color! Don’t skip dipping your tortillas in the consommé before frying. It infuses them with flavor and helps them get that beautiful reddish hue and crispy texture. For extra flavor and crispiness, skim some of the rendered fat from the top of the consommé and use that to fry your tortillas.
- Crispy is Crucial: The best birria tacos have perfectly crispy, slightly charred tortillas. Don’t be afraid to let them cook on the griddle until they’re golden and firm. A little patience here makes all the difference.
- Make It Ahead: The birria stew actually tastes even better the next day! The flavors meld and deepen overnight. You can prepare the birria and consommé a day or two in advance, then just reheat and assemble the tacos fresh when you’re ready to eat.
- Toppings Galore: While I love the classic onion, cilantro, and lime, feel free to get creative! Sliced radishes add a nice crunch and peppery bite, or a simple avocado salsa can bring a creamy element.
- Serving Presentation: Serve the consommé in small, individual bowls for each person. It’s not just a dipping sauce; it’s a vital part of the birria taco experience!
Storage
One of the best things about making my Fave Birria Tacos is how well the components store! You can enjoy the deliciousness for days.
- Shredded Birria Meat: Store any leftover shredded beef in an airtight container in the refrigerator for up to 3-4 days. It also freezes beautifully for up to 2-3 months.
- Consommé: The birria consommé can be stored separately in an airtight container in the refrigerator for up to 3-4 days. I often freeze portions of it in freezer-safe bags or containers for future taco cravings! It thaws perfectly.
- Assembled Tacos: While best enjoyed fresh, if you have leftover assembled tacos, store them in an airtight container in the fridge for a day. Reheat them gently on a dry skillet or griddle until warmed through and re-crisped. The tortillas won’t be quite as perfectly crispy as fresh, but they’ll still be tasty!
Final Thoughts
There’s truly nothing quite like the experience of diving into a plate of My Fave Birria Tacos. I poured my heart into perfecting this recipe, ensuring every single bite delivers that incredible depth of flavor we all crave. The incredibly tender, slow-cooked beef, bathed in that unbelievably rich and savory consommé, paired with the perfectly crisp, cheese-laden tortillas… it’s a symphony for your taste buds that simply has to be experienced.
This isn’t just a meal; it’s an adventure in flavor, a truly unique blend of savory, comforting, and utterly satisfying that makes you want more with every dip. Seriously, you have to try My Fave Birria Tacos for yourself. Get ready to dip, crunch, and fall head over heels for your new favorite taco. Happy cooking!
My Fave Beef Birria Tacos: Unforgettable Flavor!
- Total Time: 4 hours 30 minutes
- Yield: 6 servings
Description
Get ready for a flavor explosion with these incredibly tender, fall-apart beef birria tacos. Slow-cooked in a rich, savory broth, they deliver an authentic, crave-worthy experience right in your kitchen.
Ingredients
- Chuck roast
- Bone-in short rib (optional)
- Dried guajillo chiles
- Dried ancho chiles
- Dried chile de arbol
- Onion
- Garlic
- Tomato paste
- Cumin
- Mexican oregano
- Bay leaves
- Whole cloves
- Cinnamon (optional)
- Beef broth
- Apple cider vinegar
- Corn tortillas
- Oaxaca cheese
- Monterey Jack cheese
- Freshly chopped white onion
- Cilantro
- Lime wedges
- Vegetable oil
- Salt
- Freshly ground black pepper
Instructions
- Start by patting your chuck roast (and short ribs, if using) dry with paper towels. Cut it into large 2-3 inch chunks. Season generously all over with salt and freshly ground black pepper. In a large Dutch oven or heavy-bottomed pot, heat a couple of tablespoons of vegetable oil over medium-high heat. Sear the beef in batches until deeply browned on all sides. Remove the beef from the pot and set aside.
- While the beef is searing, remove the stems and seeds from your dried guajillo, ancho, and arbol chiles. Place the deseeded chiles in a bowl and cover them with boiling water. Let them rehydrate for about 15-20 minutes until softened.
- While the chiles are soaking, add a little more oil to your pot if needed, then sauté a chopped onion until softened. Add several cloves of minced garlic and a tablespoon of tomato paste, cooking for another minute until fragrant. Drain the softened chiles, reserving a little of the soaking liquid. Transfer the chiles, sautéed onion and garlic, tomato paste, beef broth, apple cider vinegar, cumin, Mexican oregano, bay leaves, and cloves to a blender. Blend until completely smooth. If the sauce is too thick, add a little of the reserved chile soaking liquid until you get a pourable consistency. Season the sauce with salt to taste.
- Return the seared beef to the Dutch oven. Pour the blended chile sauce over the beef. Add enough additional beef broth to just cover the meat if needed. Bring the mixture to a simmer, then reduce the heat to low, cover the pot, and braise for 3-4 hours, or until the beef is fork-tender and easily pulls apart.
- Once the beef is tender, carefully remove it from the pot and shred it using two forks. Set the shredded beef aside. Strain the braising liquid through a fine-mesh sieve into a separate bowl or container, pressing on the solids to extract all the liquid. Skim off any excess fat from the top.
- Heat a large griddle or non-stick pan over medium heat. Dip a corn tortilla into the birria consommé, ensuring both sides are coated in that rich, red broth. Place the dipped tortilla on the hot griddle. Sprinkle generously with your chosen cheese and a good helping of the shredded birria meat. Cook for a couple of minutes until the cheese starts to melt. Fold the tortilla in half to create your taco, pressing down gently. Continue to cook, flipping occasionally, until both sides are crispy and golden brown.
- Arrange your crispy Birria Tacos on a platter. Serve them immediately with small bowls of the warm, strained consommé for dipping, alongside bowls of chopped white onion, fresh cilantro, and lime wedges.
- Prep Time: 30 mins
- Cook Time: 4 hours
- Category: Dinner
- Method: Braising
- Cuisine: Mexican
Nutrition
- Serving Size: 1 taco
- Calories: 350
- Sugar: 2 g
- Sodium: 800 mg
- Fat: 20 g
- Saturated Fat: 10 g
- Unsaturated Fat: 8 g
- Trans Fat: 0 g
- Carbohydrates: 30 g
- Fiber: 3 g
- Protein: 20 g
- Cholesterol: 70 mg
Keywords: Don't rush the sear of the beef for deep flavors. Always taste your consommé before serving, and don't skip dipping your tortillas in the consommé for iconic flavor and color.

Leave a Comment