
Sushi Cups
Oh my goodness, get ready to fall in love with a dish that’s about to become your new favorite party trick! Sushi Cups are here to revolutionize your sushi experience. What makes them so special, you ask? Well, imagine all the glorious flavors and textures of your favorite sushi roll, but without the hassle of rolling! That’s right, no mats, no tricky technique, just pure, unadulterated sushi bliss in an adorable, bite-sized package.
I know you’re going to absolutely adore these Sushi Cups because they take all the intimidation out of making sushi at home. They’re incredibly fun to customize, perfect for little hands (and big ones!), and look absolutely stunning on any platter, making you look like a culinary genius with minimal effort. Plus, who can resist a dish that’s both elegant and incredibly easy to eat?
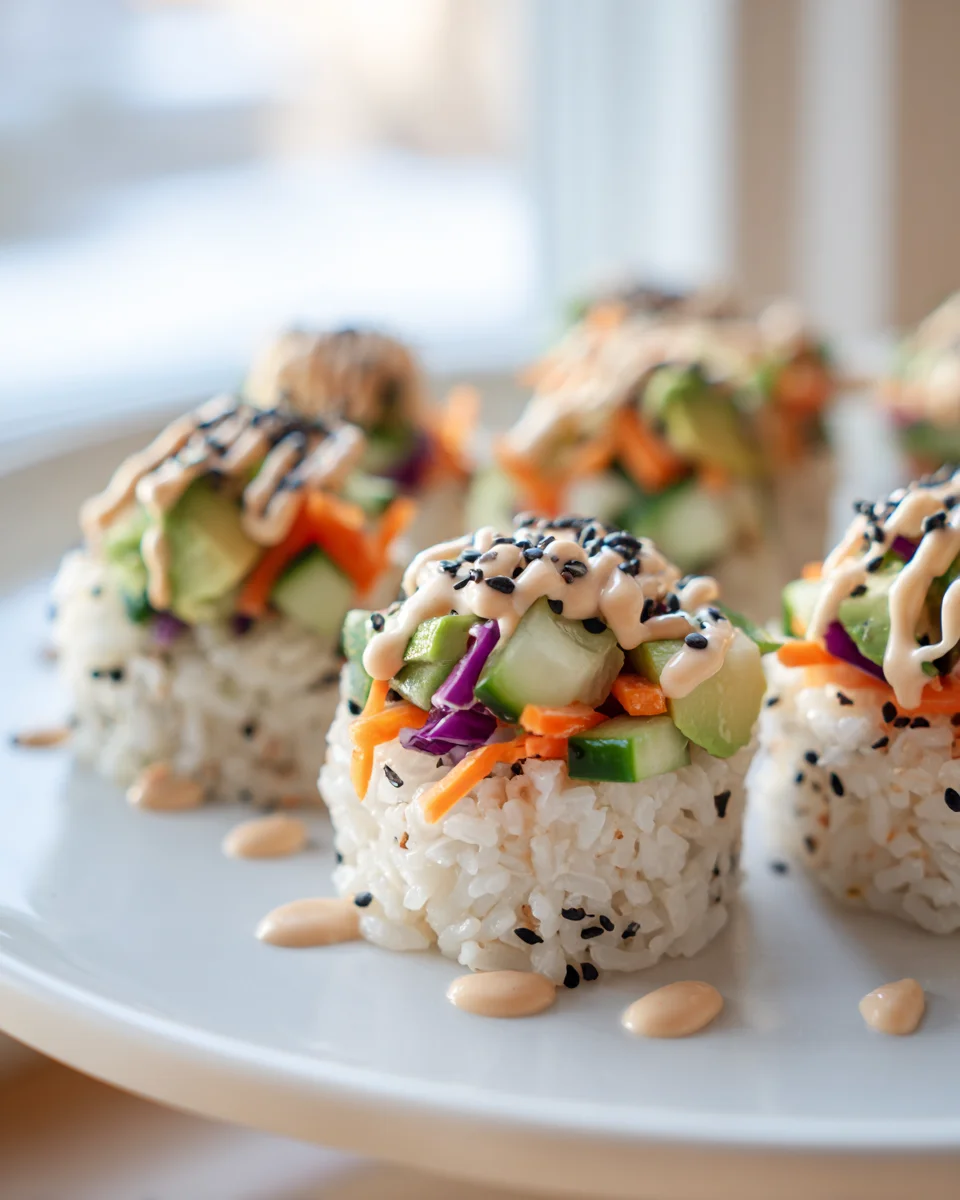
So, what exactly are we talking about? Picture perfectly seasoned sushi rice, nestled into individual cup shapes. These little rice bases then become the canvas for your wildest sushi dreams! We’ll layer them with fresh seafood like salmon or tuna, vibrant veggies, creamy avocado, and drizzle them with delicious sauces. It’s essentially a beautiful, deconstructed sushi roll, neatly presented in a cup, ready for you to pick up and enjoy. Get ready for an explosion of flavor and a whole lot of fun!

Oh, hello there, fellow food lover! Are you ready to dive into a super fun and incredibly delicious twist on traditional sushi? Today, we’re making Sushi Cups! I absolutely adore these because they’re such a creative and convenient way to enjoy all the flavors of your favorite sushi rolls without the fuss of rolling. They’re perfect for parties, lunchboxes, or just a quick, satisfying meal. Let’s get cooking!
Ingredient Notes
To make amazing Sushi Cups, choosing the right ingredients is key. Here’s what I recommend you grab and a few thoughts on why:
Sushi Rice
-
What it is: This isn’t just any rice; it’s a specific short-grain Japanese white rice. Its stickiness is crucial for holding the cup shape, and its texture is wonderfully soft and slightly chewy.
-
Why it’s essential: You absolutely need short-grain rice. Other types, like long-grain or even medium-grain, won’t achieve the right stickiness or mouthfeel, and your cups might fall apart. Trust me on this one!
-
Seasoning: The magic happens when you season it! A blend of rice vinegar, sugar, and salt gives sushi rice its distinctive sweet, tangy, and savory flavor. Don’t skip this step – it truly elevates the entire dish.
-
Substitution: While not ideal, if you’re in a pinch, you can sometimes find “sushi rice blend” at specialty stores, but true short-grain Japanese sushi rice is always my top pick.
Nori (Seaweed Sheets)
-
What it is: These are roasted sheets of dried seaweed. They add a wonderful umami flavor and a slight chewiness, plus they act as a fantastic edible liner for our cups.
-
Why it’s essential for cups: For Sushi Cups, I love using nori as an edible base or liner in the muffin tin. It helps define the cup shape, adds flavor, and makes them easier to handle. You’ll cut them into strips or circles to fit your muffin tin.
-
Substitution: If you absolutely don’t like nori, you can omit it. However, your cups will be a bit more delicate and might resemble mini sushi bowls rather than true “cups.” You might want to line your muffin tin with plastic wrap instead to help with removal.
Proteins (My Favorites for Sushi Cups)
-
Cooked Shrimp: A classic for a reason! I like to buy pre-cooked shrimp and just chop it into bite-sized pieces. It’s light, subtly sweet, and pairs beautifully with the rice.
-
Crab Meat (Real or Imitation): Whether you go for delicate lump crab meat or the more economical imitation crab sticks (surimi), both work wonderfully. Flake or shred it well. A little mayo in the mix can be lovely too!
-
Flaked Cooked Beef: For a hearty option, I sometimes use finely flaked cooked beef. Think leftover roast beef, or quickly stir-fried very thinly sliced beef seasoned with a bit of soy sauce (or tamari for gluten-free) and a non-alcoholic cooking mirin substitute. Just make sure it’s tender and not too chunky for the cups.
-
Substitution: Feel free to get creative! Cooked chicken breast, smoked salmon, firm tofu (marinated and pan-fried), or even a combination of these would be delicious.
Fresh Vegetables
-
Avocado: Creamy, rich, and a must-have for me. Make sure it’s ripe but still firm enough to dice without turning to mush.
-
Cucumber: Adds a fantastic crunch and refreshing taste. I usually peel and deseed mine before dicing to avoid excess water.
-
Carrots: Finely julienned or diced carrots bring a touch of sweetness and vibrant color. A quick blanch makes them a little softer but not mushy.
-
Bell Peppers: Any color works! Diced finely, they offer a crisp texture and mild sweetness.
-
Substitution: Edamame, corn, scallions, or even thinly sliced radishes can be excellent additions.
Condiments & Garnishes
-
Soy Sauce (or Tamari): For dipping! Always a classic.
-
Sriracha Mayo: My go-to for a little kick! It’s just sriracha mixed with mayonnaise, easy peasy.
-
Pickled Ginger & Wasabi: Traditional sushi accompaniments that cleanse the palate and add a punch of flavor. I wouldn’t skip these if you enjoy them!
-
Sesame Seeds: Toasted black and/or white sesame seeds add a lovely visual appeal and a nutty crunch.
-
Non-Alcoholic Mirin Substitute: If a recipe calls for mirin in your fillings, you can mimic its sweetness and tang by mixing a dash of rice vinegar with a pinch of sugar. For cooking, a non-alcoholic cooking sake alternative or even a splash of vegetable broth can work.
Step-by-Step Instructions
Making Sushi Cups is surprisingly straightforward, and dare I say, fun! Here’s how I go about it:
Step 1: Cook and Season Your Sushi Rice
First things first, get your rice ready. I always rinse my sushi rice thoroughly under cold running water until the water runs clear. This removes excess starch and helps with that perfect stickiness. Then, cook it according to package directions, typically in a rice cooker or on the stovetop. Once it’s cooked, transfer it to a large, shallow non-metallic bowl. While it’s still warm (this is important!), gently fold in your sushi vinegar seasoning (rice vinegar, sugar, and salt). I use a cutting motion with a spatula to mix it in without mashing the grains. Let it cool down to room temperature, or at least lukewarm, before assembling your cups.
Step 2: Prepare Your Fillings
While the rice is cooling, prepare all your delicious fillings. This is where you can truly customize your Sushi Cups! If using shrimp, chop it into small, bite-sized pieces. If you’re using imitation crab, shred it. For cooked beef, make sure it’s finely flaked or diced so it fits neatly into the cups. Dice your avocado and cucumber. Julienne or finely dice your carrots and bell peppers. If you’re using any sauces like Sriracha mayo, now’s a good time to mix that up too. Having everything prepped and ready (a technique called ‘mise en place’) makes assembly a breeze!
Step 3: Prepare Your Muffin Tin
This step is crucial for getting those perfect cup shapes! I use a standard 12-cup muffin tin. You have a couple of options here:
-
With Nori: If you’re using nori, cut your seaweed sheets into strips or circles that will fit inside each muffin cup, lining the bottom and sides. You might need to experiment a little to get the right size. This adds flavor and structure.
-
Without Nori: If you’re skipping the nori, I highly recommend lightly greasing each muffin cup with a neutral oil (like canola or vegetable oil) or, even better, lining each cup with plastic wrap. Leave a bit of overhang on the sides – this will create little “handles” to help you lift the sushi cups out later.
Step 4: Assemble Your Sushi Cups
Now for the fun part – building your cups! It’s like creating mini edible layers of art:
-
Base Layer: If you’re using nori, place your prepared nori piece into the bottom of each muffin cup. If not, just ensure your cup is ready with oil or plastic wrap.
-
Rice Layer One: Take a small amount of your cooled sushi rice (about 1-2 tablespoons, depending on your muffin tin size) and press it firmly into the bottom of each muffin cup. Use your fingers or the back of a spoon to create a flat, even base. Don’t press too hard, but hard enough so it holds its shape.
-
Filling Layers: Now, get creative! Add layers of your chosen fillings. I usually start with a layer of avocado, then some cucumber, followed by your protein (shrimp, crab, beef). Don’t overfill the cups at this stage; remember you need room for more rice!
-
Rice Layer Two (Top): Gently cover your fillings with another layer of sushi rice. Press down lightly but firmly with your fingers or a spoon to compact everything together. You want to make sure all the layers are snugly packed so the cup holds its shape when inverted.
Step 5: Invert and Garnish
Once all your cups are assembled, it’s time for the big reveal! Place a serving platter or large cutting board over the muffin tin. With one swift and confident motion, carefully invert the entire muffin tin onto the platter. If you lined them with plastic wrap, gently pull on the overhangs to lift each cup out. If you used nori or just greased the tin, they should pop right out with a gentle tap or wiggle.
Finally, garnish your beautiful Sushi Cups! I love to sprinkle them with black and white sesame seeds, drizzle a bit of Sriracha mayo, and serve them alongside small dishes of soy sauce, pickled ginger, and a dab of wasabi. Enjoy your magnificent creations!
Tips & Suggestions
I’ve made my share of Sushi Cups, and along the way, I’ve picked up a few tricks to make them even better:
-
The Rice is Royalty: Seriously, the quality and preparation of your sushi rice will make or break your Sushi Cups. Ensure it’s short-grain, rinsed well, cooked perfectly, and seasoned while warm. Letting it cool to room temperature or lukewarm is key for handling.
-
Don’t Overfill, but Do Press: It’s a delicate balance! You want enough filling to be satisfying, but not so much that the cup can’t hold its shape. When pressing the rice, be firm but gentle. You’re compacting the ingredients, not mashing them.
-
Muffin Tin Magic: If you’re not using nori, lining your muffin tin with plastic wrap is a game-changer for easy removal. Cut squares of plastic wrap, press them into each cup, and leave plenty of overhang. Once filled, you can just lift the sushi cup out by the plastic wrap ‘handles’.
-
Nori Navigation: When cutting nori to line the cups, a sharp pair of kitchen scissors or even a circular cookie cutter (if you have one that matches your muffin cup size) can create neat edges. For strips, measure the height of your muffin cup and cut accordingly.
-
Variety is the Spice of Life: Don’t be afraid to mix and match your fillings! One batch of Sushi Cups could have shrimp and avocado, while another could feature beef and cucumber. It makes for a gorgeous and interesting platter. Think about contrasting colors and textures too!
-
Chill Briefly for Firmness: If your Sushi Cups feel a little soft after assembly, pop the entire tray into the fridge for about 15-20 minutes. This helps the rice and fillings set a bit more, making them firmer and easier to handle.
-
Serving Temperature: While traditional sushi is often served at room temperature, I find Sushi Cups can be lovely slightly chilled too, especially on a warm day. Just don’t serve them ice cold, as the rice can become too firm.
-
Kids Love Them: These are fantastic for getting kids involved in the kitchen! Let them choose their own fillings and press the rice. They also make great lunchbox additions.
Storage
Sushi Cups are definitely at their absolute best when they are fresh! The texture of the rice is perfect, and the vegetables are crisp. However, if you do have leftovers or need to make them a little in advance, here are my storage tips:
-
Refrigeration: Place any leftover Sushi Cups in an airtight container. Arrange them in a single layer if possible, to prevent them from getting squished. Store them in the refrigerator for no more than 1 to 2 days.
-
Texture Changes: Be aware that the texture of the sushi rice will firm up and become a bit harder in the fridge. Also, certain ingredients like avocado will start to brown after some time. This is completely normal but something to keep in mind regarding freshness.
-
Serving from the Fridge: When serving Sushi Cups that have been refrigerated, I like to take them out of the fridge about 15-20 minutes before serving. This allows the rice to come closer to room temperature and softens it up a little, making them more enjoyable.
-
Not Freezer Friendly: I strongly advise against freezing Sushi Cups. Freezing will completely change the texture of the sushi rice, making it mushy and unpleasant when thawed. The fresh vegetables will also become watery and lose their crispness. So, definitely enjoy these fresh or within a couple of days!
Final Thoughts
And there you have it! My hope is that creating these incredible Sushi Cups has been as enjoyable for you as it always is for me. They truly are a game-changer – a delightful blend of your favorite sushi flavors, perfectly portioned, and incredibly fun to make and eat. No more struggling with rolling mats or intricate techniques; just pure, unadulterated sushi bliss in a convenient little package.
Whether you’re looking for a standout appetizer for your next gathering, a creative snack, or simply a quick and satisfying way to enjoy sushi without the fuss, these Sushi Cups deliver every single time. Their customization options mean endless possibilities, allowing you to tailor them to any palate, perhaps with a savory beef filling and your favorite non-alcohol sauces.
So, go ahead and share these wonderful Sushi Cups with your friends and family, or savor them all to yourself – I won’t tell! I promise, once you experience the ease and deliciousness of this recipe, you’ll be making Sushi Cups again and again. Enjoy every delightful bite!
Sushi Cups: Easy, Fun & Delicious Bites for Any Occasion
- Total Time: 50 minutes
- Yield: 12 servings
Description
Sushi Cups are a delightful twist on traditional sushi, offering all the flavors without the hassle of rolling. Perfect for parties or a quick meal, these bite-sized treats are both fun to make and eat!
Ingredients
- Short-grain Japanese white rice
- Rice vinegar
- Sugar
- Salt
- Nori (seaweed sheets)
- Cooked shrimp
- Crab meat (real or imitation)
- Flaked cooked beef
- Avocado
- Cucumber
- Carrots
- Bell peppers
- Soy sauce (or tamari)
- Sriracha mayo
- Pickled ginger
- Wasabi
- Toasted black sesame seeds
- Toasted white sesame seeds
- Non-alcoholic mirin substitute
Instructions
- Step 1: Cook and season your sushi rice. Rinse the sushi rice under cold running water until the water runs clear. Cook according to package directions, then transfer to a large, shallow bowl. While warm, gently fold in the sushi vinegar seasoning. Let it cool to room temperature.
- Step 2: Prepare your fillings. Chop cooked shrimp into small pieces, shred imitation crab, and ensure cooked beef is finely flaked. Dice avocado and cucumber, julienne or finely dice carrots and bell peppers, and mix any sauces like Sriracha mayo.
- Step 3: Prepare your muffin tin. Cut nori sheets into strips or circles to fit inside each muffin cup, or grease each cup with oil or line with plastic wrap.
- Step 4: Assemble your sushi cups. Place nori in the bottom of each muffin cup (if using), then add a layer of sushi rice, pressing it firmly. Add layers of fillings, starting with avocado, then cucumber, followed by protein. Cover with another layer of sushi rice, pressing down lightly.
- Step 5: Invert and garnish. Place a platter over the muffin tin and invert it to release the cups. Garnish with sesame seeds, drizzle with Sriracha mayo, and serve with soy sauce, pickled ginger, and wasabi.
- Prep Time: 30 mins
- Cook Time: 20 mins
- Category: Appetizer
- Method: Cooking
- Cuisine: Japanese
Nutrition
- Serving Size: 1 cup
- Calories: 150
- Sugar: 2 g
- Sodium: 300 mg
- Fat: 5 g
- Saturated Fat: 1 g
- Unsaturated Fat: 4 g
- Trans Fat: 0 g
- Carbohydrates: 22 g
- Fiber: 2 g
- Protein: 6 g
- Cholesterol: 30 mg
Keywords: Ensure your sushi rice is short-grain and well-prepared for the best texture. Don't overfill the cups, and consider lining your muffin tin with plastic wrap for easier removal. Feel free to mix and match fillings for variety!


Leave a Comment