
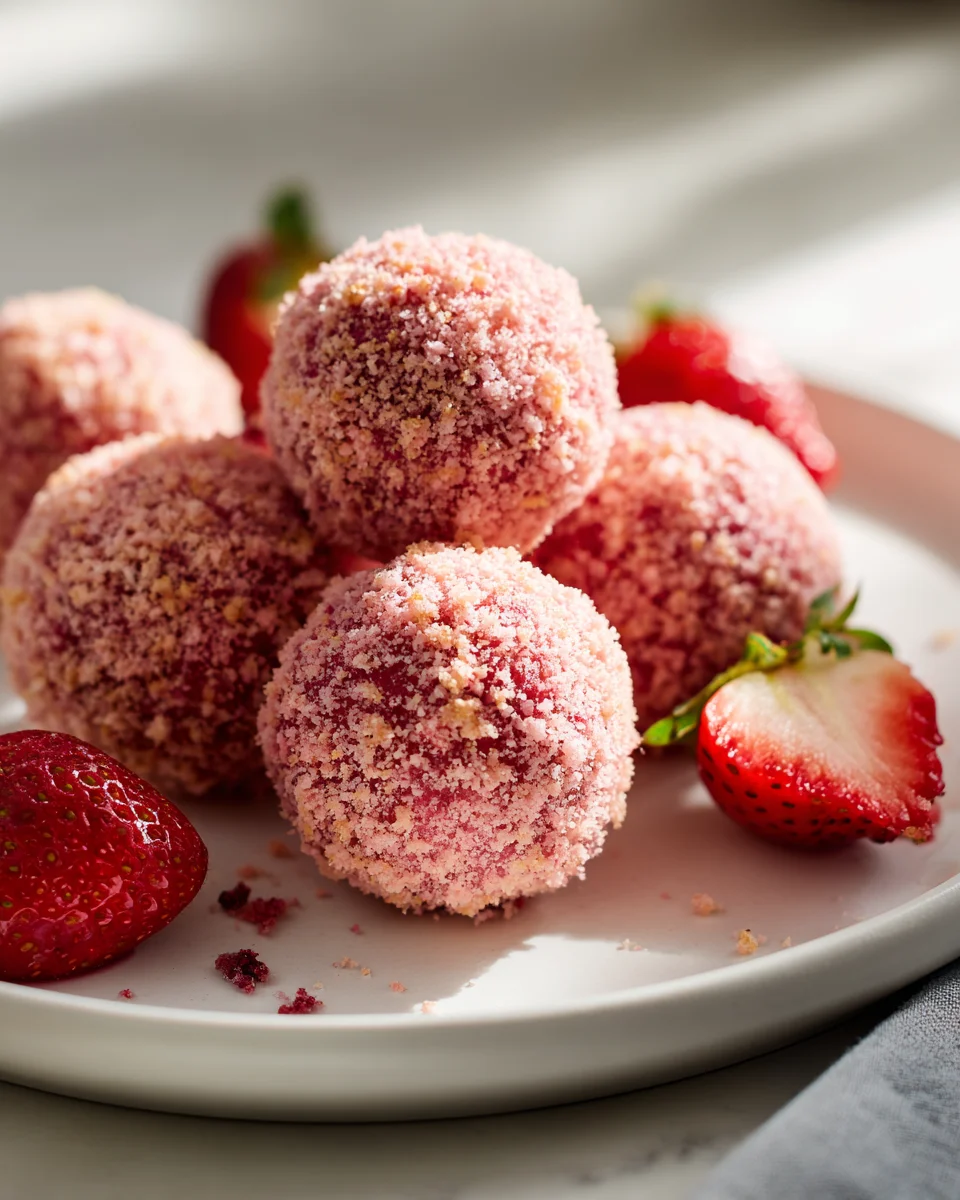
Strawberry Cheesecake Truffle Balls
Hello, fellow dessert lovers! I’m so excited to share one of my absolute favorite no-bake treats with you today: Strawberry Cheesecake Truffle Balls. If you’re anything like me, you adore the creamy, tangy goodness of a classic cheesecake, but sometimes you just don’t have the time or energy for a full-on baking project. That’s where these little gems come in!
What makes these Strawberry Cheesecake Truffle Balls so incredibly special is that they capture all the vibrant flavor of a fresh strawberry cheesecake – the rich cream cheese, the sweet strawberry essence, and a delightful cookie crumb base – all rolled into perfectly portioned, bite-sized spheres. They’re like miniature explosions of joy that you can pop right into your mouth! You’ll love them because they are ridiculously easy to make, require no oven, and are an absolute showstopper for any gathering, a thoughtful homemade gift, or simply a well-deserved treat for yourself. Imagine soft, luscious cheesecake filling infused with strawberry, blended with crushed cookies, and then coated in a delicate shell (perhaps white chocolate, perhaps even more cookie crumbs!), making them an irresistible indulgence that truly tastes like a slice of strawberry cheesecake without any of the fuss.

Ingredient Notes
Oh, these Strawberry Cheesecake Truffle Balls! They’re such a delightful bite, and the magic truly starts with choosing the right ingredients. I’ve found that a few key components are absolutely essential for that authentic cheesecake flavor and perfect truffle texture, but I also have some handy substitutions in case you’re missing something!
- Cream Cheese: This is the heart and soul of our cheesecake truffles! I always recommend using full-fat cream cheese, bricks specifically, not the whipped variety in tubs. The full-fat version provides the richest flavor and, more importantly, a firmer texture that’s crucial for rolling these beautiful balls without them becoming too soft. If you only have reduced-fat cream cheese, you can still use it, but be prepared for a slightly softer mixture that might need extra chilling time. Avoid any flavored cream cheeses; we want that classic tang to shine through with our strawberry!
- Graham Crackers: These crunchy crumbs give our truffles that classic cheesecake crust texture and a lovely honeyed flavor. I usually crush them finely in a food processor, almost to a sand-like consistency.
- Substitution: No graham crackers? No problem! You can easily substitute them with digestive biscuits, vanilla wafers, shortbread cookies, or even plain butter cookies. Just make sure to crush them to a similar fine texture. The flavor will vary slightly, but the structural integrity will remain.
- Powdered Sugar (Confectioners’ Sugar): This is vital for sweetening our truffle filling and contributing to its smooth, melt-in-your-mouth consistency. Unlike granulated sugar, powdered sugar dissolves beautifully without making the mixture gritty.
- Substitution: I really don’t recommend substituting powdered sugar. Granulated sugar will give you a grainy texture, and liquid sweeteners will throw off the consistency entirely. Stick to powdered sugar for the best results!
- Freeze-Dried Strawberries: Ah, these are my secret weapon for intense strawberry flavor and a gorgeous natural pink hue! Freeze-dried strawberries are fantastic because they provide concentrated fruit flavor and color without adding any extra moisture, which can make our truffles soggy. I process them into a fine powder in a food processor or spice grinder.
- Substitution: If you can’t find freeze-dried strawberries, you could use a very thick strawberry jam or preserve, but you’ll need to use less and might need to adjust the amount of graham cracker crumbs to compensate for the added moisture. For pure flavor, a high-quality strawberry extract works, but you’ll lose the natural color; a tiny drop of red food coloring can fix that!
- Vanilla Extract: A good quality vanilla extract enhances all the other flavors beautifully, adding depth to our cheesecake base.
- Substitution: Feel free to experiment! Almond extract offers a lovely complementary flavor, or you could even use a touch of lemon extract to brighten things up.
- White Chocolate: This is for our lovely outer coating! High-quality white chocolate melts smoothly and provides a beautiful canvas for our strawberry cheesecake truffles. Candy melts (pink or white) are also a great option if you want an easier, no-temper coating.
- Substitution: While white chocolate gives that classic look, you could use milk chocolate or dark chocolate for a different flavor profile, making them more of a chocolate-covered strawberry cheesecake treat. Pink candy melts are also excellent for a vibrant, fun look!
Step-by-Step Instructions
Creating these Strawberry Cheesecake Truffle Balls is truly a labor of love, but trust me, every step is worth it for that incredible burst of flavor! I’ve refined this process to make it as simple and foolproof as possible.
- Prepare Your Strawberry Powder and Graham Crumb Base: First things first, we need to get our dry components ready. Take your freeze-dried strawberries and pulse them in a food processor until they form a fine powder. Set aside. Next, crush your graham crackers (or chosen substitute) into very fine crumbs. A food processor works wonders here, but you can also place them in a zip-top bag and crush them with a rolling pin. You want them as fine as possible to integrate smoothly into the cream cheese mixture.
- Create the Cheesecake Filling: In a large mixing bowl, using an electric mixer, beat the softened full-fat cream cheese on medium speed until it’s incredibly smooth and creamy, with no lumps visible. This usually takes about 1-2 minutes.
- Sweeten and Flavor the Filling: Gradually add the powdered sugar to the cream cheese, mixing on low speed until fully incorporated. Then, add your freeze-dried strawberry powder and vanilla extract (or your chosen extract). Beat again on medium speed until everything is beautifully combined and the mixture has a lovely, uniform pink hue. Scrape down the sides of the bowl as needed to ensure everything is mixed thoroughly.
- Combine with Graham Cracker Crumbs: Gently fold in the crushed graham cracker crumbs into your strawberry cheesecake mixture. Use a spatula for this part, mixing until the crumbs are evenly distributed and the mixture holds together. Be careful not to overmix, or you might compact it too much.
- Chill, Chill, Chill (Crucial Step!): This is arguably the most important step for easy rolling! Cover the bowl with plastic wrap and refrigerate the mixture for at least 1-2 hours, or until it’s firm enough to handle and roll. I sometimes even pop it in the freezer for about 30 minutes if I’m in a hurry, but keep a close eye on it! A firm base makes all the difference.
- Roll Your Truffles: Once the mixture is nicely chilled, line a baking sheet with parchment paper. Use a small cookie scoop (about 1 tablespoon in size) to portion out the mixture. Roll each portion between your palms to form smooth, uniform balls. Place them on the prepared baking sheet. Once all your balls are rolled, I like to pop them back into the fridge or freezer for another 15-20 minutes while I prepare the chocolate. This helps them stay firm for dipping.
- Melt the Chocolate Coating: In a microwave-safe bowl, melt your white chocolate (or candy melts) in 30-second intervals, stirring well after each, until smooth and fully melted. Be careful not to overheat it, as white chocolate can seize easily.
- Dip and Decorate: Working with a few truffles at a time, use a fork or a candy dipping tool to dip each chilled truffle ball into the melted white chocolate. Tap off any excess chocolate by gently tapping the fork against the side of the bowl. Place the dipped truffles back onto the parchment-lined baking sheet. While the chocolate is still wet, sprinkle with additional freeze-dried strawberry powder, extra graham cracker crumbs, or even a contrasting drizzle of pink candy melt for extra flair.
- Final Chill to Set: Once all your truffles are dipped and decorated, return the baking sheet to the refrigerator for at least 30 minutes, or until the chocolate coating is completely set and firm.
- Serve and Enjoy!: Arrange your beautiful Strawberry Cheesecake Truffle Balls on a serving platter and get ready for compliments!
Tips & Suggestions
Making these Strawberry Cheesecake Truffle Balls is a joy, and I’ve picked up a few tricks along the way that I love to share to ensure your truffles turn out absolutely perfect every single time. Here are my go-to tips and suggestions:
- Don’t Skimp on Chilling Time: I cannot stress this enough! The chilling steps are critical. A well-chilled truffle base is easy to roll and won’t make a sticky mess when you try to dip it in chocolate. Chilling the rolled balls before dipping also helps the chocolate set faster and prevents the truffle from warming up too much and falling apart. If your mixture feels too soft at any point, just pop it back into the fridge for a bit. Patience is key here!
- Use a Cookie Scoop for Uniformity: For perfectly sized, professional-looking truffles, I highly recommend using a small cookie scoop (about 1 tablespoon in size). It makes portioning incredibly quick and ensures all your truffle balls are roughly the same size, which is great for even coating and presentation.
- Work in Batches When Dipping: When it comes to coating your truffles, try to work with only a few chilled balls at a time. Leave the rest in the fridge until you’re ready for them. This prevents the truffles from warming up too much while you’re busy dipping, which can lead to a messy, inconsistent coating.
- The Fork or Dipping Tool Method: For dipping, I find a simple fork works wonderfully. Drop a truffle into the melted chocolate, spoon some chocolate over the top, then lift it out with the fork, gently tapping the fork on the edge of the bowl to let excess chocolate drip off. For an even smoother finish, use a second fork or a toothpick to gently push the truffle off the dipping fork onto your parchment-lined baking sheet.
- Decorate While Wet: If you’re planning on adding sprinkles, extra freeze-dried strawberry powder, or graham cracker crumbs, make sure to do it immediately after dipping each truffle, while the chocolate is still wet. This ensures your decorations adhere properly and don’t just fall off once the chocolate sets.
- Flavor Variations Are Fun!: While strawberry cheesecake is undeniably delicious, don’t be afraid to get creative!
- Lemon Zest: Add a teaspoon of finely grated lemon zest to the cream cheese mixture for a brighter, more tangy flavor.
- Different Extracts: Instead of vanilla, try a touch of almond extract or even a little bit of orange extract for a different fruit twist.
- Chocolate Chips: Fold in a small amount of mini white or milk chocolate chips into the truffle base for added texture and chocolatey goodness.
- Presentation Matters: These truffle balls are so pretty, they deserve to be shown off! Arrange them in mini paper cupcake liners for easy handling, or place them in a decorative box tied with a ribbon for a thoughtful homemade gift.
Storage
Once you’ve gone through the delightful process of making your Strawberry Cheesecake Truffle Balls, you’ll want to make sure they stay fresh and delicious for as long as possible! Since they contain cream cheese, proper storage is key.
- Refrigeration is Essential: Due to the dairy content (cream cheese), these truffle balls absolutely must be stored in the refrigerator. They are best served chilled, so keeping them cool also helps maintain their firm texture.
- Airtight Container: Always store your truffle balls in an airtight container. This prevents them from drying out, helps them maintain their fresh flavor, and most importantly, protects them from absorbing any unwanted odors from other foods in your fridge. No one wants a truffle that tastes faintly of last night’s dinner!
- Shelf Life in the Fridge: When stored correctly in an airtight container in the refrigerator, your Strawberry Cheesecake Truffle Balls will stay fresh and delicious for up to 5-7 days. I find they taste best within the first 3-4 days, but they’re still perfectly good beyond that.
- Freezing for Longer Storage: Yes, you can freeze these delightful treats!
- How to Freeze: Once the chocolate coating is completely set, arrange the truffle balls in a single layer on a parchment-lined baking sheet. Place the sheet in the freezer for about 1-2 hours, or until they are completely solid. This step prevents them from sticking together.
- Transfer to Container: Once frozen solid, transfer the truffle balls to a freezer-safe airtight container or a heavy-duty freezer bag. You can layer them with parchment paper in between if you wish, though usually, they won’t stick once fully frozen.
- Freezer Shelf Life: They will keep well in the freezer for up to 1-2 months. While they’ll still be safe to eat after that, the quality might start to decline slightly.
- Thawing: When you’re ready to enjoy them, simply transfer the desired number of truffle balls from the freezer to the refrigerator and let them thaw for several hours or overnight. Once thawed, they’ll be ready to eat! Avoid thawing them at room temperature for extended periods, as this can affect their texture and safety.
Final Thoughts
And there you have it! I truly hope you’re as excited as I am about these delightful Strawberry Cheesecake Truffle Balls. What’s not to love? They’re incredibly simple to make, require no baking, and deliver all the creamy, fruity bliss of cheesecake in a perfectly bite-sized package. I promise you, once you taste that luscious strawberry and cream cheese filling, coated in your favorite topping, you’ll wonder why you didn’t try them sooner.
These Strawberry Cheesecake Truffle Balls are an absolute game-changer for parties, a sweet surprise for loved ones, or just a treat to brighten your own day. They’re a testament to how easy it can be to create something truly special and utterly irresistible. So go ahead, gather your ingredients, and whip up a batch. You deserve this little bit of sweet perfection!
Decadent Strawberry Cheesecake Truffle Balls Recipe
- Total Time: 30 minutes
- Yield: 24 truffles 1x
Description
Indulge in these no-bake Strawberry Cheesecake Truffle Balls that capture the essence of classic cheesecake in a bite-sized treat. With a creamy filling and a delightful coating, they are perfect for any occasion!
Ingredients
- 8 oz full-fat cream cheese
- 1 cup graham cracker crumbs
- 1 cup powdered sugar (confectioners' sugar)
- 1/2 cup freeze-dried strawberries, processed into a fine powder
- 1 tsp vanilla extract
- 8 oz white chocolate or candy melts
Instructions
- Prepare Your Strawberry Powder and Graham Crumb Base: First things first, we need to get our dry components ready. Take your freeze-dried strawberries and pulse them in a food processor until they form a fine powder. Set aside. Next, crush your graham crackers (or chosen substitute) into very fine crumbs. A food processor works wonders here, but you can also place them in a zip-top bag and crush them with a rolling pin. You want them as fine as possible to integrate smoothly into the cream cheese mixture.
- Create the Cheesecake Filling: In a large mixing bowl, using an electric mixer, beat the softened full-fat cream cheese on medium speed until it's incredibly smooth and creamy, with no lumps visible. This usually takes about 1-2 minutes.
- Sweeten and Flavor the Filling: Gradually add the powdered sugar to the cream cheese, mixing on low speed until fully incorporated. Then, add your freeze-dried strawberry powder and vanilla extract. Beat again on medium speed until everything is beautifully combined and the mixture has a lovely, uniform pink hue. Scrape down the sides of the bowl as needed to ensure everything is mixed thoroughly.
- Combine with Graham Cracker Crumbs: Gently fold in the crushed graham cracker crumbs into your strawberry cheesecake mixture. Use a spatula for this part, mixing until the crumbs are evenly distributed and the mixture holds together. Be careful not to overmix, or you might compact it too much.
- Chill, Chill, Chill (Crucial Step!): Cover the bowl with plastic wrap and refrigerate the mixture for at least 1-2 hours, or until it's firm enough to handle and roll. A firm base makes all the difference.
- Roll Your Truffles: Once the mixture is nicely chilled, line a baking sheet with parchment paper. Use a small cookie scoop (about 1 tablespoon in size) to portion out the mixture. Roll each portion between your palms to form smooth, uniform balls. Place them on the prepared baking sheet.
- Melt the Chocolate Coating: In a microwave-safe bowl, melt your white chocolate (or candy melts) in 30-second intervals, stirring well after each, until smooth and fully melted. Be careful not to overheat it.
- Dip and Decorate: Working with a few truffles at a time, use a fork or a candy dipping tool to dip each chilled truffle ball into the melted white chocolate. Tap off any excess chocolate by gently tapping the fork against the side of the bowl. Place the dipped truffles back onto the parchment-lined baking sheet. While the chocolate is still wet, sprinkle with additional freeze-dried strawberry powder or extra graham cracker crumbs.
- Final Chill to Set: Once all your truffles are dipped and decorated, return the baking sheet to the refrigerator for at least 30 minutes, or until the chocolate coating is completely set and firm.
- Serve and Enjoy!: Arrange your beautiful Strawberry Cheesecake Truffle Balls on a serving platter and get ready for compliments!
- Prep Time: 30 mins
- Cook Time: 0 mins
- Category: Dessert
- Method: No-bake
- Cuisine: American
Nutrition
- Serving Size: 1 truffle
- Calories: 120
- Sugar: 10 g
- Sodium: 50 mg
- Fat: 7 g
- Saturated Fat: 4 g
- Unsaturated Fat: 2 g
- Trans Fat: 0 g
- Carbohydrates: 13 g
- Fiber: 0 g
- Protein: 1 g
- Cholesterol: 20 mg
Keywords: Don't skimp on chilling time for easy rolling and coating. Use a cookie scoop for uniformity, and work in batches when dipping to prevent the truffles from warming up too much.


Leave a Comment