
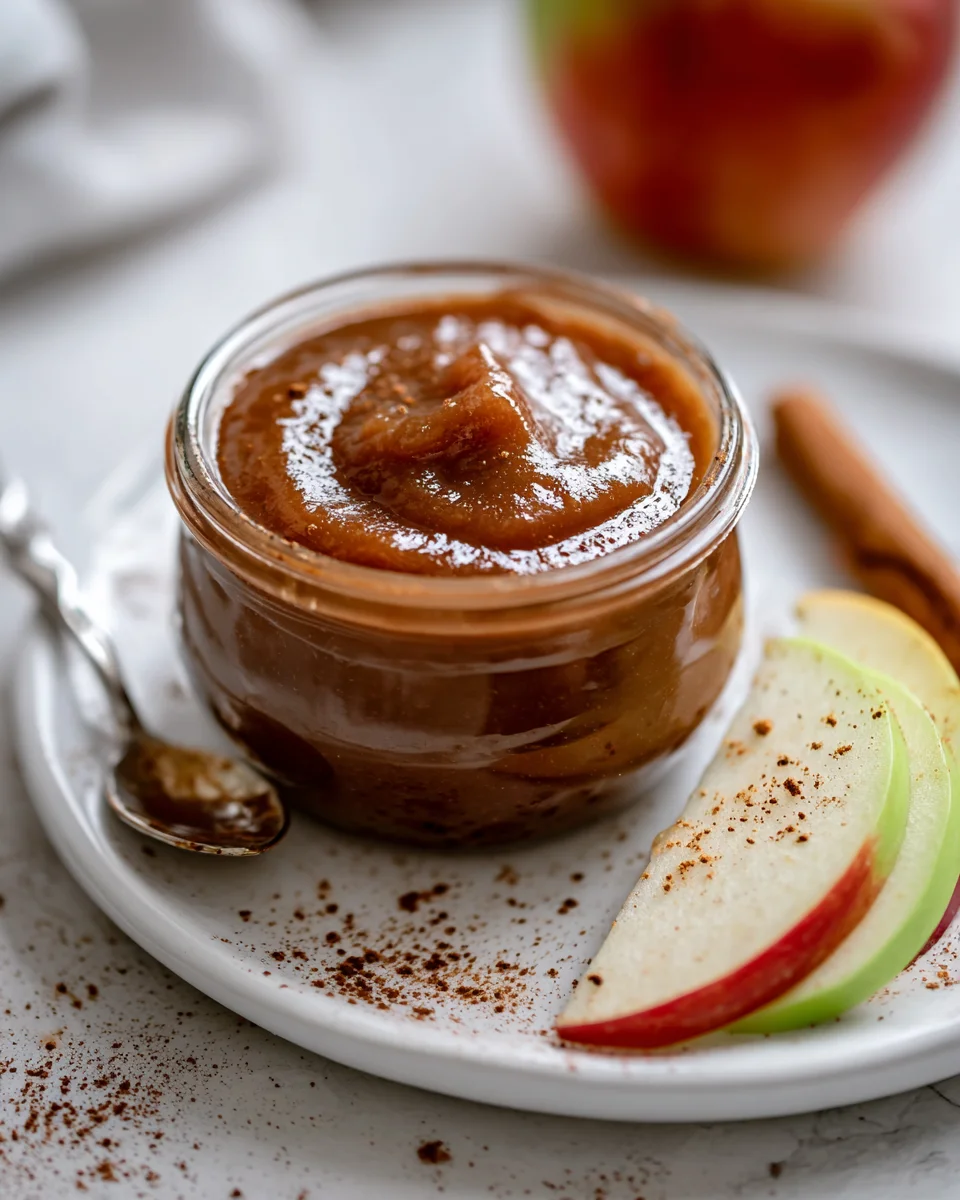
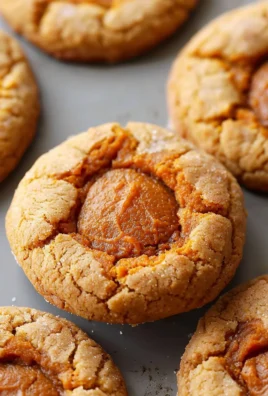
Apple Butter With Cinnamon And Cloves
Oh, the pure joy of making homemade apple butter! There’s something truly magical about transforming a pile of fresh apples into this silky-smooth, intensely flavorful spread. This isn’t just any apple spread; this specific Apple Butter With Cinnamon And Cloves recipe is a celebration of autumn, a warm hug in a jar. What makes it so special, you ask? It’s the slow, gentle simmer that coaxes out the deepest apple essence, combined with the perfectly balanced dance of aromatic cinnamon and pungent cloves. These spices don’t just add flavor; they infuse your entire home with an irresistible, comforting aroma that will make you feel like you’ve stepped into a cozy fall dream.
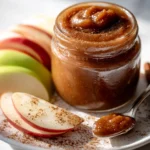
You are absolutely going to adore this Apple Butter With Cinnamon And Cloves. Imagine slathering its rich, dark amber goodness onto a warm piece of toast, stirring it into your morning oatmeal, dolloping it onto a stack of fluffy pancakes, or even using it as a glaze for roast beef (yes, it’s amazing!). It’s sweet, tangy, and deeply spiced, hitting all the right notes for a satisfying treat. This recipe takes humble apples and transforms them into a concentrated burst of flavor, far richer and more complex than any store-bought version. It’s essentially a super-reduced, thick, and velvety apple sauce, cooked down until its natural sugars caramelize and its flavors intensify, creating a truly luxurious butter that’s perfect for sharing (or hoarding!).

Ingredient Notes
There’s nothing quite like homemade apple butter, and this version, infused deeply with cinnamon and cloves, is truly something special. The beauty of this recipe lies in its simplicity, but selecting the right ingredients makes all the difference in achieving that rich, spiced flavor and velvety texture we’re aiming for.
Apples: For the best apple butter, I always recommend a mix of sweet and tart varieties. This blend creates a complex flavor profile that isn’t overly sweet or too sharp. My go-to combination often includes Honeycrisp, Fuji, Gala, and a Granny Smith or Braeburn for that delightful tart counterpoint. You’ll need quite a few apples – think about 4-5 pounds before peeling and coring. The process of peeling and coring can be a bit meditative, but it’s crucial for the smooth texture we want. Don’t worry too much about perfectly uniform pieces; they’ll all break down during cooking.
Sweeteners: I typically use a combination of light brown sugar and granulated sugar. Brown sugar contributes wonderful molasses notes and a deeper caramel-like richness that pairs beautifully with the spices. Granulated sugar provides a clean sweetness and helps achieve that classic apple butter hue. The amount can absolutely be adjusted to your personal preference. If your apples are very sweet, you might use less sugar, and if they’re quite tart, you might want a little more. Feel free to taste and adjust as you go – that’s one of the perks of home cooking!
Spices: This is where the magic happens for “Apple Butter With Cinnamon And Cloves.” I insist on both ground cinnamon and ground cloves, with an optional addition of a couple of whole cinnamon sticks and a few whole cloves thrown into the initial cook for an even deeper infusion. The ground spices provide immediate flavor, while the whole spices slowly release their aromatics, giving your apple butter an incredibly warm and inviting essence. A tiny pinch of freshly grated nutmeg or allspice can also be a lovely background note, but cinnamon and cloves are the stars here.
Liquid: A splash of liquid is needed to get things going and prevent sticking until the apples release their own juices. Apple cider is my top choice here; it intensifies the apple flavor beautifully. Unsweetened apple juice or even just water can also work perfectly well if cider isn’t available.
Lemon Juice: Don’t skip the fresh lemon juice! It’s not just for flavor, though it does brighten the overall taste and balance the sweetness. More importantly, it helps prevent the apples from browning excessively during the initial cooking phase and helps bring out the natural pectin, which contributes to the apple butter’s thick, spreadable consistency.
Substitutions: While I highly recommend the blend of apples, you can certainly use whatever apples you have on hand. Just be prepared to adjust the sugar level accordingly. For the sweeteners, you could experiment with maple syrup or dark brown sugar for a different nuance. If you don’t have ground cloves, you could use a few more whole cloves, just remember to remove them before pureeing. The core spices, however, are non-negotiable for this specific recipe – they define its character!
Step-by-Step Instructions
Making apple butter is a journey of patience and aroma, but it’s incredibly rewarding. Follow these steps for a perfectly spiced, smooth, and spreadable Apple Butter With Cinnamon And Cloves.
- Prepare the Apples: First things first, wash your apples thoroughly. Then, peel, core, and chop them into roughly 1-inch pieces. Don’t worry too much about perfect uniformity, as they’ll all break down. A good apple peeler and corer can make this step much faster, but a paring knife works just fine.
- Combine Ingredients: In a very large, heavy-bottomed pot or Dutch oven, combine your chopped apples, both brown and granulated sugars, ground cinnamon, ground cloves, apple cider (or water/juice), and fresh lemon juice. If you’re using whole cinnamon sticks or whole cloves, add them in now too. Give everything a good stir to ensure the apples are coated and the spices are distributed.
- Initial Simmer (Covered): Place the pot over medium heat. Bring the mixture to a gentle boil, stirring occasionally. Once it’s bubbling, reduce the heat to low, cover the pot, and let it simmer for about 20-30 minutes, or until the apples are very soft and easily pierced with a fork. This stage allows the apples to release their juices and begin to break down, forming a beautiful, fragrant base.
- Reduce and Thicken (Uncovered): Remove the lid from the pot. Increase the heat to medium-low, maintaining a gentle simmer. Now comes the magical part: we need to cook off the excess liquid. Stir frequently, especially as the mixture thickens, to prevent it from sticking to the bottom and scorching. This reduction process can take anywhere from 1 to 2 hours, sometimes even longer, depending on how juicy your apples are and how high your heat is. The goal is a thick, jam-like consistency.
- Puree to Perfection: Once the mixture has significantly thickened and the apples have almost completely disintegrated, it’s time to achieve that silky-smooth apple butter texture. If you added whole spices, carefully fish them out and discard them. You have a few options here:
- Immersion Blender: This is my preferred method for ease! Simply use an immersion blender directly in the pot, blending until the apple butter is completely smooth.
- Potato Masher: For a slightly chunkier, more rustic apple butter, you can use a potato masher to mash the mixture until it reaches your desired consistency.
- Food Processor/Blender: If you don’t have an immersion blender, carefully transfer the hot apple mixture in batches to a food processor or a high-speed blender. Process until smooth. Be very cautious when blending hot liquids – don’t overfill the blender, and vent the lid to allow steam to escape.
- Final Reduction and Testing: Return the pureed apple butter to the pot. Continue to cook on very low heat, stirring almost constantly, for another 30 minutes to an hour. This final reduction step is crucial for achieving that incredibly thick, spreadable consistency and the deep, rich color unique to apple butter. To test for doneness, spoon a small amount onto a chilled plate. If no liquid separates around the edges after a minute or two, and the apple butter mounds rather than runs, it’s ready!
- Jar It: Ladle the hot apple butter into sterilized jars, leaving about 1/2 inch of headspace. Wipe the rims clean, apply lids and bands.
Tips & Suggestions
Making Apple Butter With Cinnamon And Cloves is a truly enjoyable kitchen project, and a few insider tips can elevate your experience and the final product.
Patience is a Virtue: The most important tip I can give you is to be patient, especially during the reduction phases. Rushing the process by using too high heat can lead to scorching on the bottom of your pot, which will impart an unpleasant burnt flavor. Low and slow cooking allows the flavors to meld beautifully and the liquid to evaporate gradually, resulting in a rich, deeply flavored apple butter.
Stir, Stir, Stir: As your apple butter thickens, it becomes more prone to sticking and scorching. Set a timer to remind yourself to stir every 5-10 minutes, especially during the final hour of cooking. A sturdy wooden spoon or a heat-resistant spatula works best. I often find myself doing other kitchen tasks while periodically tending to my apple butter – it’s a great multitasking recipe!
Taste and Adjust: Always taste your apple butter as it cooks! This is your opportunity to truly make it your own. If you prefer it sweeter, add a little more sugar (granulated or brown, depending on the flavor you’re aiming for). If you want more spice, a small addition of ground cinnamon or cloves towards the end can really punch up the flavor. Remember, the flavors will concentrate as it reduces, so start subtly.
Hands-Off Cooking Alternatives: If you prefer a less labor-intensive approach, apple butter is fantastic in a slow cooker or the oven.
- Slow Cooker Method: Combine all ingredients in your slow cooker. Cook on low for 8-10 hours or on high for 4-6 hours, stirring occasionally, until the apples are very soft and the mixture has thickened. Then, puree and continue to cook on low, uncovered, for another 1-2 hours for final thickening.
- Oven Method: After the initial covered simmer on the stovetop, transfer your Dutch oven (uncovered) to a preheated oven set to a low temperature (around 250-300°F or 120-150°C). Stir every 30-45 minutes. This method provides very even heat and less hands-on stirring than stovetop reduction, though it still takes several hours.
Serving Suggestions: Once your Apple Butter With Cinnamon And Cloves is ready, the possibilities are endless! It’s absolutely divine spread on toast, biscuits, muffins, or pancakes. Swirl it into oatmeal or yogurt for a delightful breakfast. I love to pair it with strong cheeses on a charcuterie board. It also makes an incredible glaze for roasted beef, adding a sweet and spiced counterpoint to savory meats, or as a filling for tarts and pastries. Don’t be afraid to experiment!
Storage
Proper storage is key to enjoying your homemade Apple Butter With Cinnamon And Cloves for weeks or even months. Here’s how I keep mine fresh:
Refrigeration: Once your apple butter has cooled completely, transfer it to clean, airtight containers or jars. It will keep beautifully in the refrigerator for up to 3 weeks. Always make sure to use a clean spoon each time you dip into the jar to prevent introducing any contaminants.
Freezing: Apple butter freezes exceptionally well. For longer storage, spoon the cooled apple butter into freezer-safe containers or heavy-duty freezer bags, leaving about 1/2 inch of headspace to account for expansion. It will maintain its quality in the freezer for up to 6 months to a year. Thaw it in the refrigerator overnight before use.
Canning (Water Bath Processing): If you want to make a large batch and store it at room temperature for an extended period, water bath canning is the way to go. This method makes your apple butter shelf-stable, perfect for gifting or stocking your pantry.
- Sterilize Jars: Start with clean, hot canning jars. You can sterilize them by washing them in hot, soapy water and rinsing well, then placing them in boiling water for at least 10 minutes, or by running them through a dishwasher’s sanitizing cycle.
- Fill Jars: Ladle the hot apple butter into the hot, sterilized jars, leaving 1/2 inch of headspace (the space between the top of the food and the rim of the jar).
- Remove Air Bubbles: Use a non-metallic spatula or a bubble remover tool to gently remove any trapped air bubbles from the jars.
- Clean Rims: Wipe the rims of the jars thoroughly with a clean, damp cloth. Any food residue on the rim can prevent a proper seal.
- Apply Lids and Bands: Place new, sterile lids on the jars, and then screw on the bands finger-tight.
- Process in Water Bath: Carefully place the filled jars into a boiling water canner rack, ensuring they are fully submerged in water by at least 1 inch. Bring the water back to a rolling boil.
- Processing Time: Process pint jars for 15 minutes (adjusting for altitude if necessary). Quart jars typically require longer, but apple butter is often made in pint or half-pint jars. Always refer to a reputable canning guide for specific processing times and altitude adjustments.
- Cool and Check Seals: After processing, carefully remove the jars from the canner and place them on a clean towel on your countertop, undisturbed, for 12-24 hours. You should hear the “ping” sound as the lids seal. After cooling, check the seals by pressing down on the center of each lid; it should not flex. If a jar hasn’t sealed, refrigerate it and use it within 3 weeks.
Properly canned apple butter will last for at least a year in a cool, dark place. Once a jar is opened, it should be refrigerated and consumed within 3 weeks.
Final Thoughts
I truly hope you’ve enjoyed the delightful process of creating this incredible Apple Butter With Cinnamon And Cloves. The way the fragrant spices fill your kitchen as it simmers is an experience in itself, but the true magic happens when you taste it. The harmonious blend of sweet, slow-cooked apples, the comforting warmth of cinnamon, and the subtle, aromatic depth of cloves transforms simple fruit into something truly extraordinary. This isn’t just any apple butter; it’s the Apple Butter With Cinnamon And Cloves you’ll crave all year round.
Whether you slather it on toast, swirl it into oatmeal, spoon it over pancakes, or even pair it with a succulent beef roast, its versatility is as impressive as its flavor. Making your own Apple Butter With Cinnamon And Cloves is a deeply satisfying endeavor that yields a jar full of homemade comfort and pure, unadulterated joy. Trust me, once you try this recipe, you’ll understand why it’s an absolute must-have in your pantry. Go on, give it a try – your taste buds will celebrate!
Rich Spiced Apple Butter: Cinnamon & Clove Recipe
- Total Time: 36 minute
- Yield: Approximately 4-6 cups 1x
Description
Transform fresh apples into a silky-smooth, intensely flavorful apple butter infused with aromatic cinnamon and cloves. This rich, spiced spread is perfect for toast, pancakes, or as a glaze for savory dishes.
Ingredients
- 4–5 pounds of apples (Honeycrisp, Fuji, Gala, Granny Smith or Braeburn)
- 1 cup light brown sugar
- 1 cup granulated sugar
- 2 teaspoons ground cinnamon
- 1 teaspoon ground cloves
- 1 cup apple cider (or unsweetened apple juice or water)
- 2 tablespoons fresh lemon juice
- Optional: whole cinnamon sticks and whole cloves
- Optional: a tiny pinch of freshly grated nutmeg or allspice
Instructions
- Wash your apples thoroughly. Then, peel, core, and chop them into roughly 1-inch pieces.
- In a very large, heavy-bottomed pot or Dutch oven, combine your chopped apples, both brown and granulated sugars, ground cinnamon, ground cloves, apple cider (or water/juice), and fresh lemon juice. If using whole spices, add them now too. Stir to ensure the apples are coated and the spices are distributed.
- Place the pot over medium heat. Bring the mixture to a gentle boil, stirring occasionally. Once it’s bubbling, reduce the heat to low, cover the pot, and let it simmer for about 20-30 minutes, or until the apples are very soft.
- Remove the lid from the pot. Increase the heat to medium-low, maintaining a gentle simmer. Stir frequently as the mixture thickens, cooking off the excess liquid for 1 to 2 hours until a thick, jam-like consistency is achieved.
- Once thickened, remove any whole spices. Use an immersion blender, potato masher, or food processor to puree the mixture until smooth.
- Return the pureed apple butter to the pot. Continue to cook on very low heat, stirring almost constantly, for another 30 minutes to an hour until it reaches a thick, spreadable consistency. Test for doneness by spooning a small amount onto a chilled plate.
- Ladle the hot apple butter into sterilized jars, leaving about 1/2 inch of headspace. Wipe the rims clean, apply lids and bands.
- Prep Time: 30 mins
- Cook Time: 2-3 hours
- Category: Condiment
- Method: Stovetop
- Cuisine: American
Nutrition
- Serving Size: 2 tablespoons
- Calories: 50
- Sugar: 10 g
- Sodium: 0 mg
- Fat: 0 g
- Saturated Fat: 0 g
- Unsaturated Fat: 0 g
- Trans Fat: 0 g
- Carbohydrates: 13 g
- Fiber: 1 g
- Protein: 0 g
- Cholesterol: 0 mg
Keywords: Be patient during the reduction phases to prevent scorching. Taste and adjust sweetness and spice levels as desired. For a hands-off approach, consider using a slow cooker or oven method.
Leave a Comment