
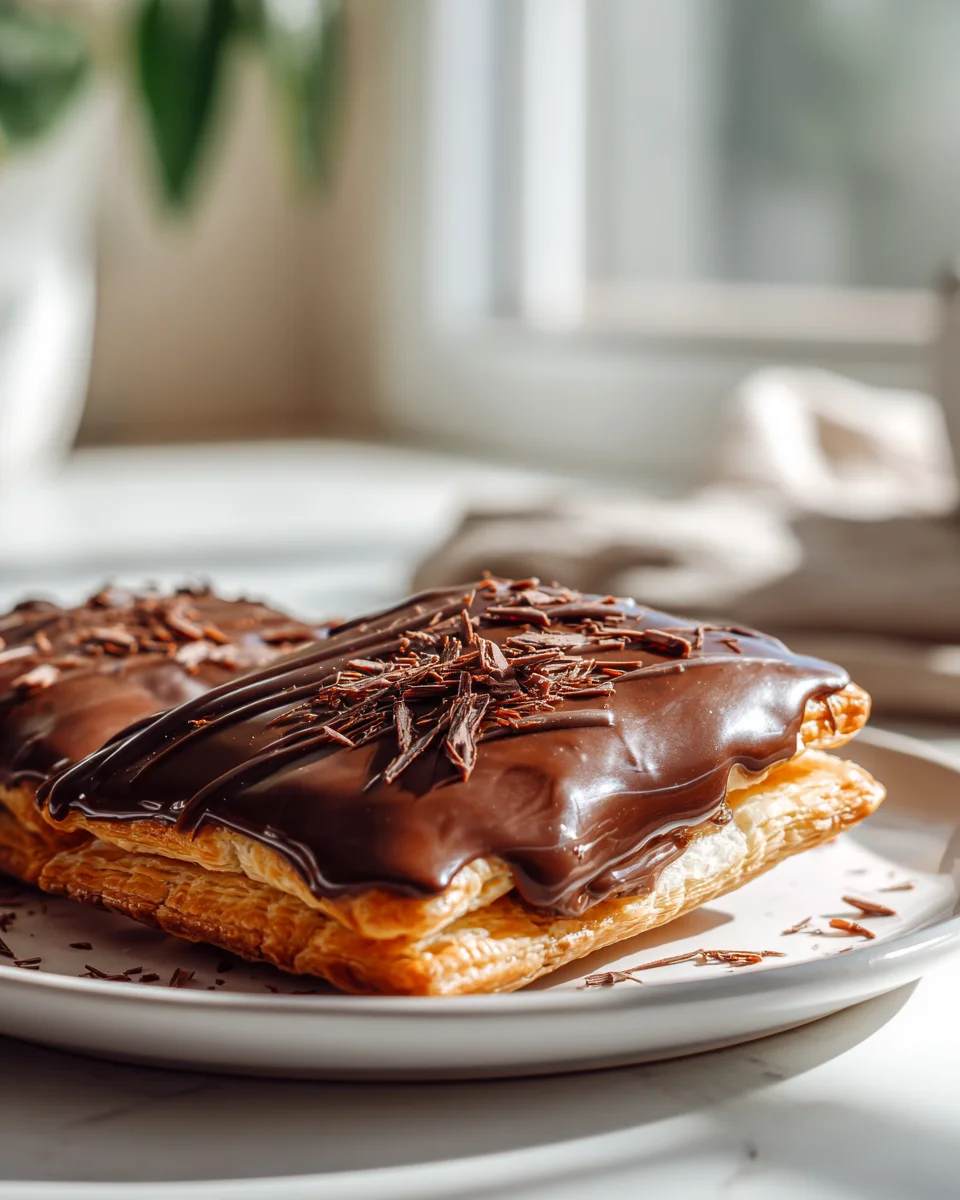
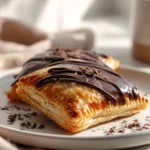
Chocolate Fudge Pop Tarts
Oh, the pure joy of a Pop Tart! But let’s be real, the store-bought versions, while nostalgic, sometimes leave a little something to be desired, especially when it comes to that elusive “fudge” flavor. That’s where my Chocolate Fudge Pop Tarts recipe steps in to save the day!
What makes these homemade delights truly special? Imagine a perfectly flaky, golden brown pastry – not too sweet, but just buttery enough – encasing a ridiculously rich, gooey, and intensely chocolatey fudge filling that practically melts in your mouth. This isn’t your average thin layer of chocolate spread; we’re talking about a luscious, deep fudge experience in every single bite. And to top it all off? A simple, sweet glaze that dries just enough to add that classic Pop Tart finish without overpowering the star of the show: the chocolate.
You, my friend, are going to absolutely adore making and devouring these. Why? Because you get to recreate a beloved childhood classic, but elevate it to gourmet status. There’s an immense satisfaction in crafting something so delicious from scratch, and the taste? It blows any packaged version out of the water. Whether you’re looking for an indulgent breakfast treat, a decadent dessert, or just a comforting snack that takes you straight back to simpler times, these Chocolate Fudge Pop Tarts are your answer. Get ready to experience pure, unadulterated chocolate bliss!

Ingredient Notes
Making homemade Chocolate Fudge Pop Tarts is such a rewarding experience, and it all starts with understanding your ingredients. Don’t worry, I’m here to guide you through what you’ll need and any handy substitutions!
For the Pastry Dough
- All-Purpose Flour: This is the backbone of our delicious, flaky crust. I recommend using unbleached all-purpose flour for the best texture.
- Unsalted Butter: Crucial for that rich, tender, and flaky crust. Make sure your butter is very cold and cut into small cubes. This helps create those beautiful pockets of steam that make the pastry so light. If you only have salted butter, just reduce the added salt in the recipe by a tiny pinch.
- Granulated Sugar: A little sweetness in the pastry helps balance the richness of the chocolate fudge.
- Salt: Essential for flavor! It really brings out the taste of the butter and flour.
- Ice Water: This is key to a tender pastry. Cold water prevents the butter from melting too quickly and keeps the dough from becoming tough.
- Egg (for egg wash, optional): A beaten egg, mixed with a splash of water, brushed on the tarts before baking gives them that beautiful golden-brown sheen. You can also use milk or just water for a less shiny finish.
- Substitution Tip: For a gluten-free version, you can experiment with a 1:1 gluten-free baking flour blend. Just be aware that the texture might be slightly different, and the dough can be a bit more delicate to work with.
For the Chocolate Fudge Filling
- Unsweetened Cocoa Powder: This is where the intense chocolate flavor comes from! I personally love using Dutch-processed cocoa powder for a darker color and a smoother, less bitter chocolate taste, but natural cocoa powder works wonderfully too.
- Granulated Sugar: To sweeten our fudge and give it that classic fudgy texture.
- Whole Milk: Adds richness and helps create a creamy, decadent filling.
- Unsalted Butter: Contributes to the smooth, melt-in-your-mouth texture of the fudge.
- Vanilla Extract: A splash of good quality vanilla really enhances the chocolate flavor.
- Pinch of Salt: Just like in the pastry, a tiny bit of salt in the fudge filling makes all the chocolate flavors pop!
- Optional: Chocolate Chips: For an extra layer of chocolatey goodness and a slightly chewier texture, you can stir in about 1/4 cup of mini chocolate chips (dark or semi-sweet) into the fudge after it’s cooked and slightly cooled.
- Substitution Tip: To make the filling dairy-free, you can use a plant-based milk (like almond or oat milk) and a dairy-free butter alternative. The texture might be slightly softer, but it will still be delicious!
For the Glaze
- Powdered Sugar (Confectioners’ Sugar): This is the base for our classic pop tart glaze. Its fine texture ensures a smooth, lump-free finish.
- Milk (or Water): Just a tiny bit to thin the glaze to a drizzling consistency.
- Vanilla Extract: For a lovely aromatic touch.
- Optional: Sprinkles: Who doesn’t love a good sprinkle finish on a pop tart? Totally optional but highly recommended for that classic look!
- Substitution Tip: For a dairy-free glaze, simply use a plant-based milk or water.
Step-by-Step Instructions
Get ready to create some magic! Here’s how we’ll bring these delightful Chocolate Fudge Pop Tarts to life, step by delicious step.
1. Prepare the Flaky Pastry Dough
- Combine Dry Ingredients: In a large mixing bowl, whisk together the all-purpose flour, granulated sugar, and salt.
- Cut in Butter: Add your very cold, cubed unsalted butter to the flour mixture. Using a pastry blender, two knives, or your fingertips, cut the butter into the flour until the mixture resembles coarse crumbs with some pea-sized pieces of butter remaining. The colder the butter, the flakier your pastry will be!
- Add Ice Water: Gradually add the ice water, one tablespoon at a time, mixing gently with a fork or your hands until the dough just comes together. Be careful not to overmix, as this can make the pastry tough.
- Chill the Dough: Divide the dough into two equal discs. Flatten each disc slightly, wrap tightly in plastic wrap, and refrigerate for at least 30 minutes, or up to 2 days. Chilling the dough is crucial for easy handling and preventing shrinkage during baking.
2. Make the Decadent Chocolate Fudge Filling
- Combine Ingredients: In a medium saucepan, whisk together the unsweetened cocoa powder, granulated sugar, whole milk, melted unsalted butter, vanilla extract, and a pinch of salt until smooth.
- Cook the Fudge: Place the saucepan over medium heat and cook, stirring constantly, until the mixture thickens and comes to a gentle boil. Continue to cook for another 1-2 minutes, stirring, until it’s thick enough to coat the back of a spoon. It should have the consistency of a thick pudding.
- Cool Completely: Remove the fudge from the heat and transfer it to a separate bowl. Cover the surface directly with plastic wrap to prevent a skin from forming, and let it cool completely to room temperature. This is incredibly important; warm filling will melt your pastry!
3. Assemble Your Chocolate Fudge Pop Tarts
- Preheat Oven & Prep Baking Sheets: Preheat your oven to 375°F (190°C). Line two large baking sheets with parchment paper.
- Roll Out Dough: On a lightly floured surface, roll out one disc of chilled pastry dough into a rectangle, about 1/8-inch thick. Aim for approximately 9×12 inches. Trim the edges to create neat rectangles.
- Cut Rectangles: Using a sharp knife or a pastry wheel, cut the large rectangle into smaller rectangles, about 3×4 inches each. You should get about 6-8 rectangles from each dough disc. Repeat with the second disc of dough.
- Fill the Tarts: Take half of your pastry rectangles and spoon about 1-2 tablespoons of the cooled chocolate fudge filling onto the center of each, leaving about a 1/2-inch border around the edges.
- Seal the Tarts: Lightly brush the edges of the pastry rectangles with a little egg wash (or just water). Place another pastry rectangle on top of each filled one, aligning the edges. Gently press down around the filling to remove any air pockets, and then use the tines of a fork to crimp and seal all four edges of each pop tart. This is vital to prevent the filling from oozing out during baking.
- Vent and Transfer: Carefully prick the top of each pop tart 2-3 times with a fork. This allows steam to escape. Transfer the assembled pop tarts to your prepared baking sheets.
4. Bake the Pop Tarts
- Bake Until Golden: Bake for 18-22 minutes, or until the pastry is golden brown and the edges are lightly crisp. Keep an eye on them; oven temperatures can vary!
- Cool: Remove the pop tarts from the oven and let them cool on the baking sheets for about 5 minutes before carefully transferring them to a wire rack to cool completely. They must be completely cool before glazing.
5. Glaze and Finish
- Make the Glaze: In a small bowl, whisk together the powdered sugar, milk (or water), and vanilla extract until smooth and of a drizzling consistency. If it’s too thick, add a tiny bit more milk; if too thin, add more powdered sugar.
- Glaze the Tarts: Once the pop tarts are completely cool, drizzle or spread the glaze over the tops. If desired, immediately add sprinkles before the glaze sets.
- Allow to Set: Let the glaze set for about 15-20 minutes before serving.
Tips & Suggestions
I’ve made my fair share of these delightful treats, and I’ve picked up a few tricks along the way. Here are my top tips for making your Chocolate Fudge Pop Tarts truly spectacular!
- Keep Everything Cold (Especially the Butter and Dough!): I can’t stress this enough! Cold butter creates flakiness, and cold dough is much easier to handle. If your kitchen is warm, you might want to pop the dough back in the fridge for 10-15 minutes if it starts to get sticky during rolling or assembling.
- Don’t Skimp on Chilling the Fudge: A warm or even slightly warm filling is a recipe for disaster! It will melt into your pastry, make it soggy, and potentially cause leakage. Let that fudge cool down completely, ideally to room temperature or even slightly chilled.
- Proper Sealing is Key: Use that fork to crimp the edges of your pop tarts firmly! This is your primary defense against the delicious fudge bubbling out during baking. Take your time with this step to ensure a good seal.
- Ventilation Matters: Those little fork pricks on top aren’t just for decoration; they allow steam to escape from the filling. This prevents the tarts from puffing up unevenly or even bursting open.
- Avoid Overfilling: While tempting to load them up, too much fudge filling can make sealing difficult and increase the chances of leakage. Stick to the recommended 1-2 tablespoons.
- Customize Your Filling: Feel free to get creative! A tiny pinch of cinnamon or a drop of espresso powder in the fudge can really deepen the chocolate flavor. A swirl of marshmallow fluff on top of the fudge before sealing could make a S’mores-inspired pop tart!
- Serving Warm: For that ultimate nostalgic experience, I love to warm my Chocolate Fudge Pop Tarts in the microwave for 10-15 seconds, or in a toaster oven for a few minutes (watch carefully so the glaze doesn’t melt off entirely!). The warm, gooey fudge is just divine.
- Even Thickness for Baking: Try to roll your dough to an even 1/8-inch thickness. This ensures consistent baking and prevents some parts from being undercooked or overcooked.
Storage
You’ve put all that effort into making these amazing Chocolate Fudge Pop Tarts, so let’s make sure you can enjoy them for as long as possible!
- At Room Temperature: Once the glaze has fully set, you can store your homemade Chocolate Fudge Pop Tarts in an airtight container at room temperature for up to 3-4 days. I like to place a piece of parchment paper between layers if stacking them, just to prevent sticking.
- Refrigeration: While not strictly necessary, if your kitchen is particularly warm or humid, or if you prefer a slightly firmer texture, you can store them in an airtight container in the refrigerator for up to a week. Just be aware that the pastry might lose a tiny bit of its crispness when chilled.
- Freezing (Baked & Unglazed): For longer storage, you can freeze baked pop tarts! Let them cool completely after baking, but before glazing. Wrap each individual pop tart tightly in plastic wrap, then place them in a freezer-safe bag or container. They will keep well for up to 1 month. When you’re ready to enjoy, simply thaw at room temperature, then glaze and serve.
- Freezing (Unbaked): If you want to get ahead, you can also freeze the assembled, unbaked pop tarts. Place them on a parchment-lined baking sheet and freeze until solid. Once frozen, transfer them to a freezer-safe bag, separating layers with parchment paper. When ready to bake, place the frozen pop tarts on a baking sheet and bake as directed, adding about 5-10 minutes to the baking time, or until golden brown. You may want to brush them with egg wash just before baking if they look a little pale.
Final Thoughts
Well, there you have it! I truly hope you’re inspired to whip up a batch of these incredible Chocolate Fudge Pop Tarts. For me, there’s something utterly magical about the combination of that flaky, golden crust and the warm, gooey, rich chocolate fudge filling that sets these apart. It’s not just a breakfast pastry; it’s an experience, a moment of pure, unadulterated comfort.
Forget the store-bought versions – once you taste the homemade goodness, the deep cocoa flavor, and that perfectly melt-in-your-mouth fudge, you’ll understand why this specific recipe for Chocolate Fudge Pop Tarts is an absolute game-changer. Whether it’s for a special breakfast, a delightful afternoon snack, or a comforting dessert, I promise you, these are a must-try. Go on, treat yourself and your loved ones to this wonderfully indulgent creation!
Homemade Chocolate Fudge Pop Tarts Recipe Delivers Joy!
- Total Time: 1 hour 20 minutes
- Yield: 6-8 pop tarts 1x
Description
Indulge in the rich, gooey goodness of homemade Chocolate Fudge Pop Tarts that elevate a nostalgic favorite to gourmet status. Experience the joy of crafting these delightful pastries from scratch, filled with intensely chocolatey fudge and topped with a sweet glaze.
Ingredients
- For the Pastry Dough:
- 2 cups All-Purpose Flour
- 1/2 cup Unsalted Butter, very cold and cut into small cubes
- 1/4 cup Granulated Sugar
- 1/2 tsp Salt
- 1/4 cup Ice Water
- 1 Egg (for egg wash, optional)
- For the Chocolate Fudge Filling:
- 1/2 cup Unsweetened Cocoa Powder
- 1 cup Granulated Sugar
- 1/2 cup Whole Milk
- 1/4 cup Unsalted Butter, melted
- 1 tsp Vanilla Extract
- Pinch of Salt
- Optional: 1/4 cup Chocolate Chips (dark or semi-sweet)
- For the Glaze:
- 1 cup Powdered Sugar (Confectioners' Sugar)
- 2 tbsp Milk (or Water)
- 1/2 tsp Vanilla Extract
- Optional: Sprinkles
Instructions
- 1. Prepare the Flaky Pastry Dough: Combine Dry Ingredients: In a large mixing bowl, whisk together the all-purpose flour, granulated sugar, and salt.
- 2. Cut in Butter: Add your very cold, cubed unsalted butter to the flour mixture. Using a pastry blender, two knives, or your fingertips, cut the butter into the flour until the mixture resembles coarse crumbs with some pea-sized pieces of butter remaining.
- 3. Add Ice Water: Gradually add the ice water, one tablespoon at a time, mixing gently with a fork or your hands until the dough just comes together.
- 4. Chill the Dough: Divide the dough into two equal discs, flatten each disc slightly, wrap tightly in plastic wrap, and refrigerate for at least 30 minutes.
- 5. Make the Decadent Chocolate Fudge Filling: Combine Ingredients: In a medium saucepan, whisk together the unsweetened cocoa powder, granulated sugar, whole milk, melted unsalted butter, vanilla extract, and a pinch of salt until smooth.
- 6. Cook the Fudge: Place the saucepan over medium heat and cook, stirring constantly, until the mixture thickens and comes to a gentle boil. Continue to cook for another 1-2 minutes, stirring, until it's thick enough to coat the back of a spoon.
- 7. Cool Completely: Remove the fudge from the heat and transfer it to a separate bowl. Cover with plastic wrap and let it cool completely to room temperature.
- 8. Assemble Your Chocolate Fudge Pop Tarts: Preheat Oven & Prep Baking Sheets: Preheat your oven to 375°F (190°C) and line two large baking sheets with parchment paper.
- 9. Roll Out Dough: On a lightly floured surface, roll out one disc of chilled pastry dough into a rectangle, about 1/8-inch thick.
- 10. Cut Rectangles: Using a sharp knife or a pastry wheel, cut the large rectangle into smaller rectangles, about 3×4 inches each.
- 11. Fill the Tarts: Take half of your pastry rectangles and spoon about 1-2 tablespoons of the cooled chocolate fudge filling onto the center of each.
- 12. Seal the Tarts: Lightly brush the edges of the pastry rectangles with a little egg wash. Place another pastry rectangle on top of each filled one and gently press down around the filling.
- 13. Vent and Transfer: Carefully prick the top of each pop tart 2-3 times with a fork and transfer to your prepared baking sheets.
- 14. Bake the Pop Tarts: Bake for 18-22 minutes, or until the pastry is golden brown.
- 15. Cool: Remove the pop tarts from the oven and let them cool on the baking sheets for about 5 minutes before transferring to a wire rack.
- 16. Glaze and Finish: Make the Glaze: In a small bowl, whisk together the powdered sugar, milk (or water), and vanilla extract until smooth.
- 17. Glaze the Tarts: Once the pop tarts are completely cool, drizzle or spread the glaze over the tops and add sprinkles if desired.
- 18. Allow to Set: Let the glaze set for about 15-20 minutes before serving.
- Prep Time: 1 hour
- Cook Time: 20 minutes
- Category: Dessert
- Method: Baking
- Cuisine: American
Nutrition
- Serving Size: 1 pop tart
- Calories: 250
- Sugar: 20 g
- Sodium: 150 mg
- Fat: 10 g
- Saturated Fat: 6 g
- Unsaturated Fat: 4 g
- Trans Fat: 0 g
- Carbohydrates: 35 g
- Fiber: 1 g
- Protein: 3 g
- Cholesterol: 30 mg
Keywords: Keep everything cold, especially the butter and dough, for a flaky texture. Don't skimp on chilling the fudge, and ensure proper sealing to prevent leakage during baking.
Leave a Comment