
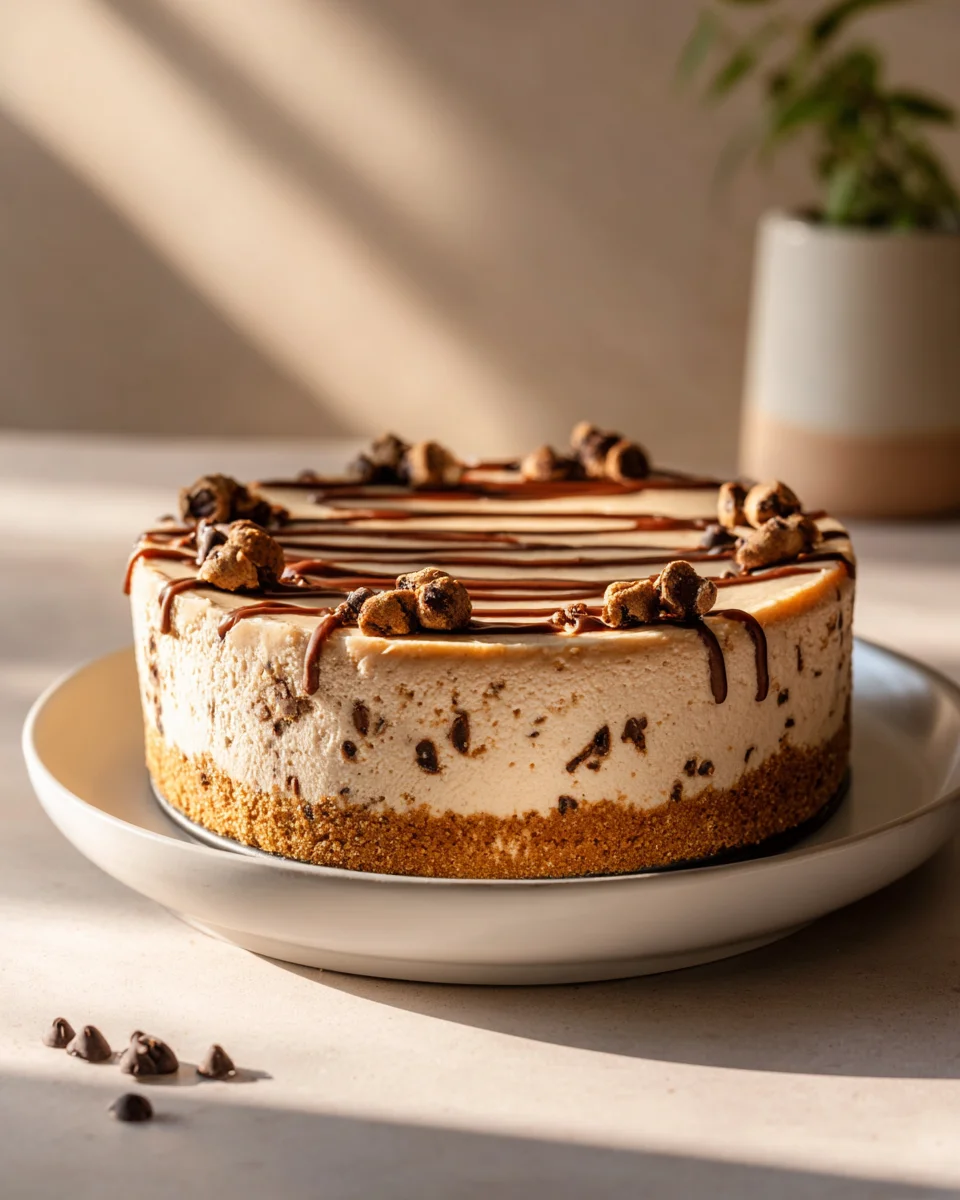
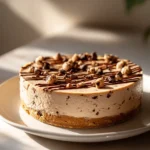
No Bake Cookie Dough Cheesecake
Ever had those moments where you crave something utterly decadent, but the thought of turning on the oven or spending hours in the kitchen feels like too much? I certainly have! That’s exactly where my No Bake Cookie Dough Cheesecake swoops in to save the day.
This isn’t just any dessert; it’s the ultimate fusion of two beloved treats: creamy, dreamy cheesecake and irresistible, edible cookie dough, all without needing to bake a thing. What makes this recipe truly special is its incredible ease combined with its show-stopping flavor and texture. No hot oven means less fuss and more time to enjoy!
You’re going to adore this recipe because it delivers maximum flavor with minimal effort. It’s perfect for impressing guests, bringing to a potluck, or simply treating yourself to something truly extraordinary on a weeknight. Plus, who can resist the nostalgic joy of raw cookie dough safely nestled in a rich, tangy cheesecake?
Imagine: a buttery graham cracker crust forming the perfect base, topped with a velvety smooth, rich cheesecake layer generously swirled with chunks of safe-to-eat chocolate chip cookie dough, and perhaps a sprinkle of extra mini chocolate chips on top for good measure. Every single bite is a delightful texture and flavor explosion that will have you coming back for more. Get ready to fall in love with your new favorite dessert!

Ingredient Notes
Creating the perfect No Bake Cookie Dough Cheesecake starts with understanding each component. I’ve broken down the key players and shared some thoughts on why they’re important, plus how you can swap things around if you need to.
- For the Crust:
- Graham Cracker Crumbs: These form the classic, buttery base of our cheesecake. You’ll need about 1 ½ cups, which is typically one sleeve of graham crackers.
- Melted Unsalted Butter: The binder for our crust. Unsalted is my go-to so I can control the saltiness myself, but salted works too; just be mindful of any extra salt you add.
- Substitution Tip: Feel free to use chocolate cookie crumbs (like Oreos, with the cream filling removed) for a chocolatey crust that pairs wonderfully with the cookie dough. Digestive biscuits or even shortbread cookies can also be crushed and used. For a dairy-free option, use a plant-based butter alternative.
- For the Edible Cookie Dough:
- Heat-Treated All-Purpose Flour: This is CRITICAL for food safety since we’re not baking the cookie dough. Raw flour can contain bacteria, so don’t skip this step! I’ll explain how to do this safely in the instructions.
- Light Brown Sugar & Granulated Sugar: A mix of both gives that classic cookie dough chewiness and depth of flavor.
- Softened Unsalted Butter: Essential for a smooth, creamy cookie dough. Make sure it’s truly softened, not melted.
- Vanilla Extract: Pure vanilla extract is always best for flavor.
- Milk (or Cream): Just a touch helps bring the cookie dough together to the right consistency without making it too sticky. Any milk will do, from whole to skim, or even a non-dairy alternative like almond or soy milk.
- Mini Chocolate Chips: I prefer mini chocolate chips for the cookie dough layer because they distribute more evenly in a no-bake context and are easier to slice through.
- Substitution Tip: For the cookie dough, you can swap out mini chocolate chips for other mix-ins like sprinkles, white chocolate chips, or even chopped toffee bits. For a dairy-free cookie dough, use a plant-based butter alternative and non-dairy milk.
- For the No-Bake Cheesecake Filling:
- Full-Fat Cream Cheese: This is the backbone of our cheesecake. It MUST be softened to room temperature for a silky-smooth, lump-free filling. Don’t try to rush this step! Full-fat gives the best rich, creamy texture.
- Powdered Sugar (Confectioners’ Sugar): This sweetens the cheesecake and dissolves beautifully, ensuring a smooth texture without any grittiness.
- Vanilla Extract: Enhances the creamy flavor of the cheesecake.
- Cold Heavy Cream (or Heavy Whipping Cream): This is what gives our no-bake cheesecake its light, airy, and stable structure. It needs to be very cold to whip properly into stiff peaks.
- Substitution Tip: For a dairy-free cheesecake filling, use a vegan cream cheese alternative and full-fat canned coconut cream (the thick, solid part, chilled overnight) in place of heavy cream. Ensure all dairy-free alternatives are specified as “full-fat” for best results.
- Optional Garnish:
- Extra mini chocolate chips, a drizzle of chocolate fudge sauce, or even a dollop of whipped cream can take your slice over the top!
Step-by-Step Instructions
Making this No Bake Cookie Dough Cheesecake is a breeze, but there are a few key steps to ensure it turns out perfectly creamy and delicious. Follow along, and you’ll have an impressive dessert chilling in no time!
- First, Heat Treat the Flour: This is a crucial safety step for your edible cookie dough.
- Oven Method: Spread the all-purpose flour thinly on a baking sheet. Bake at 300°F (150°C) for 5-7 minutes, stirring halfway through, until the flour reaches an internal temperature of 160°F (71°C). Let it cool completely.
- Microwave Method: Place the flour in a microwave-safe bowl. Microwave on high for 30-second intervals, stirring well after each, until it reaches an internal temperature of 160°F (71°C). This usually takes 1-2 minutes total. Let it cool completely.
- Prepare the Edible Cookie Dough:
- In a medium bowl, cream together the softened unsalted butter, light brown sugar, and granulated sugar until light and fluffy.
- Beat in the vanilla extract.
- Gradually add the cooled, heat-treated flour and milk (or cream) until just combined. Be careful not to overmix.
- Stir in the mini chocolate chips until evenly distributed. Set aside.
- Make the Graham Cracker Crust:
- In a medium bowl, combine the graham cracker crumbs with the melted unsalted butter. Mix until the crumbs are evenly moistened.
- Press the mixture firmly and evenly into the bottom of a 9-inch springform pan. You can use the bottom of a measuring cup or your knuckles to get a compact crust.
- Place the pan in the refrigerator to chill while you prepare the filling.
- Prepare the No-Bake Cheesecake Filling:
- In a large mixing bowl, using an electric mixer, beat the softened full-fat cream cheese on medium speed until smooth and creamy. Make sure there are no lumps!
- Gradually add the powdered sugar and vanilla extract, continuing to beat until well combined and smooth. Scrape down the sides of the bowl as needed.
- In a separate, very cold bowl (I sometimes chill my bowl and whisk attachments for 15 minutes prior), whip the very cold heavy cream on high speed until stiff peaks form. This means when you lift the beaters, the cream holds its shape.
- Gently fold the whipped cream into the cream cheese mixture in two additions. Use a spatula and a gentle hand to maintain the airiness of the whipped cream. Mix until just combined and no streaks of cream remain.
- Assemble Your Cheesecake:
- Spoon about half of the cheesecake filling over the chilled graham cracker crust and spread it evenly.
- Take about half to two-thirds of your edible cookie dough and crumble it over the first layer of cheesecake filling. Don’t worry about perfect placement; irregular chunks add character!
- Carefully spread the remaining cheesecake filling over the cookie dough layer.
- Crumble the remaining cookie dough over the top of the cheesecake. You can press it down gently if you like, or leave it loose for a more rustic look.
- Chill Thoroughly:
- Cover the springform pan loosely with plastic wrap.
- Refrigerate the cheesecake for a minimum of 6 hours, but ideally overnight. This chilling time is absolutely essential for the cheesecake to set properly and become firm enough to slice cleanly.
- Serve and Enjoy:
- Once fully chilled, carefully remove the sides of the springform pan.
- Slice with a sharp knife (running it under hot water and wiping it clean between slices can help with cleaner cuts) and serve. Garnish with extra mini chocolate chips or a drizzle of chocolate sauce if desired!
Tips & Suggestions
Making a No Bake Cookie Dough Cheesecake is quite forgiving, but I’ve picked up a few tricks over the years that can elevate your dessert from good to absolutely phenomenal. Here are my top tips and some creative suggestions for making it your own:
- Room Temperature is Your Friend (for some ingredients!): For the smoothest cheesecake filling, ensure your cream cheese and butter (for the cookie dough) are at proper room temperature. This makes them much easier to cream together without lumps, creating a truly silky texture.
- Don’t Skip Heat-Treating the Flour: I know I mentioned it in the instructions, but I can’t stress this enough for food safety. Raw flour can contain bacteria, so always take the extra few minutes to heat-treat it. It’s a small step for peace of mind!
- Whip Cream in a Chilled Bowl: For the best results when whipping heavy cream, use a very cold bowl and whisk attachments. Pop them in the freezer for 10-15 minutes before you start. Cold cream whips faster and holds its stiff peaks better.
- Fold Gently: When incorporating the whipped cream into the cream cheese mixture, use a light hand and fold gently. Overmixing can deflate the whipped cream, leading to a less airy and dense cheesecake.
- Chilling is Non-Negotiable: I know waiting is hard, but patience truly pays off here. A minimum of 6 hours, and preferably overnight, in the refrigerator allows the cheesecake to set up properly. If you cut into it too soon, it will be soft and won’t hold its shape. Trust me, it’s worth the wait!
- Use a Springform Pan: While you could technically make this in a regular pie dish, a springform pan makes for a beautiful presentation and incredibly easy removal. If you don’t have one, lining a regular dish with parchment paper with an overhang will allow you to lift the cheesecake out.
- Mini Chocolate Chips are Key: For the cookie dough, mini chocolate chips are fantastic. They distribute more evenly, ensure every bite gets some chocolate, and make slicing through the cheesecake much easier than larger chunks.
- Crust Customization: While graham crackers are classic, don’t be afraid to experiment! Oreo crumbs (without the cream filling) make a wonderful chocolate cookie dough cheesecake. Vanilla wafers or digestive biscuits are also great options.
- Cookie Dough Variations: Get creative with your cookie dough! Instead of just chocolate chips, consider adding sprinkles for a funfetti cookie dough, or switch to white chocolate chips, butterscotch chips, or even a handful of chopped nuts (if you like nuts in your cookie dough).
- Garnish Galore: Before serving, consider adding a little something extra. A drizzle of homemade or store-bought chocolate sauce or caramel sauce, a scattering of extra mini chocolate chips, or a dollop of fresh whipped cream on each slice can make it feel extra special.
- Clean Slices: For perfectly clean slices, dip your knife in hot water and wipe it clean between each cut. This helps prevent the cheesecake and cookie dough from sticking to the knife.
Storage
Once you’ve put in the effort to create this delicious No Bake Cookie Dough Cheesecake, you’ll want to make sure it stays fresh and tasty for as long as possible. Here’s how I recommend storing it:
- In the Refrigerator:
- Whole Cheesecake: If you have leftovers of the whole cheesecake, cover it loosely but securely with plastic wrap or aluminum foil. I like to keep the springform pan collar on for added protection if I’m not planning to serve it immediately. This helps prevent it from absorbing any odors from other foods in your fridge and keeps it from drying out.
- Individual Slices: For individual slices, place them in an airtight container. This is the best way to keep them fresh and prevent them from getting stale or picking up fridge smells.
- Shelf Life: Stored properly in the refrigerator, your No Bake Cookie Dough Cheesecake will last for about 3-5 days.
- In the Freezer:
- This cheesecake freezes wonderfully, making it a great make-ahead dessert!
- Whole Cheesecake: Once the cheesecake is fully set and chilled, remove the springform pan collar. Place the cheesecake on a sturdy plate or cardboard round. Wrap it tightly in a layer of plastic wrap, then an additional layer of aluminum foil. This double layer helps prevent freezer burn.
- Individual Slices: For easy portioning later, you can freeze individual slices. Place them on a baking sheet lined with parchment paper and freeze for about an hour, until firm. Then, wrap each slice tightly in plastic wrap and then foil. This way, you can grab just one slice whenever a craving strikes!
- Shelf Life: Properly wrapped and frozen, the No Bake Cookie Dough Cheesecake can be stored for up to 1-2 months.
- Thawing: When you’re ready to enjoy, simply transfer the frozen cheesecake (whole or individual slices, still wrapped) to the refrigerator and let it thaw for several hours or overnight. Once thawed, it should be just as delicious as when it was first made!
- General Tips for Storage:
- Always ensure your cheesecake is covered tightly to protect its flavor and texture.
- Avoid leaving the cheesecake out at room temperature for extended periods, especially in warm environments, as it contains dairy and will soften quickly.
Final Thoughts
And there you have it – my incredible recipe for No Bake Cookie Dough Cheesecake! I truly hope you’re feeling inspired to whip up this dessert. What makes this particular treat an absolute must-try, in my opinion, is its sheer simplicity combined with an explosion of beloved flavors. Imagine: all the creamy, dreamy texture of a classic cheesecake, infused with chunks of irresistible cookie dough, and the best part? No oven required! That’s right, the convenience of this No Bake Cookie Dough Cheesecake means less time fussing and more time enjoying. It’s perfect for impressing guests, satisfying a serious sweet tooth, or just treating yourself to something truly special without any of the stress. Trust me, once you try this No Bake Cookie Dough Cheesecake, you’ll understand why it’s become a fast favorite!
The Best No Bake Cookie Dough Cheesecake Recipe Ever
- Total Time: 30 minutes
- Yield: 8 servings 1x
Description
Indulge in the ultimate dessert fusion with this No Bake Cookie Dough Cheesecake, combining creamy cheesecake and edible cookie dough without the need for baking. Perfect for impressing guests or treating yourself, this cheesecake is a delightful explosion of flavor and texture.
Ingredients
- 1 ½ cups Graham Cracker Crumbs
- ½ cup Melted Unsalted Butter
- 1 cup Heat-Treated All-Purpose Flour
- ½ cup Light Brown Sugar
- ½ cup Granulated Sugar
- ½ cup Softened Unsalted Butter
- 1 teaspoon Vanilla Extract
- 2–4 tablespoons Milk (or Cream)
- ½ cup Mini Chocolate Chips
- 16 oz Full-Fat Cream Cheese
- 1 cup Powdered Sugar (Confectioners' Sugar)
- 1 teaspoon Vanilla Extract
- 1 cup Cold Heavy Cream (or Heavy Whipping Cream)
- Extra mini chocolate chips (for garnish)
- Chocolate fudge sauce (for garnish)
- Whipped cream (for garnish)
Instructions
- First, Heat Treat the Flour: Spread the all-purpose flour thinly on a baking sheet. Bake at 300°F (150°C) for 5-7 minutes, stirring halfway through, until the flour reaches an internal temperature of 160°F (71°C). Let it cool completely.
- Prepare the Edible Cookie Dough: In a medium bowl, cream together the softened unsalted butter, light brown sugar, and granulated sugar until light and fluffy. Beat in the vanilla extract. Gradually add the cooled, heat-treated flour and milk (or cream) until just combined. Stir in the mini chocolate chips until evenly distributed. Set aside.
- Make the Graham Cracker Crust: In a medium bowl, combine the graham cracker crumbs with the melted unsalted butter. Mix until the crumbs are evenly moistened. Press the mixture firmly and evenly into the bottom of a 9-inch springform pan. Place the pan in the refrigerator to chill while you prepare the filling.
- Prepare the No-Bake Cheesecake Filling: In a large mixing bowl, using an electric mixer, beat the softened full-fat cream cheese on medium speed until smooth and creamy. Gradually add the powdered sugar and vanilla extract, continuing to beat until well combined and smooth. In a separate, very cold bowl, whip the very cold heavy cream on high speed until stiff peaks form. Gently fold the whipped cream into the cream cheese mixture in two additions.
- Assemble Your Cheesecake: Spoon about half of the cheesecake filling over the chilled graham cracker crust and spread it evenly. Crumble about half to two-thirds of your edible cookie dough over the first layer of cheesecake filling. Carefully spread the remaining cheesecake filling over the cookie dough layer. Crumble the remaining cookie dough over the top of the cheesecake.
- Chill Thoroughly: Cover the springform pan loosely with plastic wrap. Refrigerate the cheesecake for a minimum of 6 hours, but ideally overnight.
- Serve and Enjoy: Once fully chilled, carefully remove the sides of the springform pan. Slice with a sharp knife and serve. Garnish with extra mini chocolate chips or a drizzle of chocolate sauce if desired.
- Prep Time: 30 mins
- Cook Time: 0 mins
- Category: Dessert
- Method: No-Bake
- Cuisine: American
Nutrition
- Serving Size: 1 slice
- Calories: 450
- Sugar: 35 g
- Sodium: 300 mg
- Fat: 30 g
- Saturated Fat: 15 g
- Unsaturated Fat: 10 g
- Trans Fat: 0 g
- Carbohydrates: 40 g
- Fiber: 1 g
- Protein: 5 g
- Cholesterol: 70 mg
Keywords: Ensure your cream cheese and butter are at room temperature for the smoothest cheesecake filling. Don't skip heat-treating the flour for food safety, and use a chilled bowl for whipping cream for best results.


Leave a Comment