
Dairy Free Gluten Free Dinner Rolls
Welcome to the world of baking where everyone can enjoy a warm, fluffy roll straight from the oven! These Dairy Free Gluten Free Dinner Rolls are not just any rolls; they’re a delightful blend of textures and flavors that everyone—regardless of dietary restrictions—will adore. What makes this recipe truly special is its ability to bring people together at the dinner table, offering a delicious alternative for those who are dairy and gluten sensitive.
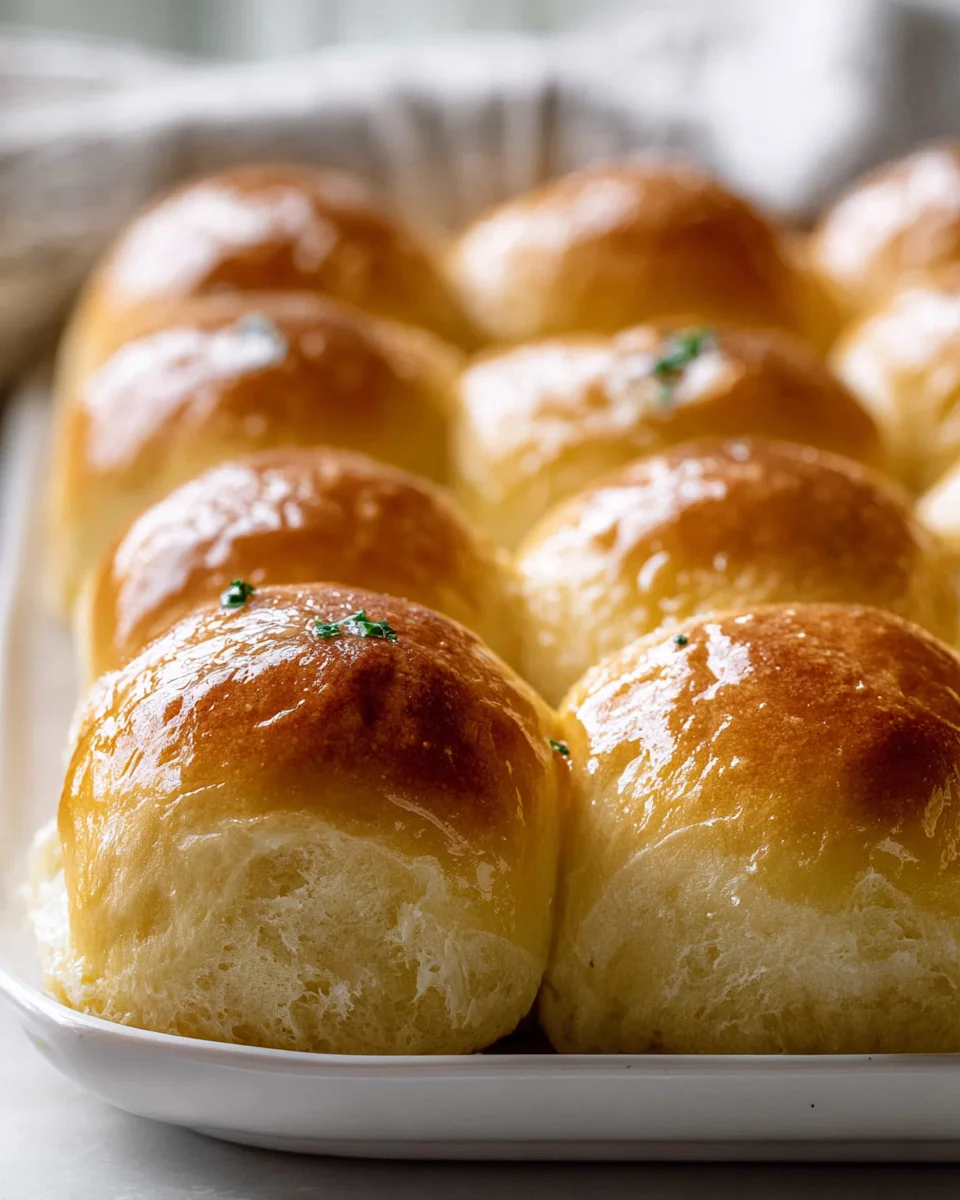
Imagine pulling a batch of golden-brown rolls from the oven, their warm aroma filling your kitchen and enticing your family to gather around. These rolls are soft, tender, and perfect for sopping up sauces or enjoying with a smear of your favorite dairy-free spread. They’re simple to make and require ingredients you probably already have on hand, making them not only a fantastic choice for your next meal but also a great last-minute addition to any gathering.
Join me in creating these scrumptious rolls that promise to elevate your dining experience. Trust me, once you try these Dairy Free Gluten Free Dinner Rolls, you’ll find it hard to believe they’re free from dairy and gluten!

Ingredient Notes
When making Dairy Free Gluten Free Dinner Rolls, it’s essential to choose the right ingredients to achieve the best texture and flavor. Here’s what you’ll need:
- Gluten-Free All-Purpose Flour: Choose a high-quality blend that contains xanthan gum or add your own for better structure. Popular brands include Bob’s Red Mill and King Arthur.
- Dairy-Free Milk: Unsweetened almond milk, coconut milk, or oat milk work beautifully. Avoid sweetened varieties to keep the rolls savory.
- Active Dry Yeast: This is what helps the rolls rise. Make sure it’s fresh for the best results.
- Sweetener: A bit of sugar or maple syrup helps activate the yeast. You can substitute with agave nectar if preferred.
- Olive Oil or Coconut Oil: Either works for moisture and flavor. If you prefer a buttery taste, you can use a dairy-free butter alternative.
- Salt: Don’t skip the salt! It enhances flavor and balances the sweetness.
Feel free to get creative with herbs and spices. Rosemary or garlic powder can add a lovely twist to your rolls!
Step-by-Step Instructions
Here’s how to make your Dairy Free Gluten Free Dinner Rolls:
- Activate the Yeast: In a small bowl, combine 1 cup of warm dairy-free milk (about 110°F) with 2 teaspoons of sugar and 2 ¼ teaspoons of active dry yeast. Let it sit for 5-10 minutes until frothy.
- Mix the Dry Ingredients: In a large mixing bowl, whisk together 3 cups of gluten-free all-purpose flour, 1 teaspoon of salt, and 1 teaspoon of xanthan gum if your flour blend doesn’t already contain it.
- Combine Wet Ingredients: In a separate bowl, mix the activated yeast mixture with ¼ cup of olive oil (or melted coconut oil) and 1 teaspoon of apple cider vinegar. Stir well.
- Combine the Mixtures: Pour the wet ingredients into the dry ingredients. Mix until a soft, sticky dough forms. If the dough is too dry, add a little more dairy-free milk, one tablespoon at a time.
- Shape the Rolls: Using wet hands, divide the dough into 12 equal portions and shape them into balls. Place them on a parchment-lined baking sheet, leaving space between each roll to rise.
- Let it Rise: Cover the rolls with a clean kitchen towel and let them rise in a warm place for about 30-45 minutes, or until they’ve doubled in size.
- Preheat the Oven: While the rolls are rising, preheat your oven to 375°F (190°C).
- Bake the Rolls: Once risen, bake the rolls for 20-25 minutes, or until they are golden brown. You can brush the tops with a little olive oil or dairy-free butter right before baking for a shiny finish.
- Cool: Let the rolls cool on a wire rack for at least 10 minutes before serving. Enjoy warm!
Tips & Suggestions
Making Dairy Free Gluten Free Dinner Rolls can be a rewarding experience. Here are some tips to ensure your rolls turn out perfectly:
- Check Your Yeast: Always check the expiration date on your yeast. Fresh yeast is crucial for proper rising.
- Temperature Matters: Ensure your dairy-free milk is warm but not hot. Too much heat can kill the yeast.
- Don’t Overmix: After combining wet and dry ingredients, mix just until combined. Overmixing can lead to dense rolls.
- Experiment with Flavors: Add herbs like thyme or spices like paprika for a unique flavor profile, or mix in some nutritional yeast for a cheesy taste.
- Use a Silpat or Parchment Paper: This will help prevent sticking and make cleanup a breeze!
Storage
To store your Dairy Free Gluten Free Dinner Rolls, follow these guidelines:
- Room Temperature: If you plan to eat them within a day, store the rolls in an airtight container at room temperature. They are best enjoyed fresh.
- Refrigeration: For longer storage, place the rolls in the fridge in an airtight container. They will stay fresh for about 3-5 days.
- Freezing: For longer preservation, freeze the rolls. Place them in a freezer-safe bag or container. They can be frozen for up to 3 months. To serve, simply thaw at room temperature or reheat in the oven.
These Dairy Free Gluten Free Dinner Rolls are perfect for any meal, and I hope you enjoy making and sharing them as much as I do!
Final Thoughts
In conclusion, I truly believe that these Dairy Free Gluten Free Dinner Rolls are a must-try for anyone looking to enjoy a delicious and inclusive meal. Whether you have dietary restrictions or simply want to try something new, these rolls offer a delightful, fluffy texture and a wonderful flavor that will impress everyone at your table. They are perfect for soaking up sauces, pairing with hearty soups, or simply enjoying warm with a spread of your choice. Plus, making them is a breeze! So gather your ingredients and give these Dairy Free Gluten Free Dinner Rolls a go – I promise you won’t be disappointed!

Delicious Dairy Free Gluten Free Dinner Rolls Recipe!
- Total Time: 40 minutes
- Yield: 12 rolls 1x
Description
These Dairy Free Gluten Free Dinner Rolls are a delightful blend of textures and flavors that everyone can enjoy. Perfect for sopping up sauces or enjoying with a dairy-free spread, they are simple to make and a fantastic addition to any meal.
Ingredients
- 3 cups gluten-free all-purpose flour
- 2 ¼ teaspoons active dry yeast
- 1 teaspoon salt
- 1 teaspoon xanthan gum (if not included in flour blend)
- 1 cup warm dairy-free milk (about 110°F)
- 2 teaspoons sugar
- ¼ cup olive oil or melted coconut oil
- 1 teaspoon apple cider vinegar
Instructions
- In a small bowl, combine 1 cup of warm dairy-free milk with 2 teaspoons of sugar and 2 ¼ teaspoons of active dry yeast. Let it sit for 5-10 minutes until frothy.
- In a large mixing bowl, whisk together 3 cups of gluten-free all-purpose flour, 1 teaspoon of salt, and 1 teaspoon of xanthan gum if your flour blend doesn’t already contain it.
- In a separate bowl, mix the activated yeast mixture with ¼ cup of olive oil (or melted coconut oil) and 1 teaspoon of apple cider vinegar. Stir well.
- Pour the wet ingredients into the dry ingredients. Mix until a soft, sticky dough forms. If the dough is too dry, add a little more dairy-free milk, one tablespoon at a time.
- Using wet hands, divide the dough into 12 equal portions and shape them into balls. Place them on a parchment-lined baking sheet, leaving space between each roll to rise.
- Cover the rolls with a clean kitchen towel and let them rise in a warm place for about 30-45 minutes, or until they’ve doubled in size.
- While the rolls are rising, preheat your oven to 375°F (190°C).
- Once risen, bake the rolls for 20-25 minutes, or until they are golden brown. You can brush the tops with a little olive oil or dairy-free butter right before baking for a shiny finish.
- Let the rolls cool on a wire rack for at least 10 minutes before serving. Enjoy warm!
- Prep Time: 15 mins
- Cook Time: 25 mins
- Category: Dinner
- Method: Baking
- Cuisine: American
Nutrition
- Serving Size: 1 roll
- Calories: 150
- Sugar: 2 g
- Sodium: 200 mg
- Fat: 5 g
- Saturated Fat: 1 g
- Unsaturated Fat: 4 g
- Trans Fat: 0 g
- Carbohydrates: 24 g
- Fiber: 2 g
- Protein: 3 g
- Cholesterol: 0 mg
Keywords: Check the expiration date on your yeast for proper rising. Ensure your dairy-free milk is warm but not hot to avoid killing the yeast.


Leave a Comment