
Apple Butter Pie is more than just a dessert; it’s a warm hug for your soul, a nostalgic trip back to simpler times with every single slice. I still remember the incredible aroma wafting from my grandmother’s kitchen whenever she baked this autumnal delight, promising comfort and joy.
Historically, apple butter itself has deep roots in American colonial and Pennsylvania Dutch traditions, serving as a cherished method for preserving the bountiful apple harvest. Transforming that rich, spiced apple butter into a creamy, baked filling for a pie truly elevates it, creating a dish that feels both timeless and innovative. People adore this pie for its uniquely concentrated apple flavor, a profound sweetness balanced by a gentle tartness, all encased within a perfectly flaky crust.
It offers a wonderfully smooth, almost custardy texture that sets it apart from a typical sliced apple pie, making it an irresistible treat that embodies the very essence of comfort food. Preparing an Apple Butter Pie is an act of love, and the rewards are immeasurable – pure, unadulterated joy in every mouthful.

Ingredients:
For the Flaky Pie Crust:
- 2 ½ cups (300g) all-purpose flour, plus more for dusting
- 1 teaspoon salt
- 1 cup (226g) unsalted butter, very cold and cut into ½-inch cubes
- ½ cup (120ml) ice water, plus an extra tablespoon or two if needed
- 1 tablespoon apple cider vinegar (optional, helps with flakiness!)
For the Luscious Apple Butter Filling:
- 6-8 medium apples (about 2.5-3 lbs), a mix of sweet and tart varieties like Fuji, Honeycrisp, Granny Smith, or Gala, peeled, cored, and finely diced
- 1 cup (240ml) homemade or good quality store-bought apple butter
- ½ cup (100g) granulated sugar (adjust to apple sweetness)
- ¼ cup (50g) packed light brown sugar
- ¼ cup (60ml) fresh apple cider or water
- 2 tablespoons cornstarch
- 1 teaspoon ground cinnamon
- ½ teaspoon ground nutmeg
- ¼ teaspoon ground cloves or allspice
- Pinch of salt
- 1 tablespoon fresh lemon juice
- 1 teaspoon pure vanilla extract
- 2 tablespoons unsalted butter, cut into small pieces
For the Buttery Crumble Topping:
- 1 cup (120g) all-purpose flour
- ½ cup (100g) packed light brown sugar
- ½ teaspoon ground cinnamon
- ¼ teaspoon ground nutmeg
- Pinch of salt
- ½ cup (113g) unsalted butter, melted
For the Sweet Vanilla Glaze (Optional but highly recommended for a finishing touch!):
- 1 cup (120g) powdered sugar (confectioners’ sugar)
- 2-3 tablespoons milk (dairy or non-dairy) or apple cider
- ½ teaspoon pure vanilla extract
Instructions:
Phase 1: Preparing Your Flaky Pie Crust Foundation
- Combine Dry Ingredients: In a large mixing bowl, whisk together the 2 ½ cups of all-purpose flour and 1 teaspoon of salt. This ensures even distribution and prepares the base for our magnificent Apple Butter Pie crust.
- Incorporate Cold Butter: Add the very cold, cubed unsalted butter to the flour mixture. Using a pastry blender, your fingertips, or a food processor, cut the butter into the flour until the mixture resembles coarse crumbs with some pea-sized pieces of butter still visible. The key here is to keep the butter as cold as possible – this creates those beautiful, flaky layers we all adore in a perfect pie crust.
- Add Liquid Gradually: In a separate small bowl, whisk together the ½ cup of ice water and the optional apple cider vinegar. Gradually add this liquid to the flour and butter mixture, starting with about half of it. Mix gently with a fork or your hands until the dough just comes together. Avoid overworking the dough. If it’s too dry, add the remaining liquid a tablespoon at a time until a shaggy dough forms.
- Form and Chill the Dough: Turn the dough out onto a lightly floured surface. Gently gather it into a cohesive ball, then flatten it into a disc. Wrap the disc tightly in plastic wrap and refrigerate for at least 30 minutes, or up to 2 days. Chilling the dough is crucial; it allows the gluten to relax, preventing shrinkage during baking, and firms up the butter, which contributes to an incredibly flaky Apple Butter Pie crust.
- Prepare for Rolling: Once thoroughly chilled, remove the dough from the refrigerator. Let it sit at room temperature for about 5-10 minutes to make it slightly more pliable, but still cold. Lightly flour your work surface and your rolling pin.
- Roll Out the Crust: Roll the dough out into a 12-13 inch circle, about ⅛-inch thick. Periodically lift the dough and dust with more flour underneath if it starts to stick. Carefully transfer the rolled dough into a 9-inch pie plate. Trim the edges, leaving about a ½-inch overhang. You can crimp the edges decoratively or simply tuck and press them for a rustic look. Place the pie crust-lined plate back into the refrigerator while you prepare the filling. This extra chill helps maintain its shape during baking.
Phase 2: Crafting the Rich Apple Butter Pie Filling
- Prepare the Apples: Peel, core, and finely dice your chosen apples. Aim for consistent small pieces to ensure even cooking and a smooth texture for our Apple Butter Pie. Place them in a large mixing bowl.
- Combine Filling Ingredients (Part 1): To the diced apples, add the homemade or store-bought apple butter, granulated sugar, brown sugar, apple cider (or water), cornstarch, ground cinnamon, ground nutmeg, ground cloves (or allspice), and a pinch of salt. Stir everything together gently until the apples are evenly coated with the spices and sugars.
- Cook the Filling: Transfer the apple mixture to a large saucepan or Dutch oven. Cook over medium heat, stirring frequently, for 10-15 minutes, or until the apples have softened slightly but still hold their shape, and the mixture has thickened. The cornstarch will help create a lovely, spoonable consistency for your Apple Butter Pie filling.
- Finish the Filling: Remove the saucepan from the heat. Stir in the fresh lemon juice and pure vanilla extract. The lemon juice brightens the flavors and prevents the apples from browning excessively. Finally, stir in the 2 tablespoons of unsalted butter until melted and fully incorporated. This adds a lovely richness and gloss to the filling. Allow the filling to cool slightly while you prepare the crumble topping.
Phase 3: Creating the Irresistible Crumble Topping
- Combine Dry Ingredients: In a medium bowl, whisk together the 1 cup of all-purpose flour, ½ cup of packed light brown sugar, ½ teaspoon ground cinnamon, ¼ teaspoon ground nutmeg, and a pinch of salt.
- Add Melted Butter: Pour the ½ cup of melted unsalted butter over the dry mixture. Using a fork or your fingertips, mix until coarse, moist crumbs form. Some larger clumps are desirable for that perfect crumble texture. This simple topping truly elevates the homemade goodness of an Apple Butter Pie.
Phase 4: Assembling Your Magnificent Apple Butter Pie
- Preheat Oven and Prep Rack: Preheat your oven to 400°F (200°C). Position an oven rack in the lower third of the oven. It’s often a good idea to place a baking sheet on the bottom rack to catch any potential drips, especially if your pie is very full.
- Fill the Crust: Retrieve your chilled pie crust. Spoon the cooled apple butter filling evenly into the pie crust. Make sure to get all that deliciousness into every corner of the crust.
- Add Crumble Topping: Generously sprinkle the crumble topping over the apple butter filling. Ensure an even layer, covering the entire surface of the pie. Don’t be shy – the more crumble, the merrier your Apple Butter Pie will be!
Phase 5: Baking Your Apple Butter Pie to Golden Perfection
- Initial High Heat Bake: Place the assembled Apple Butter Pie on the preheated baking sheet (if using). Bake at 400°F (200°C) for 15 minutes. This initial high heat helps to set the crust and begin the browning process for the crumble.
- Reduce Heat and Continue Baking: After 15 minutes, reduce the oven temperature to 375°F (190°C) without opening the oven door. Continue baking for an additional 40-50 minutes, or until the crumble topping is deep golden brown, and the filling is bubbling thickly around the edges. If the crust edges start to brown too quickly, you can loosely cover them with aluminum foil or a pie crust shield.
- Check for Doneness: To ensure the filling is perfectly cooked, you can gently insert a thin knife or skewer into the center – it should feel tender, and if you can see some of the filling, it should be thick and not watery.
- Cool Completely: Once baked, carefully remove the Apple Butter Pie from the oven and place it on a wire rack to cool completely. This is perhaps the hardest part of any pie recipe! Cooling allows the filling to set properly, preventing it from being runny when sliced. Allow at least 3-4 hours for proper setting, or even better, let it cool overnight. Patience is a virtue here, leading to perfect slices of Apple Butter Pie.
Phase 6: The Grand Finale: Glazing and Enjoying Your Apple Butter Pie
- Prepare the Glaze (If Using): In a small bowl, whisk together the powdered sugar, 2 tablespoons of milk (or apple cider), and ½ teaspoon of vanilla extract until smooth. If the glaze is too thick, add more milk a teaspoon at a time until it reaches a pourable but still thick consistency.
- Glaze the Pie: Once the Apple Butter Pie has cooled completely, drizzle the vanilla glaze generously over the crumble topping. You can use a spoon or a whisk to create decorative streaks.
- Serve and Savor: Slice your homemade Apple Butter Pie and serve it at room temperature. It’s absolutely delicious on its own, but also heavenly with a scoop of vanilla bean ice cream or a dollop of fresh whipped cream. This delightful Apple Butter Pie is perfect for any occasion, from a cozy family dessert to a festive gathering. Enjoy every single bite of your hard work!
Conclusion:
Well, my friends, we’ve reached the sweet finale of our culinary journey with this truly exceptional recipe. I hope you’re feeling as inspired as I am to get into the kitchen and create something truly memorable. What makes this dish an absolute must-try isn’t just its incredible flavor, though that certainly plays a starring role. It’s the unique combination of rich, comforting aromas that fill your home as it bakes, the satisfying texture, and the sheer joy it brings to any table. It’s more than just a dessert; it’s an experience, a little slice of culinary heaven that promises to delight with every single bite.
I genuinely believe this recipe stands out because it strikes that perfect balance between familiar comfort and sophisticated taste. It’s approachable enough for a novice baker to tackle with confidence, yet elegant enough to impress even the most discerning palate. The way the core flavors develop during baking creates a depth that simply can’t be rushed, rewarding your patience with an unparalleled deliciousness. This isn’t just a fleeting trend; it’s a timeless classic reimagined, offering a warmth and heartiness that is particularly welcome during cooler months, or anytime you crave a hug in dessert form. It’s a recipe that truly delivers on its promise of sweet, spiced perfection.
Now, let’s talk about how to make this delightful creation even more special when you serve it. While it’s absolutely divine on its own, a warm slice truly shines when accompanied by a scoop of good quality vanilla bean ice cream, allowing the creamy coldness to contrast beautifully with the warm, spiced notes. Alternatively, a generous dollop of freshly whipped cream, perhaps lightly sweetened and infused with a hint of cinnamon or a drop of bourbon vanilla extract, elevates the experience further. For those who enjoy a touch of tang, a spoonful of crème fraîche can add an unexpected but delightful counterpoint. Don’t forget a dusting of powdered sugar or a delicate drizzle of caramel sauce for that extra touch of visual appeal and flavor complexity. Consider serving it with a robust cup of coffee or a spiced herbal tea for a truly cozy occasion, turning a simple dessert into a memorable gathering.
But why stop there? The beauty of a great recipe lies in its adaptability, and this one is no exception. If you’re feeling adventurous, consider adding a handful of toasted pecans or walnuts to the filling for an extra layer of crunch and nutty flavor. For a touch of fruitiness, a small amount of dried cranberries or chopped apricots could be folded in, adding bursts of color and tartness. Another wonderful variation involves experimenting with the spices; perhaps a pinch of cardamom or a touch of ground ginger could introduce a new dimension to the overall profile, making it even more aromatic. You could also explore different crust options – a oat streusel topping instead of a traditional pastry crust offers a delightful textural contrast, or even a gingerbread crust for a truly festive twist around the holidays. Don’t be afraid to make it your own; that’s where the real magic of home baking truly lies and where your personal touch can shine.
I am so incredibly excited for you to try your hand at making this. There’s something uniquely satisfying about pulling a freshly baked treat from the oven, filling your home with an aroma that promises pure bliss. Whether you’re making it for a special occasion, a family gathering, or simply to treat yourself to a moment of indulgence, I promise it will be worth every moment spent in the kitchen. This Apple Butter Pie is more than just a recipe; it’s an invitation to create lasting memories around the table, a testament to the simple joy of homemade goodness. So please, gather your ingredients, preheat your oven, and embark on this delicious adventure – you won’t regret it.
Once you’ve experienced the joy of baking and tasting this incredible dessert, I would absolutely love to hear all about it! Did you try any of the variations? What was your favorite part? Share your experiences, your photos, and your triumphs with me. Your feedback and stories are what make this culinary community so vibrant and inspiring, and I can’t wait to see the wonderful creations that emerge from your kitchens. Happy baking, and I can’t wait to see what deliciousness you create!
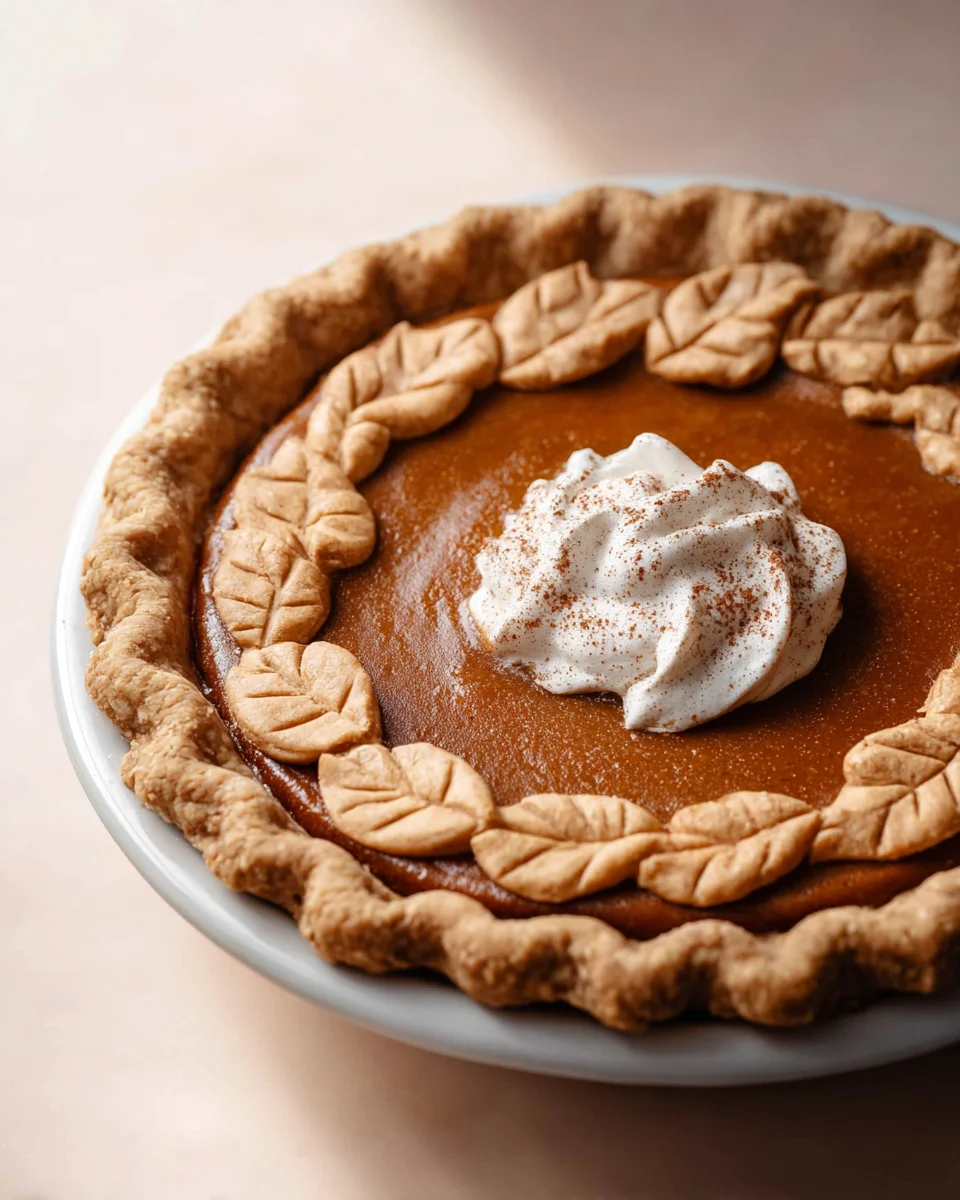
Irresistible Apple Butter Pie
A comforting Apple Butter Pie with a smooth, custardy filling baked in a spelt crust, seasoned with warm spices. A perfect dessert for any occasion.
Ingredients
Instructions
Important Information
Nutrition Facts (Per Serving)
It is important to consider this information as approximate and not to use it as definitive health advice.
Allergy Information
Please check ingredients for potential allergens and consult a health professional if in doubt.


Leave a Comment