
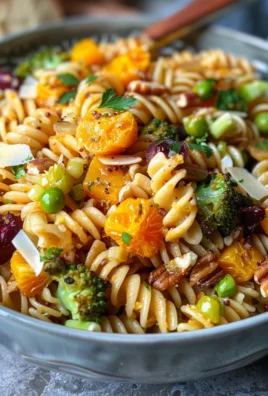
Favorite Green Bean Casserole From Scratch Recipe – the very phrase evokes warmth, family, and the unmistakable aroma of a holiday classic baking in the oven. But what if I told you the truly best version isn’t from a can, but made entirely from scratch? For many of us, green bean casserole holds a special place at the holiday table, a quintessential American side dish that has graced countless Thanksgiving and Christmas dinners since its creation in 1955. It’s more than just a dish; it’s a symbol of togetherness, tradition, and the simple joy of sharing a meal. People adore it for its incredible blend of tender green beans, a rich, creamy sauce, and that irresistible crispy onion topping. The contrast of textures and the savory depth of flavor are simply unmatched, making it a perennial crowd-pleaser.
While the original version is beloved, crafting a Favorite Green Bean Casserole From Scratch Recipe elevates this humble side dish to an entirely new level of gourmet comfort. Imagine fresh, crisp-tender green beans enveloped in a homemade mushroom cream sauce, topped with truly golden, crunchy fried onions that you’ve prepared yourself. The effort, though minimal, truly pays off in a dish that tastes undeniably fresh, vibrant, and utterly delicious. Get ready to redefine your holiday traditions and impress everyone with a homemade twist on a timeless classic.

Ingredients:
- For the Green Beans:
- 2 pounds fresh green beans, trimmed and snapped
- 2 teaspoons salt, plus more for blanching water
- 1/2 teaspoon black pepper
- For the Creamy Mushroom Sauce:
- 4 tablespoons unsalted butter, divided
- 1 pound fresh cremini mushrooms, wiped clean and thinly sliced
- 1 medium yellow onion, finely diced (about 1 cup)
- 3 cloves garlic, minced
- 1/2 cup all-purpose flour
- 2 cups whole milk, warmed
- 1 cup chicken or vegetable broth, warmed
- 1/2 cup heavy cream
- 1 teaspoon fresh thyme leaves, chopped
- 1 teaspoon Worcestershire sauce (optional, but highly recommended for depth)
- 1/4 teaspoon freshly grated nutmeg
- Salt and freshly ground black pepper to taste
- (Optional) 1/4 cup grated Parmesan cheese for extra richness
- For the Crispy Fried Onions (Homemade):
- 2 large sweet onions (such as Vidalia or Walla Walla), very thinly sliced into rings
- 2 cups buttermilk (or milk with 1 tablespoon white vinegar mixed in, let sit 5 minutes)
- 1 1/2 cups all-purpose flour
- 1 teaspoon salt
- 1/2 teaspoon black pepper
- 1/4 teaspoon cayenne pepper (optional, for a subtle kick)
- 4-6 cups vegetable oil, canola oil, or peanut oil, for frying
Preparing the Green Beans:
- Clean and Trim the Beans: First things first, let’s get those beautiful fresh green beans ready. Give them a good rinse under cool water. Then, using your hands or a small knife, snap or cut off the stem ends. You can leave the tail ends on if you prefer, or snap those off too for a neater look. The goal here is uniformity, which helps them cook evenly.
- Blanch the Green Beans: Now, we’re going to give them a quick blanch. This step is crucial for ensuring our beans are perfectly tender-crisp in the final casserole, vibrant green, and not mushy. Bring a large pot of heavily salted water to a rolling boil. Think ocean water for the salt level – it really penetrates the beans and enhances their flavor.
- Cook the Beans: Carefully add the trimmed green beans to the boiling water. Let them cook for about 4-5 minutes. We’re looking for them to become tender, but still retain a slight bite – al dente is the key! They should turn a brilliant, vibrant green. Do not overcook them here, as they will continue to cook in the oven.
- Prepare the Ice Bath: While the beans are blanching, prepare a large bowl of ice water. This is our “shock treatment.” As soon as the beans are done, use a slotted spoon or a colander to quickly transfer them from the boiling water directly into the ice bath. This immediate cooling stops the cooking process and locks in that beautiful green color.
- Drain and Dry: Let the beans sit in the ice bath for 2-3 minutes until completely cooled. Then, drain them thoroughly in a colander. For the best results, spread them out on a clean kitchen towel or paper towels and gently pat them dry. Excess moisture can dilute our delicious sauce later, so a good dry is important. Set them aside while we work on the other components.
Crafting the Creamy Mushroom Sauce (The Heart of the Casserole):
- Sauté the Mushrooms: This is where we build the foundational flavor for our casserole. In a large, heavy-bottomed pot or Dutch oven, melt 2 tablespoons of unsalted butter over medium-high heat. Once the butter is shimmering, add the thinly sliced cremini mushrooms. Spread them out in a single layer as much as possible without overcrowding the pan. If your pan isn’t big enough, cook them in two batches.
- Achieve Golden Goodness: Cook the mushrooms, stirring only occasionally, until they release their liquid, the liquid evaporates, and they begin to brown beautifully and caramelize. This can take 8-10 minutes. Patience is a virtue here; deeply browned mushrooms mean deeply flavored sauce. Once golden, remove the mushrooms from the pot and set them aside. We’ll add them back in later.
- Sauté the Aromatics: Add the remaining 2 tablespoons of unsalted butter to the same pot over medium heat. Once melted, add the finely diced yellow onion. Cook, stirring occasionally, until the onion softens and becomes translucent, about 5-7 minutes.
- Add the Garlic: Stir in the minced garlic and cook for another minute until fragrant. Be careful not to burn the garlic, as it can turn bitter.
- Make the Roux: Now for the thickening agent! Sprinkle the 1/2 cup of all-purpose flour over the softened onions and garlic. Stir continuously with a whisk or wooden spoon for 2-3 minutes. You want to cook out the raw flour taste. The mixture will form a thick paste, or “roux,” and should turn a light golden color and smell slightly nutty. This roux is what will give our sauce its luxurious thickness.
- Gradually Add Liquids: This is a critical step for a smooth, lump-free sauce. Slowly, a little at a time, whisk in the warmed whole milk and warmed chicken or vegetable broth. Adding them warm helps prevent lumps from forming. Whisk vigorously after each addition until the liquid is fully incorporated and the sauce is smooth before adding more. Take your time!
- Simmer and Thicken: Once all the milk and broth are added, bring the sauce to a gentle simmer, continuing to whisk constantly. The sauce will begin to thicken as it heats. Reduce the heat to low and let it simmer for 5-7 minutes, whisking frequently, until it reaches a rich, creamy consistency that coats the back of a spoon.
- Stir in Heavy Cream and Seasonings: Remove the pot from the heat. Stir in the 1/2 cup of heavy cream, the cooked mushrooms we set aside earlier, fresh thyme, Worcestershire sauce (if using), and freshly grated nutmeg.
- Taste and Adjust: Season the sauce generously with salt and freshly ground black pepper. Remember, this sauce needs to carry a lot of flavor, so don’t be shy. Taste it and adjust the seasonings as needed. If you’re using Parmesan cheese, stir it in now until melted and smooth. This sauce should be rich, savory, and absolutely delicious on its own! Set the sauce aside.
Preparing the Crispy Fried Onions (Homemade is Best!):
- Slice the Onions: This step takes a little precision but is totally worth it. Peel your large sweet onions and slice them as thinly as possible into rings. A mandoline slicer is fantastic for this if you have one, ensuring uniform thickness, which is key for even frying. If using a knife, take your time to make them almost paper-in. Separate the rings.
- Soak in Buttermilk: Place the separated onion rings into a large bowl. Pour the buttermilk over them, making sure all the onion pieces are submerged. Let them soak for at least 30 minutes, or even up to a few hours in the refrigerator. This tenderizes the onions and helps the flour adhere, resulting in extra crispy, flavorful fried onions.
- Prepare the Dredging Mixture: While the onions are soaking, prepare your dredging station. In a shallow dish or large Ziploc bag, combine the all-purpose flour, salt, black pepper, and cayenne pepper (if using). Whisk or shake well to combine.
- Heat the Frying Oil: In a large, heavy-bottomed pot or Dutch oven, pour in enough vegetable, canola, or peanut oil to reach a depth of about 2-3 inches. Attach a deep-fry thermometer to the side of the pot. Heat the oil over medium-high heat until it reaches 350°F (175°C). Maintaining the correct oil temperature is crucial for crispy, not greasy, onions.
- Dredge the Onions: Working in batches, remove a handful of onion rings from the buttermilk, letting any excess drip off. Transfer them to the flour mixture. Toss or shake them vigorously until they are thoroughly coated. Make sure there are no wet spots. Gently shake off any excess flour; you want a thin, even coating.
- Fry the Onions: Carefully drop a single layer of floured onion rings into the hot oil. Do not overcrowd the pot, as this will lower the oil temperature and lead to soggy onions. Fry for 2-4 minutes, turning occasionally with a slotted spoon or spider, until they are beautifully golden brown and incredibly crispy.
- Drain and Season: Using your slotted spoon, transfer the fried onions to a baking sheet lined with several layers of paper towels to drain off excess oil. Immediately sprinkle them with a little extra salt while they are still hot. Continue frying the remaining onion rings in batches, ensuring the oil returns to 350°F (175°C) between batches. Set aside most of the crispy onions for topping, saving a handful to mix into the casserole.
Assembling and Baking Your Favorite Green Bean Casserole:
- Preheat Oven and Prepare Dish: Preheat your oven to 375°F (190°C). Lightly grease a 9×13-inch baking dish (or an equivalent 2.5-3 quart casserole dish) with butter or cooking spray.
- Combine Green Beans and Sauce: In a large mixing bowl, gently combine the blanched and dried green beans with the creamy mushroom sauce. Make sure the beans are well coated.
- Add Some Crispy Onions to the Mix: Stir in about 1/2 to 3/4 cup of your homemade crispy fried onions directly into the green bean and sauce mixture. This adds an incredible texture and flavor layer throughout the casserole, not just on top.
- Transfer to Baking Dish: Pour the green bean mixture into your prepared baking dish, spreading it out evenly.
- Bake Initial Phase: Place the casserole in the preheated oven and bake for 20-25 minutes. During this time, the casserole will heat through, the flavors will meld, and the sauce will bubble enticingly.
- Top with Remaining Onions: Remove the casserole from the oven. Carefully arrange the remaining crispy fried onions generously over the top of the casserole. You want a good, thick layer of that golden crunch!
- Final Bake: Return the casserole to the oven and bake for another 10-15 minutes, or until the topping is deeply golden brown and the sauce is bubbly and hot.
- Optional Broiling for Extra Crisp: For an exceptionally crispy topping, you can carefully broil the casserole for 1-2 minutes at the very end. Keep a very close eye on it, as the onions can burn quickly under the broiler.
-
Rest and Serve: Once out of the oven, let the casserole rest for 5-10 minutes before serving. This allows the sauce to set slightly and prevents it from being too runny.
Serve this glorious “Favorite Green Bean Casserole From Scratch Recipe” hot and enjoy the homemade difference! It’s truly a labor of love that tastes miles better than anything from a can.

Conclusion:
Well, there you have it, friends! We’ve journeyed through the steps to create something truly magical in your kitchen, and I sincerely hope you’re as excited about it as I am. This isn’t just another side dish; it’s a celebration of comfort, flavor, and the simple joy of homemade goodness. If you’ve ever settled for a lackluster, canned-soup-based version of this classic, prepare to have your world, or at least your palate, delightfully rocked. What makes this particular recipe a must-try, you ask? It’s the harmonious blend of fresh, vibrant green beans, enveloped in a rich, creamy sauce crafted from scratch with real ingredients, and crowned with those perfectly crispy onions that offer that irresistible textural contrast. Every single component contributes to a depth of flavor that a shortcut simply cannot replicate.
I genuinely believe that once you experience the difference that fresh ingredients and a little bit of love make, there’s no going back. The aroma alone as it bakes in your oven is enough to make mouths water, promising a dish that’s both elegant enough for a holiday feast and comforting enough for a cozy Sunday dinner. It transcends the usual expectations for a green bean casserole, transforming it from a mere accompaniment into a star attraction. The tender-crisp snap of the beans, the velvety embrace of the homemade mushroom cream sauce, and the golden-brown crunch of the fried shallots or onions on top create a symphony of textures and tastes that truly elevates the entire experience. This recipe isn’t just about following instructions; it’s about creating a moment of pure culinary bliss for yourself and your loved ones.
When it comes to serving, this incredible casserole is a versatile superstar. Naturally, it’s an absolute essential for any holiday table – think Thanksgiving, Christmas, or Easter – pairing beautifully with roasted turkey, glazed ham, or a succulent prime rib. But don’t limit its brilliance to special occasions! It’s also a fantastic companion to a simple weeknight roast chicken, grilled pork chops, or even a hearty meatloaf. For an added touch of elegance, consider serving individual portions in small ramekins, freshly garnished with a sprinkle of fresh parsley or chives. You could even transform leftovers, if you’re lucky enough to have any, into a delicious breakfast hash by scrambling an egg into it, or serving it alongside a juicy steak for a more refined meal. The possibilities are truly endless, and its robust flavor profile stands up beautifully to a variety of main courses.
Looking to personalize this masterpiece? I encourage you to experiment! For a cheesy twist, try folding in a half-cup of shredded Gruyère or sharp white cheddar cheese into the sauce before baking, or sprinkle some Parmesan on top during the last 10 minutes for an extra golden crust. If you love a hint of smokiness, a pinch of smoked paprika in the sauce can work wonders. For those who enjoy a bit of heat, a tiny dash of cayenne pepper can add a subtle kick without overwhelming the dish. You could even swap out half of the green beans for asparagus or broccoli florets for a different vegetable medley. And if you’re feeling adventurous, try making your own crispy shallots from scratch for the topping – the effort is absolutely worth the incredible flavor and texture! This is your kitchen, your creation, so feel free to make it uniquely yours.
Now, It’s Your Turn!
I’ve poured my heart into perfecting this recipe, and I truly believe it will become a staple in your culinary repertoire. This Favorite Green Bean Casserole From Scratch Recipe is more than just ingredients and steps; it’s an invitation to savor the unparalleled taste of homemade. So, I urge you, don’t just read about it – gather your ingredients, set aside a little time, and bring this incredible dish to life in your own kitchen. You won’t regret it! And please, please, please, once you’ve experienced the magic, come back and share your thoughts! Did you add your own twist? What did you serve it with? I absolutely love hearing about your cooking adventures and seeing how you make these recipes your own. Your feedback and stories inspire me, so let’s build a community of enthusiastic home cooks around this truly exceptional casserole. Happy cooking!
Favorite Green Bean Casserole From Scratch Recipe
Elevate your holiday table with this Favorite Green Bean Casserole From Scratch Recipe. Featuring fresh green beans, a rich homemade mushroom cream sauce, and crispy fried shallots, this recipe redefines a timeless classic with vibrant, undeniable flavor. A delicious homemade twist that will impress.
Ingredients
Instructions
Important Information
Nutrition Facts (Per Serving)
It is important to consider this information as approximate and not to use it as definitive health advice.
Allergy Information
Please check ingredients for potential allergens and consult a health professional if in doubt.


Leave a Comment